
Summary of Contents for Conair TrueFeed
- Page 1 U S E R G U I D E www.conairgroup.com UGB025-0806 TrueFeed ™ Gravimetric Dual Feeder Corporate Office: 724.584.5500 | Instant Access 24/7 (Parts and Service): 800.458.1960 | Parts and Services: 814.437.6861...
- Page 2 Serial Number(s): Model Number(s): DISCLAIMER: Conair shall not be liable for errors contained in this User Guide or for incidental, consequential damages in connection with the furnishing, performance or use of this information. Conair makes no warranty of any kind with regard to this information, including, but not limited to the implied warranties of merchantability and fitness for a particular purpose.
-
Page 3: Table Of Contents
7.14 Event log _____________________________________________________________________________________ 34 System Performance ________________________________________________________________________________ 35 Reset regulation ___________________________________________________________________________________ 35 Troubleshooting ____________________________________________________________________________________ 36 Appendix A: TrueFeed print view ______________________________________________________________________ 37 Appendix B: TrueFeed wiring diagram __________________________________________________________________ 38 Appendix C: TrueFeed technical specifications ___________________________________________________________ 39 Appendix D: TrueFeed general dimensions ______________________________________________________________ 40... -
Page 5: Introduction
Software Version: Disclaimer: The Conair Group, Inc. shall not be liable for errors contained in this User Guide or for incidental, consequential damages in connection with the furnishing, performance or use of this information, including, but not limited to the implied warranties of merchantability and fitness for a particular purpose. -
Page 6: General Information
Before switching on the unit for the first time, ensure that the main power voltage applied is between 80 VAC and 260 VAC. Always switch off the Conair control cabinet and disconnect the main power plug from electrical power before performing maintenance. -
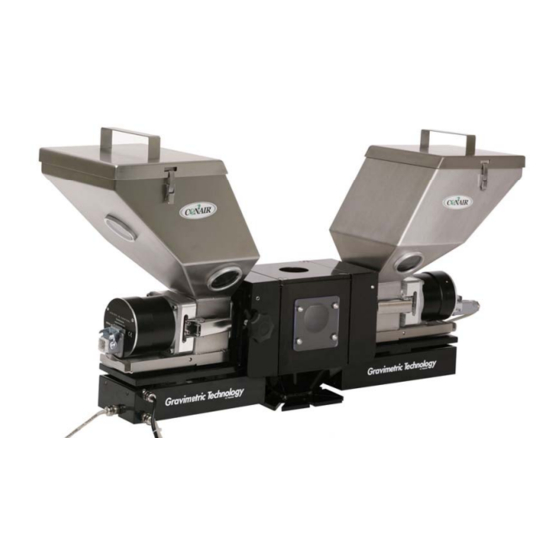
Page 7: Overview Feeding Unit
(locking the slide-in position) Only supplied together with the optional slide mechanism Note that the Dual TrueFeed will have two (2) of all the components listed above, except the standard NST40 throat adapter. The Dual TrueFeed only requires one (1) throat adaptor. -
Page 8: Weighing Frame
To connect the dispensing cylinder, put it on the motor shaft while turning it to the keyed section to find the flat side of the shaft, then press the dispensing cylinder completely backwards. Dual Feed TrueFeed Manual... -
Page 9: Metering Principle
The throat adapter (mixing chamber) is designed to blend the main material and the additive homogeneously. Conair supplies a large range of machine throat adaptors to fit injection molding machines. The most common mounting of the throat adaptor is between the production machine and the machine hopper. -
Page 10: Feeding Systems / Capacities
5. Feeding systems / Capacities Depending on the application a different feeding system might be needed. Use the following table to determine roughly the best system for the application. For more detailed information please contact a Conair representative. † †... - Page 11 All Conair TrueFeed feeders are equipped with a 2A (LT) stepper motor as standard. However, if you are using an A30 feed auger, a 4.5A (HT) stepper motor will be supplied. An A20 auger can also be connected to the 4.5A (HT) motor.
-
Page 12: Installation
6. Installation 6.1 Transport To protect the Conair Dual TrueFeed gravimetric feeder against damage during transport, the unit is packaged in a cardboard box filled with polyurethane foam. Delivery terms are FOB Franklin, PA. The buyer is responsible for the transport. Conair cannot be held liable for any damage that might occur during transport. -
Page 13: Changing From Feeding Cylinder To Feed Screw
GX / GLX / HX Art.nr:H000002 Art.nr:H000014 G / GL / H Included ball bearing Note that the A20HT and A30HT auger Art.nr:H000010 Included seal screws have a larger diameter motor mounting for the larger, high torque motor shaft. Dual Feed TrueFeed Manual... -
Page 14: Electrical Installation
Temperature o Dusty/fine powder materials 6.5 Electrical installation The Dual TrueFeed controller is equipped as standard with the following connections: Main power cable Before switching on the unit for the first time, ensure the main power voltage being applied is between 80 and 260V. - Page 15 (See wiring diagram Appendix B for electrical connections) 7. POWER SUPPLY The Dual TrueFeed will operate with a voltage from 80 VAC to 260 VAC, 50 and 60 Hz by integrated automatic voltage selector. (See wiring diagram Appendix B for electrical connections)
-
Page 16: Operation
UNIT RJ45 Output for: Crossed -Alarm Valve output UTP cable -Warning for hopper loader -Running Motor cable Note that from the color unit the internal dipswitch 1 = ON on the main board. (see Appendix A) Dual Feed TrueFeed Manual... -
Page 17: Startup And Login
7.2 Start-up & Login Immediately after switching on the main power of the Dual TrueFeed, the software versions will be displayed. In the first screen the software version of the terminal will be shown. Conair Terminal Version x.xx Date: January 2007 After a few seconds the second screen appears for 10 seconds. -
Page 18: Keyboard Lock
MENU to continue When “Locked” is selected it is still possible to: Shift between the LOGIN, PRODUCTION and HOPPER LOADER menu. To START and STOP the feeder. For further information see the Start-up & Login Section 7.2. Dual Feed TrueFeed Manual... -
Page 19: Configuration
7.4 Configuration For initial setup, the Dual TrueFeed controller needs to be setup in the CONFIGURATION menu once. Depending on the configuration, some settings will be invisible if they are not relevant. Highlighted Parameters are factory settings. Motor type : LT / HT... - Page 20 A relay signal up to 30 Volt DC. In case of a powered relay signal, connect the white wire to +24 VDC and the yellow wire to the side. To detect a start signal, the TrueFeed needs a minimum voltage of 18 VDC. Configuration: Input filter The “Input filter”...
- Page 21 Configuration: Deviation alarm The TrueFeed automatically adjusts its motor speed to the desired setpoint. The controller is able to detect and alarm when the setpoint is not reached within a set percentage. If, after normally performed speed adjustments, the setpoint is consistently not reached, the controller will give an alarm signal and show “Maximum deviation exceeded”...
- Page 22 Configuration: Date Actual date: (dd / mm / yy) Configuration: Time Actual time: (hh / mm / ss) Date and Time will be stored for a minimum of 1500 hours when the Dual TrueFeed controller is OFF. Dual Feed TrueFeed Manual...
- Page 23 The Dual TrueFeed system functions as two gravimetric feeders with the Regrind unit as the master and the Color unit as the slave. It is only possible to use the Dual TrueFeed system on an injection molding machine. See the schematic below.
- Page 24 (MATERIAL menu) and loadcell calibrations can be done. All production settings can be done from the PRODUCTION menu in Regrind mode. There are two ways to operate a Dual TrueFeed: 1. Without a grinder connected to the machine. 2. With a grinder connected to the machine (closed-loop) 1 Without a grinder connected to the machine.
- Page 25 Level 2 and 3. 7.5 Loadcell calibration Two types of calibrations are available with the Dual TrueFeed, depending on the selection made in the Configuration menu : 1. Automatic - The advantage of automatic over manual calibration is that the automatic calibration is self-calibrating and the probability of failures will be reduced.
-
Page 26: Loadcell Calibration
When using a TrueFeed for the first time, do an initial loadcell calibration as follows: The unit must be mounted horizontally (water-leveled) Avoid vibrations during the loadcell calibration. This will influence the calibration. Do not touch the unit during loadcell calibration. -
Page 27: Material Pre-Calibration
With pre-calibration it is possible to calibrate the unit before production is started; this way the time needed to be in specification can be reduced. The TrueFeed is a gravimetric/loss-in weight feeder. When starting up the feeder for a new production run, there is no direct information available about the loss in weight. Of course you want the feeder to reach its setpoint with the matching speed of the motor (RPM) as quickly as possible. - Page 28 “ENTER”. How can I delete or rename a calibrated material? To delete one or more material see Section 7.13. To delete all Materials, select “Master Reset Material” in the CONFIGURATIONS menu and press “ENTER”. Dual Feed TrueFeed Manual...
-
Page 29: Production
7.7 Production The rotation direction of the feeding from the front view must be to the right (clockwise) See Section 7.4 for the operation and regulation of the DUAL TRUEFEED. Production (Motor On/Off) Press the “START” button to begin feeding. (Only possible in Regrind mode) The start LED blinks when the unit is waiting for an input signal. - Page 30 Go to PRODUCTION menu Fill in the production settings Use the arrow buttons to go to “Test” Select “YES” and press “ENTER” The unit will run with the set parameters. To stop the test, press the “STOP” button. Dual Feed TrueFeed Manual...
-
Page 31: Filling The Hopper
The controller automatically detects when the hopper is manually filled. During the time that the hopper is being filled, the TrueFeed is feeding with a fixed RPM, this means the unit runs temporarily volumetric. As soon as the hopper filling is complete, the TrueFeed immediately resumes working gravimetric. - Page 32 Hopper loader settings This part of the manual describes how to configure the hopper loader. For further technical information about the hopper loader consult the specific hopper loader manual or contact a Conair representative. There are three ways to fill the hoppers: 1.
- Page 33 During the time that the hopper is being filled, the TrueFeed is feeding with a fixed RPM, this means that the unit runs temporarily volumetric. As soon as the hopper filled, the TrueFeed immediately resumes to work gravimetric.
-
Page 34: Consumption
With the Consumption function it is possible view the total quantity of material feed by the TrueFeed. The consumption is saved in the memory and remains in the memory even when the unit is shut off or unplugged. -
Page 35: Alarms
GENERAL To reset an alarm/warning press the “STOP” or “MENU” buttons. When an error occurs using the TrueFeed, the display will indicate an error code and description. Together with the displayed error an output contact will be switched. The controller itself gives a beeping signal and the alarm LED will illuminate. - Page 36 - Check the production settings. - Decrease the feeding time (if possible) - Use a different dispensing cylinder type with lower output, for example a GL-cylinder - Check the rotation direction of the dispensing cylinder. Front view to the right Dual Feed TrueFeed Manual...
-
Page 37: Files
= Rename a file, press “ENTER” to confirm. 7.12 Select mode In this menu, you can switch from Regrind to Color modes to: Do configuration settings Make loadcell calibrations Make/Choose material calibrations Set hopper loader (if selected) Dual Feed TrueFeed Manual... -
Page 38: Material
The error codes can be found in Section 7.12 EVENT LOG Rec nr: 0078/0078 01/01/06 20:53 Log: COLOR PCT Old: 2.0% New: 1.8% To effectively use the Event Log, be aware that the correct data and time must be set in the CONFIGURATION menu. Dual Feed TrueFeed Manual... -
Page 39: System Performance
The Dual TrueFeed algorithm needs a certain time to weigh material loss and adjust the RPM accordingly. This time depends largely on the setpoint and the above mentioned three variables. The system constantly adjusts itself to reach the best possible accuracy for current conditions. -
Page 40: Troubleshooting
9. Troubleshooting Problem: The Dual TrueFeed does not come into specification or a Maximum deviation alarm occurred. Possible causes: 1. Check to ensure all cables are connected correctly. 2. Check to ensure the transport protection pins are removed from the loadcell safety bolts. -
Page 41: Appendix A: Truefeed Print View
APPENDIX A: TrueFeed Print view INSIDE VIEW OF THE CABINET Dual Feed TrueFeed Manual... -
Page 42: Appendix B: Truefeed Wiring Diagram
APPENDIX B: TrueFeed Wiring diagram Only with Dual TrueFeed Dual Feed TrueFeed Manual... -
Page 43: Appendix C: Truefeed Technical Specifications
APPENDIX C: TrueFeed Technical Specifications Controls: Set and actual % setting for injection molding and extrusion Extrusion control by relay or tachometer Injection molding control Automatic metering time synchronization or by manual timer Manual speed and time setting Speed: Manual setting from 0,1 to 200 RPM max, in increments of 0,1 RPM. -
Page 44: Appendix D: Truefeed General Dimensions
APPENDIX D: TrueFeed General Dimensions Dual Feed TrueFeed Manual... -
Page 45: Appendix E: Truefeed Quality Checklist
APPENDIX E: TrueFeed Quality Checklist Date of production : ………………… Conair order number : ………………… Controller serial number : ………………… Software version : ………………… Motor serial number : ………………… Unique ID code : ………………… Check original order with internal packing list Ordercode : ……………………………………………………………………... - Page 46 From outside the United States, call: 814-437-6861 You can commission Conair service personnel to provide on-site service by contacting the Customer Service Department. Standard rates include an on-site hourly rate, with a one-day minimum plus expenses.
- Page 47 Returns must be prepaid. Purchaser must notify Conair in writing of any claim and provide a customer receipt and other evidence that a claim is being made.
Need help?
Do you have a question about the TrueFeed and is the answer not in the manual?
Questions and answers