
Related Manuals for Cylinda DM8290PRO


Summary of Contents for Cylinda DM8290PRO
- Page 1 DM8290PRO...
- Page 2 Innehåll Panelen Teknisk information Säkerhetsanvisningar Installation Innan du diskar första gången Service Lasta diskmaskinen Information för testinstitut Använda diskmaskinen Egna noteringar Inställningar Skötsel och rengöring Felsökning Panelen För att sätta på diskmaskinen tryck och håll in Huvudströmbrytaren tills displayen tänds. "This is a first time set up."...
- Page 3 Säkerhetsanvisningar Förpackningsmaterial OBS! Förpackningen skyddar produkten under transporten. Materialet Läs och spara bruksanvisningen! i förpackningen är återvinningsbart. Källsortera förpackningen Antal standardkuvert: 13 för att bidra till minskad råvaruförbrukning och minskat avfall. Din Använd inte diskmaskinen till något utöver det som anges återförsäljare kan ta tillbaka förpackningen för återvinning eller i denna bruksanvisning.
- Page 4 Innan du diskar första gången 1. Kontrollera vattnets hårdhetsgrad 2. Grundinställningar För att uppnå ett bra diskresultat behöver diskmaskinen mjukt För att sätta på diskmaskinen tryck och håll in Huvudströmbryta- vatten (vatten med låg kalkhalt). Hårt vatten orsakar vita belägg- ren tills displayen tänds.
- Page 5 3. Fylla på spolglansmedel 4. Fylla på salt Torkningen går snabbare och får ett bättre resultat om man an- Innan du använder en diskmaskin med avhärdare måste du fylla vänder spolglansmedel. Du får också ett finare diskresultat med på salt i saltbehållaren för att det inkommande vattnet automatiskt klart och fläckfritt diskgods.
- Page 6 Lasta diskmaskinen Diska energisnålt Ömtåligt diskgods Diska bara full maskin En del husgeråd tål inte att maskindiskas. Detta kan bero på flera saker. Vissa material tål inte stark värme, andra kan skadas av Vänta med diskningen tills diskmaskinen är full, så sparar du maskindiskmedlet.
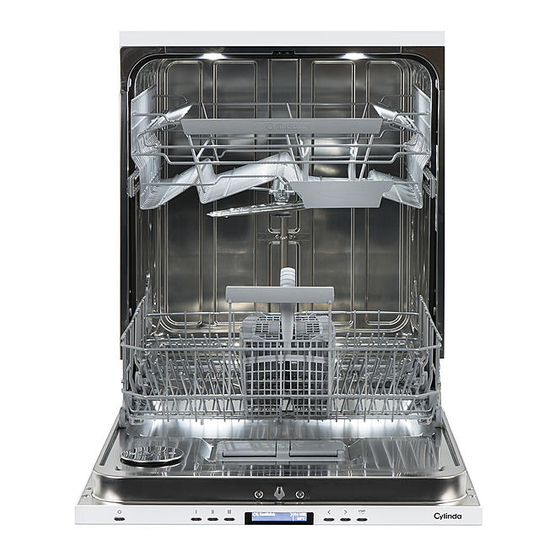
- Page 7 Diskmaskinens korgar Underkorg Diskmaskinen är utrustad med överkorg och underkorg med Placera tallrikar, assietter, uppläggningsfat, kastruller och bestick bestickskorg. (i bestickskorgen) i underkorgen. Korgarnas utseende kan skilja sig beroende på diskmaskinens Placera grytor och kastruller i den bakre högra delen av under- utförande.
- Page 8 Använda diskmaskinen Dosera diskmedel Tryck för att öppna Bestickskorg med lock 1 Fack för fördiskmedel 2 Fack för huvuddiskmedel Diskmedel skall doseras efter vattnets hårdhetsgrad. Följ doseringsanvisningarna på diskmedelsförpackningen. Disk- maskinen är utrustad med en avhärdare, dosera därför som om du har mjukt vatten.
- Page 9 Tryck och håll in Huvudströmbrytaren tills displayen tänds. Starta diskmaskinen START STOP 2:00 2:15 58°C Speed mode Välj program Välj bland fler program Huvudströmbrytaren SaniB Välj SaniB om du önskar ett snabbare program som fortfarande Tryck och håll in Huvudströmbrytaren tills displayen tänds. Kon- uppfyller hygienkrav.
- Page 10 Färgindikering OBS! Färgindikering i frontdisplayen ger dig information genom olika Under torkningen avbryts programmet om strömmen stängs färger. av eller om luckan är öppen i mer än 2 minuter. Aktivera inställningen Info i frontdisplay. Se kapitel Inställningar. Efter avslutat program Blå...
- Page 12 Inställningar Öppna diskmaskinens Inställningsmeny För att öppna diskmaskinens Inställningsmeny, tryck på Navigationsknapparna: För att lämna diskmaskinens Inställningsmeny, välj Tillbaka och bekräfta valet med Start/Stop. Navigationsknappar för att välja inställning Bekräfta aktuell inställning START STOP 1 Language English Inställning Aktuell inställning Inställningar Alternativ Språk...
- Page 13 Inställningar Alternativ Spolglansmedel 0/1/2/3/4/5/TAB Inställning för dosering av spolglansmedel. Doseringen av spolglansmedel kan ställas in från 0 (Av) till 5 (Hög dosering). Öka doseringen av spolglansmedel: Om diskgodset har vattenfläckar. Minska doseringen av spolglansmedel: Om diskgodset har en vit/blå kladdig film. Om diskgodset har ränder.
- Page 14 Skötsel och rengöring 2 Skruva spolarmslagringen motsols för att lossa spolarmen Grovsilen från överkorgen. I grovsilen samlas större matrester, som inte utan vidare kan passera avloppspumpen. Töm grovsilen vid behov. Grovsil Undre spolarm Dra den undre spolarmen rakt upp för att lossa den. 1 Lyft grovsilen rakt upp med hjälp av handtaget.
- Page 15 Om diskmaskinen ändå inte går att starta och ett surrande 1 Stäng av maskinen med Huvudströmbrytaren och dra ur ljud hörs har överfyllnadsskyddet aktiverats. stickkontakten ur vägguttaget. Stäng av vattnet. 2 Stäng av vattenkranen. Dra ur stickkontakten ur vägguttaget. 3 Skruva loss inloppsslangen. Ring service.
- Page 16 Felsökning Typ av fel i display Åtgärd Överfyllnad 1 Rensa avloppspumpen. Se kapitel Skötsel och rengöring. Om problemet kvarstår ring service. Uttömningsfel Se ”Vatten kvar i diskmaskinen” i tabellen ”Problem” nedan. Om problemet kvarstår ring service. Vattenintagsfel Kontrollera att vattenkranen är öppen. Kontrollera att yttre silen på inloppsslangen inte är blockerad.
- Page 17 Problem Tänkbara orsaker Åtgärder Disken är inte ren. Spolarmarna går inte runt. Kontrollera att diskgods inte hindrar spolar- marna. Spolarmarnas hål eller lagringar är igensatta. Rengör spolarmarna. Se kapitel Skötsel och rengöring. Felaktigt diskprogram. Välj ett längre program. Felaktig dosering av diskmedel. Dosera efter vattnets hårdhetsgrad.
- Page 18 Problem Tänkbara orsaker Åtgärder Slamrande ljud vid diskning. Disken är inte rätt placerad eller spolarmarna Kontrollera att diskgodset står stadigt. Snurra går inte runt. på spolarmarna för att se att de går runt. 1 minut visas i displayen. Programmet tar längre tid än beräknat. Ingen åtgärd.
- Page 19 Teknisk information Information om energimärkning Informationsblad, enligt Kommissionens delegerade förordning (EU) nr 1059/2010 Cylinda Modellbeteckning: DM8290PRO Antal standardkuvert: Energieffektivitetsklass: Årlig energiförbrukning (AE ??? kWh per år Energiförbrukning i en standarddiskcykel(E Effektförbrukning Frånläge (P Viloläge (P Årlig vattenförbrukning (AW ???? liter per år...
- Page 20 Installation [mm] 1198 30-94 *Ta bort låsmuttrar för en installationshöjd på 820-821 mm. Nominella mått. Variationer kan förekomma. Säkerhetsanvisningar Transportskydd för luckan Anslutning till el, vatten och avlopp ska utföras av en person Glöm inte att ta bort transportskydden för luckan då du packar med erforderlig kompetens.
- Page 21 Placera diskmaskinen Montera skyddsfilmen Diskmaskinen kan placeras som inbyggd, helt fristående eller Montera skyddsfilmen (bifogas dokumentsats) under bänkskivan. delvis inbyggd. Skyddsfilmens funktion är att skydda bänkskivan från fukt. A. Inbyggd OBS! Diskmaskinen är avsedd att byggas in under en bänkskiva. In- Ytan där skyddsfilmen ska sitta ska vara ren och torr.
- Page 22 Justera höjden och skjut Anslutning till avlopp diskmaskinen på plats Denna diskmaskin är lämplig att installeras i en upphöjd inbygg- nad (för att få en arbetsvänlig höjd). Det betyder att diskmaskinen 1 Börja med att mäta höjden från golvet till underkanten av ar- kan placeras så...
- Page 23 Anslutning till varmt vatten Skruva fast diskmaskinen Anslut diskmaskinen till varmt vatten (max 70 °C) om fastigheten (Gäller diskmaskiner som byggs in.) värms upp med energisnål varmvattenberedning som exempelvis fjärrvärme, solceller eller bergvärme. Genom att välja varmvat- tenanslutning sparar du disktid och minskar diskmaskinens kon- sumtion av elenergi.
- Page 24 Service Läs kapitel Felsökning innan du kontaktar service. Vid kontakt Diskmaskinens sparkplåt ange uppgifterna på typskylten. Notera typ (1) och serienummer Diskmaskinen levereras med en sparkplåt. (2). Cylinda service 0771-25 25 00. ART. NO. SERIAL NO. Montera sparkplåten...
- Page 25 Information för testinstitut Beställ information för testinstitut via e-post dishwashers@appli- ance-development.com. Vid förfrågan ange uppgifterna på typskylten. Notera artikelnum- mer (1) och serienummer (2). ART. NO. SERIAL NO.
- Page 26 Egna noteringar...
-
Page 27: Table Of Contents
Contents Front panel Safety instructions Technical information Before washing for the first time Installation Loading the dishwasher Service Using the dishwasher Information for test institute Settings Your notes Care and cleaning Troubleshooting Front panel To switch on the dishwasher, press and hold the main power switch until the display lights up. "This is a first time set up."... -
Page 28: Safety Instructions
Safety instructions Overflow guard function NOTE! The overflow protection starts pumping out the machine and turns Read the operating instructions and keep them in a safe off the water supply if the water level in the dishwasher exceeds place! the normal level. If the overflow protection is triggered, turn off Number of standard place settings: 13 the water supply and call the service department. -
Page 29: Before Washing For The First Time
Before washing for the first time 1. Checking water hardness 2. Basic settings In order to achieve good dishwashing results, the dishwasher To switch on the dishwasher, press and hold the main power needs soft water (water with low mineral content). Hard water switch until the display lights up. - Page 30 3. Top up with rinse aid 4. Top up with salt Drying is faster and a better result is achieved if you use rinse Before you begin using a dishwasher with a water softener, you aid. You will also achieve a better dishwashing result with clear must fill the salt compartment with salt for the water supply to be and spotless dishes.
-
Page 31: Loading The Dishwasher
Loading the dishwasher Energy-efficient dishwashing Fragile dishes Run programmes only with a full load Some cookware is not dishwasher safe. This can be for several reasons. Some materials cannot withstand strong heat, others Wait to run a programme until the dishwasher is full, this way you can be damaged by dishwashing detergent. - Page 32 The dishwasher's baskets Lower basket The dishwasher is equipped with an upper basket and a lower Place plates, side plates, serving dishes, pots and cutlery (in the basket with a cutlery basket. cutlery basket) in the lower basket. The appearance of the baskets may differ depending on the Place pots and pans in the rear right of the lower basket to best dishwasher setup.
-
Page 33: Using The Dishwasher
Using the dishwasher Add detergent Press to open Cutlery basket with lid 1 Prewash detergent compartment 2 Main wash detergent compartment Detergent is added according to water hardness. Follow the instructions on the detergent packaging. This dishwash- er is fitted with a water softener, so use detergent and rinse aid doses suitable for soft water. - Page 34 Press and hold the main power switch until the display lights up. Starting the dishwasher START STOP 2:00 2:15 58°C Speed mode Select the programme Select from more programmes The main power switch SaniB wash Choose SaniB wash if you want a quicker programme that still Press and hold the main power switch until the display turns on.
- Page 35 Unload the lower basket first to avoid any water drops from the Status indicator upper basket falling onto the dishes in the lower basket. The status indicator on the front display provides information by means of different colours. Activate the Info in front display setting. See the chapter Settings. Blue - Load more The programme has started, but you can still load more dishes.
-
Page 37: Settings
Settings Open the dishwasher's Settings menu To open the dishwasher's Settings menu, press the Navigation buttons: To exit the dishwasher's Settings menu, select Exit and confirm your selection with Start/Stop. Navigation buttons for choosing setting Confirm current setting START STOP 1 Language English Settings... - Page 38 Settings Options Buzzer volume 0/1/2/3 The buzzer indicates when a dishwashing programme has ended. Error messages are always indicated by a loud buzzer. Rinse aid 0/1/2/3/4/5/TAB Setting for rinse aid dosage. The rinse aid dispenser can be adjusted between 0 (Off) and 5 (High dosage). Increase the rinse aid dosage: If the dishes have water marks.
-
Page 39: Care And Cleaning
Care and cleaning To facilitate cleaning you can remove the spray arms. Remember Coarse filter to fit them firmly back into place afterwards. The coarse filter traps larger food particles, which cannot get Upper spray arm past the drainage pump. Empty the coarse filter as necessary. 1 Pull out the upper basket. - Page 40 5 Turn the pump wheel located behind the drainage pump stop Unblocking the inlet hose filter by hand. Carefully remove any items. If the water supply contains small particles, the outer filter on the 6 Replace the drainage pump stop along with the fine and inlet hose may become blocked, which results in Water inlet fault.
-
Page 41: Troubleshooting
Troubleshooting Type of fault on the display Action Overfilling water 1 Clear the drainage pump. See the section Care and cleaning. If the problem persists, call the service department. Water outlet fault See “Water remains in the dishwasher” in the table “Problem” below. If the problem persists, call the service department. - Page 42 Problem Possible causes Action The dishes are not clean. The spray arms do not rotate. Check that the dishes are not blocking the spray arms. Spray arm holes or bearings blocked. Clean the spray arms. See the chapter Care and cleaning. Unsuitable dishwashing programme.
- Page 43 Problem Possible causes Action Detergent residue in the detergent compart- The detergent compartment was damp when The detergent compartment must be dry ment after dishwashing. adding detergent. when adding detergent. The detergent compartment has been Check that the dishes are not preventing the blocked.
-
Page 44: Technical Information
Technical information Information on energy labelling Information sheet, in compliance with Commission Delegated Regulation (EU) No. 1059/2010 Cylinda Model designation: DM8290PRO Number of standard place settings: Energy efficiency class: Annual energy consumption(AE ??? kWh per year Energy consumption of the standard cleaning cycle(E... -
Page 45: Installation
Installation [mm] 1198 30-94 *Remove locking nuts for an installed height of 820-821 mm. Nominal dimensions. Actual measurements may vary. Safety instructions Transport protection for the door Connections to electricity, water and drainage must be per- Do not forget to remove the transport protection for the door when formed by a qualified professional. - Page 46 Placing the dishwasher Affix the protective film The dishwasher can be installed built-in, completely freestanding Affix the protective film (packed in the document bag) to the un- or partially built-in. derside of the worktop. The protective film is to protect the worktop from moisture.
- Page 47 Adjust the height and slide the Drainage connection dishwasher into place This dishwasher is suitable for installing in a raised recess (to attain an ergonomic working height). This means that the dish- 1 Start by measuring the height from the floor to the bottom washer can be placed so that the drainage hose runs to a lower edge of the worktop.
- Page 48 Connection to cold water supply Screwing the dishwasher into place Connect the dishwasher to the cold water supply if the building (Applicable only to built-in dishwashers.) is heated using oil, electricity or gas. Connection to hot water supply Connect the dishwasher to the hot water supply (max. 70 °C) if the building is heated using an energy-efficient means such as district heating, solar power or geothermal power.
-
Page 49: Service
Provide the details on the serial number plate in all The dishwasher is supplied with a toe kick. contact. Include the type (1) and the serial number (2). Cylinda service 0771-25 25 00. ART. NO. SERIAL NO. Fit the toe kick... -
Page 50: Information For Test Institute
Information for test institute Request test institute information via e-mail dishwashers@appli- ance-development.com. The request should include the details on the serial number plate. Include the article number (1) and the serial number (2). ART. NO. SERIAL NO. -
Page 51: Your Notes
Your notes... - Page 52 • Maskintyp / Model code • Problembeskrivning / Problem description • Problembeskrivning / Problem description • Gå in på www.cylinda.se / Visit www.cylinda.se • Gå in på www.cylinda.se / Visit www.cylinda.se • Serienummer / Serial number • Serienummer / Serial number •...
Need help?
Do you have a question about the DM8290PRO and is the answer not in the manual?
Questions and answers