Marport M4 Service Manual
Installation with 2 mac minis
Hide thumbs
Also See for M4:
- Service manual (81 pages) ,
- User manual (43 pages) ,
- User manual (37 pages)
Table of Contents
Advertisement
Quick Links
Advertisement
Table of Contents

Related Manuals for Marport M4


Summary of Contents for Marport M4
- Page 1 Service Manual Installation with 2 Mac minis...
-
Page 3: Table Of Contents
History...................................5 Copyright..................................5 Disclaimer..................................5 Introduction and Presentation............6 Introduction................................6 Safety Guidelines..............................7 Description.................................. 8 M4 System Overall Architecture......................8 Equipment List..............................9 Technical Specifications........................... 11 Installation Steps..............................11 Computer Configuration..............12 Configuring Mac Mini Settings......................... 12 Disabling Automatic Updates.........................12 Disabling Sleeping Mode......................... 12 Changing Security &... - Page 4 Configuring Networks............................35 Configuring the Mac Mini i7 Ethernet Networks................35 Configuring the Mac Mini i5 Ethernet Network................36 Configuring the Virtual Machine Network (i7)................37 Removing M4 Protection............................ 42 Installing Hydrophones............................44 List of Marport Hydrophones.......................44 Hydrophone Cabling..........................47 Passive Hydrophone........................47 Passive Hydrophone + Wideband Preamplifier..............
- Page 5 Appendix..................95 Appendix A: Frequency Plan..........................95 Appendix B: Technical Drawings........................100 Mac Mini Mounting Bracket Dimensions..................100 Hydrophone Junction Box Dimensions.................... 101 Wideband Preamplifier Dimensions....................102 Thru-Hull Penetration Dimensions....................103 ShipModul MiniPlex NMEA Multiplexer Dimensions..............104 Index....................... 105...
-
Page 6: Legal
Marport. “Marport ”, the Marport logo and Software Defined Sonar are registered trademarks of Marport. All other brands, products and company names mentioned are the trademark and property of its respective owners only. Marport is a division of Airmar Technology Corporation. -
Page 7: Introduction And Presentation
Introduction and Presentation Read this section to get a basic knowledge of your M4 system. Tip: Click Marport logo at the bottom of pages to come back to the table of contents. Introduction The M4 is our heavyweight acoustic receiver, combining the latest digital signal processing with the smartest software. -
Page 8: Safety Guidelines
M4 System - 2 Mac Minis | V2 | Introduction and Presentation Safety Guidelines Important: To ensure proper and safe use of this equipment, carefully read and follow the instructions in this manual. Product installation and use Install and use this product in accordance with this user manual. Incorrect use of the product may cause damage to the components or void the warranty. -
Page 9: Description
M4 System - 2 Mac Minis | V2 | Introduction and Presentation Description M4 System Overall Architecture This schema presents the overall architecture of a M4 system with 2 Mac minis. -
Page 10: Equipment List
M4 System - 2 Mac Minis | V2 | Introduction and Presentation Equipment List To install a M4 system with 2 Mac minis, you need the following hardware and software equipment. Hardware • 1 Mac mini i7 • 3GHz Dual-Core Intel Core i7 (Turbo Boost up to 3.5GHz) •... - Page 11 M4 System - 2 Mac Minis | V2 | Introduction and Presentation Software Software Application Name Definition Marport validated MacOS Operating system on Mac minis VMware Fusion Virtual machine software, necessary to run M4 SDS processor Scala Marport software application collecting, processing, storing and displaying data received from sensors, sounders and other connected devices.
-
Page 12: Technical Specifications
M4 System - 2 Mac Minis | V2 | Introduction and Presentation Technical Specifications Frequency range 30-60 kHz Active bandwidth 24 kHz Number of Rx/Tx channels Hydrophones Bearing to sensor measurement Distance to sensor measurement Number of simultaneous data reception... -
Page 13: Computer Configuration
M4 System - 2 Mac Minis | V2 | Computer Configuration Computer Configuration Read this section to learn how to configure the Mac computer. Important: This section applies only to technicians from Marport offices. Configuring Mac Mini Settings If you do not have a computer already configured and you are beginning from scratch, you need to apply all the following settings on both Mac Mini computers. -
Page 14: Changing Security & Privacy Settings
M4 System - 2 Mac Minis | V2 | Computer Configuration 3. Deselect Enable Power Nap and Put hard disks to sleep when possible. 4. Some versions of Mac OS may also have the option Start up automatically after a power failure: select it. -
Page 15: Changing Desktop Wallpaper And Screen Saver
M4 System - 2 Mac Minis | V2 | Computer Configuration 4. Select Allow apps downloaded from: Anywhere. 5. If you are under OS X Sierra, Anywhere option may not be displayed by default. To display Anywhere: a) From the top right corner of the screen, click the magnifying glass and type Terminal. - Page 16 M4 System - 2 Mac Minis | V2 | Computer Configuration 2. From the tab Screen Saver, select Start after: Never. 3. From the tab Desktop, click Folders, then the add icon from the bottom left corner. 4. Select the Downloads folder and click Choose.
-
Page 17: Adding A Virtual Keyboard
M4 System - 2 Mac Minis | V2 | Computer Configuration 5. From Downloads, select Marport wallpaper (See Downloading Software Applications on page 18 to know where to find Marport wallpaper). Adding a Virtual Keyboard If you do not have a keyboard, you can add a virtual keyboard to the screen and type words using the mouse. -
Page 18: Disabling Automatic Search Of Bluetooth Keyboard
M4 System - 2 Mac Minis | V2 | Computer Configuration 4. From the top right corner of the screen, click the little flag corresponding to the keyboard language preferences, then select Show Keyboard Viewer. Results A virtual keyboard is displayed on the screen. You can change its size by dragging its corners. -
Page 19: Installing Software Applications
Specific applications are required to correctly run the system. Downloading Software Applications Some software applications required to configure and use the M4 system are already installed on the computer. Marport offices need to download from a Marport FTP server and from the DealerWeb additional applications. About this task Marport offices only. -
Page 20: Installing Vmware Fusion
M4 System - 2 Mac Minis | V2 | Computer Configuration 6. To download Mosa: a) From the DealerWeb page, click Sensors > Tools. b) Click Download next to the release version you want (latest is on top). 7. To download Marport Tools: a) From the DealerWeb page, click Receivers >... -
Page 21: Installing Mozilla Firefox
M4 System - 2 Mac Minis | V2 | Computer Configuration 2. Enter the license key: it is written on a sticker under the computer. Note: If not using a Marport supplied Mac or if there is no sticker, please buy a Fusion PRO license. -
Page 22: Installing Java
M4 System - 2 Mac Minis | V2 | Computer Configuration Procedure 1. Double-click Firefox *.dmg file to install it. 2. When the following window appears, drag Firefox icon as indicated. Results Firefox is now installed on the computer and accessible via the Launchpad . -
Page 23: Installing Scala And Scala Replay
M4 System - 2 Mac Minis | V2 | Computer Configuration c) From the terminal, enter sudo defaults write /Library/Preferences/ com.oracle.java.Java-Updater JavaAutoUpdateEnabled -bool false. d) Press enter. Installing Scala and Scala Replay You need to install Scala and Scala Replay on both Mac minis. Repeat this procedure for each. -
Page 24: Installing Marport Tools
You need to install this application on the Mac mini i7 computer only. Procedure 1. Double-click Marport Tools installation file to unzip it. 2. From MarportTools folder, copy Marport Tools application and paste it in the Applications folder. Marport Tools is now installed on your computer and accessible via the Launchpad . -
Page 25: Installing Synergy
M4 System - 2 Mac Minis | V2 | Computer Configuration Installing Synergy You have to buy and download a license for Synergy software if you want to be able to share the mouse and keyboard between the two Mac minis. You need to install it on both Mac minis. - Page 26 M4 System - 2 Mac Minis | V2 | Computer Configuration c) From Server Configuration window, drag the monitor icon on the top right corner to a cell next to the server monitor. The grid determines the placement of the monitors when moving the mouse cursor.
-
Page 27: Automatically Opening Scala And Vmware Fusion At Start Up
M4 System - 2 Mac Minis | V2 | Computer Configuration c) Check if the server IP of the Mac mini i7 indicated from the Mac mini i5 is correct (check the address on the Mac mini i7 Synergy Basic window). -
Page 28: Installing M4-Processor Virtual Machine
5. Select Hide in front of VMware so that the application window does not open when it starts. This prevent the user from closing the window and crashing the system. Installing M4-Processor Virtual Machine You need to install the M4-Processor Virtual Machine on the Mac mini i7 computer only. Before you begin VMware Fusion software is installed. -
Page 29: Sharing System Information
What to do next Now you need to configure the virtual machine network. Sharing System Information Marport offices only: You need to share details about the sytem so that Marport can keep record of systems installed. Procedure 1. Go the the DealerWeb web page: https://dealerweb.marport.fr/Default.aspx. -
Page 30: Cloning Disks
M4 System - 2 Mac Minis | V2 | Computer Configuration Cloning Disks Once both computers are configured, you can clone their hard drive and then, install the hard drive images on other Mac mini computers in order to save time for future installations. -
Page 31: Installation
M4 System - 2 Mac Minis | V2 | Installation Installation Read this section to learn how to connect and configure the equipment of the M4 system. Installing the System Marport technicians or dealers need to connect the different components of the system. -
Page 32: M4 Receiver Cabling
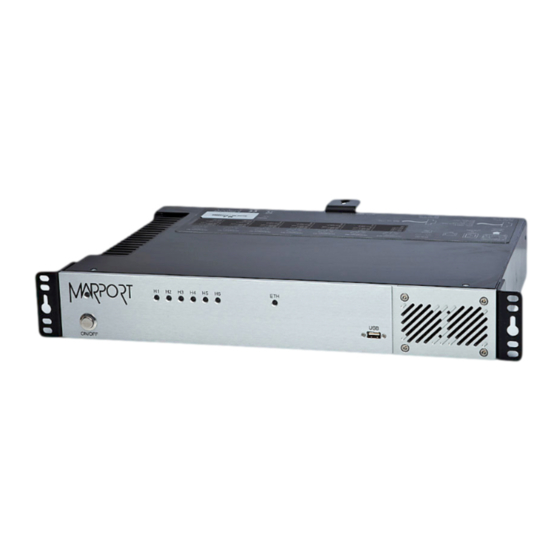
M4 System - 2 Mac Minis | V2 | Installation M4 Receiver Cabling Install the M4 Receiver according to the following cablings. Cable Connected to Power cable 110-220V AC power supply Ethernet cable Mac mini i7 Marport cable Junction box... -
Page 33: Mac Mini Cabling
M4 System - 2 Mac Minis | V2 | Installation Mac Mini Cabling Install the Mac minis according to the following cablings. Mac mini i7 Cable Connected to Power cable 100-240V AC power supply 2 Ethernet cable M4 receiver HDMI cable... - Page 34 M4 System - 2 Mac Minis | V2 | Installation Mac mini i5 Cable A/C power cable 100-240V AC power supply 2 Ethernet cable Ethernet switch HDMI cable Monitor 1 4 Thunderbolt to HDMI/VGA/DVI Monitor 2 adapter* + monitor cable...
-
Page 35: Ethernet Switch Cabling
M4 System - 2 Mac Minis | V2 | Installation Ethernet Switch Cabling You can check that the Ethernet switch is correctly connected to the components. Procedure 1. Check that the following Ethernet cables are plugged into the Ethernet switch: •... -
Page 36: Configuring Networks
When using an Ethernet switch, the Ethernet and virtual machine networks need to be configured so that the Mac minis receive information from the receiver. Configuring the Mac Mini i7 Ethernet Networks You need to configure the Mac mini i7 network in order to be compliant with the M4-Processor Virtual Machine. Procedure 1. -
Page 37: Configuring The Mac Mini I5 Ethernet Network
M4 System - 2 Mac Minis | V2 | Installation b) From IP Address enter 192.168.10.100. 6. Select the network called Ethernet. This network is the one connected to the M4 receiver. a) From Configure IPv4 select Manually. b) From IP Address enter 192.168.44.100. -
Page 38: Configuring The Virtual Machine Network (I7)
M4 System - 2 Mac Minis | V2 | Installation Procedure 1. From the top left corner of the screen, click Apple Menu > System Preferences > Network. 2. Select the network called Ethernet. This network is the one connected to the Ethernet switch. - Page 39 M4 System - 2 Mac Minis | V2 | Installation 5. Check that there is a green LED next to the network name and that the IP address is 192.168.10.100. If not, click System Preferences at the bottom of the window to be able to manually change the IP address.
- Page 40 M4 System - 2 Mac Minis | V2 | Installation 10. Check that there is a green LED next to the network name and that the IP address is 192.168.44.100. If not, click System Preferences at the bottom of the window to be able to manually change the IP address.
- Page 41 M4 System - 2 Mac Minis | V2 | Installation c) Check Processors number and Memory space. There needs to be 2 processors. 14. Open Scala. 15. From the top left corner of Scala window, click menu > Receivers. 16. Check that there are green checks everywhere, which means that the system is operational.
- Page 42 M4 System - 2 Mac Minis | V2 | Installation 17. From the M4-Processor window, check that the you see the prompt marport: login: Note: The prompt ending by failed does not impact the correct functionning, you can ignore it.
-
Page 43: Removing M4 Protection
M4 System - 2 Mac Minis | V2 | Installation Removing M4 Protection From version 06.00.05 and later of Mx receivers, you need to import a license file into your system to make it fully operational. Before you begin For this task, you need one license file (*.zob). Refer to sales' headquarters to get them. - Page 44 M4 System - 2 Mac Minis | V2 | Installation Results The message on the top of the page indicates the number of PRP (50) and NBTE (10) sensors that can be added to the system and if a SC TrawlEye sensor can be added (TEY). The M3 system is now an M5 system.
-
Page 45: Installing Hydrophones
M4 System - 2 Mac Minis | V2 | Installation Installing Hydrophones You need to connect hydrophones to the system. List of Marport Hydrophones These are technical specifications for hydrophones currently sold by Marport. For information about obsolete hydrophones, please contact Marport support. Typical Product... - Page 46 M4 System - 2 Mac Minis | V2 | Installation Typical Product Name Use case Bandwidth current Cable* reference consumption NC-1-04 Active hydrophone 38-45 KHz 8-12 mA Black • Vessel with normal (integrated level of noise (below preamplifier) -80 dBV).
- Page 47 M4 System - 2 Mac Minis | V2 | Installation *After NC-1-04, cables are colored according to the type of hydrophone: blue for passive, green for active narrowband and yellow for active wideband. † Standard active hydrophones have an available bandwidth of 6kHz. So, if: (PRP_number * 100) + (NBTE_number * 800) <...
-
Page 48: Hydrophone Cabling
• 55°x 55° : only connect cell with black + green wires • 55° x 35°: connect both cells Note: To be able to receive temperature from Marport hydrophones, connect to the hydrophone input 1 or 2 using an NMEA converter junction box (P/N: NC-2-TEMP). -
Page 49: Passive Hydrophone + Wideband Preamplifier
Gains are now respectively 40dB and 20dB. This improves performance by reducing saturation with strong signals, especially in shallow waters. Note: To be able to receive temperature from Marport hydrophones, connect to the hydrophone input 1 or 2 using an NMEA converter junction box (P/N: NC-2-TEMP). - Page 50 M4 System - 2 Mac Minis | V2 | Installation Configuration 1 • Gain: High • Notch filter 38kHz: On • Notch filter 50kHz: On | 49...
- Page 51 M4 System - 2 Mac Minis | V2 | Installation Configuration 2 • Gain: Low • Notch filter 38kHz: On • Notch filter 50kHz: On | 50...
- Page 52 M4 System - 2 Mac Minis | V2 | Installation Configuration 3 • Gain: Low • Notch filter 38kHz: Off • Notch filter 50kHz: Off | 51...
-
Page 53: Active Hydrophone
We recommend the following wiring for the installation of the active hydrophones NC-1-04 and NC-1-07. Note: To be able to receive temperature from Marport hydrophones, connect to the hydrophone input 1 or 2 using an NMEA converter junction box (P/N: NC-2-TEMP). -
Page 54: Active Wideband Hydrophone
Configuration 4 No Filters / Gain High 50kHz filter activated / Gain High Note: To be able to receive temperature from Marport hydrophones, connect to the hydrophone input 1 or 2 using an NMEA converter junction box (P/N: NC-2-TEMP). | 53... - Page 55 M4 System - 2 Mac Minis | V2 | Installation Configuration 1 First generation 46-127-X Second generation 46-138-X / 46-139-X 38kHz and 50kHz filters activated / Gain High 38kHz filter activated / Gain High Note: NC-1-08 hydrophone black/green (ground/-12V) cables are not needed and cut off at cable end.
- Page 56 M4 System - 2 Mac Minis | V2 | Installation Configuration 2 First generation 46-127-X Second generation 46-138-X / 46-139-X 38kHz and 50kHz filters activated / Gain Low 38kHz filter activated / Gain Low This configuration is recommended for seine fishing and trawling in shallow water.
- Page 57 M4 System - 2 Mac Minis | V2 | Installation Configuration 3 First generation 46-127-X Second generation 46-138-X / 46-139-X 38kHz filter activated / Gain High 38kHz and 50kHz filters activated / Gain High Note: NC-1-08 hydrophone black/green (ground/-12V) cables are not needed and cut off at cable end.
- Page 58 M4 System - 2 Mac Minis | V2 | Installation Configuration 4 First generation 46-127-X Second generation 46-138-X / 46-139-X No Filters / Gain High 50kHz filter activated / Gain High Note: NC-1-08 hydrophone black/green (ground/-12V) cables are not needed and cut off at cable end.
-
Page 59: Scanmar Hydrophone
Scanmar Hydrophone We recommend the following wiring to connect a Scanmar hydrophone to a Marport system. Scanmar hydrophones can be used with Marport receivers. They will show a lower current (5.5mA instead of 8-9mA). If you want to receive temperature data from this hydrophone, connect the junction box to H3 port on M3 and M6 receivers or to H1 or H2 on an M4 receiver. -
Page 60: Simrad Pi Hydrophone
M4 System - 2 Mac Minis | V2 | Installation Simrad PI Hydrophone We recommend the following wiring to connect Simrad PI hydrophone to a Marport system. On Scala, Simrad PI hydrophone can be added to the receiver as an active Simrad hydrophone (typical current consumption is 15-17 mA). -
Page 61: Simrad Iti Hydrophone
M4 System - 2 Mac Minis | V2 | Installation Simrad ITI Hydrophone We recommend the following wiring to connect Simrad ITI passive hydrophone to a Marport system. From Scala, this hydrophone can be added to the receiver as a passive Marport hydrophone. Receiving (Rx) | 60... - Page 62 M4 System - 2 Mac Minis | V2 | Installation Receiving and transmitting (Rx + Tx) Connect ITI cables to a junction box to receive (Rx) and to a preamplifier to transmit (Tx). Passive Hydrophone + Wideband Preamplifier on page 48 to know how to configure the gain and notch filters on the preamplifier.
-
Page 63: Furuno Passive Hydrophone
M4 System - 2 Mac Minis | V2 | Installation Furuno Passive Hydrophone We recommend the following wirings to connect Furuno passive hydrophones to a Marport system. There are three passive Furuno hydrophones, with different bandwidths: • 31.5-34.5kHz • 38-42kHz •... -
Page 64: Passive Hydrophone From Other Brands + Wideband Preamplifier
Passive Hydrophone from other brands + Wideband Preamplifier You can connect passive hydrophones from other brands to Marport wideband preamplifier. Passive hydrophones can be connected to Marport wideband preamplifier the same way Marport passive hydrophone is connected. This drawing is an example of connection of a Furuno passive hydrophone with 1 cell. -
Page 65: Receiving Hydrophone Data On Two Systems
If you have two different systems, you can receive on both systems data coming from a hydrophone connected to one of the systems. About this task The following procedure explains how to receive data on a Marport Mx system from an active hydrophone connected to another system. Procedure 1. - Page 66 M4 System - 2 Mac Minis | V2 | Installation 2. To receive data from a Simrad PI system, connect a shielded multi-conductor cable as described below: Primary system Secondary system Data received on Data received Simrad PI system on Marport...
-
Page 67: Connecting The Hydrophone To The Receiver
4. To add sensors from other systems on Scala: a) Scanmar: add in the same way as for a Marport sensor, according to the type of sensor. Only data sent on boat/channel codes can be read by the Mx receiver. When TEY option is activated on your system, you can read all TEY sensor data (add as Trawl Explorer SC Compatible). -
Page 68: Adding Sc Sensor And Sc Compatible Sensor To The Receiver
• No light: no configured hydrophone Adding SC Sensor and SC Compatible Sensor to the Receiver You can add an SC sensor or a Marport SC compatible sensor to a Marport receiver. Before you begin To add this sensor to Marport receiver, you need to have: •... - Page 69 From Trawl Gear Location, choose the location of the sensor on the trawl. The sensor configuration page appears. 4. Complete the settings according to the configuration you did on Mosa (for a Marport SC compatible sensor) or on the SC programmer (SC sensor).
-
Page 70: Displaying Data On Scala
M4 System - 2 Mac Minis | V2 | Installation Note: Frequency Band: normal = 43600 kHz / high = 45000 kHz Note: To deactivate Up sounding, enter 0 or deselect the check box. 5. On Scala receiver page, complete Quality settings according to the up and down settings:... - Page 71 M4 System - 2 Mac Minis | V2 | Installation c) Drag bottom handles to 1 and upper handles to 99. 3. By default, Scala applies filters on data to reduce interference. You can remove these filters to have a display similar to an SC system: a) Right-click the echogram and click Filtered Data to deactivate it.
- Page 72 M4 System - 2 Mac Minis | V2 | Installation Default display with filters Display without filters | 71...
-
Page 73: Installing Shipmodul Miniplex Multiplexer (Optional)
M4 System - 2 Mac Minis | V2 | Installation Installing ShipModul MiniPlex Multiplexer (Optional) You can use a ShipModul MiniPlex multiplexer to receive simultaneously NMEA data from devices such as GPS, compass or warp length sensor module and display them in Scala. -
Page 74: Nmea Multiplexer Cabling
M4 System - 2 Mac Minis | V2 | Installation NMEA Multiplexer Cabling Cable Connected to NMEA2000 bus (only for Device outputting NMEA2000 Miniplex-3E-N2K) NMEA0183 input bus (can be plugged Device outputting NMEA0183 into input 1 to 4) NMEA 0183 output bus... -
Page 75: Detecting The Multiplexer
M4 System - 2 Mac Minis | V2 | Installation Detecting the Multiplexer You need to detect the multiplexer on the network to be able to use it. Wiring and configuration change according to your type of network installation. Before you begin •... -
Page 76: Wifi Connection / No Wired Ethernet Network
M4 System - 2 Mac Minis | V2 | Installation The MiniPlex is detected and displayed in the search results. 5. Select it and click OK. The part MiniPlex Connection is automatically filled in. 6. From MiniPlex Connection, click Connect. - Page 77 M4 System - 2 Mac Minis | V2 | Installation 3. Click Apple Menu > System Preferences > Network. From the network list, you can see . Wait a few seconds until the LED becomes orange and until an IP address appears. Its IP address has been given automatically and randomly.
-
Page 78: Multiplexer With Defined Ip Address
M4 System - 2 Mac Minis | V2 | Installation b) From Netmask, enter 255.255.255.0. c) From Gateway IP, enter IP address: 192.168.70.1. d) Click OK. From the part MiniPlex Connection, the Host IP address is updated. 7. From MiniPlex Connection, click Connect. - Page 79 M4 System - 2 Mac Minis | V2 | Installation The multiplexer is displayed. You can see its IP address (192.168.70.2). 3. Click Apple Menu > System Preferences > Network. 4. Check that is on top of the network list. If not, click the tooth wheel icon at the bottom of the list, select Set Service Order and drag to the top.
-
Page 80: Multiplexer Not Detected
M4 System - 2 Mac Minis | V2 | Installation If you have connected and correctly configured the baud speed of the device outputting NMEA data, you should see incoming NMEA messages. Multiplexer Not Detected Before you begin Make sure that your firewall does not block the multiplexer: from System Preferences > Security &... - Page 81 M4 System - 2 Mac Minis | V2 | Installation Important: Close Scala if open: MPX-Config3 software uses UDP channel to transmit and receive commands to the MiniPlex multiplexer. This channel needs to remain exclusive during the configuration of the multiplexer.
- Page 82 M4 System - 2 Mac Minis | V2 | Installation NMEA2000 Example Device 3 is a WeatherStation WX220 from Airmar on NMEA 2000. The multiplexer has to be set up the following way: The console will output the following messages: NMEA sentences from this device all begin by $CC.
-
Page 83: Configuring Scala
M4 System - 2 Mac Minis | V2 | Installation Note: Messages in plain text longer than 61 characters will not be received by the multiplexer. Configuring Scala You need to configure Scala software to receive and display the NMEA data received on the multiplexer. - Page 84 M4 System - 2 Mac Minis | V2 | Installation 6. From the Sensor Data section of the control panels, under the tab NMEA, check the activity of data received. If you gave talker IDs to the devices you configured on MPX-Config3, you can see that each device is identified by its talker ID (AA, BB and CC).
-
Page 85: Servicing And Maintenance
M4 System - 2 Mac Minis | V2 | Servicing and Maintenance Servicing and Maintenance Read this section for troubleshooting and maintenance information. Interference Check You can check if there is noise interfering with the reception of signals. Spectrum Analyzer Display The following picture explains the main parts of the spectrum analyzer on Scala. - Page 86 M4 System - 2 Mac Minis | V2 | Servicing and Maintenance 3. From the top right corner of the screen, click Spectrum. 4. From the top left corner of the screen, click Start Spectrum. 5. Select the hydrophone you want to test. Only the hydrophones that are switched on are displayed.
-
Page 87: Updating The Processor And Receiver
11. To save data recorded by the spectrum in a *.txt file, click Save FFT. 12. When you have enough data, click Stop Spectrum. Updating the Processor and Receiver This procedure applies only to technicians from Marport offices. You can update the Processor and Receiver firmware when new versions are available. Procedure 1. - Page 88 10. Right-click the new firmware and select Update Equipment Software. 11. Wait for the update to be complete. 12. Reboot the receiver to complete the update: from Marport Tools toolbar, click Marport > Discovery > Reboot Equipment. 13. To refresh data displayed in Marport Tools, from Marport Tools toolbar, click Marport >...
- Page 89 M4 System - 2 Mac Minis | V2 | Servicing and Maintenance Results The receiver is updated. | 88...
-
Page 90: Troubleshooting
M4 System - 2 Mac Minis | V2 | Servicing and Maintenance Troubleshooting Read this section to know how to solve common problems. Downloading a VMware Fusion license under version 10 You need to download a VMware Fusion PRO license but VMware Fusion website only sells version 10 licenses, that are not compatible with Mavericks, Yosemite, El Capitan or Sierra Mac OS. - Page 91 M4 System - 2 Mac Minis | V2 | Servicing and Maintenance Or you have the following error message: The receiver is not accessible. There might be an issue with the network or the virtual machine. 1. Open a terminal to check the connection of the receiver.
- Page 92 M4 System - 2 Mac Minis | V2 | Servicing and Maintenance 7. Deselect Connect Network Adapter and select Autodetect from the list. 8. Restart the virtual machine: from VMware Fusion toolbar, click Virtual Machine > Restart. 9. Reconfigure correctly the Ethernet network adapter 2:...
-
Page 93: Receiver Page: Code 02 Error Message
M4 System - 2 Mac Minis | V2 | Servicing and Maintenance Receiver page: code 02 error message On the receiver page, you have the following error message: The M4 receiver is not connected to the Mac mini. 1. Restart the computer. -
Page 94: Giving Remote Access To The Computer
M4 System - 2 Mac Minis | V2 | Servicing and Maintenance Giving Remote Access to the Computer If you have an issue with the system, you may need to give remote access to the computer to the support team with TeamViewer software. -
Page 95: Support Contact
M4 System - 2 Mac Minis | V2 | Servicing and Maintenance Support Contact You can contact your local dealer if you need maintenance on your Marport products. You can also ask us at the following contact details: FRANCE ICELAND... -
Page 96: Appendix
M4 System - 2 Mac Minis | V2 | Appendix Appendix Appendix A: Frequency Plan It is important to carefully plan the setup of your sensors before adding them to the system. You can create a table with a list of frequencies and complete it when you add sensors. - Page 97 M4 System - 2 Mac Minis | V2 | Appendix C-4/CH5 42700 C-4/CH6 43300 C-5/CH1 42024 C-5/CH2 41690 C-5/CH3 41285 C-5/CH4 41060 C-5/CH5 42900 C-5/CH6 43400 C-6/CH1 39062 C-6/CH2 39375 C-6/CH3 39688 C-6/CH4 40000 C-6/CH5 40312 C-6/CH6 40625 C-7/CH1 38906...
- Page 98 M4 System - 2 Mac Minis | V2 | Appendix Frequencies and intervals The diagrams below show the bandwidth of the different types of Marport sensors and intervals you must respect when adding other sensors. Note: The bandwidth of wide band HDTE is 1200 kHz. Intervals are the same.
- Page 99 M4 System - 2 Mac Minis | V2 | Appendix Examples of frequency allocations • We recommend to allocate frequencies between 37 and 52 kHz. • Echo sounders are usually placed around 38 kHz, make sure to allow enough distance with them.
- Page 100 M4 System - 2 Mac Minis | V2 | Appendix | 99...
-
Page 101: Appendix B: Technical Drawings
M4 System - 2 Mac Minis | V2 | Appendix Appendix B: Technical Drawings Technical drawings of the components of the system. Mac Mini Mounting Bracket Dimensions | 100... -
Page 102: Hydrophone Junction Box Dimensions
M4 System - 2 Mac Minis | V2 | Appendix Hydrophone Junction Box Dimensions | 101... -
Page 103: Wideband Preamplifier Dimensions
M4 System - 2 Mac Minis | V2 | Appendix Wideband Preamplifier Dimensions | 102... -
Page 104: Thru-Hull Penetration Dimensions
M4 System - 2 Mac Minis | V2 | Appendix Thru-Hull Penetration Dimensions washer rubber gasket washer | 103... -
Page 105: Shipmodul Miniplex Nmea Multiplexer Dimensions
M4 System - 2 Mac Minis | V2 | Appendix ShipModul MiniPlex NMEA Multiplexer Dimensions | 104... -
Page 106: Index
Index Junction box Cabling Architecture Dimensions Boat code Keyboard Sharing Virtual Channel code Cloning Disks Contact M4 Processor Virtual Machine Installing Network Data recording M4 Receiver Audio recording Cabling M5 system Upgrade to Mac mini Error message Installation The system isn't answering... - Page 107 Index | 106 NMEA0183 Search Software NMEA2000 Download NMEA converter junction box NMEA multiplexer, See ShipModul MiniPlex multiplexer Software list Noise Interference Spectrum Synergy Parallel systems TeamViewer Technical drawings Thru-hull Receiver Dimensions Connecting to ETH LED H# LEDs Installation Updating processor and receiver Upgrade Lights To M5 system...
Need help?
Do you have a question about the M4 and is the answer not in the manual?
Questions and answers