Table of Contents
Advertisement
Quick Links
Download this manual
See also:
Service Manual
Advertisement
Table of Contents

Subscribe to Our Youtube Channel
Related Manuals for Marport M6


Summary of Contents for Marport M6
- Page 1 M6 System User Guide...
-
Page 3: Table Of Contents
History...................................4 Copyright..................................4 Disclaimer..................................6 Introduction and Presentation............7 Introduction................................7 Safety Guidelines..............................8 Description.................................. 9 M6 System Overall Architecture......................9 Equipment List............................10 Technical Specifications........................... 11 Computer Configuration..............12 Adding a Virtual Keyboard..........................12 Installation..................14 Installing the System............................14 Mx Receiver Cabling.............................. 15 Mac Pro Cabling..............................16... - Page 4 Contents | iii Detecting the Multiplexer........................51 Wired Ethernet Network......................51 WiFi Connection / No Wired Ethernet Network..............53 Multiplexer with Defined IP address..................55 Multiplexer Not Detected......................57 Configuring Inputs............................ 58 Configuring Scala............................60 Servicing and Maintenance.............62 Interference Check..............................62 Spectrum Analyzer Display........................62 Checking Noise Interference.........................
-
Page 5: Legal
No part of this document may be reproduced, stored in a retrieval system or transmitted in any form by any means; electronic, mechanical, photocopying or otherwise, without the express written permission from Marport. “Marport ”, the Marport logo and Software Defined Sonar are... - Page 6 M6 System | V4 | Legal registered trademarks of Marport. All other brands, products and company names mentioned are the trademark and property of its respective owners only. Marport is a division of Airmar Technology Corporation.
-
Page 7: Disclaimer
M6 System | V4 | Legal Disclaimer Marport endeavors to ensure that all information in this document is correct and fairly stated, but does not accept liability for any errors or omissions. U.S. Patent 9,091,790... -
Page 8: Introduction And Presentation
• There are 2 NMEA and 4 NTC entries to receive hydrophones' temperature data. The M6 works with an Apple Mac pro and two Mx receivers. The computer processes the signal and displays on a screen data received. You can configure the sensors and display data to suit your... -
Page 9: Safety Guidelines
Product installation and use Install and use this product in accordance with this user manual. Incorrect use of the product may cause damage to the components or void the warranty. Only qualified Marport dealers can do installation and maintenance interventions. -
Page 10: Description
M6 System | V4 | Introduction and Presentation Description M6 System Overall Architecture Ethernet cable Marport junction box extension cable & hydrophone cable Manufacturer standard cable (Blurred) Optional elements Screen(s) Internet Mac (ref. PC-0-04) NMEA multiplexer Wireless trackball mouse Mx receiver (ref. M6REC) Scala software dongle 10 Junction boxes (x2) (ref. -
Page 11: Equipment List
N2K if using NMEA2000 and NMEA0183 or Miniplex-3E if using only NMEA0183. • 1 Ethernet switch, if you are connected to the internet and to an NMEA multiplexer. • If using Mosa on a tablet computer: refer to Marport sales offices to know the recommended model. -
Page 12: Technical Specifications
M6 System | V4 | Introduction and Presentation Software Software Application Name Definition Marport validated MacOS Operating system on computer (Mavericks OS recommended for Mac pro) VMware Fusion Virtual machine software, necessary to run processor virtual machine. Scala Marport software application collecting, processing, storing and displaying data received from sensors, sounders and other connected devices. -
Page 13: Computer Configuration
M6 System | V4 | Computer Configuration Computer Configuration Read this section to learn how to configure the Mac computer. Adding a Virtual Keyboard If you do not have a keyboard, you can add a virtual keyboard to the screen and type words using the mouse. - Page 14 M6 System | V4 | Computer Configuration | 13...
-
Page 15: Installation
Marport technicians or dealers need to connect the different components of the system. About this task Note: The system is installed by Marport or by a dealer. If there is a problem, you can read these installation steps to check the system installation. -
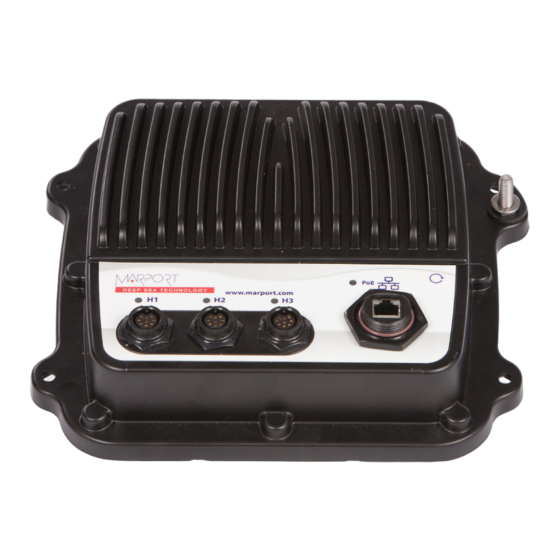
Page 16: Mx Receiver Cabling
M6 System | V4 | Installation Mx Receiver Cabling M6 system is made of 2 Mx receivers. Both Mx receivers have to be connected the following way. Cable Connected to Marport junction box extension cable Junction box 2 Ethernet cable... -
Page 17: Mac Pro Cabling
M6 System | V4 | Installation Mac Pro Cabling Connect equipment to the Mac pro according to the following cabling. Cable Connected to Thunderbolt to HDMI/VGA/DVI adapters + Up to 6 monitors monitor cable* Ethernet cable (Ethernet port on the left) -
Page 18: Installing Hydrophones
M6 System | V4 | Installation Installing Hydrophones You need to connect hydrophones to the system. List of Marport Hydrophones These are technical specifications for hydrophones currently sold by Marport. For information about obsolete hydrophones, please contact Marport support. Typical Product... - Page 19 M6 System | V4 | Installation Typical Product Bandwidth Name Use case current Cable* reference (3 dB) consumption NC-1-07 Active hydrophone 41-44 KHz 4-6 mA Green • Vessel with normal (integrated level of noise (below preamplifier) -100 dBV). • Limited number of sensors.†...
-
Page 20: Hydrophone Cabling
Note: To be able to receive water temperature from Marport hydrophones, on M3, M5 and M6 systems connect to the NTC hydrophone input H1 or H2. On M4 system connect to the hydrophone input 1 or 2 using an NMEA converter junction box (P/N: NC-2-TEMP). - Page 21 M6 System | V4 | Installation If not using the junction box, wire directly the hydrophone to the cable 22-1265-01 the following way: • 55°x 55° : only connect cell with black + green wires • 55° x 35°: connect both cells 1.
-
Page 22: Passive Hydrophone + Wideband Preamplifier
Note: To be able to receive water temperature from Marport hydrophones, on M3, M5 and M6 systems connect to the NTC hydrophone input H1 or H2. On M4 system connect to the hydrophone input 1 or 2 using an NMEA converter junction box (P/N: NC-2-TEMP). - Page 23 M6 System | V4 | Installation Configuration 1 • Gain: High • Notch filter 38kHz: On • Notch filter 50kHz: On | 22...
- Page 24 M6 System | V4 | Installation Configuration 2 • Gain: Low • Notch filter 38kHz: On • Notch filter 50kHz: On | 23...
- Page 25 M6 System | V4 | Installation Configuration 3 • Gain: Low • Notch filter 38kHz: Off • Notch filter 50kHz: Off | 24...
- Page 26 M6 System | V4 | Installation If not using the junction box, wire directly the hydrophone to the cable 22-1265-01 the following way: 1. Wire / 2. Heat shrink / 3. Welding point | 25...
-
Page 27: Active Hydrophone
Note: To be able to receive water temperature from Marport hydrophones, on M3, M5 and M6 systems connect to the NTC hydrophone input H1 or H2. On M4 system connect to the hydrophone input 1 or 2 using an NMEA converter junction box (P/N: NC-2-TEMP). -
Page 28: Active Wideband Hydrophone
Note: To be able to receive water temperature from Marport hydrophones, on M3, M5 and M6 systems connect to the NTC hydrophone input H1 or H2. On M4 system connect to the hydrophone input 1 or 2 using an NMEA converter junction box (P/N: NC-2-TEMP). - Page 29 M6 System | V4 | Installation Configuration 1 First generation 46-127-X Second generation 46-138-X / 46-139-X 38kHz and 50kHz filters activated / Gain High 38kHz filter activated / Gain High | 28...
- Page 30 M6 System | V4 | Installation Configuration 2 First generation 46-127-X Second generation 46-138-X / 46-139-X 38kHz and 50kHz filters activated / Gain Low 38kHz filter activated / Gain Low This configuration is recommended for seine fishing and trawling in shallow water.
- Page 31 M6 System | V4 | Installation Configuration 3 First generation 46-127-X Second generation 46-138-X / 46-139-X 38kHz filter activated / Gain High 38kHz and 50kHz filters activated / Gain High | 30...
- Page 32 M6 System | V4 | Installation Configuration 4 First generation 46-127-X Second generation 46-138-X / 46-139-X No Filters / Gain High 50kHz filter activated / Gain High If not using the junction box, wire directly the hydrophone to the cable 22-1265-01 the following way: (adapt according to configuration 1, 2, 3 or 4) 1.
-
Page 33: Scanmar Hydrophone
Scanmar Hydrophone We recommend the following wiring to connect a Scanmar hydrophone to a Marport system. Scanmar hydrophones can be used with Marport receivers. They will show a lower current (5.5mA instead of 8-9mA). If you want to receive temperature data from this hydrophone, connect the junction box to H3 port on M3 and M6 receivers or to H1 or H2 on an M4 receiver. -
Page 34: Simrad Pi Hydrophone
M6 System | V4 | Installation Simrad PI Hydrophone We recommend the following wiring to connect Simrad PI hydrophone to a Marport system. On Scala, Simrad PI hydrophone can be added to the receiver as an active Simrad hydrophone (typical current consumption is 15-17 mA). -
Page 35: Simrad Iti Hydrophone
M6 System | V4 | Installation Simrad ITI Hydrophone We recommend the following wiring to connect Simrad ITI passive hydrophone to a Marport system. From Scala, this hydrophone can be added to the receiver as a passive Marport hydrophone. Receiving (Rx) | 34... - Page 36 M6 System | V4 | Installation Receiving and transmitting (Rx + Tx) Connect ITI cables to a junction box to transmit (Tx) and to a preamplifier to receive (Rx). Passive Hydrophone + Wideband Preamplifier on page 21 to know how to configure the gain and notch filters on the preamplifier.
-
Page 37: Furuno Passive Hydrophone
M6 System | V4 | Installation Furuno Passive Hydrophone We recommend the following wirings to connect Furuno passive hydrophones to a Marport system. There are three passive Furuno hydrophones, with different bandwidths: • 31.5-34.5kHz • 38-42kHz • 47.5-52.5kHz From Scala, Furuno passive hydrophone can be added to the receiver as a passive Furuno hydrophone, according to the bandwidth (33kHz, 40kHz or 50kHz). -
Page 38: Passive Hydrophone From Other Brands + Wideband Preamplifier
Passive Hydrophone from other brands + Wideband Preamplifier You can connect passive hydrophones from other brands to Marport wideband preamplifier. Passive hydrophones can be connected to Marport wideband preamplifier the same way Marport passive hydrophone is connected. This drawing is an example of connection of a Furuno passive hydrophone with 1 cell. -
Page 39: Receiving Hydrophone Data On Two Systems
If you have two different systems, you can receive on both systems data coming from a hydrophone connected to one of the systems. About this task The following procedure explains how to receive data on a Marport Mx system from an active hydrophone connected to another system. Procedure 1. - Page 40 4. To add sensors from other systems on Scala: a) Scanmar: add in the same way as for a Marport sensor, according to the type of sensor. Only data sent on boat/channel codes can be read by the Mx receiver. When TE SC option...
-
Page 41: Connecting The Hydrophone To The Receiver
Note: H3 hydrophone input allows to receive water temperature from an NMEA connection (Scanmar hydrophone or NMEA converter junction box). If you connect a Marport hydrophone to H3 without NMEA converter, you will not have temperature data from the hydrophone. -
Page 42: Adding Temperature Data From The Hydrophones To The System
M6 System | V4 | Installation Adding Temperature Data from the Hydrophones to the System You can add the hydrophone to the receiver as a sensor in order to display in Scala the temperature of the water surface. Before you begin Important: In order to receive temperature data, make sure the hydrophone is connected to an NTC input on the receivers or is connected using an NMEA converter junction box. -
Page 43: Understanding Receiver Leds
M6 System | V4 | Installation Understanding Receiver LEDs LEDs on the receiver are useful to know if the receiver is connected to the computer and what types of hydrophones are connected to the receiver. Boot sequence When the receiver restarts, the hydrophone and PoE LEDs light up according to a specific sequence. -
Page 44: Adding Te Sc Sensor To The Receiver
M6 System | V4 | Installation Adding TE SC Sensor to the Receiver You can add a TE SC sensor or a Marport TE SC compatible sensor to a Marport receiver. Before you begin To add this sensor to Marport receiver, you need to have: •... - Page 45 M6 System | V4 | Installation Note: Frequency Band (1): normal = 43600 kHz / high = 45000 kHz Note: To deactivate Up sounding (2), enter 0 or clear the check box. | 44...
-
Page 46: Displaying Data On Scala
M6 System | V4 | Installation 5. On Scala receiver page, complete Quality (3) settings according to the up and down settings: DOWN Available quality settings on Scala Worst / Medium / Best ≤ 150 m Worst / Medium / Best ≤... - Page 47 M6 System | V4 | Installation 3. By default, Scala applies filters on data to reduce interference. You can remove these filters to have a display similar to a TE SC system: a) Right-click the echogram and click Filtered Data to deactivate it.
- Page 48 M6 System | V4 | Installation Display without filters | 47...
-
Page 49: Installing Shipmodul Miniplex Multiplexer (Optional)
M6 System | V4 | Installation Installing ShipModul MiniPlex Multiplexer (Optional) You can use a ShipModul MiniPlex multiplexer to receive simultaneously NMEA data from devices such as GPS, compass or warp length sensor module and display them in Scala. Note: Product reference: ShipModul MiniPlex-3E-N2K if using NMEA2000 and NMEA0183... -
Page 50: Nmea Multiplexer Cabling
M6 System | V4 | Installation NMEA Multiplexer Cabling You can connect ShipModul MiniPlex-3E-N2K or Miniplex-3E NMEA multiplexers in two different ways, depending on whether you have a network with DHCP server or not. Wired Ethernet network Connect the multiplexer according to the following schema if: •... - Page 51 M6 System | V4 | Installation WiFi connection / No wired Ethernet network Connect the multiplexer according to the following schema if: • you connect to the internet via WiFi, • or you do not have a wired Ethernet network.
-
Page 52: Detecting The Multiplexer
M6 System | V4 | Installation Detecting the Multiplexer You need to detect the multiplexer on the network to be able to use it. Wiring and configuration change according to your type of network installation. Before you begin • Scala must be closed. - Page 53 M6 System | V4 | Installation 4. Open MPX-Config3 and click Tools > MiniPlex-3E > Search in the toolbar. The MiniPlex is detected and displayed in the search results. 5. Select it and click OK. The part MiniPlex Connection is automatically filled in.
-
Page 54: Wifi Connection / No Wired Ethernet Network
M6 System | V4 | Installation WiFi Connection / No Wired Ethernet Network About this task Do this procedure if: • You have a wireless internet connection • Or you have no wired Ethernet network Procedure 1. If you are connected to a WiFi network, turn off the WiFi on your computer. - Page 55 M6 System | V4 | Installation f) Click Apply. 4. Open MPX-Config3 and from the toolbar click Tools > MiniPlex-3E > Search. The multiplexer is displayed. Its IP address is also an auto-IP address that you need to change. Trouble: If the multiplexer is not displayed: wait for a few seconds, then try again. It may take a few minutes to recognize the auto-assigned IP address.
-
Page 56: Multiplexer With Defined Ip Address
M6 System | V4 | Installation d) Click OK. In MiniPlex Connection, the Host IP address is updated. 7. In MiniPlex Connection, click Connect. If you have connected and correctly configured the baud speed of the device outputting NMEA data, you should see incoming NMEA messages. - Page 57 M6 System | V4 | Installation 3. Click Apple Menu > System Preferences > Network. 4. Check that Ethernet 2 is on top of the network list. If not, click the tooth wheel icon at the bottom of the list, select Set Service Order and drag Ethernet 2 to the top.
-
Page 58: Multiplexer Not Detected
M6 System | V4 | Installation a) In Gateway IP, enter the IP address of Ethernet 2 (in this example 192.168.70.4). b) Click OK. 7. In MiniPlex Connection, click Connect. If you have connected and correctly configured the baud speed of the device outputting NMEA data, you should see incoming NMEA messages. -
Page 59: Configuring Inputs
M6 System | V4 | Installation Wait for the update process to complete (approx. 10 sec.). 3. You can now have access to the multiplexer settings through Network Settings dialog box. Configuring Inputs You can configure the NMEA inputs of the multiplexer from MPX-Config3 software. - Page 60 M6 System | V4 | Installation The console will output the following messages: You can see the talker IDs AA and BB at the beginning of the NMEA sentences. On the multiplexer, the LED NMEA0183 blinks green. NMEA2000 Example Device 3 is a WeatherStation WX220 from Airmar on NMEA 2000.
-
Page 61: Configuring Scala
M6 System | V4 | Installation If you do not select Plain Text, messages will not be received by the multiplexer. Note: Messages in plain text longer than 61 characters will not be received by the multiplexer. Configuring Scala You need to configure Scala software to receive and display the NMEA data received on the multiplexer. - Page 62 M6 System | V4 | Installation If you gave talker IDs to the devices you configured on MPX-Config3, you can see that each device is identified by its talker ID (AA, BB and CC). Note: You need to give talker IDs to devices sending the same type of data, so that Scala can distinguish them.
-
Page 63: Servicing And Maintenance
M6 System | V4 | Servicing and Maintenance Servicing and Maintenance Read this section for troubleshooting and maintenance information. Interference Check You can check if there is noise interfering with the reception of signals. Spectrum Analyzer Display The following picture explains the main parts of the spectrum analyzer on Scala. -
Page 64: Checking Noise Interference
M6 System | V4 | Servicing and Maintenance Checking Noise Interference You can use the spectrum analyzer to check the noise level of the hydrophones and check for interference. About this task Spectrum Analyzer Display on page 62 for details about the spectrum analyzer display. - Page 65 M6 System | V4 | Servicing and Maintenance The acceptable average level of noise depends on the conditions (distance from the sensor to the hydrophone, fishing method, type of hydrophone). You can have better performance with the following levels: • Active wideband hydrophone with high/low gain: below -100 dBV •...
-
Page 66: Troubleshooting
M6 System | V4 | Servicing and Maintenance Troubleshooting Learn how to solve common problems. Downloading a VMware Fusion license under version 10 You need to download a VMware Fusion PRO license but VMware Fusion website only sells version 10 licenses, that are not compatible with Mavericks, Yosemite, El Capitan or Sierra Mac OS. -
Page 67: Receiver Page Is Empty
M6 System | V4 | Servicing and Maintenance Or you have the following error message: The computer cannot connect to the receivers. There might be an issue with the network or the virtual machine. 1. Check connections and refresh the page. - Page 68 M6 System | V4 | Servicing and Maintenance The virtual machine (VMware Fusion) is off. 1. Restart your computer. 2. When the computer is on, from the Dock, click VMware Fusion icon and check that there are command lines in the M6-Processor window.
-
Page 69: Receiver Page: Hydrophones Have Bad Streaming Status
Note: The prompt ending by failed does not impact the correct functioning, you can ignore it. 3. Click to hide it. M6-Processor virtual machine must always be active, never close this window. 4. Check that you see the receiver page and data in Scala. -
Page 70: No Internet Access
M6 System | V4 | Servicing and Maintenance 2. Click Rx/Tx menu and re-select the correct hydrophone configuration (even if it is already selected). The software updates the hydrophone configuration. 3. Check the status of the hydrophones on the receiver page. If the status stays on BAD STREAMING, restart the computer. -
Page 71: Vmware Fusion Pop-Up Message
M6 System | V4 | Servicing and Maintenance 2. Make sure that the network called Ethernet 2 is at the top of the list, then is followed by the network called Ethernet 1. 3. If not, to change the order click the tooth wheel icon at the bottom of the list and select Set Service Order. -
Page 72: Giving Remote Access To The Computer
M6 System | V4 | Servicing and Maintenance Giving Remote Access to the Computer If you have an issue with the system, you may need to give remote access to the computer to the support team with TeamViewer software. Before you begin You need to have access to a good internet connection. -
Page 73: Support Contact
M6 System | V4 | Servicing and Maintenance Support Contact You can contact your local dealer if you need maintenance on your Marport products. You can also ask us at the following contact details: FRANCE ICELAND Marport France SAS Marport EHF 8, rue Maurice Le Léon... -
Page 74: Appendix
M6 System | V4 | Appendix Appendix Appendix A: Frequency Plan When the system is installed, you can add sensors to it. It is important to carefully plan the setup of your sensors before adding them to the system. You can create a table with a list of frequencies and complete it when you add sensors. - Page 75 M6 System | V4 | Appendix C-4/CH5 42700 C-4/CH6 43300 C-5/CH1 42024 C-5/CH2 41690 C-5/CH3 41285 C-5/CH4 41060 C-5/CH5 42900 C-5/CH6 43400 C-6/CH1 39062 C-6/CH2 39375 C-6/CH3 39688 C-6/CH4 40000 C-6/CH5 40312 C-6/CH6 40625 C-7/CH1 38906 C-7/CH2 39219 C-7/CH3 39531...
- Page 76 M6 System | V4 | Appendix Frequencies and intervals The diagrams below show the bandwidth of the different types of Marport sensors and intervals you must respect when adding other sensors. Figure 1: PRP sensors (e.g. Catch sensor, Trawl Speed, Spread sensor...) Example: If the frequency of the sensor is 40kHz, there should be no sensors between 39.9-40kHz...
- Page 77 M6 System | V4 | Appendix Examples of frequency allocations • We recommend to allocate frequencies between 34 and 56 kHz for wideband hydrophones and between 41 kHz and 44 kHz for narrowband hydrophones. • Echosounders are usually placed around 38 kHz, make sure to allow enough distance with them.
- Page 78 M6 System | V4 | Appendix | 77...
-
Page 79: Appendix B: Technical Drawings
M6 System | V4 | Appendix Appendix B: Technical Drawings Technical drawings of the components of the system. Mx Receiver Dimensions Product reference: M3REC/M5REC | 78... -
Page 80: Hydrophone Junction Box Dimensions
M6 System | V4 | Appendix Hydrophone Junction Box Dimensions Product reference: 46-055-01 | 79... -
Page 81: Wideband Preamplifier Dimensions
M6 System | V4 | Appendix Wideband Preamplifier Dimensions Product reference: NC-2-02 | 80... -
Page 82: Thru-Hull Penetration Dimensions
M6 System | V4 | Appendix Thru-Hull Penetration Dimensions Product reference: TH-1-XX | 81... -
Page 83: Shipmodul Miniplex Nmea Multiplexer Dimensions
M6 System | V4 | Appendix ShipModul MiniPlex NMEA Multiplexer Dimensions | 82... -
Page 84: Index
Index | 83 Index Keyboard Bad streaming Virtual Boat code Mac pro Channel code Cabling Contact Installation Module is disconnected MPX-Config3 Data recording Audio recording NMEA converter junction box NMEA multiplexer, See ShipModul MiniPlex multiplexer NMEA0183 Export NMEA2000 Frequency plan Noise Interference Hydrophone Parallel systems... - Page 85 Index | 84 NMEA0183 NMEA2000 Not detected Rapp Marine Search Software List Spectrum System List of equipment TeamViewer Technical drawings Technical specifications Thru-hull Dimensions VMware Fusion License under version 10 Message connect to Mac/Linux OS compatibility Wideband preamplifier Dimensions...
Need help?
Do you have a question about the M6 and is the answer not in the manual?
Questions and answers