Page 1
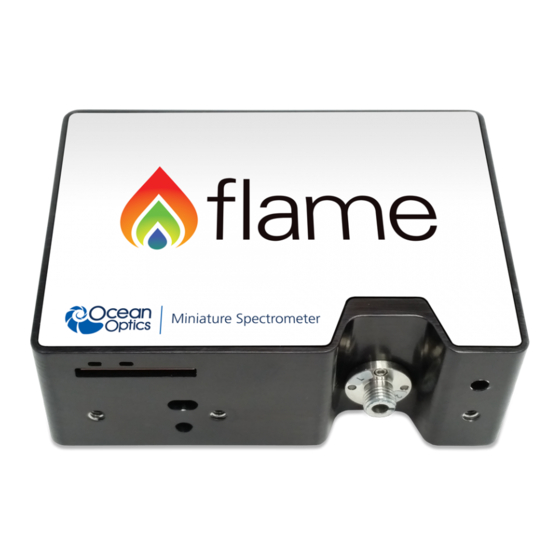
Flame Miniature Spectrometer User Manual Amy to r For Products: FLAME-S, FLAME-T Document: 225-00000-000-11-201604...
Page 2
Every effort has been made to make this manual as complete and as accurate as possible, but no warranty or fitness is implied. The information provided is on an “as is” basis. Ocean Optics, Inc. shall have neither liability nor responsibility to any person or entity...
Table of Contents About This Manual ......................v Document Purpose and Intended Audience ................v Document Summary ........................v Product-Related Documentation ....................vi Document Version ........................vi Patent Pending Notice ....................vi Warranty ........................vii ISO Certification ......................vii Compliance ........................vii Chapter 1: Introduction ..............
Page 4
Table of Contents Common UV-Vis Applications ....................18 Reflectance & Transmission ...................... 18 Common UV-Vis Reflectance Applications ................18 Common UV-Vis Transmission Applications ................ 18 Fluorescence ..........................19 Common Fluorescence Applications ..................19 Irradiance ........................... 20 Common Irradiance Applications ..................21 Chapter 3: Flame Operation with OceanView ........
Page 5
Preparing for Calibration ....................... 60 Calibrating the Wavelength of the Spectrometer ..............60 Irradiance Calibrations ....................63 Chapter 8: Firmware and Advanced Communications ....65 FLAME-S Firmware ....................... 65 Hardware Description ........................ 65 USB Information ........................65 Instruction Set ..........................65 Command Syntax ........................
Page 6
Table of Contents Spectral Memory Storage ..................... 91 USB Information ........................91 Instruction Set ..........................91 Command Syntax ........................91 USB Command Summary ......................92 USB Command Descriptions ....................93 Flame –T Serial Port Interface Communications and Control Information ........ 106 Hardware Description ......................
About This Manual Document Purpose and Intended Audience Thank you for choosing Ocean Optics! We hope that you’ll be delighted with your decision. This document provides the users of Flame Spectrometers with instructions for setting up, calibrating and performing experiments with their spectrometer. It also contains detailed technical specifications and information about firmware and hardware integration.
External triggering http://oceanoptics.com/wp-content/uploads/External-Triggering- Options_Firmware3.0andAbove.pdf Replacing the slit http://oceanoptics.com/wp-content/uploads/INTSMA-Slit.pdf Device driver issues http://oceanoptics.com///wp-content/uploads/Correcting-Device-Driver-Issues.pdf Ocean Optics offers a Glossary of spectroscopy terms to help you further understand your state-of-the-art products and how they function, located at: http://oceanoptics.com/glossary/. Document Version Document Number Version 225-00000-000-11-201503...
July 1, 2010. The warranty covers parts and labor needed to repair manufacturing defects that occur during the warranty period. We also will cover the costs of shipping warranty-related repairs from our customers to Ocean Optics and from us to our customers.
Page 10
About This Manual FCC COMPLIANCE This equipment has been tested and found to comply with the limits for a Class A digital device, pursuant to Part 15 of the FCC Rules. These limits are designed to provide reasonable protection against harmful interference when the equipment is operated in a commercial environment.
The Flame Spectrometer is the latest generation of Ocean Optics’ ubiquitous Czerny-Turner design. With the release of the world’s first miniature spectrometer in 1993, Ocean Optics helped to make spectroscopy portable, inexpensive and flexible in a way that was never before possible.
190-1100nm. Balanced throughput, resolution and range to optimize the spectrometer for your application. Works seamlessly with Ocean Optics’ large range of light sources, accessories and software Easy to use. Plug and play via the micro-USB connection.
1: Introduction Key Feature Best For… Example Applications Configurability Optimizing your spectrometer for Laser characterization, low signal application-specific requirements; fluorescence and optimizing for specific adjusting range, throughput and absorbance bands resolution and adding features such as filters as required Plug & Play Users that want the convenience of Remote sensing measurements in the Operation...
Page 14
1: Introduction Application Area Examples Semiconductors Processing and Thin Film Plasma Monitoring Metrology Process Endpoint Detection Thickness Measurement Agricultural Measurements and Monitoring Farm to Table Technologies Food and Beverage Quality Control Food Safety Biofuels Analysis Energy Technologies Mining and Exploration Oil and Petroleum Analysis Photovoltaic Analysis Solar Simulators...
Page 15
1: Introduction Specifications Summary Specification FLAME-S FLAME-T SPECTROSCOPIC Optical resolution ~0.1-10.0 nm FWHM (configuration dependent) Signal-to-noise ratio 250:1 300:1 – 65 seconds 3.8 ms – 10 seconds Integration time 10 µs Corrected linearity >99.8% ELECTRONIC A/D resolution 16 bit Power requirement...
1: Introduction Product Versions Many variants of the Flame Spectrometer exist. Ocean Optics offers both preconfigured units as well as custom-configured units, enabling you to order a customized spectrometer optimized for your application. You can tell which kind of spectrometer you have by looking at the product code, located on the bottom of your spectrometer.
Page 17
1: Introduction FLAME-T Preconfigured Models (Toshiba TCD1304TP Detector) Resolution Filters & Range Grating Mirror Model Slit std slit Detector Lens (nm) Type (μm) (nm) Options* FLAME-T-UV-VIS 200- ~1.5 200-850 FLAME-T-UV-VIS-ES General Purpose FLAME-T-VIS-NIR 350- ~1.5 1000 350-1000 FLAME-T-VIS-NIR-ES FLAME-T-XR1 200- Extended Range 1025...
Chapter 2 Installation and Setup What’s In the Box Packing List The packing list is inside a plastic bag attached to the outside of the shipment box (the invoice arrives separately). It lists all items in the order, including customized components in the spectrometer (such as the grating, detector collection lens, and slit).
2: Installation and Setup Caution Be sure to install the software BEFORE connecting the spectrometer to your PC. The software installs the drivers required for spectrometer installation. If you do not install the software first, the system will not properly recognize the spectrometer.
USB 2.0 or 1.1 port, the spectrometer draws power from the host computer, eliminating the need for an external power supply. The Flame, like all Ocean Optics USB devices, can be controlled by our OceanView software (see Product-Related Documentation).
Page 22
2: Installation and Setup Ocean Optics Flame Fiber Optic Spectrometer Typical Set-up Follow the steps below to connect the Flame to a computer via the USB port: 1. Install the spectrometer operating software on the destination computer. 2. Locate the USB cable (CBL-MICROTOA-USB) provided with the Flame.
2: Installation and Setup Hardware Features Flame LEDs The Flame features two indicator lights that operate as shown below: Steady Flashing Unit is on green Unit is ready Unit is acquiring data Note that LEDs can be turned off in OceanView or by using a firmware command. Change the Slit The Flame allows you to change your spectrometer’s slit to match your application requirements.
6. If necessary, connect the fiber again. Accessories Ocean Optics provides a range of standard cables and accessories that connect the Flame to our large range of sampling and light source accessories. Items specifically designed for the Flame are described here; they are not provided with the Flame spectrometer and must be purchased separately.
2: Installation and Setup DB15 Connector Cable (FLAME-CBL-DD4P-DB15P) This cable connects the Flame to existing Ocean Optics accessories that use a DB-15HD connector. These include the PX-2, LLS and HL-2000-FHSA light sources. DD4-DB15 Pin Connections 15 PIN Name Single Strobe...
2: Installation and Setup Light Sources, Cuvette Holders and Other Accessories Ocean Optics supplies a large range of accessories for use with our spectrometers. Visit us at www.oceanoptics.com for a complete list of products available for all of your spectroscopy needs.
2: Installation and Setup Common UV-Vis Applications Quantification of DNA & proteins in life science samples Concentration of solutions & gaseous samples Identification of trace gases in a mixture Reflectance & Transmission Reflectance spectroscopy compares the relative level of light reflected off a sample compared with a reference (given as a percentage of the reference spectrum at each wavelength).
2: Installation and Setup Fluorescence Fluorescence is a technique where a sample is excited with a light source and fluorescent light emitted from the sample at a higher wavelength is measured by the spectrometer. Typically the excitation source is applied at 90º to the sample to minimize light from the excitation source reaching the spectrometer.
2: Installation and Setup Irradiance Irradiance is the technique of measuring the total energy of light at a given wavelength, either relative to the spectral output of a known source (relative irradiance) or in absolute units of power or energy (absolute irradiance).
2: Installation and Setup Typical Set-up for an Absolute Irradiance Measurement Using Field Calibration with a Calibrated Light Source Common Irradiance Applications Measuring the radiant output of lamps and LEDs Measuring color using relative irradiance Measuring the color rendering index (CRI) ...
Page 32
2: Installation and Setup 225-00000-000-11-201604...
OceanView. Launching OceanView differs, depending on your operating system and where you have placed your OceanView program files. For PCs running Microsoft Windows, the default location is Start | Programs | Ocean Optics | OceanView | OceanView.
3: Operation Quick View - Displays the spectrum in Quick View mode showing raw, unprocessed data. This is uncorrected for instrument response vs. wavelength. Quick View shows you a live shot of what the Flame is “seeing.” From Quick View you can launch application wizards or construct your own method.
3: Operation Connect the Flame in OceanView The Flame should automatically appear when you start OceanView and should be acquiring with the default acquisition parameters. If you do not see a signal or the Flame icon on the schematic you may need to rescan for spectrometers. ►...
3: Operation Boxcar – Boxcar is a form of averaging across pixels. It applies a rolling average to multiple adjacent pixels to help smooth the spectral response and reduce the impact of noise. Electric Dark Correction (on/off) – There are pixels on the detector that are kept deliberately dark.
3: Operation Aquire data continuously Take a single acquisition and then pause Pause all acquisitions. Save Data Configure Saving, set saving parameters and file type, file directory and file naming convention. Once selected, the file directory will persist until changed. Start saving data.
3: Operation Saved Data Panel 1. Saved Files List of saved files currently in the saved directory. Arrange by name or date. 2. Preview Shows a preview of the saved spectra, time series or appended series saved data can be stepped through acquisition by acquisition using the controls above the saved files list.
3: Operation Spectroscopy Application Wizards Click this button to set up a measurement using simple step by step wizards. A large range of applications is available. Application Wizard Window Dark and Reference Measurements Dark and reference measurements are commonly used in spectroscopy. ...
3: Operation Reference – click to update the stored reference measurement. Dark – click to update the stored dark measurement. Schematic View The schematic view is a graphical interface that allows you to move from device through to processed data. There are a few basic components to consider. Devices –...
Sometimes things don’t quite go to plan; hopefully you’ll find some answers below. If not, don’t hesitate to contact us and our Tech Support team will leap into action. Some typical questions are answered here. For more information, consult the FAQs on the Ocean Optics website at http://oceanoptics.com/faq/ I connected the USB cable and started OceanView but I don’t see...
The steps to take to resolve this issue differ, depending on your computer’s operating system. Microsoft Windows Operating Systems If you connected your Ocean Optics Flame device to the computer prior to installing your Ocean Optics software application on a Windows platform, you may encounter installation issues that you must correct before your Ocean Optics device will operate properly.
4: Troubleshooting Remove the Unknown Device from Windows Device Manager ► Procedure 1. Open Windows Device Manager. Consult the Windows operating instructions for your computer for directions, if needed. 2. Locate the Universal Serial Bus Devices option and expand the Universal Serial Bus Devices selection by clicking on the "+"...
Page 44
Product Upgrades, Repairs and Servicing Occasionally, you may find that you need Ocean Optics to make a change or an upgrade to your system. To facilitate these changes, you must first contact Customer Support and obtain a Return Merchandise Authorization (RMA) number. Please contact Ocean Optics for specific instructions when returning a product.
Page 45
4: Troubleshooting Upon careful examination, we’ll advise you with an estimate. When your product is ready, it will be returned to you. Servicing To keep your instrument in tip top shape we recommend yearly wavelength recalibration. You can do this yourself if you have appropriate tools or we can do this for you. Contact your local representative to find out more about service availability and cost.
Chapter 5 How the Flame Spectrometer Works Overview This section provides an overview of the Flame spectrometer and how it works from light entering the slit through to the transmission of the spectrum over USB. It also provides an overview of all the different possible configurations that are possible, designed to help you optimize your spectrometer for specific applications.
Page 48
INTSMA-KIT Interchangeable SMA Kit connectors; 5µm; 10µm; 25µm; 50µm; 100µm and 200µm Ocean Optics also offers a range of FC connector slits in the same wavelengths, with the product code INTFC-XXX. An INTFC-KIT is also available. Note that these items are made to order and have a longer lead time.
Page 49
5: How the Flame Spectrometer Works 3. LongPass Absorbing Filter (optional): If selected, an absorbing filter is installed between the slit and the aperture in the SMA 905 bulkhead. The filter is used to limit bandwidth of light entering spectrometer or to balance color.
Page 50
5: How the Flame Spectrometer Works Reflectance vs. Wavelength for Aluminum, Gold, and Silver Mirrors By Bob Mellish in Wikipedia 5. Grating and Wavelength Range (specify grating and starting wavelength): We install the grating on a platform that we then rotate to select the starting wavelength you have specified.
Page 51
8. Detector: There are two choices of detector available for the flame. We offer a 2048- element FLAME-S (Sony ILX511B) or a 3648 element FLAME-T (Toshiba TCD1304AP) linear CCD array. These both have an effective range of 190-1100 nm. The...
Page 52
The driver electronics process this signal and send the spectrum via the USB connection to the software. The best choice of detector will depend on the application. Detector Specifications Specification S Type (FLAME-S) T Type (FLAME-T) Detector Sony ILX511B linear...
Page 53
Detector Description Spectrometer DET2B-200-535 Sony ILX511B detector, installed, with Custom OFLV Coated FLAME-S Window Assembly for Grating#5 and Grating#5U, S-bench DET2B-200-850 Sony ILX511 detector, installed, with 200 – 850 nm variable FLAME-S longpass filter and UV2 quartz window; best for UV-VIS systems configured with Grating #1 or #2 DET2B-200-1100 Sony ILX511 detector, installed, with 200 –...
Page 54
5: How the Flame Spectrometer Works 225-00000-000-11-201604...
Chapter 6 Technical Specifications Specification FLAME-S FLAME-T Optical and Spectroscopic 10 µs – 65 seconds Integration Time 3.8 ms to 10 seconds Dynamic Range for single 1300:1 acquisition Dynamic Range of 2 x 10 3.4 x 10 system Signal-to-Noise (single...
Page 56
6: Technical Specifications Specification FLAME-S FLAME-T Corrected linearity >99.8% Filters (optional) and 3 order rejection, long pass Electrical Power requirement 250 mA at +5 VDC (spectrometer functions) 4.75 – 5.25 V Supply voltage Power-up time Connectors Micro-USB and JAE DD4 (DD4RA40JA1) 40-pin connector...
Page 57
6: Technical Specifications Specification FLAME-S FLAME-T Operation Humidity 0% - 90% noncondensing Compliance Electrical CE, FCC, CISPR 11:2010, EMC 2004/108/EC and EN 61326-1:2013 Material RoHS Shock IEC 60068-2-64 Vibration IEC 60068-2-31 Manufacturing ISO:9001 Dynamic range for a single acquisition is a measure of the ratio of full signal to noise.
6: Technical Specifications Electrical Pinout The Flame features a 40-pin Accessory Connector, located on the front of the unit as shown: Location of Flame Accessory Connector DD4 Accessory Connector Pinout Diagram When facing the 40-pin Accessory Connector on the front of the vertical wall of the Flame, pin number 1 is on the right.
Page 60
6: Technical Specifications Voltage Pin # Function Description Level 2.5 V General Purpose Software Programmable Digital GPIO 1 Inputs/Output* 2.5 V General Purpose Software Programmable Digital GPIO 2 Inputs/Output* 2.5 V General Purpose Software Programmable Digital GPIO 3 Inputs/Output* 2.5 V General Purpose Software Programmable Digital Ground Inputs/Output*...
Page 61
6: Technical Specifications Voltage Pin # Function Description Level Reserved Reserved Reserved Reserved Reserved Do not connect Reserved Reserved Reserved Reserved Reserved Reserved Reserved Reserved Reserved Reserved Reserved Reserved Reserved Reserved Reserved Reserved Reserved Reserved 5V Out The input power pin from the Flame. Ground Ground The input power pin to the Flame.
6: Technical Specifications The Flame has the ability to function as a SPI master through the SPI port, which comprises the SPI Master Clock, SPI Master MOSI, SPI Master CS, and SPI Master MISO pins. To send General SPI Input/Output messages over the SPI port, use the message.
6: Technical Specifications CCD Well Depth We strive for a large signal-to-noise (S:N) in optical measurements so that small signal variations can be observed and a large dynamic range is available. The S:N in photon noise- limited systems is defined and measured as the square root of the number of photons it takes to fill a well to saturation.
The following is a description of all of the pixels, both as they exist on the hardware device and as they are actually read from the device via USB: Pixels on the FLAME-S Pixels on the FLAME-T Pixel...
20-2047 Optical active pixels It is important to note that the Flame-S only digitizes the first 2048 pixels. For Flame-T, Ocean Optics software displays 3648 pixels starting at pixel 1 above. In RS232 interface mode, the USB4000 transmits out the first 3670 pixels.
6: Technical Specifications The Trigger Delay (TD) is another user programmable delay which specifies the time in 500ns increments that the SOI will be delayed beyond the normal Start of Integration Delay (SOID). An example calculation of the Single Strobe timing follows: If the TD = 1ms, SSHTD = 50ms, and SSLTD = 70ms then, the rising edge of the Single Strobe will occur approximately 51.82ms (1ms + 50ms + 8.2us) after the External Trigger Input goes high and the Pulse Width will be 20ms (70ms –...
Idle Cycles will be generated until both conditions are true. For the Flame-S and Flame-T, this is also referred to as the nonbuffering mode because only one spectrum is stored within the FPGA and not multiple spectra. In this scenario, ReadEnable is generated by the software/firmware to initiate each new acquisition.
Page 68
6: Technical Specifications After the integration period, the spectrum is retrieved and is ready to be read by the user. If another trigger is sent a new integration cycle will begin. If a spectrum request is not received before the integration cycle has ended then that data will be deleted and a new trigger and spectrum request is required.
This section describes how to calibrate the wavelength of your spectrometer. Though each spectrometer is calibrated before it leaves Ocean Optics, the wavelength for all spectrometers will drift slightly as a function of time and environmental conditions. Ocean Optics recommends periodically recalibrating the Flame.
A light source capable of producing spectral lines Note Ocean Optics’ HG-1 Mercury-Argon lamp is ideal for recalibration. If you do not have an HG-1, you need a light source that produces several (at least 4-6) spectral lines in the wavelength region of your spectrometer.
Page 71
7: Calibration In the second column of this worksheet, place the observed pixel number. In the third column, calculate the pixel number squared, and in the fourth column, calculate the pixel number cubed. Independent Values Computed Dependent from the Regression Variable Variables Output...
Page 72
Keep these values at hand. Saving the New Calibration Coefficients: USB Mode Ocean Optics programs wavelength calibration coefficients unique to each Flame onto an EEPROM memory chip in the Flame. You can overwrite old calibration coefficients on the EEPROM if you are using the Flame via the USB port.
7: Calibration 14. Click on the Save All Values button to save the information, and then Exit the USB Programmer software. The new wavelength calibration coefficients are now loaded onto the EEPROM memory chip on the Flame. Irradiance Calibrations Irradiance calibrations and relative irradiance calibrations are about quantifying the spectra, by translating the signal (incident number of photons) to a calibration.
Universal Serial Bus or RS-232. This section contains the necessary command information for controlling the Flame via the USB interface command. This information is mainly relevant to those who don’t wish to use Ocean Optics OmniDriver or SeaBreeze device drivers, or to those who wish to communicate via RS-232.
8: Firmware and Advanced Communications Flame-S Endpoints Hi Speed Size Full Speed Endpoint Pipe # Description Type (Bytes) Size (Bytes) Address End Point 1 Out Bulk 0x01 End Point 2 In Bulk 0x82 End Point 6 In Bulk 0x86 End Point 1 In...
8: Firmware and Advanced Communications Command Description Byte Value 0x61 General I C Write 0x62 General SPI I/O 0x6A Write Register Information* 0x6B Read Register Information 0x6C Read PCB Temperature 0x6D Read Irradiance Calibration Factors 0x6E Write Irradiance Calibration Factors 0xFE Query Information *Writing bit 0 of register 0xB5 to ‘1’...
Page 78
8: Firmware and Advanced Communications Byte Format Byte 0 0x01 Set Integration Time Sets the Flame integration time in microseconds. The value is a 32-bit value whose acceptable range is 1,000µs – 65,535,000µs. If the value is outside this range the value is unchanged. For integration times less than 655,000us, the integration counter has a resolution of 10us.
Page 79
8: Firmware and Advanced Communications Byte Format Byte 0 Byte 1 Byte 2 0x04 Data byte LSB Data Byte MSB Query Information Queries any of the 20 stored spectrometer configuration variables. The Query command is sent to End Point 1 Out and the data is retrieved through End Point 1 In. When using Query Information to read EEPROM slots, data is returned as ASCII text.
Page 80
8: Firmware and Advanced Communications Byte Format Byte 0 Byte 1 Configuration 0x05 Index Return Format (EP1) The data is returned in ASCII format and read in by the host through End Point 1. Byte 0 Byte 1 Byte 2 Byte 3 …...
Page 81
8: Firmware and Advanced Communications USB High Speed (480Mbps) Packet Format The data is read from EP2In. The packet format is described below. Packet # End Point # Bytes Pixels EP2In 0-255 EP2In 256-511 EP2In 512-767 EP2In 768-1023 EP2In 1024-1279 EP2In 1280-1535 …...
Page 82
8: Firmware and Advanced Communications USB Full Speed (12Mbps) Packet Format In this mode all data is read from EP2In. The pixel and packet format is shown below. Packet # End Point # Bytes Pixels EP2In 0-31 EP2In 32-63 EP2In 64-95 …...
Page 83
Query Plug-in Identifiers Queries the Plug-in accessories identifiers. This command returns 7 bytes with the last byte always being zero at this point. Each of the first 6 bytes correspond to Ocean Optics compatible devices which responded appropriately for I C addresses 2 through 7 respectively.
Page 84
8: Firmware and Advanced Communications Return Format The data is returned in Binary format and read in by the host through End Point 7. Byte 0 Byte 1 … Byte 5 Byte 6 … Value @ I Value @ I C address 2 Value @ I C address 3...
Page 85
8: Firmware and Advanced Communications Return Byte Format Byte 0 Byte 1 Byte 2 Byte 3 … Byte N+3 … C Results C Address Bytes to Read Data Byte 0 Data byte N C Result Value Description C bus Idle C bus Sending Data C bus Receiving Data C bus Receiving first byte of string...
Page 86
8: Firmware and Advanced Communications General SPI Input/Output Performs a general-purpose write and read on the SPI bus for interfacing to attached peripherals. The time to complete the command is determined by the amount of data transferred and the response time of the peripheral. Wait at least 10 ms after sending a Write command before reading the Return value.
Page 87
8: Firmware and Advanced Communications Time Base Default Register Value Value Value Description Address 0x00 Master Clock Counter Divisor 0xFFFF 48MHz 0x04 FPGA Firmware Version (Read Only) Continuous Strobe Base Clock 0x08 Continuous Strobe Timer Interval Divisor 48000 0xFFFF (see Register 0x0C) 0x0C Continuous Strobe Base Clock Divisor...
Page 88
8: Firmware and Advanced Communications Time Base Default Register Value Value Value Description Address Trigger Mode 0 = Free Running &* 0x2C 1 = External Hardware Level Trigger 1 = External Synchronization Trigger 3 = External Hardware Edge Trigger 0x30 Reserved Single Strobe High Clock Transition Delay 0x38...
Page 89
8: Firmware and Advanced Communications Time Base Default Register Value Value Value Description Address Synchronous continuous strobe Bit 0: 0xB5 0x00 0x00 0xFF Bit 0 = Asynchronous Continuous Strobe Bit 1 = Synchronous Continuous Strobe Synchronous strobe delay 0xB6 0x00 0x00 0xFF Value = delay form start of integration of first...
Page 90
8: Firmware and Advanced Communications Byte Format Byte 0 0x6C Return Format (EP1In) Byte 0 Byte 1 Byte 2 Read Result ADC Value LSB ADC Value MSB If the operation was successful, the Read Result byte value will be 0x08. All other values indicate the operation was unsuccessful.
8: Firmware and Advanced Communications Byte Format Byte 0 0xFE Return Format The data is returned in Binary format and read in by the host through End Point 1 In. The structure for the return information is as follows: Byte Description Comments Number of Pixels - WORD...
8: Firmware and Advanced Communications Instruction Set Command Syntax The list of the commands is shown in the following table along with the microcode version number they were introduced with. All commands consist of an ASCII character passed over the serial port, followed by some data.
Page 93
8: Firmware and Advanced Communications Letter Description Partial Pixel Mode Starts spectral acquisition with previously set parameters Sets trigger mode Query scans in memory Read out Scan from memory Set ASCII mode for data values Set binary mode for data values Sets Checksum mode Oxygen (USB-LS-450) related commands Temperature in hundredths of degrees C...
8: Firmware and Advanced Communications Command Descriptions A detailed description of all Flame commands follows. The {} indicates a data value which is interpreted as either ASCII or binary (default). The default value indicates the value of the parameter upon power up. Add Scans Sets the number of discrete spectra to be summed together.
Page 95
8: Firmware and Advanced Communications Integration Time (16 bit) Sets the Flame’s integration time, in milliseconds, to the value specified. Command Syntax: I{16 bit DATA WORD Response: ACK or NAK Range: 1 - 65000 Default value: Integration Time (32 bit) Sets the Flame’s integration time, in microseconds, to the value specified.
Page 96
8: Firmware and Advanced Communications 1. Controlling program sends K with desired baud rate, communicating at the old baud rate 2. The Flame responds with ACK at old baud rate, otherwise it responds with NAK and the process is aborted 3.
Page 97
8: Firmware and Advanced Communications Pixel Mode Specifies which pixels are transmitted. While all pixels are acquired on every scan, this parameter determines which pixels will be transmitted out the serial port. Command Syntax: DATA WORD Description Example 0 = all 2048 pixels P 0 (spaces for clarity only) 1 = every n pixel with no averaging...
Page 98
8: Firmware and Advanced Communications Command Syntax: If successful, STX followed by data Response: If unsuccessful, ETX The format of returned spectra includes a header to indicate scan number, channel number, pixel mode, etc. The format is as follows: WORD 0xFFFF – start of spectrum WORD Data size flag (0Data is WORD’s, 1Data is DWORD’s) WORD Number of Scans Accumulated WORD Integration time in milliseconds...
Page 99
8: Firmware and Advanced Communications ASCII Data Mode Sets the mode in which data values are interpreted to be ASCII. Only unsigned integer values (0 – 65535) are allowed in this mode and the data values are terminated with a carriage return (ASCII 13) or linefeed (ASCII 10).
Page 100
8: Firmware and Advanced Communications Command Syntax: Response: ACK followed by { DATA WORD Default value Calibration Constants Writes one of the 16 possible calibration constant to EEPROM. The calibration constant is specified by the first DATA WORD which follows the x. The calibration constant is stored as an ASCII string with a max length of 15 characters.
With this approach it is capable to accumulate any number of spectra (previous limit was 4). USB Information Ocean Optics Vendor ID number is 0x2457 and the Product ID is 0x1022. Instruction Set Command Syntax The list of the commands is shown in the following table followed by a detailed description of each command.
8: Firmware and Advanced Communications Hi Speed Size Full Speed Size Endpoint Pipe # Description Type (Bytes) (Bytes) Address End Point 1 Out Bulk 0x01 End Point 2 In Bulk 0x82 End Point 6 In Bulk 0x86 End Point 1 In Bulk 0x81 USB Command Summary...
8: Firmware and Advanced Communications EP2 Command Description Byte Value 0x6E Write Irradiance Calibration Factors 0xFE Query Information USB Command Descriptions A detailed description of all Flame commands follows. While all commands are sent to EP1 over the USB port, the byte sequence is command dependent. The general format is the first byte is the command value and the additional bytes are command specific values.
Page 104
8: Firmware and Advanced Communications Set Strobe Enable Status Sets the Flame Lamp Enable line (J2 pin 4) as follows. The Single Strobe and Continuous Strobe signals are enabled/disabled by this Lamp Enable Signal. Data Byte = 0 Lamp Enable Low/Off Data Byte = 1 ...
Page 105
8: Firmware and Advanced Communications Byte Format Byte 0 Byte 1 0x05 Data byte Return Format (EP1) The data is returned in ASCII format and read in by the host through End Point 1. Byte 0 Byte 1 Byte 2 Byte 3 …...
Page 106
8: Firmware and Advanced Communications USB High Speed (480Mbps) Packet Format In this mode, the first 2K worth of data is read from EP6In and the rest is read from EP2In. The packet format is described below. Packet # End Point # Bytes Pixels EP6In...
Page 108
Query Plug-in Identifiers Queries the Plug-in accessories identifiers. This command returns 7 bytes with the last byte always being zero at this point. Each of the first 6 bytes correspond to Ocean Optics compatible devices which responded appropriately for I C addresses 2 through 7 respectively.
Page 109
8: Firmware and Advanced Communications LED Status Sets the Flame LEDs as follows. Data Byte = 0 LEDs Off Data Byte = 1 LEDs On Byte Format Byte 0 Byte 1 0x12 Data byte General I2C Read Performs a general purpose read on the I2C pins for interfacing to attached peripherals. The time to complete the command is determined by the amount of data transferred and the response time of the peripheral.
Page 110
8: Firmware and Advanced Communications General I2C Write Performs a general purpose write on the I C pins for interfacing to attached peripherals. The time to complete the command is determined by the amount of data transferred and the response time of the peripheral. The I C bus runs at 400KHz.
Page 111
8: Firmware and Advanced Communications program needs to delay for this length of time before issuing another command. In some instances, other commands will also write to these registers (i.e., integration time), in these cases the user has the options of setting the parameters through 2 different methods. Byte Format Byte 0 Byte 1...
Page 112
8: Firmware and Advanced Communications Time Base Default Register Max Value Value Value Description Address Hardware Trigger Delay – Number of Master Clock cycles to delay when in 0x28 0xFFFF 2MHz External Hardware Trigger mode before the start of the integration period Trigger Mode 0 = Free Running...
Page 113
8: Firmware and Advanced Communications Time Base Default Register Max Value Value Value Description Address Offset Control Bit 0 = Enable Auto- Nulling 0x78 0xFFFF Bit 1 = Enable Auto- Nulling Saturation FPGA Programmed 0x7C 0x5501 (Read Only) Maximum Saturation 0x80 0x55F0 0xFFFF...
Page 114
8: Firmware and Advanced Communications Byte Format Byte 0 0x6C Return Format (EP1In) Byte 0 Byte 1 Byte 2 Read Result ADC Value LSB ADC Value MSB If the operation was successful, the Read Result byte value will be 0x08. All other values indicate the operation was unsuccessful.
Page 115
8: Firmware and Advanced Communications Query Status Returns a packet of information containing the current operating information. The structure of the status packet is given below: Byte Format Byte 0 0xFE Return Format The data is returned in Binary format and read in by the host through End Point 1 In. The structure for the return information is as follows: Byte Description...
8: Firmware and Advanced Communications Flame –T Serial Port Interface Communications and Control Information The Flame is a microcontroller-based Miniature Fiber Optic, which can communicate via the Universal Serial Bus or RS-232. This document contains the necessary command information for controlling the Flame via the RS-232 interface.
Page 117
8: Firmware and Advanced Communications Letter Description Version Set Data Compression 1.00.0 Sets integration time (ms increments) 1.00.0 Sets Lamp Enable Signal 1.00.0 Changes baud rate 1.00.0 Clear Memory Partial Pixel Mode 1.00.0 Starts spectral acquisition with previously set parameters 1.00.0 Sets trigger mode 1.00.0...
8: Firmware and Advanced Communications Command Descriptions A detailed description of all Flame commands follows. The {} indicates a data value which is interpreted as either ASCII or binary (default). The default value indicates the value of the parameter upon power up. Add Scans Sets the number of discrete spectra to be summed together.
Page 119
8: Firmware and Advanced Communications Command Syntax: I{16 bit DATA WORD Response: ACK or NAK 1 – 65,000,000 Range: Default value: Integration Time (32 Bit) Sets the Flame’s integration time, in microseconds, to the value specified. Command Syntax: i{32-bit DATA DWORD Response: ACK or NAK 10 –...
Page 120
8: Firmware and Advanced Communications At 9600 baud, send “K6<enter>” You will receive an ACK at 9600 baud Send “K6<enter>” at 115200. (Note that the “K” is not echoed back, but the “6” is) You will receive two ACK characters and the prompt at 115200 baud. ...
Page 121
8: Firmware and Advanced Communications Note Since most applications only require a subset of the spectrum, this mode can greatly reduce the amount of time required to transmit a spectrum while still providing all of the desired data. This mode is helpful when interfacing to PLCs or other processing equipment.
Page 122
8: Firmware and Advanced Communications Command Syntax: DATA WORD 0 = Normal – Continuously scanning 1 = Software trigger Value: 2 = External Synchronization 3 = External Hardware Trigger Response: ACK or NAK Default value: ASCII Data Mode Sets the mode in which data values are interpreted to be ASCII. Only unsigned integer values (0 –...
Page 123
8: Firmware and Advanced Communications Checksum Mode Specifies whether the Flame will generate and transmit a 16-bit checksum of the spectral data. This checksum can be used to test the validity of the spectral data, and its use is recommended when reliable data scans are required.
Page 124
8: Firmware and Advanced Communications Note This command requires that the string “aA” be sent without any CR or LF. This is an attempt to ensure that this mode is not entered inadvertently. A legible response to the version number query (v command) indicates the Flame is in the ASCII data mode.
Page 125
8: Firmware and Advanced Communications Calibration Constants Writes one of the 32 possible calibration constant to EEPROM. The calibration constant is specified by the first DATA WORD which follows the x. The calibration constant is stored as an ASCII string with a max length of 15 characters. The string is not check to see if it makes sense.
8: Firmware and Advanced Communications Command Syntax: ?{ASCII character} Response: ACK followed by { DATA WORD Default value: Examples Below are examples on how to use some of the commands. Commands are in BOLD and descriptions are in parenthesis. For clarity, the commands are shown in the ASCII mode (a command) instead of the default binary mode.
Need help?
Do you have a question about the Flame-S and is the answer not in the manual?
Questions and answers