Table of Contents
Advertisement
Quick Links
Advertisement
Table of Contents

Related Manuals for Monoprice 30526


Summary of Contents for Monoprice 30526
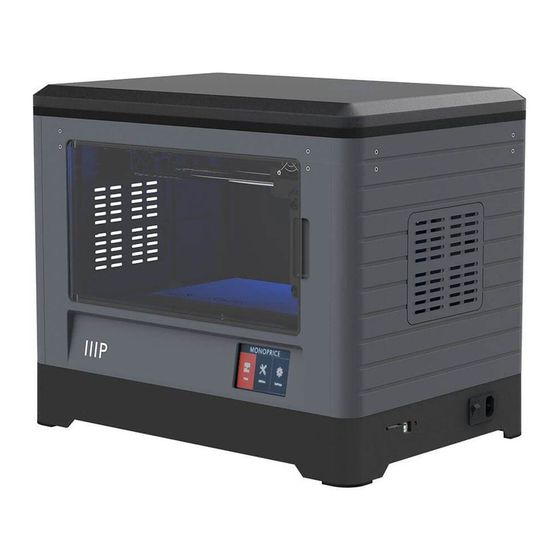
- Page 1 MP Education Inventor 3D Printer P/N 30526 User's Manual...
-
Page 2: Table Of Contents
CONTENTS SAFETY WARNINGS AND GUIDELINES ............................5 CUSTOMER SERVICE ....................................6 PACKAGE CONTENTS ....................................7 Tool Box Contents: ....................................8 Accessory Kit Contents: ..................................8 PRODUCT OVERVIEW ....................................8 Main Unit ......................................... 8 Extruder ..........................................9 OSD MENU SYSTEM ....................................9 Top Menu ........................................ - Page 3 UNPACKING ........................................17 HARDWARE ASSEMBLY ..................................19 LOADING FILAMENT ....................................22 UNLOADING FILAMENT ..................................24 BUILD PLATE LEVELING ..................................25 FLASHPRINT SOFTWARE ..................................28 Installation ........................................28 Initial Setup ........................................ 29 Main Interface Overview ................................30 Loading a File ......................................32 Generating a Model ....................................
- Page 4 PRINTING ..........................................54 Generating Gcode ....................................54 USING THE CAMERA ....................................57 Direct Login ........................................ 57 Local Login ........................................59 RESUME PRINTING ..................................... 62 SPECIFICATIONS ......................................63 TECHNICAL SUPPORT ....................................64 REGULATORY COMPLIANCE ................................64 Notice for FCC ......................................64 Notice for Industry Canada ................................
-
Page 5: Safety Warnings And Guidelines
SAFETY WARNINGS AND GUIDELINES Please read this entire manual before using this device, paying extra attention to these safety warnings and guidelines. Please keep this manual in a safe place for future reference. Take care to avoid touching hot parts, including heat blocks, extruder nozzles, build plate, and the extruded filament. -
Page 6: Customer Service
If you have any problem with your order, please give us an opportunity to make it right. You can contact a Monoprice Customer Service representative through the Live Chat link on our website www.monoprice.com during normal business hours (Mon-Fri: 5am-7pm PT, Sat-Sun: 9am-... -
Page 7: Package Contents
PACKAGE CONTENTS Please take an inventory of the package contents to ensure you have all the items listed below. If anything is missing or damaged, please contact Monoprice Customer Service for a replacement. 1x 3D printer 2x Spool filament 1x Lid... -
Page 8: Tool Box Contents
Tool Box Contents: SD Card Leveling Knob Tweezers Wrench Graver Grease Scraper Allen Wrench PTFE Tube Phillips Screwdriver Screws Unclogging Pin Tool Accessory Kit Contents: 2x M3x8 Bolts ... -
Page 9: Extruder
12. SD™ card slot Extruder 13. Filament intake 14. Turbofan 15. Spring presser 16. Cooling fan 17. Turbofan baffle 18. Nozzle OSD MENU SYSTEM Top Menu The Top Menu is displayed after the printer is powered on and initialized. Touch the Print button to enter the Print Menu. -
Page 10: Print Menu
Print Menu The Print Menu is displayed by touching the Print button from the Top Menu. Touch the Internal Memory button to read the print file from internal memory. Touch the SD™ Card button to read the print file from the SD card. ... -
Page 11: Print Progress Screen
Print Progress Screen The Print Progress Screen is displayed while printing is in progress. It shows the print filename, the actual and target temperatures, and the print progress with the remaining time displayed. Touch the Stop button to cancel the print in progress. -
Page 12: Preheat Menu
Preheat Menu The Preheat Menu is displayed by touching the Preheat button on the Top Menu. Touch the slider buttons to turn extruder and platform heating on or off. Touch the target temperature buttons to set the preheat temperature. The default target print temperature for the extruders is 230°C and 100°C for the platform. -
Page 13: Preheating Screen
Preheating Screen The Preheating Screen is displayed during the preheating process. It displays the preheating progress, as well as the actual and target temperatures of each element. Touch the Stop button to abort the preheating process. Touch the Back button to return to the previous menu. -
Page 14: Manual Adjustment Screen
Manual Adjustment Screen The Manual Adjustment Screen displays the X and Y positions of the extruder and the Z position of the build plate. Touch the X+ button to move the extruder to the right. Touch the X- button to move the extruder to the left. -
Page 15: Language Menu
Touch the Camera button to turn the camera on or off. Touch the Resume Print button to turn resume printing on or off. Touch the Back button to return to the previous menu. Language Menu The Language Menu is displayed by touching the Language button in the Setting Menu. -
Page 16: Pulley Type Selection Screen
Pulley Type Selection Screen The Pulley Type Selection Screen is displayed by touching the Pulley button on the Setting Menu. Touch the Down Arrow next to the currently selected pulley type to display a list of available pulley types. Touch the name of a pulley type to select it. -
Page 17: Unpacking
UNPACKING 1. Place the box on a flat, clean work surface. After opening the box, you can the Build Tape, a Leveling Card, and this User's Manual. 2. Remove the top protective styrofoam piece, which contain the Inventor's lid. Set this aside for now. - Page 18 4. The Inventor printer has an accessory box on top, which contains the Extruder Accessory Kit and two removable side panels. Remove the box and the foam pad from the Inventor and gently lay the extruder set on the Inventor's build plate. 5.
-
Page 19: Hardware Assembly
HARDWARE ASSEMBLY The Inventor comes pre-assembled and is almost ready to print. All you need to do is to set the appropriate voltage, mount the extruder set, and install the filament. It will only take about 5-10 minutes to setup the Inventor and prepare for your first 3D print! 1. - Page 20 4. Take the turbofan baffle from the extruder's accessory kit and install it onto the turbofan. 5. Align the bump on the turbofan seat to the hole in the turbofan sub-assembly. Place the turbofan sub-assembly beside the turbofan seat. Insert the bump on the turbofan seat to the turbofan sub-assembly.
- Page 21 7. Feed the filament through the filament guide tube. Attach the guide tube onto the two filament guide tube brackets. 8. Stick the build sheet to the build plate after installing the filament, as shown in the image below. 9. Ensure that the power switch is in the OFF position. Locate the included power cord and plug it into the Inventor, then plug the other end into a nearby AC power outlet.
-
Page 22: Loading Filament
LOADING FILAMENT Perform the following steps to load filament into your 3D printer. 1. Remove the lid from the Inventor. 2. If it is not already powered on, flip the power switch to the ON position. Wait for the system to stabilize, then touch the Tool button on the Top Menu. 3. - Page 23 4. Wait for the extruder to heat up to the target temperature. The extruder will alert you when it is at the target temperature. 5. Load the filament by inserting it into the extruder at an upright angle. Filament will start to extrude out of the nozzle.
-
Page 24: Unloading Filament
UNLOADING FILAMENT 1. Remove the lid from the Inventor. 2. If it is not already powered on, flip the power switch to the ON position. Wait for the system to stabilize, then touch the Tool button on the Top Menu. 3. -
Page 25: Build Plate Leveling
4. Wait for the extruder to heat up to the target temperature. The extruder will alert you when it is at the target temperature. 5. Unload the filament by gently guiding it out of the extruder, then touch the Done button to finish unloading. - Page 26 Perform the following steps to level the build plate. 1. If it is not already powered on, flip the power switch to the ON position. Wait for the system to stabilize. Touch the Tool button on the Top Menu, then touch the Level button on the Tool Menu.
- Page 27 4. Touch the Next button and wait for the extruder to move to the second position. Slide the card back and forth again and adjust the knob to create the same amount of friction as the previous step. 5. Touch the Next button again and repeat the same leveling steps. 6.
-
Page 28: Flashprint Software
7. Touch the Finish button to complete the leveling process. FLASHPRINT SOFTWARE Installation The Inventor 3D printer uses MP FlashPrint slicing software to create print files or to print directly from the computer via a wired USB or wireless connection. MP FlashPrint is available for Microsoft®... -
Page 29: Initial Setup
Initial Setup Once MP FlashPrint has been installed, double-click the application shortcut to start the program. If this is the first time the program has been run, you will be presented with a dialog asking you to select the Machine Type. Choose the MP Inventor entry. You can also select the Machine Type from within the program by clicking Print >... -
Page 30: Main Interface Overview
Main Interface Overview The screenshot below shows the three main elements of the software - the Menus, the Icons, and the Build Plate. The icons have the functions listed in the table below. Icon Function Loads a model or Gcode file. FlashPrint supports .STL, .OBJ, and .FPP model files. - Page 31 Prints directly from FlashPrint via a USB or wireless connection or exports a Gcode file to the SD™ card. Print Views the FlashPrint home screen from one of six viewing angles. View Moves the model around on the X/Y plane. Hold the SHIFT key then click to move the mode along the Z axis.
-
Page 32: Loading A File
Selects the right or left extruder for printing. Extruder Loading a File FlashPrint supports six different ways to load a model or Gcode file, as outlined below. Click the Load icon on the main interface, then select the file. ... - Page 33 Base Thickness: Sets the minimum raft thickness. The default value is 0.5mm. Width: Sets the X value of the model. Depth: Sets the Y value of the model. Bottom Thickness: Sets the thickness of the bottom of tube, canister, and lamp type models.
- Page 34 Canister Lamp Seal...
-
Page 35: Changing Views
Changing Views You can change the camera angle in relation to the model and build area using a variety of methods. Drag: Click the View icon, then drag the camera using one of the following methods. Left click and hold, then move the mouse. ... -
Page 36: Model Manipulation
disable Show Steep Overhang, click the View menu, then select the Show Steep Overhang entry. The default threshold value is 45 degrees. Model Manipulation You can manipulate the model using a variety of methods. Move: Click on the model to select it. You can then move it around the build area in a variety of ways. - Page 37 Click the Scale icon, then click the Reset button to reset the size of the model. Note that if the Uniform Scaling radio button is enabled, it will scale the model in proportion when changing any size value. Cut: Click the model to select it, then double-click the Cut icon to set the cut plane in a variety of ways.
-
Page 38: Extruder
Select the Z Plane option to cut the model horizontally. Extruder Double-click the Extruder icon to select the left and/or right extruder for printing. -
Page 39: Supports
Supports Because 3D printing is an additive process, each layer of filament needs a base to be built on. The printer can gradually increase the layer size, so long as the overhang angle is less than about 45 degrees. Otherwise, you need to create support elements to serve as the base for adding additional layers. - Page 40 Auto Supports: Click the Auto Supports button to allow the software to judge where supports are needed and will generate corresponding treelike or linear supports. If the model already has supports, the software will delete them and new supports will be generated. Add Supports: Click the Add button to manually generate supports.
-
Page 41: Printing A Model
Printing a Model Click the Print icon on the main interface to slice the model and print the resulting Gcode file, either directly from FlashPrint or by first exporting it to the SD™ card. Preview: Check the Preview box to preview the model before slicing and printing. Print When Slice Done: Check the Print When Slice Done box to start the print as soon as the slice is completed. - Page 42 More Options: Click the More Options button to reveal tabs with additional options. Layer: Click the Layer tab to reveal the layer options. Layer Height: Sets the thickness of each layer. The thinner the layer, the smoother the model surface, but at a corresponding cost in print speed. ...
- Page 43 Speed: Click the Speed tab to reveal the speed settings. Print Speed: Determines the speed that the extruder moves while printing filament. It can be set from 10 to 200 mm/sec in 10mm/sec increments. The slower the speed, the higher quality the resulting printed models. For PLA printing, 80mm/sec is recommended.
-
Page 44: File Menu
File Menu The File Menu contains the following options. New Project: Click File > New Project or press CTRL+N to create a new, blank project. A project saves in one place all the models in the scene, including positions, supports, and settings. -
Page 45: Edit Menu
Printing Window Type: Allows you to choose the Basic (default) print dialog or the Expert dialog, with many more individual settings. Quit: Click File > Quit or press ALT+F4 to exit FlashPrint. If there are any unsaved changes to your project or model, you will be prompted to save the changes. Edit Menu The Edit Menu contains the following options. -
Page 46: Print Menu
Print Menu The Print Menu contains the following options. Connect Machine: Click Print > Connect Machine to establish a USB or Wi-Fi® connection to the printer. This option is not available if the printer is already connected. Disconnect: Click Print > Disconnect to break a connection with the printer. This option is not available if there is no connection with the printer. -
Page 47: Tools Menu
Tools Menu The Tools Menu contains the following options. Control Panel: Click Tools > Control Panel to modify the printer's settings from within FlashPrint. Note that if you are not connected to the printer, you will be prompted to do so before the Control Panel can be displayed. ... - Page 48 Set X/Y Speed: Sets the speed at which the extruder moves. Set Z Speed: Sets the speed at which the build plate moves. Limit Switch: Displays the status of the limit switches on each axis. If the extruder or build plate are not moved to its maximum positions, the status will show Not Triggered in green.
-
Page 49: Help Menu
Help Menu The Help Menu contains the following options. First Run Wizard: Re-runs the wizard that automatically runs the first time FlashPrint is run. Help Contents: Allows you to read the help files. Feedback: Allows you to submit feedback. Check For Updates: Checks for FlashPrint updates. About FlashPrint: Displays FlashPrint version information. -
Page 50: Wi-Fi Connection
Wi-Fi Connection Perform the following steps to connect your PC to the Inventor printer using a Wi-Fi® connection. Note that printing from an SD™ card is disabled when Wi-Fi is enabled. 1. Power on the printer and your computer. 2. On the printer, select Tool > Setting > WIFI > WIFI ON. 3. - Page 51 STA mode configures the printer's Wi-Fi® radio to connect to your regular Wi-Fi AP. In STA mode you do not need to change your computer's network settings and can continue to use your Wi-Fi AP, as normal. If you choose to use AP mode, you can set the network name (Inventor1) and password of the hotspot.
- Page 52 If you choose you use STA mode, input the SSID and password of your existing Wi-Fi® connection. If your Wi-Fi connection does not use a password, enter NONE into the password field. Then click the Save button and restart it. Restart the Inventor printer, then open the WIFI Screen.
-
Page 53: Updating The Firmware
Turn on the Inventor again and connect your computer to the network. Open FlashPrint, then click Print > Connect Machine. Select Wi-Fi as the Connect Mode and enter the IP Address, as shown on the Inventor's screen. Click Connect. If you want to switch between AP and STA modes, touch the Reset button on the WIFI Screen. -
Page 54: Printing
3. Reboot the Inventor printer and wait 4-5 seconds until the update progress bar is displayed. When the update is finished, it will return to the Top Menu. 4. Touch the Tool button, then touch About to check that the version is correct. PRINTING There are two basic modes of printing: single extrusion and dual extrusion. - Page 55 3. Click Print > Machine Type and select the MP Inventor entry. 4. Click the Load icon to load a .STL model file. The model will display within the build area. 5. Double-click the Move icon, then click the On the Platform and Center buttons to ensure the model is in contact with the center of the build platform.
- Page 56 Material Right: Select the type of filament you are using. Material Left: Select the type of filament you are using. Supports: If your model has overhanging elements, enable the Supports option. Raft: It is recommended to enable the Raft option. ...
-
Page 57: Using The Camera
13. Touch the Print button to begin printing. The printer will begin heating the extruder and/or platform, then will begin printing once the target temperatures are reached. Touch the Stop button at any time to cancel the print. Touch the Pause button to pause the print. - Page 58 2. Touch the Camera button, then touch the On button to turn the camera on. You will see the words Turned on in the upper left corner of the screen. 3. Open your phone's Wi-Fi® settings and scan for the camera's Wi-Fi radio. The camera name always starts with xmjp, but will have different combinations of letters and numbers for the rest of the name.
-
Page 59: Local Login
Local Login 1. If the printer is not already powered on, flip the power switch to the ON position. Wait for the printer to stabilize, then touch the Tool button on the Top Menu, then touch the Setting button. 2. Touch the Camera button, then touch the On button to turn the camera on. You will see the words Turned on in the upper left corner of the screen. - Page 60 4. Tap WiFi Config, then enter the password for your Wi-Fi® access point. Check the Ensure the indicator and Device operation options, then tap Complete all the above operation. 5. Touch the Reset button on the printer's screen, then tap Yes in the dialog that appears on your phone.
- Page 61 6. The app starts to scan for the camera. If a green point appears, the camera is properly configured. If not, you will need to start over from the beginning. Tap the green point on your phone. 7. You can now see the camera in the device list. Tap it to watch the video. 8.
-
Page 62: Resume Printing
RESUME PRINTING The MP Inventor has the ability to automatically resume printing in the event of a power outage. Perform the following steps to enable print resuming. 1. If the printer is not already powered on, flip the power switch to the ON position. Wait for the printer to stabilize, touch the Tool button on the Top Menu, then touch the Setting button. -
Page 63: Specifications
SPECIFICATIONS Model 30526 Printer Name Inventor Number of Extruders Print Technology Fused Filament Fabrication (FFF) Screen Type 3.5" color IPS touch screen Build Area 230 x 150 x 160 mm Layer Resolution 0.05 - 0.4 mm Build Accuracy ±0.1mm Positioning Accuracy XY Axis: 0.011mm, Z Axis: 0.0025mm... -
Page 64: Technical Support
TECHNICAL SUPPORT Monoprice is pleased to provide free, live, online technical support to assist you with any questions you may have about installation, setup, troubleshooting, or product recommendations. If you ever need assistance with your new product, please come online to talk to one of our friendly and knowledgeable Tech Support Associates. -
Page 65: Notice For Industry Canada
Cet appareil numerique de la classe B est conforme a la norme NMB-003 du Canad EU Declaration of Conformity Monoprice, Inc. declares the product described within this user guide or manual is in compliance with below applicable directives. The full text of the EU Declaration of Conformity is available at the following internet address: https://www.monoprice.com/product?c_id=107&cp_id=10724&cs_id=1072403&p_id=30525... -
Page 66: Weee Information
Electric and Electronic Equipment (WEEE) This document contains important information for users with regards to the proper disposal and recycling of Monoprice products. Consumers are required to comply with this notice for all electronic products bearing the following symbol: For Consumers in the European Union: This EU Directive requires that the product bearing this symbol and or its packaging must not be disposed of with unsorted municipal waste. -
Page 67: Safety Notice
Safety Notice WARNING: Do not use this product near water, for example, in a wet basement or near swimming pool or in an area where accidental contact with water or liquid might occurs WARNING: Avoid using this product during an electrical storm. There may be a remote risk of electric shock from the surge caused by lightning WARNING: The external power adapter or AC power cord is the equipment's disconnection device.
Need help?
Do you have a question about the 30526 and is the answer not in the manual?
Questions and answers