Table of Contents
Advertisement
Advertisement
Table of Contents

Related Manuals for Monoprice Select Mini Pro


Summary of Contents for Monoprice Select Mini Pro
- Page 1 Select Mini Pro 3D Printer P/N 33012, 33286, 33287 User's Manual...
-
Page 2: Table Of Contents
CONTENTS SAFETY WARNINGS AND GUIDELINES ............................3 INTRODUCTION ........................................ 4 FEATURES ..........................................4 CUSTOMER SERVICE ....................................5 PACKAGE CONTENTS ....................................5 PRODUCT OVERVIEW ....................................6 SETUP ............................................7 AUTO LEVELING ......................................11 LIVE LEVELING ........................................ 12 WI-FI SETUP ........................................12 SOFTWARE INSTALLATION AND SETUP .......................... -
Page 3: Safety Warnings And Guidelines
SAFETY WARNINGS AND GUIDELINES Be careful not to damage the printing surface on the build plate. Do not remove the insulating tape on the extruder nozzle. Take care to avoid touching hot parts, including heat blocks, extruder nozzle, extruded filament, and the heated build plate. -
Page 4: Introduction
INTRODUCTION Thank you for purchasing this 3D printer from Monoprice! This printer features a single extruder, which is capable of printing in PLA, ABS, and other materials. You can print from a Windows® or Mac® PC using a USB connection or can print from 3D model files stored on a microSD card, without the need for a PC connection of any kind. -
Page 5: Customer Service
If you have any problem with your order, please give us an opportunity to make it right. You can contact a Monoprice Customer Service representative through the Live Chat link on our website www.monoprice.com during normal business hours (Mon-Fri: 5am-7pm PT, Sat-Sun: 9am-... -
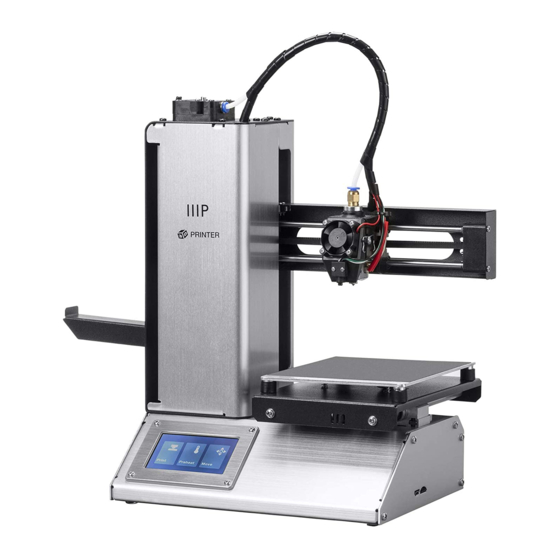
Page 6: Product Overview
PRODUCT OVERVIEW 1. Feed Mechanism 2. Filament Rack 3. Extruder 4. LCD Touch Screen 5. Micro USB and MicroSD Ports 6. Input Power Jack and Power Switch... -
Page 7: Setup
SETUP Perform the following steps to prepare the printer for use. 1. Remove the printer from its packaging and place it on a flat, stable surface with plenty of ventilation and a nearby AC power outlet. 2. Open the Accessories box and remove the Filament Rack. - Page 8 10. While the printer is heating, open your filament. Using a pair of scissors or side cutters, diagonally snip the end of the filament to make a point, as shown in the images below. 11. Touch the Back button on the Preheat Menu to return to the Main Menu, then touch the Move button on the Main Menu to enter the Move Menu.
- Page 9 14. If the Main Menu is displayed, touch the Move button to enter the Move Menu. If already on the Move Menu, touch the button (enclosed in red in the image below) to start feeding filament into the extruder. Continue touching the button until several centimeters of filament have been extruded.
- Page 10 18. Compare the first layer with the images in the table below to determine whether the build platform needs to be leveled or not. If it does need adjustment, touch the AUTO LEVELING Cancel button, then perform the steps in the section.
-
Page 11: Auto Leveling
AUTO LEVELING If the gap between the nozzle and the build platform is not correct, use the Auto Level function to adjust the gap. You will want to perform Auto Leveling after you unbox the printer or move it. 1. With the printer powered on and the Main Menu displayed, touch the Move button on the Main Menu, then touch the button to enter the Bed Level Correction Menu. -
Page 12: Live Leveling
LIVE LEVELING While printing the model, you can use this function to fine tune the gap between the nozzle and the bed. Touch the Tune button to enter the Bed Level Correction menu, then touch the FAR button to increase the gap between the nozzle and the bed or the CLOSE Note that the Bed Level Correction value must be less than button to decrease the gap. -
Page 13: Software Installation And Setup
8. Press the Connect to WiFi button on your mobile device. The connection will be completed within 10 ~ 60 seconds, the message MP Select Mini Pro is now connected to Wi-Fi will be displayed on your device's screen, and the IP address will be displayed at the top of the printer's LCD screen. - Page 14 2. Click the Next button on the Welcome screen, then click the I Agree button on the License Agreement screen. 3. Use the file browser to select an install directory or accept the default directory (recommended). Click the Next button to continue.
- Page 15 5. Click Finish to complete the installation and launch the Cura program. 6. Click Printer > Printer > Add Printer... 7. Click the Other option, then choose the Monoprice Select Mini V2 (E3D) entry. Click the Add Printer button to continue.
- Page 16 8. The Machine Settings screen will display. Click the Finish button to continue. You can now use Cura to print models and create gcode files for your printer. Congratulations, you have installed Cura and connected to your PC to your new 3D printer. Refer to Cura's documentation for operating instructions.
-
Page 17: Repetier-Host
Repetier-Host You can also install Repetier-Host from the file on the included microSD™ card. The screenshots below show the proper Repetier-Host settings to use for this printer. -
Page 19: Technical Support
TECHNICAL SUPPORT Monoprice is pleased to provide free, live, online technical support to assist you with any questions you may have about installation, setup, troubleshooting, or product recommendations. If you ever need assistance with your new product, please come online to talk to one of our friendly and knowledgeable Tech Support Associates. -
Page 20: Specifications
SPECIFICATIONS Model 33012 Extruder System Single Maximum Extruder Temperature 280°C Maximum Build Plate Temperature 70°C Build Plate Heated removable aluminum Display Type 3.3" touch screen Printing Area 4.7" x 4.7" x 4.7" (120 x 120 x 120 mm) Supported Materials ABS, PLA, PETG, etc. -
Page 21: Regulatory Compliance
Modifying the equipment without Monoprice’s authorization may result in the equipment no longer complying with FCC requirements for Class B digital devices. In that event, your right to use the equipment may be limited by FCC regulations, and you may be required to correct any interference to radio or television communications at your own expense. -
Page 22: Eu Declaration Of Conformity
EU Declaration of Conformity Monoprice, Inc. declares the product described within this user guide or manual is in compliance with below applicable directives. The full text of the EU Declaration of Conformity is available at the following internet address: https://www.monoprice.com/product?c_id=107&cp_id=10724&cs_id=1072403&p_id=33012... -
Page 23: Weee Information
Electric and Electronic Equipment (WEEE) This document contains important information for users with regards to the proper disposal and recycling of Monoprice products. Consumers are required to comply with this notice for all electronic products bearing the following symbol: For Consumers in the European Union: This EU Directive requires that the product bearing this symbol and or its packaging must not be disposed of with unsorted municipal waste. -
Page 24: Safety Notice
Safety Notice WARNING: Do not use this product near water, for example, in a wet basement or near swimming pool or in an area where accidental contact with water or liquid might occurs WARNING: Avoid using this product during an electrical storm. There may be a remote risk of electric shock from the surge caused by lightning WARNING: The external power adapter or AC power cord is the equipment's disconnection device.
Need help?
Do you have a question about the Select Mini Pro and is the answer not in the manual?
Questions and answers