Table of Contents
Advertisement
Advertisement
Table of Contents

Related Manuals for Monoprice maker architect 13861


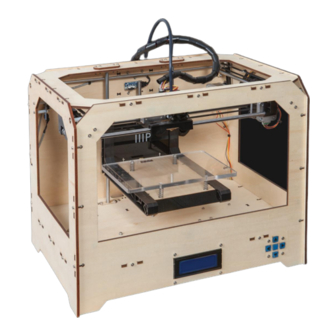
Summary of Contents for Monoprice maker architect 13861
-
Page 2: Table Of Contents
CONTENTS SAFETY WARNINGS AND GUIDELINES ............................3 INTRODUCTION ........................................ 4 FEATURES ..........................................4 CUSTOMER SERVICE ....................................4 PACKAGE CONTENTS ....................................5 NAVIGATING THE MENU SYSTEM ..............................5 UNPACKING AND SETUP ..................................6 FINE TUNING PLATFORM HEIGHT..............................15 SOFTWARE INSTALLATION AND SETUP ..........................17 TECHNICAL SUPPORT .................................... -
Page 3: Safety Warnings And Guidelines
SAFETY WARNINGS AND GUIDELINES The printer is very sensitive to static electricity. Always contact a grounded object before working with this device. It is recommended to wear an anti-static wrist strap when working with this device. Power off and unplug the printer from the power source prior to making repairs or alterations. -
Page 4: Introduction
If you have any problem with your order, please give us an opportunity to make it right. You can contact a Monoprice Customer Service representative through the Live Chat link on our website www.monoprice.com during normal business hours (Mon-Fri: 5am-7pm PT, Sat-Sun: 9am-... -
Page 5: Package Contents
PACKAGE CONTENTS Please take an inventory of the package contents to ensure you have all the items listed below. If anything is missing or damaged, please contact Monoprice Customer Service for a replacement. 1x 3D Printer 1x Bolt & Hex Wrench Kit... -
Page 6: Unpacking And Setup
UNPACKING AND SETUP Carefully read and perform the following instructions for unpacking the printer and performing the initial setup. Failure to follow these unpacking instructions could result in damage to your new printer. 1. Place the box on the floor in the middle of a clean, flat area. Carefully open the top and remove the accessories box and set it aside. - Page 7 3. Carefully remove the bubble wrap from the printer. 4. Remove the foam packing from inside the top of the printer, then open the top of the exposed box and carefully remove the print head/extruder and set it on your work area next to the printer.
- Page 8 6. The build platform is now visible. Grip each side of the platform at the back, next to the vertical guides and gently pull the platform up to give access to the boxes under the platform. 7. Remove the boxes from beneath the build platform and set them aside.
- Page 9 8. Carefully remove the bubble wrap from around the print head/extruder. Open the parts bag and remove two (2) 3/8" long hex screws and the hex wrench. 9. Place the extruder on the extruder seat with the fan facing forward. Secure it to the seat using two 3/8"...
- Page 10 10. Secure the filament guide tube to the back of the printer with the two clips. Ensure that the guide tube can reach the extruder, but do not connect it to the extruder yet. 11. Remove the outer plastic nut from the filament support bracket, then insert the threaded end through the hole in the back of the printer.
- Page 11 12. Screw the nut onto bracket and tighten it from both sides. Take care not to over- tighten. 13. Insert the SD card into the vertical slot on the right side of the printer.
- Page 12 14. Squeeze each corner of the build platform and tighten the wingnuts to minimize the platform height. 15. Ensure that the power switch is in the OFF position (with the O side depressed). Insert the plug on the included AC power cord into the panel connector, then plug the other end into a nearby AC power outlet.
- Page 13 Run Startup Script 1. Welcome! I'm the 3D printer. Press the 'M' to get started! 2. A blinking 'M' means I'm waiting and will continue when you press the button... 3. A solid 'M' means I'm working and will update my status when I'm finished... 4.
- Page 14 22. First we'll load the right extruder. Push filament in... 23. until you feel the motor tug it in. Push for a few more seconds, then wait. 24. When filament is being extruded from the nozzle, Press M to stop extruding. 25.
-
Page 15: Fine Tuning Platform Height
FINE TUNING PLATFORM HEIGHT Getting the platform height correct is critical to a successful print. Examine the extruded material and compare it to the following charts to determine if your build platform is a tad too high, a tad too low, or just right. You may need to make several passes at height adjustment before you are ready for a large, complicated print job. -
Page 17: Software Installation And Setup
SOFTWARE INSTALLATION AND SETUP This 3D printer, like most 3D printers, uses open source 3D printing software. We recommend that you begin your 3D printing experience by using Python 2 and ReplicatorG to create the Gcode 3D model files. Perform the following steps to install Python and ReplicatorG for Windows and to setup ReplicatorG for use with this printer: 1. - Page 18 5. Click the Next button to continue. 6. Click the Next button to accept the default install directory. 7. Click the Next button to accept the default program options.
- Page 19 8. Once the files have been copied and configuration complete, click the Finish button to complete the installation. 9. Point your browser to http://replicat.org/download 10. Download the Windows version of the software. 11. Locate the file you just downloaded and double-click it to launch the installer. 12.
- Page 20 13. Click the Next button to continue. 14. Regardless of whether you changed the Python install location or not, the next screen warns that "It looks like you don't have Python." We will tell ReplicatorG where to find the Python software later in these instructions. For now, click the Install button to continue.
- Page 21 16. The wizard will begin installing a set of six (6) drivers. Depending on your Windows security settings, you may see up to six security warnings. For each one, click the Install this driver software anyway button to continue. 17. Once the drivers have finishing installing, click the Finish button to continue. 18.
- Page 22 19. Click the Start menu in the lower left corner of the screen. Click All Programs, then locate and double-click the ReplicatorG shortcut. 20. When it runs for the first time, the ReplicatorG client will copy files to the install location.
- Page 23 22. Use the file browser to select the Python.exe file located in the following directory: c:\Python27 then click the Open button. 23. Click the Close button to save your preferences. 24. Click the Machine menu, select Machine Type (Driver) entry, then click The Replicator Single.
- Page 24 25. Click the GCode menu, select the GCode Generator entry, then click Skeinforge (50). 26. Using the included USB cable, plug one end into the back of the printer and the other into an available USB port on your computer, then turn the printer on. 27.
- Page 25 28. Click the Connect button (highlighted below, second from the right). 29. ReplicatorG will respond by changing the banner to green and displaying the printer status on the right, as shown in the image below. 30. Select File >> Examples >> 20mm_Calibration_Box.stl...
- Page 26 31. ReplicatorG will load the model and display it in the middle of the virtual build platform, as shown below. Note: If the software does NOT load the model and change to the above view, perform the following steps: a. Select File >> Examples >> 20mm_Calibration_Box.stl again. b.
- Page 27 32. Click the Generate GCode button in the gray box on the right. 33. Change the Slicing Profile to Replicator 2 slicing defaults using the drop down list box. 34. If your model has portions that hang over empty spaces in the model or over the build platform, you will want to use the Support option.
- Page 28 36. Custom Gcode allows for complex automatic printer movements and operations. By adding custom Gcode into the start or end of your file, you can alter how it prints. A comprehensive list of Gcode commands can at: http://reprap.org/wiki/G-code For now, ensure the Use default start/end gcode option is selected. 37.
- Page 29 44. Click the Plastic tab. 45. The Filament Diameter (mm) setting is very important and must be set the filament's average diameter. Because we are using the included sample PLA filament, set Filament Diameter (mm) to 1.75. 46. Click the Extruder tab. 47.
-
Page 30: Technical Support
TECHNICAL SUPPORT Monoprice is pleased to provide free, live, online technical support to assist you with any questions you may have about installation, setup, troubleshooting, or product recommendations. If you ever need assistance with your new product, please come online to talk to one of our friendly and knowledgeable Tech Support Associates. -
Page 31: Notice For Industry Canada
user is encouraged to try to correct the interference by one or more of the following measures: Reorient or relocate the receiving antenna. Increase the separation between the equipment and receiver. Connect the equipment into an outlet on a circuit different from that to which the receiver is connected.
Need help?
Do you have a question about the maker architect 13861 and is the answer not in the manual?
Questions and answers