Table of Contents
Advertisement
Quick Links
Advertisement
Table of Contents

Related Manuals for Monoprice 35435


Summary of Contents for Monoprice 35435
- Page 1 MP Mini SLA LCD High Resolution Resin 3D Printer P/N 35435 User's Manual...
-
Page 2: Table Of Contents
CONTENTS SAFETY WARNINGS AND GUIDELINES ............................3 INTRODUCTION ........................................ 5 USEFUL TOOLS ......................................... 6 CUSTOMER SERVICE ....................................7 PACKAGE CONTENTS ....................................7 PRODUCT OVERVIEW ....................................8 CONTROL BUTTONS ..................................... 8 MENU FUNCTIONS ......................................9 Main Menu ........................................9 Control Menu ......................................9 Print Menu........................................ -
Page 3: Safety Warnings And Guidelines
Safety and Resin ..................................... 19 Transferring Resin to Storage ..............................20 Discarding Resin ..................................... 20 PRINTING TIPS ........................................ 20 CREATION WORKSHOP ..................................20 SLICING WITH CREATION WORKSHOP ............................ 25 MODEL CLEANING ..................................... 26 CLEANING THE RESIN VAT .................................. 26 TROUBLESHOOTING ....................................27 TECHNICAL SUPPORT .................................... - Page 4 Do not expose this device to excessively high temperatures. Do not place it in, on, or near heat sources, such as a fireplace, stove, radiator, etc. Do not leave it in direct sunlight. Do not place or install this device in an area where it can be exposed to excessive amounts of dust, humidity, oil, smoke, or combustible vapors.
-
Page 5: Introduction
INTRODUCTION This printer uses an LCD screen to mask a cross section of your model, one layer at a time, using a 405nm UV light array to cure resin held in a vat. The LCD screen is positioned beneath a vat of resin, with a transparent film separating the resin and screen. Between layers, the printer will lift (or "Raise") the print and return it one layer higher than previously. -
Page 6: Useful Tools
USEFUL TOOLS There are a few tools that will make life easier when working with a resin printer. Some of these are more important than others, but this list covers what a good workstation should contain in ideal conditions. Disposable Gloves: Always wear gloves when working with uncured resin. Nitrile gloves are what we use in our lab. -
Page 7: Customer Service
If you have any problem with your order, please give us an opportunity to make it right. You can contact a Monoprice Customer Service representative through the Live Chat link on our website www.monoprice.com or via email at support@monoprice.com. -
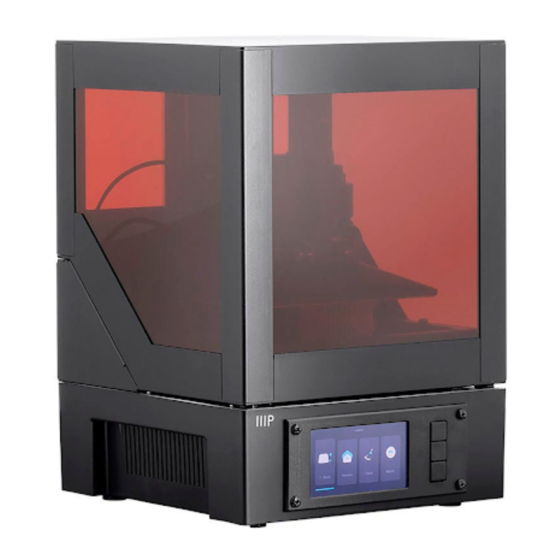
Page 8: Product Overview
PRODUCT OVERVIEW 1. Acrylic Cover 2. Leveling Knob 3. Printing Platform 4. Resin Vat 5. LCD Display 6. Control Buttons CONTROL BUTTONS The control buttons on the front panel perform the following functions. Press the top button to move the highlight left or up. ... -
Page 9: Menu Functions
MENU FUNCTIONS Main Menu 1. Print: Select this option to print from a microSD™ card. 2. Profile: Select this option to manage the profile file being used. 3. Control: Select this option to display the Control Menu. Control Menu 1. Z Axis: Select this option to control the movement of the Z axis. 2. -
Page 10: Print Menu
Print Menu 1. ETA: Displays the estimated remaining print time. 2. Print Phase: Displays either EXPOSURE or LIFT, indicating the action being currently performed. 3. LAYERS: Displays the number of layers printed and the total number of layers for the model. 4. -
Page 11: Finish Screen
Finish Screen 1. ONE MORE: Select this option to print the model again. 2. GO HOME: Select this option to return to the Main Menu. PREPARING THE PRINTER Before you run your first test print, there are a few steps that you should take to begin printing. -
Page 12: Quick Start Guide
c. Shake the resin prior to filling the Resin Vat. Pigments can settle to the bottom of the bottle, so make sure they are mixed properly prior to pouring. d. Pour resin to fill the vat about half way. If recycling used resin, be sure to filter it to prevent cured resin from entering the vat and causing complications with the auto leveling system. -
Page 13: Wi-Fi® Setup
12. Scrape the print from the build plate into a small container. Fill the container with Isopropyl Alcohol (91% or greater can be found at your local drugstore). 13. Cover the container, then shake vigorously for about 30-60 seconds. Refer to the MODEL CLEANING section for more detail. -
Page 14: Accessing The Web Ui
4. Locate the wifi.conf file in the Download directory, then copy it to the included microSD™ card. 5. Ensure the printer is powered off. 6. Insert the microSD card into the card slot, then turn the printer on. The printer will automatically read the generated file and will connect to your Wi-Fi network. -
Page 15: Web Ui Details
5. Enter the Access Code into the field on your web browser, then click the Submit button. WEB UI DETAILS Main UI 1. Displays an image of the current layer being printed. 2. The printer management window allows you to Start, Pause, or Cancel prints. You can also review the status of the current print. - Page 16 Exposure second: Displays or changes the cure time for the layers other than the base three layers. Different manufacturers have different cure times for their resins. Monoprice resin has a nominal cure time of 8 seconds for layers other than the first three layers.
-
Page 17: Web Slicer Ui
Exposure Time: The amount of time that the UV light will expose each layer during printing. Different manufacturers have different cure times for their resins. Monoprice resin has a cure time of 8 seconds for layers other than the base three layers. -
Page 18: Using The Web Slicer
USING THE WEB SLICER 1. Turn the printer on. Type the IP address in the upper left corner of the Main Menu into your web browser's address bar, then press the Enter key. 2. Click the Slicer entry in the upper left corner of the Main UI. 3. -
Page 19: Auto Calibration
9. With the printer powered off, insert the microSD™ card into the card slot. AUTO CALIBRATION Whenever the printer is sent to the Home position or whenever a print is started, the printer will automatically calibrate the Printing Platform. This requires the Resin Vat to be free of cured resin particles or print failures can occur. -
Page 20: Transferring Resin To Storage
Transferring Resin to Storage When you use resin, small portions can be unintentionally cured. For this reason, it is recommended to not mix used resin and unused resin. The used resin can be filtered using a fine mesh to remove any cured bits. For best results, store the resin in a black container with a lid. - Page 21 The following screen is displayed when the Creation Workshop program is executed. Click the button to load an STL or OBJ model file. Click the button to save the loaded model file in Creation Workshop format. Click the button to slice the loaded model file.
- Page 22 After a model file has been loaded, the following screen is displayed. After the model has been loaded, you can add supports, as needed. Click to open the Support Generation menu. Click , then click on the model to manually add a support to that location. ...
- Page 23 The imported model may differ in size and location from the print area. You can adjust the model using the controls on the Property Bar on the right side of the screen. The Move (mm) button allows you to easily and quickly locate the model file.
- Page 24 Special note should be made of the following options: Enable Slice Outlines: This is the feather value option. The larger the value, the smoother the printed model will be. This can reduce the model pixel pattern. The general value of 3 or more can effectively alleviate. ...
-
Page 25: Slicing With Creation Workshop
Click the Configure button, then click Configure Machine to display the following screen. If the print size is different from the actual size, you can change the display size. Correct the print size by adjusting the XY values in the Build Size (mm) section. Click Apply Changes to save your settings. -
Page 26: Model Cleaning
5. Copy the resulting CWS file to the microSD™ card or send it over the network to the printer. MODEL CLEANING Perform the following steps to clean your finished print/model. 1. Once the print has completed, twist to remove the build platform, then use a metal putty knife or spatula to remove the print from the platform. -
Page 27: Troubleshooting
The cure time for the resin in not long enough. The model likely fell into the vat and it will be necessary to remove it before attempting to print again. The default exposure time for Monoprice resins is 8 seconds for layers other than the first three layers. -
Page 28: Technical Support
TECHNICAL SUPPORT Monoprice is pleased to provide free, live, online technical support to assist you with any questions you may have about installation, setup, troubleshooting, or product recommendations. If you ever need assistance with your new product, please come online to talk to one of our friendly and knowledgeable Tech Support Associates.
Need help?
Do you have a question about the 35435 and is the answer not in the manual?
Questions and answers