Table of Contents
Advertisement
Advertisement
Table of Contents

Related Manuals for Easypix goXtreem REEF


Summary of Contents for Easypix goXtreem REEF
- Page 1 User manual...
-
Page 2: Main Features
Main features • 3 meters waterproof, photo capture and video recording under water • FHD 1920x1080, HD 1280x720P, VGA 640x480, QVGA 320x240 • Max. 24M pixels • C onvenient dual screens, 1.8 inch front screen, 2.7 inch TFT rear screen • F ace detection, image stabilization, web cam function, various scene modes • 4 x digital zoom • High speed continuous shooting • Built-in speaker, microphone • M icro SD card support up to 32GB (not included) • Built-in LED flash... -
Page 3: Preparation Before Use
Preparation before use Please install the lithium battery provided with your camera before first use. 1. Slide the battery cover on the bottom of the camera: Installing lithium battery 2. Please install the battery in a right direction 3. Close battery cover Note: Please remove the battery when you know the camera will not be used for extended periods. -
Page 4: Charging The Lithium Battery
Charging the lithium battery Connect the camera to your computer using the USB cable. The red LED illuminates to indicate charging is in progress. The LED will switch off to indicate when the battery is fully charged. Computer requirements Windows 7/XP3 Your computer should have the following minimum requirements in order to transfer photos and videos: Windows7/XP system or more higher Pentium series processor 128MB memory / 150MB available disk space / USB Interface Recommended display resolution: 1024x768 resolutions.16 bit color or higher. -
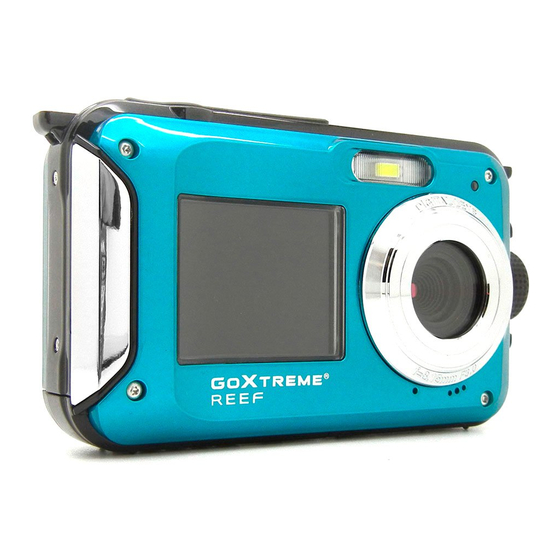
Page 5: Camera Overview
Camera overview ... -
Page 6: Digital Zoom
Icons: Battery Power Full Charge Self-timer 10s Half Charge Self-timer 5s No Charge Self-timer 2s Quality Self-timer off Digital Zoom Common 1.00X 4.00X Protect Fine Protect Anti-shake Super Fine Flashing Light Anti-shake On Flash On Auto Flash Anti-Shake Off Flash Off Scenes Anti-Red Eye Flashing Light Mode Auto Night Portrait Night scene Portrait Landscape Beach Playback Photo High Sensitivity video... -
Page 7: Installing Micro Sd Card
Installing Micro SD card The camera supports Micro SD memory cards up to 32GB max (not included). The camera’s internal memory only stores one photo for testing purposes. Please insert a Micro SD card into the memory card slot before use, being careful to ensure that the card is installed correctly. When inserted correctly the card will slide into place smoothly and a ”Click” sound will confirm that it is locked in place. A Micro SD card icon will display on the LCD screen to confirm the camera has detected the card. To remove the card simply press firmly and it will pop out of the memory card slot. -
Page 8: Photo Shooting
Photo shooting To capture a photo press the shutter key There will be a slight delay while the photo is stored on the memory card. After taking a photo, the number displayed on the screen indicates how many more photos can be taken considering the current settings and the size of the memory card installed in the camera at that time. A message will be displayed on the screen when the SD card is full. To continue, please transfer all data on the SD card to your computer or insert a new memory card. Digital zoom Your camera features a 4x digital zoom. Press the up button to zoom in and the down button to zoom out. Built-in Flash Press the ‘Flash’ key to activate the various flash modes. The icon indicates ‘Flash Off’. The flash will not operate when this mode is selected. icon indicates ‘Auto Flash’ mode and the camera will activate the flash automatically if required in low light conditions. The icon indicates ‘Flash Mode’ and the flash will operate every time a photo is taken. The icon indicates ‘Anti-Red Eye’ mode. The camera flash will operate a flash burst to reduce the red eye effect in your photos. Scenes The following ‘Scene’ modes are available to facilitate photo capture in different environments: Auto, night landscape portrait, night landscape, portrait, landscape, sports, party, beach or high sensitivity. - Page 9 Press the power key to turn on camera, The icon will be displayed on top left of the LCD display. 1. Press the Menu key 2. Press the left/right keys to choose ‘Scene’ icon 3. Press up/down key to select your preferred scene. Auto, night landscape portrait, night landscape, portrait, landscape, sports, party 4. Press OK to confirm. Selection the photo resolution 1. Press the Menu key 2. Press left/right key to select photo size icon ‘MP’. 3. Press the up/down key to choose: (24M) 5600x4200 , (20M) 5200x3900 , (18M) 4896X3672, (16M) 4608x3456 (14M) 4416x3312, (12M) 4000x3000, (10M) 3648x2736, (8M) 3264x2448, (7M HD) 3648x2048, (7M) 3072x2304, (5M) 2592x1944, (3M) 2048x1536, (2MHD) 1920x1080, (2M) 1600x1200, (VGA) 640X480 4. Press the OK key to confirm your selection. The photo size icon will be displayed on the LCD screen Anti-shake Your camera features an anti shake function to deliver better photo quality when a tripod is not being used. 1. Press the Menu key 2. Press the left/right keys to select anti shake icon 3. Press the up/down key to select anti shake on/off 4. Press OK to confirm your selection, 5. The icon will be displayed on the LCD screen to confirm anti-shake is activated.
- Page 10 Face detection To activate the face detection function. 1. Press the Menu key 2. Press the left/right keys to select the face detection icon 3. Press the up/down keys to select face detection on/off. 4. Press OK key to confirm your selection. Continuous shooting The continuous shooting function allows you to capture 6 individual photos in rapid succession with just one press of the shutter button. 1. Press the Menu key 2. Press the left/right keys to select continuous shooting icon 3. Press the up/down keys to select continuous shooting on/off 4. Press OK key to confirm your selection. Please Note: When using the ‘Continuous Shooting’ function, the photo resolution automatically changes to VGA. Self timer 1. Press the Menu key. 2. Press the left/right keys to select the self-timer icon 3. Press the up/down keys to review the self-timer options. 4. Press the OK key to confirm your selection. Settings The camera with 21 different setting options. EV, ISO, White balance, Sharpness, Quality, Effects, Setting Time, Auto Shut down, Language, Frequency Format, Default, Mule mode, Light detect, Sensitivity, Continuous shooting, Anti shake, Photo size, Scene option, Self-timer, Face Detection.
- Page 11 1. to enter the settings menus press the Menu key. 2. Use the left/right keys to select the settings icon The following different settings can be adjusted. Exposure Adjusts your photos brightness. 1. Press the up/down keys to select the Exposure option. 2. Press the Ok key to enter the sub-menu. 3. Press the up/down keys to select EV(+3 to -3). 4. Press the OK key to confirm and save your selection. The relative icon will be displayed on the LCD screen. ISO This is a special function for when the light source is insufficient, but the environment you are shooting in may not allow for use of the flash. 1. Press the up/down keys to select the ISO option under the settings menu. 2. Press the OK key to enter the ISO sub menu. 3. Press the up/down keys to select the ISO: Auto/100/200/400. 4. Press the menu key to save. The relative icon will be displayed on the LCD screen. White balance This option adjusts the photo color and can be adjusted according to light source. 1. Press the up/down keys to select White Balance option under setting menu. 2. Press the OK key to enter the sub menu. 3. Press the up/down keys to select: Auto/Sunny/Cloudy/tungsten lamp/fluorescent lamp. 4. Press the OK key to confirm and save your selection. Sharpness The function permits the user to adjust the sharpness of the photo so that the edge is clearer or softer. 1. Press the up/down key to select the Sharpness option under setting menu. 2. Press the OK key to enter the sub menu. 3. Press the up/down keys to select: sharp/common/ soft...
- Page 12 4. Press the OK key to confirm and save your selection. Quality This function adjusts the overall quality of your photo. 1. Press the up/down keys to select the Quality option under setting menu. 2. Press the OK key to enter the sub menu. 3. Press the up/down keys to select: Super fine/fine/ common 4. Press the OK key to confirm. The relative icon will be displayed on the LCD screen. Effects 1. Press the up/down key to select the Effects option under setting menu. 2. Press the OK key to enter the sub menu. 3. Press the up/down keys to select: Common/Black/Old-fashioned/Red/Green/Blue/Sun set/Warm/Cold. 4. Press the OK key to confirm and save your selection. Auto shut down Please Note: The default setting for auto shut down for camera is 3 minutes. This can be adjusted as follows: 1. Press the up/down key to select the Auto shut down option. 2. Press the OK key to enter the auto shut down sub menu. 3. Press the up/down keys to select: 1min/3mins/5mins/Off 4. Press the OK key to confirm and save your selection. Note: If you choose ‘Off’, the camera will not auto shut down until the battery runs out of charge.
-
Page 13: Formatting The Memory Card
Frequency 1. Press he up/down key to select the Frequency option under setting menu. 2. Press the OK key to enter the frequency sub menu. 3. Press the up/down keys to select: 50Hz/60Hz. 4. Press the OK key to confirm and save your selection. Formatting the memory card Note: Formatting your memory card deletes all data and files on the card. Please ensure any files are saved before formatting. 1. Press the up/down keys to select the Format option under the setting menu. 2. Press the OK key to enter the sub menu. 3. Press the up/down keys to select: Yes/Cancel. 4. If you select cancel, press the OK key to confirm. The camera will return to photo mode 5. Alternatively press the OK key to confirm the Format. Factory default settings You can restore you cameras settings to the factory default – PLEASE NOTE: all user defined settings will be lost unless they match some of the default settings. 1. Press the up/down keys to select factory default option under settings menu. 2. Press the OK key to enter the sub menu. 3. Press the up/down keys to select factory default or Cancel 4. If you select Cancel, press the OK key to confirm, the camera will revert to photo mode. 5. Alternatively select YES to continue 6. Press the OK key to confirm your selection. Video Recording Mode Press the Mode key to activate the video recording mode. Press shutter key to start recording The video icon will show on top the left of the LCD screen. The recording time will show on top right of the LCD screen The red ‘Recording’ icon will flash to confirm that video is currently being recorded. Note: Your video can be viewed on your camera using Playback mode. After reaching a max. video recording time of 29 minutes the camera will automatically stop. It can only be restarted manually. -
Page 14: Playback Mode
Playback Mode Press the Mode key to enter playback mode. In playback mode the icon will show on LCD screen. Using Playback mode you can view photos and video files currently saved on the memory card. You can also rotate, protect, delete and cut images. Video files can be protected or deleted. Note: 1. Files will not be displayed on the LCD screen if there are no photos or videos saved on the memory card. 2. Please set your video recording settings under Video Recording mode. Using Playback Mode functions Select a photo to rotate, protect, delete, cut, slide play or print. Rotate 1. Press the Menu key in playback mode. 2. Press the left/right keys to select the ‘Rotate’ icon 3. Press the up/down keys to select: 90º /180º /270º /cancel. 4. Press the OK key to confirm your selection. Slide Show Playback You can choose how long you want each photo to be displayed on the screen when using the preview mode. Option (in seconds): 3s/5s/10s Protect Protect images and videos to avoid deleting them by accident. 1. Press the Menu key in playback mode. 2. Press the left/right keys to select the Protect icon 3. Press the up/down keys to select: lock/unlock. - Page 15 Delete To delete one or all unprotected images or videos. 1. Press the delete key in playback mode. 2. Press the left/right keys to select the delete icon 3. Press the up/down keys to select: This image/All images /Format/Cancel. 4. Press the OK key to confirm your selection 5. Press the up/down keys to select: Yes/No 6. Press the OK key to delete Print Photos can be printed wirelessly to any Pict Bridge enabled printer 1. Select a photo to be printed 2. Press the Menu key. 3. Press the left/right keys to select the Print icon 4. Press the up/down keys to select: Print/Cancel. 5. Press the OK key to enter the print option 6. Should wireless printing fail please connect the camera to your printer via a USB cable. Play Video file Select the video to be played. Press the shutter button to start playback. Press the Up key to stop playback...
- Page 16 Manual transfer of photo and video files to computer 1. Turn on the camera, 2. Select playback mode 3. Connect the camera to a computer via a USB cable, 4. The removable disc image will pop up on the screen as shown below 5. Click the removable disk to view the photos, which will be stored in the sub file of DICM. 6. You can the copy and paste the photos to your chosen folder or location.
-
Page 17: Technical Specification
Technical specification Sensor 8MP CMOS sensor (24M) 5600x4200, (20M) 5200x3900, (16M) 4608x3456, (14M) 4416x3312, (12M) 4000x3000, (10M) 3648x2736, Photo resolution (8M) 3264x2448, (7M HD) 3648x2048, ( 7M) 3072x2304, (5M) 2592x1944, (3M) 2048x1536, (2M HD) 1920x1080, (2M) 1600x1200, (VGA) 640x480 Video resolution FHD1920x1080, HD1280x720P, (VGA)640x480, QVGA320x240 Displays 2.7 inch back screen, 1.8 inch front screen External memory Micro SD cards max. up to 32 GB (not included) Digital zoom 4x -3~+3 White balance Auto/Sunny/Cloudy/Tungsten Lamp/Fluorescent Lamp Scene Auto/Night Landscape/Portrait/Night Landscape/Portrait /Landscape/Beach/High Sensitivity/Sport/Party ISO Auto/100/200/400 Self timer 2s, 5s, 10s File format JPEG format (Still image) / AVI format (video) Anti-shake Yes Flash light Auto/force flash light/flash off/anti red eye Print support Yes Face detection Yes Continuous shooting Yes (VGA 6pcs) Microphone Built-in Interface USB2.0... -
Page 18: Common Problems And Solutions
Common problems and solutions Q: What shall I do? I took some photos, but the computer does not recognize my camera. A: First of all please make sure you have taken the photos. Take some photos for testing, then try to download them to your computer. Alternatively please try inserting the memory card directly into your computers card reader if available or by using an external card reader that can be connected to your computers USB port. Please ensure your computer meets the minimum spec requirements as detailed in this user manual. Q: How to ensure I am not missing any important photos A: As all photos are stores to the micro SD card inserted in your camera please ensure that there is always enough space available on the card to allow you to take photos. It is recommended that you download the photos stored on the card regularly to make more room for the memory card and also as a back up for your files. Q: Whether my device will be working in MAC system. A: The device can be worked as a removable disk, Mac OSX (10.5x or higher version) DECLARATION OF CONFORMITY Easypix hereby declares that the product GoXtreme Reef is in conformity with all the essential requirements of Directive 1999/5/EC. The declaration of conformity can be downloaded here: http://www.easypix.info/download/pdf/doc_goxtreme_reef.pdf For technical help please visit our support area on www.easypix.eu. Only EU...
Need help?
Do you have a question about the goXtreem REEF and is the answer not in the manual?
Questions and answers