Table of Contents
Advertisement
Advertisement
Table of Contents

Summary of Contents for Easypix GoXtreme Reef
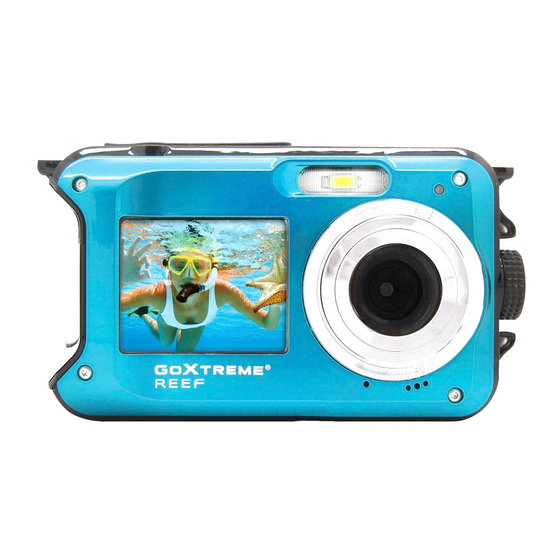
- Page 1 USER’S GUIDE Congratulations on the purchase of the GoXtreme Reef.
- Page 2 IMPORTANT INFORMATION To ensure the optimal functioning of your camera, please note the following important information: MicroSD card: • Please ensure your memory card is formatted in the camera before first using the card for the first time (Settings > Format). •...
-
Page 3: Preparation Before Use
WARNING: Do not plug in the power cord with wet hands to avoid the risk of electric shock. Only open the battery compartment with dry hands and ensure that no dirt can get inside the camera when inserting, changing or removing the batteries or the SD card. •... -
Page 4: Charging The Lithium Battery
Note: Please remove the battery when you know the camera will not be used for extended periods. Charging the lithium battery Connect the camera to your computer via USB. The red LED illuminates to indicate charging is in progress. The LED will switch off to indicate when the battery is fully charged. Computer requirements Your computer should have the following minimum requirements in order to transfer photos and videos:... -
Page 5: Camera Overview
CAMERA OVERVIEW... -
Page 6: Digital Zoom
Icons: Battery Power Full Self-timer 10s Half Self-timer 5s Self-timer 2s Quality Self-timer off Digital Zoom Common Fine Protect Super Fine Flashing Light Protect Flash On Anti-shake Auto Flash Flash Off Anti-shake On Anti-Shake Off Anti-Red Eye Flashing Light Mode Scenes Auto Scenery... -
Page 7: Turning On The Camera
INSTALLING MICRO SD CARD The camera supports Micro SD memory card up to 32GB Max. (not included). The camera’s internal memory only stores one photo for testing purposes. Please insert a Micro SD card into the memory card slot before use, being careful to ensure that the card is installed correctly. -
Page 8: Photo Mode
PHOTO MODE To capture a photo press the shutter key. There will be a slight delay while the photo is stored on the memory card. After taking a photo, the number displayed on the screen indicates how many more photos can be taken considering the current settings and the size of the memory card installed in the camera at that time. -
Page 9: Photo Resolution
Photo resolution 1. Press the menu key 2. Press left/right key to select photo size icon 3. Press the up/down key to choose: (24M) 5600x4200 , (20M) 5200x3900 , (16M) 4608x3456, (14M) 4416x3312, (12M) 4000x3000, (10M) 3648x2736, (8M) 3264x2448, (7M HD) 3648x2048, (5M) 2592x1944, (3M) 2048x1536, (2MHD) 1920x1080, (VGA) 640X480 4. -
Page 10: Self-Timer
Please Note: When using the ‘Continuous Shooting’ function, the photo resolution automatically changes to VGA. Self timer 1. Press the Menu key. 2. Press the left/right keys to select the self-timer icon 3. Press the up/down keys to review the self-timer options. 4. -
Page 11: Auto Power Off
2. Press the up/down keys to make your selection. 3. Press the OK key to confirm and save your selection. Sharpness The function permits the user to adjust the sharpness of the photo so that the edge is clearer or softer. 1. -
Page 12: Formatting The Memory Card
Formatting the memory card Note: Formatting your memory card deletes all data and files on the card. Please ensure any files are saved before formatting. 1. Press the Menu key. 2. Press the left/right keys to select the Format option under the setting menu. 3. -
Page 13: Playback Mode
PLAYBACK MODE Press the Mode key to enter playback mode. In playback mode the icon will show on LCD screen. Using Playback mode you can view photos and video files currently saved on the memory card. You can also rotate, protect and delete files. Rotate 1. - Page 14 Delete using the delete key button In the in the photo or video mode: With the delete button you have the possibility to delete the last current photo or video file. Print Photos can be printed to any Pict Bridge enabled printer 1.
-
Page 15: Technical Specification
TECHNICAL SPECIFICATION Sensor 8MP CMOS sensor (24M) 5600x4200, (20M) 5200x3900, (16M) 4608x3456, (14M) 4416x3312, (12M) 4000x3000, (10M) 3648x2736, Photo resolution (8M) 3264x2448, (7M HD) 3648x2048, (5M) 2592x1944, (3M) 2048x1536, (2M HD) 1920x1080, (VGA) 640x480 Video resolution FHD1920x1080, HD1280x720P, (VGA)640x480, QVGA320x240 Displays 2.7 inch back screen, 1.8 inch front screen External memory... - Page 16 All product specifications are correct at time of print and are subject to change without prior notice. Easypix GmbH reserve the right for errors or omissions. For technical help please visit our support area on www.easypix.eu. CONFORMITY The manufacturer hereby declares that the CE marking was applied to the product GoXtreme...
- Page 17 DISPOSAL Dispose of packaging For disposal, separate packaging into different types. Cardboard and board must be disposed of as paper and foil must be recycled. Disposal of Waste Electrical and Electronic Equipment and/or Battery by users in private households in the European Union. This symbol on the product or on the packaging indicates that this cannot be disposed of as a household waste.
- Page 18 • Always charge using the charger. Risk of explosion if battery is replaced by an incorrect type. • Keep the battery out of reach of children. • Batteries may explode if exposed to naked fire. Never dispose of batteries in a fire. •...


Need help?
Do you have a question about the GoXtreme Reef and is the answer not in the manual?
Questions and answers