Table of Contents
Advertisement
Advertisement
Table of Contents

Subscribe to Our Youtube Channel
Related Manuals for Selta NETfon 100


Summary of Contents for Selta NETfon 100
- Page 1 NETfon 100/300/500 SIP Administrator Guide...
- Page 2 SELTA RESERVES THE RIGHT TO MODIFY THE CONTENTS OF THIS MANUAL WITHOUT NOTICE AND DECLINES ALL RESPONSIBILITY FOR ANY ERROR OR OMISSION WITHIN Seltatel® è un marchio registrato di Selta SpA Seltatel® is a registered trademark of Selta SpA Selta S.p.A.
-
Page 3: Table Of Contents
Index ENGLISH NETfon 100/300/500 SIP Administrator Guide 1. Preface ........................................... 1 2. Installation ......................................... 2 2.1. Connecting the phone ............................2 2.2. Connecting the DSS module ..........................3 3. Basic network settings ....................................4 3.1. Administrator’s password setting.......................... 4 3.2. DHCP ................................... 5 3.2.1. - Page 4 Index NETfon SIP - Administrator Guide 723142009-A0-GB...
-
Page 5: Preface
WARNING! The functionality of the services described in this guide is dependent on SIP communication system where NETfon 100/300/500 SIP are connected to, so there is no guarantee that all services can work properly on all SIP communication systems. NETfon SIP - Administrator Guide 723142009-A0-GB... -
Page 6: Installation
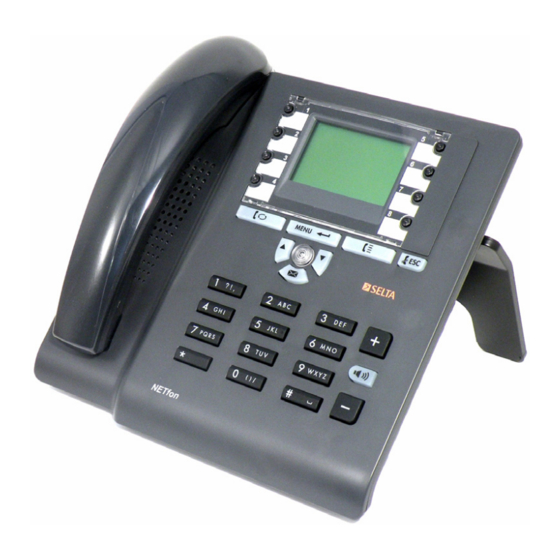
Installation 2. Installation 2.1. Connecting the phone To correcly connect the phone, see the image below and the description of connectors. Description LAN connector Connect a termination of the network cable to the Ethernet interface of the telephone and the other termination to the LAN network box. -
Page 7: Connecting The Dss Module
Installation 2.2. Connecting the DSS module The DSS module provides 24 programmable buttons (besides the ones already present in the base phone) that when pressed, depending on configuration, the features for which they are set up, start. To correcly connect the DSS module, see the image below and the connectors’ description. The maximum number of optional DSS modules is 2 (48 programmable buttons in total). -
Page 8: Basic Network Settings
Basic network settings 3. Basic network settings This paragraph explains the basic configuration of a NETfon installed on a IP network. 3.1. Administrator’s password setting The administrator’s password allows the access to: • some locked menu item of phone, the screen displays the following image •... -
Page 9: Dhcp
Basic network settings Enter the current password, the new password (max 4 digits) and retype new password. To send the customization, click on Apply button. To exit the WEB Server, click on Logout button Sequence of operations from configuration file See “Appendix C - Parameters list of configuration file”... -
Page 10: Ip Settings
Basic network settings Sequence of operations from WEB pages Perform a login to embedded WEB server from browser, entering the IP address of the phone Enter the administrator’s password (default “1234”) and click LOGIN button Click on the link <Advanced setup> Click on the link <WAN>... - Page 11 Basic network settings Enter new IP address. The screen displays the following data: Pay attention! The cursor is positioned at the start of New Value and if you press menu/enter now, you will confirm the empty value; in this case treat it as any other value. To switch from the first block of numbers to second and so on until the fourth, press menu / enter and then return to the Settings menu.
- Page 12 Basic network settings Enter the static IP address of NETfon, the Subnet Mask IP address and the Gateway IP address in the opened web page. WARNING! The TFTP SERVER address cannot be set from WEB server, only from telephone’s local menu (see TFTP server Address parameter).
-
Page 13: Basic Sip Settings
Basic SIP settings 4. Basic SIP settings Now you have to register the accounts on REGISTAR SERVER and the configuration of each account provides the setting of the following parameters (consult the paragraph <SIP SETTINGS> menu WARNING! It is possible to configure 2 accounts from telephone’s local menu, 2 accounts from embedded web server, 8 accounts from configuration file located on TFTP server. - Page 14 Basic SIP settings <Save the changes?> press menu/enter button to confirm or cancel the changes by pressing the button dedicated to exit the menu NETFON SCREEN If the registration was made properly, the screen displays the following data (among others): R+ = ALL ACCOUNT REGISTERED 102 = USERNAME R- = AT LEAST ONE ACCOUNT NOT REGISTERED...
-
Page 15: Firmware Upgrade
Firmware upgrade 5. Firmware upgrade The phone uses the TFTP server to download the firmware files from IP Address configured in TFTP server Address local parameter. The firmware upgrade can be performed automatically (at a specific time, once a day) or manually; both methods are explained in the following tables. -
Page 16: Manual Upgrade
Firmware upgrade 5.2. Manual upgrade Sequence of operations from the phone menu Press menu/enter button to enter the programming local menu, scroll the menu up to SETTINGS and press menu/ enter button to confirm Scroll the menu items up to Software Loading and press menu/enter button to confirm Enter the administrator’s password (default “1234”) and press menu/enter button to confirm Select “Firmware”... -
Page 17: Understanding Startup Process And Configuration
Understanding startup process and configuration 6. Understanding startup process and configuration When you first supply power to the phone, the firmware executes a series of operations. The startup process of the SIP phone is described in the following table. Step Description The firmware of the phone applies the VLAN settings The firmware of the phone applies the network settings... -
Page 18: Centralized Administrator's Password Setting
Understanding startup process and configuration 6.2. Centralized administrator’s password setting This feature allows to set an administrator password on the SIP server using a special SIP account. This feature is only available by using the configuration files, with centralized configuration method. Step Description On SIP server, add an account that will be used to set the administrator’s password of... -
Page 19: Advanced Settings
Advanced settings 7. Advanced settings Previuos chapters of this guide provide the instructions for basic Network and SIP settings of your NETfon. Complete and advanced options are described in the next appendix sessions, in detail they dial with: • Appendix A - Parameters list of phone’s local menu = provides a complete description of settings, available from local programming menu •... - Page 20 Advanced settings NETfon SIP - Administrator Guide 723142009-A0-GB...
-
Page 21: Appendix A - Parameters List Of Phone's Local Menu
Appendix A - Parameters list of phone’s local menu 8. Appendix A - Parameters list of phone’s local menu WARNING! • Configuration from local programming menu or embedded WEB server are stored in the local configuration on the phone (not on the server), while configuration from <first account number>.cfg files are stored on the server and when you restart the phone these files are downloaded and used in place of the local configuration file. -
Page 22: Sip Settings> Menu
Appendix A - Parameters list of phone’s local menu 8.2. <SIP SETTINGS> menu Press menu/enter buttons and scroll the menu up to SIP SETTINGS menu. Enter the administrator’s password (default “1234”), when required, and press menu/enter button to confirm The following table explains the SIP SETTINGS menu. With UP and DOWN arrows it is possible to scroll the following options: Menu options Descriptions... -
Page 23: Appendix B - Parameters List Of Embedded Web Server
Appendix B - Parameters list of embedded WEB server 9. Appendix B - Parameters list of embedded WEB server WARNING! • Configuration from local programming menu or embedded WEB server are stored in the local configuration on the phone (not on the server), while configuration from <first account number>.cfg files are stored on the server and when you restart the phone these files are downloaded and used in place of the local configuration file. -
Page 24: Settings
Appendix B - Parameters list of embedded WEB server 9.1.1. Settings Sequence of operations to ADD a contact Enter new Name (max 12 characters) Enter new Telephone number (max 20 digits) Click on Add button and automatically the configuration will be send to the phone and its Local Telephone Book will be updated. -
Page 25: Saving Local Telephone Book
Appendix B - Parameters list of embedded WEB server 9.1.2. Saving local telephone book Sequence of operations to EXPORT contacts to .CSV files Click on EXPORT button to open the .CSV file with the list of all the contacts present in the address book Select <File>... -
Page 26: Sip Parameter Web
Appendix B - Parameters list of embedded WEB server 9.2. SIP Parameter WEB pages Select the link <SIP Parameters> from home page, to open the following links: • Parameters • Codec Priority • Codec Disabled • Parameters Updates Each link open a WEB page and the description of the parameters is written in the following tables. 9.2.1. -
Page 27: Codec Priority
Appendix B - Parameters list of embedded WEB server 9.2.2. Codec Priority Fields Descriptions Codec Priority Establishes the priority list for the negotiation of the codec. To change the default order, select a data and press <+> or <-> keys to move it up and down. -
Page 28: Parameters Updates
Appendix B - Parameters list of embedded WEB server 9.2.4. Parameters Updates See the following instructions to save local configuration file, you can EXPORT the local configuration file (compressed) from phone and IMPORT the same file (unzipped) in phone file system. Fields Descriptions Export... -
Page 29: Appendix C - Parameters List Of Configuration File
Appendix C - Parameters list of configuration file 10. Appendix C - Parameters list of configuration file WARNING! • Configuration from local programming menu or embedded WEB server are stored in the local configuration on the phone (not on the server), while configuration from <first account number>.cfg files are stored on the server and when you restart the phone these files are downloaded and used in place of the local configuration file. - Page 30 Appendix C - Parameters list of configuration file <Save the changes?> press menu/enter button to confirm or cancel the changes by pressing the button dedicated to exit the menu Restart the phone (see <SIP SETTINGS> menu, Restart option) and wait for about one minute. Table B: Sequence of operations from WEB pages Perform a login to embedded WEB server from browser, entering the IP address of the phone Enter the administrator’s password (default “1234”) and click LOGIN button...
- Page 31 Appendix C - Parameters list of configuration file The configuration files are stored on TFTP server. In the following example, we consider the TFTP server of SAMIP platform by SELTA, where [<first account number>.cfg files (e.g. 1191.cfg)] are stored on the path </root/tftpboot>...
- Page 32 Appendix C - Parameters list of configuration file SIP Account Options Parameter Description Format Range Example --id Set SIP URL of the account sipurl n.a. --id sip:247203@26.2.213.84 (e.g. From header) --registrar Set SIP URL of the registrar server sipurl n.a. --registrar sip:26.2.213.84 --reg-timeout...
- Page 33 Appendix C - Parameters list of configuration file Media Options Parameter Description Format Range Example --rtp-port Set the RTP port integer n.a. --rtp-port 4000 --add-codec Set codec priority; this option may n.a. PCMA --add-codec G729 be specified multiple times. The PCMU --add-codec PCMA...
- Page 34 Appendix C - Parameters list of configuration file --auto- Enable the automatic n.a. n.a. --auto-recording recording call to the recorder. Put the parameter under comment (“#”) to disable (consult Call Recording configuration paragraph for further details) --ntel- Telephone number to text alphanumeric --ntel-voicemail...
- Page 35 Appendix C - Parameters list of configuration file Function KEYS(*) Parameter Description Format Range Example --tasto- Setting the association n.a. TT_L1,TT_L2 --tasto-funzione TT_MUTE funzione between function and TT_CONFERENCE --next-tastofunzione programmable key in TT_DONOTDISTURB the same order in which TT_REDIAL they appear in the TT_RUBRICA_LOCALE configuration file TT_MUTE...
- Page 36 Appendix C - Parameters list of configuration file --tasto-buddy- integer integer --tasto-funzione TT_SEQUENCE Setting up TT_BUDDY, TT_SEQUENCE and numtel --tasto-buddy-numtel 247E TT_FORWARD functions: integer integer + “E” in the end --tasto-etichetta 247 the automatic sequence to + “E” in --next-tastofunzione execute when the key is the end pressed.
-
Page 37: Description Of Functions
Appendix C - Parameters list of configuration file 10.1. Description of functions Description of function key Keyword Description Led associated Example TT_L1 The TT_L1 function Led off = phone in idle --tasto-funzione TT_L1 key is used to answer --next-function the incoming calls and Green led steady on = line seizure for active line... - Page 38 Appendix C - Parameters list of configuration file TT_BUDDY The TT_BUDDY Led off = user is available --tasto-funzione TT_BUDDY function key monitor and in idle --tasto-buddy-uri sip:907@192.168.0.50 the state of another --tasto-buddy-numtel user. Red led steady on = user is --tasto-etichetta Direttore According to the...
-
Page 39: Login/Logout Configuration (User Mobility)
Any other information concerning the use of such feature by users and any operation to handle the feature offered, is treated in the following documents, published by SELTA spa: • NETfon 100 SIP - User Guide code 723142005-A0-LM •... -
Page 40: Call Recording Configuration
Appendix C - Parameters list of configuration file The login/logout setup procedure is described in the following table. Step Description On TFTP server, add one configuration file (e.g. 2000.cfg) for Login-Logout consoles containing the following parameters: • Add “--login-logout” parameter between the first account parameters. •... -
Page 41: Appendix D - Sample Of Configuration File
Appendix D - Sample of configuration file 11. Appendix D - Sample of configuration file This is a comment, without # Account 0: MAIN any effect on configuration --id sip:247230@26.2.213.84 --registrar sip:26.2.213.84 Main account, generally used --reg-timeout 60 for outgoing calls --proxy sip:26.2.213.84;lr --realm * --username 247230... - Page 42 Appendix D - Sample of configuration file Account for CHECK PASSWORD ADMIN It is not a real account because of the registration password lack. This account number is used to try --id sip:247900@26.2.213.84 a registration with a password requested when a --registrar sip:26.2.213.84 login to admin menu is tempted.
- Page 43 Appendix D - Sample of configuration file # tasto 3 --tasto-funzione TT_MUTE --next-tastofunzione # tasto 4 --tasto-funzione TT_CONFERENCE --next-tastofunzione # tasto 5 --tasto-funzione TT_DONOTDISTURB --next-tastofunzione # tasto 6 --tasto-funzione TT_SEQUENCE --tasto-buddy-numtel 247E --tasto-etichetta 247 --next-tastofunzione Example to jump the setting of # tasto 7 a function key for the 7th programmable key of the phone...
- Page 44 Appendix D - Sample of configuration file # tasto 9 This is the first programmable key of the DSS --tasto-funzione TT_BUDDY module (independently from NETfon type --tasto-buddy-uri sip:247218@26.2.213.84 (100-300-500) --tasto-buddy-numtel 247218 --tasto-buddy-tipoblf TT_BLF --tasto-etichetta RAFFAELLO --next-tastofunzione # tasto 10 --tasto-funzione TT_FORWARD --tasto-buddy-uri sip:247231@26.2.213.84 --tasto-buddy-numtel 247230 --tasto-etichetta DEV_dir...
-
Page 45: Appendix E - Advanced Network Settings
Appendix E - Advanced network settings 12. Appendix E - Advanced network settings This paragraph explains the advanced setting of a NETfon installed on a IP network such as Virtual LAN (VLAN), Quality of Service (QoS) and Network Time Protocol (NTP). 12.1. -
Page 46: Advanced Settings
Appendix E - Advanced network settings Select the link <Extended QoS Setting> To enable/disable the parameter “802.1p/Q priority (VLAN)” select Yes/No respectively. You’ll obtain the following: if enabled: Incoming tagged Ethernet packets are untagged and outgoing Ethernet packets are tagged; if disabled: Incoming tagged Ethernet packets are rejected and outgoing Ethernet packets are not tagged. - Page 47 Appendix E - Advanced network settings Select the link <Built-in Switch Setting> Assign to LAN / PC / IP Phone ports VLAN priority (from 0 to 7). Assign to LAN / PC / IP Phone ports VLAN ID value (from 1 to 4094). This field identifies the VLAN to which the frame belongs.
- Page 48 Appendix E - Advanced network settings Setting traffic filtering rule for tagged and untagged packets is required to accept/deny packet’s transit on each switch port and/or sending tagged or untagged packets from phone. If the VLAN Identifier of a tagged packet matches a rule (same VLAN-ID), the traffic packets follows the rule, otherwise the rule is ignored and packets transit unchanged.
-
Page 49: A Practical Example To Configure Vlan Encapsulation
Appendix E - Advanced network settings 12.1.3. A practical example to configure VLAN encapsulation To implement IEEE 802.1q tagging standard protocol, only configure the “Extended QoS Setting” web page. In the following image you can see the IEEE 802.1q protocol enabled with VLAN-ID = 50 and priority = 5, while ToS is equal to 0. -
Page 50: Quality Of Service (Dscp Parameter)
Appendix E - Advanced network settings To program the VLAN rules required, you have to configure the “VLAN Setting” web page. Configure two rules: • VLAN-ID = 50: untag towards each port but LAN port (so to avoid to send packets tagged “50” to PC port) •... - Page 51 Appendix E - Advanced network settings The Differentiated Services Code Point (DSCP) operates on RTP packets; based on DSCP code, RTP packets are subject to the policy of assigning priority, shown and described in RFC2474. Sequence of operations from the phone menu NOT APPLICABLE To enable/disable and configure DSCP, see following table Sequence of operations from WEB pages...
-
Page 52: Network Time Protocol (Ntp)
Appendix E - Advanced network settings 12.3. Network Time Protocol (NTP) Network Time Protocol (NTP) is used to synchronize the phones to SIP Server. Sequence of operations from the phone menu NOT APPLICABLE Sequence of operations from WEB pages Perform a login to embedded WEB server from browser, entering the IP address of the phone Enter the administrator’s password (default “1234”) and click LOGIN button Click on the link <Advanced setup>... - Page 53 Appendix E - Advanced network settings Sequence of operations from the phone menu Press menu/enter button to enter the programming local menu, scroll the menu up to SETTINGS and press menu/ enter button to confirm Scroll the menu items up to Software Loading and press menu/enter button to confirm Enter the administrator’s password (default “1234”) and press menu/enter button to confirm Select “Rootfs”, “Kernel”, “Bootloader”...
- Page 54 Appendix E - Advanced network settings NETfon SIP - Administrator Guide 723142009-A0-GB...
Need help?
Do you have a question about the NETfon 100 and is the answer not in the manual?
Questions and answers