
Subscribe to Our Youtube Channel
Related Manuals for Comtrend Corporation GS-7424


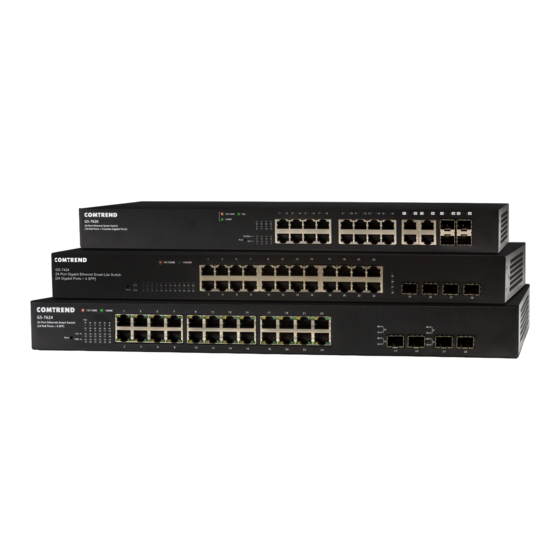
Summary of Contents for Comtrend Corporation GS-7424
- Page 1 USER MANUAL GS-7424, GS-7620, & GS-7624 Smart Lite Gigabit (PoE) August 2018, v1.0...
- Page 2 Any software described in this manual is sold or licensed “as is”. Should the programs prove defective following their purchase, the buyer (and not Comtrend Corporation, its distributors, or its dealers) assumes the entire cost of all necessary servicing, repair, and any incidental or consequential damages resulting from any defect in the software.
-
Page 3: Table Of Contents
Table of Contents 1. Introduction ........................2 1.1. Overview ........................2 1.2. Package contents ......................2 1.3. Features ........................3 1.4. Specifications ......................3 1.5. Front and Back Panel Configuration ................4 1.5.1. Ports ......................... 4 1.5.2. LED Indicators ......................6 2. - Page 4 4.3.3. Link Aggregation ....................33 4.3.4. EEE ........................36 4.3.5. Jumbo Frame ......................37 4.4. PoE ..........................38 4.4.1. Global Setting ......................38 4.4.2. Priority Setting ....................... 40 4.4.3. Power Limit ......................41 4.4.4. Power Show ......................42 4.5. VLAN ........................43 4.5.1.
- Page 5 4.10.8. DHCP Snooping ....................95 4.10.9. IP Source Guard ..................... 99 4.11. ACL ......................... 102 4.11.1. MAC ACL ......................102 4.11.2. MAC ACE ......................103 4.11.3. IPv4 ACL ......................104 4.11.4. IPv4 ACE ......................104 4.11.5. ACL Binding ....................... 106 4.12.
- Page 6 Safety and Regulatory Audience This guide is for the networking professional managing the standalone GS-7000 switch series. It is recommended that only professionals with experience working with Comtrend networking devices who are familiar with the Ethernet and local area networking terminology, should service the equipment. Conventions The following conventions are used in this manual to convey instructions and information:...
-
Page 7: Introduction
24 Gigabit PoE+ ports, respectively. While the GS-7620 provides four mini-GBIC/SFP slots for combo ports, the GS-7624 has four Gigabit SFP slots. In comparison the GS-7424 provides 24 Gigabit ports and four Gigabit SFP slots. Designed for medium to large network environments, the Smart Lite Gigabit PoE Switch series include a standard 19-inch rack-mount design for greater installation options. -
Page 8: Features
• IEEE 802.1Q VLAN allows network segmentation to enhance performance and security • Supports Access Control List (ACL) • Switch capacity: GS-7624 & GS-7424: 56 Gbps; GS-7620: 40 Gbps, Forwarding rate: 35.7 Mbps • Supports IGMP Snooping V1 / V2 / partial V3 •... -
Page 9: Front And Back Panel Configuration
24-Port Gigabit Ethernet Smart-Lite Switch [24 Gigabit Ports + 4 SFP] 21 23 Reset 22 24 Figure 1 - GS-7424 Front Panel View Name Description Port 1 to Port 24 function as an Ethernet connection RJ-45 LNK/ACT (10/100/1000 Mbps). Each has a corresponding Port 1~24 10/100/1000 Mbps LED. - Page 10 10/100/1000 Mbps LED. SFP LNK/ACT Ports 25 to 28 function as fiber connections. Each has a Port 25~28 corresponding 1000Mbps LED. Figure 4 - GS-7424, GS-7620, and GS-7624 Back Panel View Name Description AC power inlet 100~240V/AC, 50/60Hz Introduction...
-
Page 11: Led Indicators
24-Port Gigabit Ethernet Smart-Lite Switch [24 Gigabit Ports + 4 SFP] 21 23 Reset 22 24 Figure 5 - GS-7424 Front Panel LED Indicators Description • Off: power off • On: power on • Off: system not ready • On: system ready •... - Page 12 1 2 3 GS-7620 20-Port PoE Gigabit Ethernet Smart-Lite Switch [16 PoE Ports + 4 Combo Gigabit Po rts] 2 4 6 8 Reset 1 3 5 7 Figure 6 - GS-7620 Front Panel LED Indicators Name Description • Off: power off or fail •...
- Page 13 1 2 3 GS-7624 24-Port PoE Gigabit Ethernet Smart-Lite Switch [24 PoE Ports + 4 SFP] Figure 7 - GS-7624 Front Panel LED Indicators Name Description • Off: power off • On: power on • Off: system not ready • On: system ready •...
-
Page 14: Installation
2. Installation This chapter describes how to install and connect your Comtrend Switch. Read the following topics and perform the procedures in the correct order. Incorrect installation may cause damage to the product. 2.1. Mounting the Switch There are two ways to physically set up the switch. •... -
Page 15: Rack Mounting
2.1.2. Rack Mounting You can mount the switch in any standard sized 19-inch (482.6 mm) wide rack. The switch requires 1 rack unit (RU) of space, which is 1.75 inches (44.45 mm) high. For stability, load the rack from the bottom to the top, with the heaviest devices on the bottom. - Page 16 Secure the switch on the equipment rack with the screws provided. Figure 10 - Rack Installation Installation...
-
Page 17: Getting Started
3. Getting Started This section provides an introduction to the web-based configuration utility, and covers the following topics: • Powering on the device • Connecting to the network • Power over Ethernet (PoE) considerations • Starting the web-based configuration utility 3.1. -
Page 18: Connecting To The Network
3.1.2. Connecting to the Network To connect the switch to the network: Connect an Ethernet cable to the Ethernet port of a computer. Connect the other end of the Ethernet cable to one of the numbered Ethernet ports of the switch. If activity is present on the port, the LED lights up. Repeat for any remaining cable connections. -
Page 19: Starting The Web-Based Configuration Utility
Ports 1-24 provide PoE power supply functionality with a maximum output power up to 30W each port. This can supply power to PDs such as Internet phones, network cameras, wireless access points. Connect the switch PoE port directly to the PD port using a network cable. - Page 20 Launching the Configuration Utility To open the web-based configuration utility: Open a Web browser. Enter the IP address of the device you are configuring in the address bar on the browser (factory default IP address is 192.168.169.1) and then press Enter. Your computer’s IP address must be in the same subnet as the switch.
-
Page 21: Logging In
3.1.5. Logging In To log in to the device configuration utility: Open a browser window and enter the IP address in the browser’s address bar. In the Login Window, enter the default user ID (admin) and the default password (admin). If this is the first time that you logged on with the default user ID (admin) and the default password (admin). - Page 22 Logging Out To logout, click Logout in the top right corner of any page. The system logs out of the device. When a timeout occurs or you intentionally log out of the system, a message appears and the Login page appears. After you log in, the application returns to the initial page.
-
Page 23: Web-Based Switch Configuration
4. Web-based Switch Configuration The PoE smart switch software provides rich Layer 2 functionality for switches in your networks. This chapter describes how to use the web-based management interface (Web UI) to configure the switch’s features. For the purposes of this manual, the user interface is separated into four sections, as shown in the following figure: Figure 15 - User Interface Name... -
Page 24: Status
4.1. Status 4.1.1. System Information The System Information menu provides status information such as Device ID, MAC address, IP Address and System Time. To view the menu, navigate to Status > System Information. Figure 16 - Status > System Information Item Description Model... - Page 25 Item Description Firmware Version Current firmware version of the switch. Firmware Date Current firmware build date of the switch. Telnet Display the telnet function status. Display the SSH function status. HTTP Display the HTTP function status. HTTPS Display the HTTPS function status. SNMP Display the SNMP function status.
-
Page 26: Logging Message
4.1.2. Logging Message The page provides access to listed log notification and descriptions. To view the menu, navigate to Status > Logging Message. Figure 17 - Status > Logging Message Item Description Click the drop-down menu to select the type of log Viewing information to view. -
Page 27: Port
4.1.3. Port The Port menu provides access to port Statics, Error Disabled, and Bandwidth Utilization to monitor port function. Statistics To view the menu, navigate to Status > Port > Statistics. Figure 18 - Status > Port > Statistics Item Description Port Click the drop-down menu to select the port. - Page 28 Error Disabled The Error Disabled menu provides the function necessary to place a port in an error state – errors that may jeopardize stability to the switch or network. Once a port is placed in an error state, an administrator must manually re-enable the port.
- Page 29 Bandwidth Utilization The Bandwidth Utilization menu displays the network monitoring status performance of the switch. To view the menu, navigate to Status > Port > Bandwidth Utilization. Figure 20 - Status > Port > Bandwidth Utilization Item Description Click the drop-down menu to select the refresh rate time (2, Refresh Rate 5, 10) in seconds.
-
Page 30: Link Aggregation
4.1.4. Link Aggregation The Link Aggregation menu displays the traffic loading usage among the specified ports. To view the menu, navigate to Status > Link Aggregation. Figure 21 - Status > Link Aggregation Item Description Enter the keywords to use in the search function. 4.1.5. -
Page 31: Network
Item Description Clear Click to clear the current listed entries. Refresh Click to refresh the display. 4.2. Network The Network menu provides access to the following functions for configuration: IPv4 Address, IPv6 Address, and Operational Status. 4.2.1. IP Address The IP Address function enables the management of the device’s IP and gateway (next hop) addresses for outgoing traffic. - Page 32 Item Description Enter the variable to specify the DNS server 1 for the DNS Server 1 interface. Enter the variable to specify the DNS server 2 for the DNS Server 2 interface. IPv6 Address Auto Configuration Click the radio button to enable the IPv6. DHCPv6 Client Click the radio button to enable the DHCPv6 client function.
-
Page 33: System Time
4.2.2. System Time The System Time function enables the management of the system time and date on the device using automatic configuration, such as SNTP or a localhost (computer), or manual configuration settings. To view the menu, navigate to Network > System Time. Figure 24 - Network >... - Page 34 Item Description Daylight Saving Time Click the radio buttons to select the daylight saving time Type type. Enter the offsetting variable in seconds to adjust for daylight Offset saving time. Click the drop-down menu to designate the start date and Recurring time/end date and time for daylight saving time.
-
Page 35: Port
4.3. Port The Port menu provides access to port configuration settings such as: Port Setting, Error Disabled, Link Aggregation, EEE, and Jumbo Frame. 4.3.1. Port Setting Use the page to configure settings for the switch ports, trunk, Layer 2 protocols and other switch features. -
Page 36: Error Disabled
Item Description Select a port entry and click the Edit button to configure the following settings: • Description: Enter a string text to describe the device. • State: Tick the radio button to enable/disable the device state setting. • Speed: Click a radio button to select the device speed (Auto, Auto-10M, Auto-100M, Auto-1000M, Auto-10/100M, 10M, 100M, 1000M) Edit... - Page 37 Item Description Click the radio button to recover the port being blocked Unknown Multicast by unknown multicast flood after the time set in Recovery Flood Interval. Click the radio button to recover the port being blocked by Unicast Flood unicast flood after the time set in Recovery Interval. Click the radio button to recover the port being blocked by ACL after the time set in Recovery Interval.
-
Page 38: Link Aggregation
4.3.3. Link Aggregation The Link Aggregation menu provides configuration for link aggregation settings: group, port settings, LACP. Group To view the menu, navigate to Port > Link Aggregation > Group. Figure 27 - Port > Link Aggregation > Group Item Description Click the radio buttons to select the Load balance algorithm. - Page 39 Port Setting To view the menu, navigate to Port > Link Aggregation > Port Setting. Figure 28 - Port > Link Aggregation > Port Setting Item Description Enter the keywords to use in the search function. Click to edit the port settings by entering the following data: •...
- Page 40 LACP To view the menu, navigate to Port > Link Aggregation > LACP. Figure 29 - Port > Link Aggregation > LACP Item Description Enter the variable to determine which switch (local or remote) on the LAG connection is able to decide LACP activities.
-
Page 41: Eee
4.3.4. EEE The Energy Efficient Ethernet (EEE) menu reduces the power consumption during periods of low link utilization. The functions saves energy by putting part of the transmission circuit into low power mode when the link is idle. To view the menu, navigate to Port > EEE. Figure 30 - Port >... -
Page 42: Jumbo Frame
4.3.5. Jumbo Frame Jumbo Frame is an Ethernet frame with a payload greater than the maximum transmission unit (MTU) of 1,500 bytes (standard). The Jumbo Frame menu provides configuration access to allow for local area networks that support at least 1 Gbps and as large as 9,000 bytes. -
Page 43: Poe
4.4. PoE Devices with PoE support are designed with PoE-capable ports capable of automatically supplying power to connected devices when the switch detects an absence of power on the circuit. Supported device: • an IEEE 802.3af-compliant powered device Powered devices can receive redundant power when connected to a PoE-enabled port and to an AC power source. - Page 44 Item Description Click the drop-down menu to enable or disable the Schedule Status. Schedule Status If enabled, a defined Time Range setting can be selected and applied to the port, see Edit in the following. Apply Click to save the values and update the screen. Enter the keywords to use in the search function.
-
Page 45: Priority Setting
4.4.2. Priority Setting The Priority Setting menu provides configuration for a PoE port to have a high power priority setting. In the event where there isn’t sufficient power for all the PoE ports, available power is directed to the higher priority ports, while lower priority ports are shut down as needed. -
Page 46: Power Limit
4.4.3. Power Limit The Power Limit menu provides configuration to set the amount of power in milliwatts to the powered device connected to the selected port. To view the menu, navigate to PoE > Power Limit. Figure 34 - PoE > Power Limit Item Description Enter the keywords to use in the search function. -
Page 47: Power Show
4.4.4. Power Show The Power Show menu provides the setting to enable or disable the viewing of the power function for each port. To view the menu, navigate to PoE > Power Show. Figure 35 - PoE > Power Show Item Description Click the ports to enable or disable power show for the PoE... -
Page 48: Vlan
4.5. VLAN The virtual LAN (VLAN) menu provides functionality to divide the network into separate logical areas. A switch port belonging to a VLAN can receive unicast, broadcast, and multicast packets. Each VLAN is considered a logical network. 4.5.1. VLAN In a switched network, a VLAN is a group of end stations that is logically segmented by either function, definition, or application, without regard to a user’s physical location. - Page 49 Item Description An existing VLAN entry must be available before the Edit function can be selected. To modify a VLAN entry: • Select a VLAN entry and click Edit. Edit • In the Edit VLAN Name menu, enter a text string to define the VLAN entry.
- Page 50 VLAN Configuration The VLAN Configuration menu provides the functionality to select and configure available ports to a defined VLAN group. To view the menu, navigate to VLAN > VLAN > VLAN Configuration. Figure 37 - VLAN > VLAN > VLAN Configuration Item Description Click the drop-down menu to select a defined VLAN, see...
- Page 51 Membership To view the menu, navigate to VLAN > VLAN > Membership. Figure 38 - VLAN > VLAN > Membership Item Description Enter the keywords to use in the search function. Select an entry and click Edit the membership settings. In the Edit Port Setting menu, select a membership entry and click Select to add the entry to the group.
- Page 52 Port Setting The Port Setting menu provides configuration function for each selected port allowing setting changes to mode, PVID, frame type, and ingress filtering. To view the menu, navigate to VLAN > VLAN > Port Setting. Figure 39 - VLAN > VLAN > Port Setting Item Description Enter the keywords to use in the search function.
-
Page 53: Voice Vlan
4.5.2. Voice VLAN The Voice VLAN function enables the IP voice traffic access from an IP phone. When connected to an Internet phone, the device can receive voice traffic with Layer 3 IP precedence and Layer 2 class of service (CoS) values. Property To view the menu, navigate to VLAN >... - Page 54 Item Description Select an entry and click Edit the Property Port settings. In the Edit Port Setting menu, configure the following: • State: Tick to enable or disable the state mode. • Mode: Select either Auto or Manual. Edit • QoS Policy: Select Voice Packet or All to set the QoS attributes.
-
Page 55: Mac Vlan
4.5.3. MAC VLAN MAC Group To view the menu, navigate to VLAN > MAC VLAN > MAC Group. Figure 42 - VLAN > MAC VLAN > MAC Group Item Description Click the drop-down menu to select the number of entries to Showing display (All, 10, 30, 50, 100). - Page 56 Group Binding To view the menu, navigate to VLAN > MAC VLAN > Group Binding. Figure 43 - VLAN > MAC VLAN > Group Binding Item Description Click the drop-down menu to select the number of entries to Showing display (All, 10, 30, 50, 100). Enter the keywords to use in the search function.
-
Page 57: Mac Address Table
4.6. MAC Address Table 4.6.1. Dynamic Address To view the menu, navigate to MAC Address Table > Dynamic Address. Figure 44 - MAC Address Table > Dynamic Address Item Description Enter the variable to set the dynamic MAC address aging out Aging Time value. -
Page 58: Static Address
4.6.2. Static Address To view the menu, navigate to MAC Address Table > Static Address. Figure 45 - MAC Address Table > Static Address Item Description Click the drop-down menu to select the number of entries to Showing display (All, 10, 30, 50, 100). Enter the keywords to use in the search function. -
Page 59: Filtering Address
4.6.3. Filtering Address To view the menu, navigate to MAC Address Table > Filtering Address. Figure 46 - MAC Address Table > Filtering Address Item Description Click the drop-down menu to select the number of entries to Showing display (All, 10, 30, 50, 100). Enter the keywords to use in the search function. -
Page 60: Spanning Tree
4.7. Spanning Tree 4.7.1. Property To view the menu, navigate to Spanning Tree > Property. Figure 47 - Spanning Tree > Property Item Description Click the radio button to enable the spanning tree protocol State function. Click the radio buttons to set the operating mode of spanning tree (STP). - Page 61 Item Description Enter the variable to specify the bridge priority. It ensures the probability that the switch is selected as the root bridge, Priority and the lower value has the higher priority for the switch to be selected as the root bridge of the topology. Enter the variable to specify the STP hello time in seconds to Hello Time broadcast its hello message to other bridge by Designated...
-
Page 62: Port Setting
4.7.2. Port Setting To view the menu, navigate to Spanning Tree > Port Setting. Figure 48 - Spanning Tree > Port Setting Item Description Click to edit the spanning tree port settings by entering the following data: • State • Path Cost •... -
Page 63: Mst Instance
4.7.3. MST Instance To view the menu, navigate to Spanning Tree > MST Instance. Figure 49 - Spanning Tree > MST Instance Item Description Enter the keywords to use in the search function. Click to edit the MST instance settings by entering the following data: Edit •... -
Page 64: Mst Port Setting
4.7.4. MST Port Setting To view the menu, navigate to Spanning Tree > MST Port Setting. Figure 50 - Spanning Tree > MST Port Setting Item Description MSTI Click the drop-down menu to select the MST instance. Click to edit the MST port settings by entering the following data: Edit •... -
Page 65: Statistics
4.7.5. Statistics To view the menu, navigate to Spanning Tree > Statistics. Figure 51 - Spanning Tree > Statistics Item Description Refresh Rate Click the drop-down menu to select refresh rate. Enter the keywords to use in the search function. Clear Click to clear the statistics table. -
Page 66: Discovery
4.8. Discovery 4.8.1. LLDP LLDP is a one-way protocol; there are no request/response sequences. Information is advertised by stations implementing the transmit function, and is received and processed by stations implementing the receive function. Property The page allows a user to set general settings for LLDP. To view the menu, navigate to Discovery >... - Page 67 Port Setting The page allows a user to select a specified port or all ports and specify its port setting(s). To view the menu, navigate to Discovery > LLDP > Port Setting. Figure 53 - Discovery > LLDP > Port Setting Item Description Enter the keywords to use in the search function.
- Page 68 Select an entry to edit. The following screen displays. Figure 54 - Discovery > LLDP > Port Setting >Edit Item Description Port Selected port (s). Select the transmission state of LLDP port interface. • Transmit: Transmit LLDP PDUs only. Mode •...
- Page 69 Packet View To view the menu, navigate to Discovery > LLDP > Packet View. Figure 55 - Discovery > LLDP > Packet View Item Description Enter the keywords to use in the search function. Click to display the packet transmission details in bytes Detail (port, mandatory TLVs, 802.3 TLVs, Optional TLVs, 802.1 TLVs, and Total) for the selected port.
- Page 70 Local Information To view the menu, navigate to Discovery > LLDP > Local Information. Figure 56 - Discovery > LLDP > Local Information Item Description Chassis ID Subtype Display the type of chassis ID, such as the MAC address. Display Identifier of chassis. Where the chassis ID subtype is Chassis ID a MAC address, the MAC address of the switch is displayed.
- Page 71 Neighbor To view the menu, navigate to Discovery > LLDP > Neighbor. Figure 57 - Discovery > LLDP > Neighbor Item Description Click the drop-down menu to select the number of entries to Showing display (All, 10, 30, 50, 100). Enter the keywords to use in the search function.
- Page 72 Statistics To view the menu, navigate to Discovery > LLDP > Statistics. Figure 58 - Discovery > LLDP > Statistics Item Description Display the number of insertions made to the database Insertions table. Deletions Display the number of deletions made to the database table. Display the number of LLDP frames dropped from the Drops database table due to errors.
-
Page 73: Multicast
4.9. Multicast 4.9.1. General Property To view the menu, navigate to Multicast > General > Property. Figure 59 - Multicast > General > Property Item Description Click the radio buttons to select an action for the switch to handle with unknown multicast packet. •... - Page 74 Group Address To view the menu, navigate to Multicast > General > Group Address. Figure 60 - Multicast > General > Group Address Item Description Click the drop-down menu to select the IP version for the IP Version multicast group. Click the drop-down menu to select the number of entries to Showing display (All, 10, 30, 50, 100).
- Page 75 Router Port To view the menu, navigate to Multicast > General > Router Port. Figure 61 - Multicast > General > Router Port Item Description Click the drop-down menu to select the IP version for the IP Version multicast group. Click the drop-down menu to select the number of entries to Showing display (All, 10, 30, 50, 100).
-
Page 76: Igmp Snooping
4.9.2. IGMP Snooping IGMP snooping is the process of listening to Internet Group Management Protocol (IGMP) network traffic. The feature allows a network switch to listen in on the IGMP conversation between hosts and routers. By listening to these conversations the switch maintains a map of which links need which IP multicast streams. - Page 77 Item Description Click to edit the IGMP settings by entering the following data: • State • Router Port Auto Learn • Query Robustness Edit • Query Interval • Query Max Response Interval • Last Member Query Counter • Last Member Query Interval •...
- Page 78 Statistics To view the menu, navigate to Multicast > IGMP Snooping > Statistics. Figure 64 - Multicast > IGMP Snooping > Statistics Item Description Receive Packet Total Display the counter total of IGMP packets received. Valid Display the number of valid IGMP packets received. InValid Display the number of invalid IGMP packets received.
-
Page 79: Mvr
Item Description Source-specific Display the total number of group queries transmitted by a Group Query specific source at the interface. Clear Click to clear the IGMP snooping statistic tables. Refresh Click to refresh the display. 4.9.3. MVR Multicast VLAN Registration (MVR) can route packets received in a multicast source VLAN to one or more destination VLANs. - Page 80 Item Description Click the radio buttons to select the mode for MVR operation. • Compatible: Multicast data received by MVR hosts (multicast server) will be forwarded to all MVR receiver Mode ports. • Dynamic: Multicast data received by MVR hosts (multicast server) on Vigor switch will be forwarded from those MVR data and client ports grouped under MVR server.
- Page 81 Port Setting Use the page to specify destination port and source port (GE/LAG) for Vigor system to perform MVR operation. To view the menu, navigate to Multicast > MVR > Port Setting. Figure 66 - Multicast > MVR > Port Setting Item Description Enter the keywords to use in the search function.
- Page 82 Group Address The page allows the network administrator to configure the IP address and specify the port member for the selected VLAN. To view the menu, navigate to Multicast > MVR > Group Address. Figure 67 - Multicast > MVR > Group Address Item Description Click the drop-down menu to select the number of entries to...
-
Page 83: Security
4.10. Security 4.10.1. RADIUS The page allows the network administrator to add and configure multiple RADIUS servers. To view the menu, navigate to Security > RADIUS. Figure 68 - Security > RADIUS Item Description Use Default Parameter Enter the variable to set the retry time before the switch Retry being considered not-reachable. -
Page 84: Management Access
Item Description Click to edit the RADIUS server settings by entering the following data: • Server Address • Server Port • Priority Edit • Key String • Retry • Timeout • Usage Delete Click to delete the desired entries. 4.10.2. Management Access Management Service To view the menu, navigate to Security >... - Page 85 Item Description HTTPS Click the radio button to enable the HTTPS service. SNMP Click the radio button to enable the SNMP service. Session Timeout Enter the variable to define the timeout period for the Console console session. Enter the variable to define the timeout period for the telnet Telnet session.
- Page 86 Management ACL The page allows a user to add, edit, and delete Management Access Control profiles. To view the menu, navigate to Security > Management Access > Management ACL. Figure 70 - Security > Management Access > Management ACL Item Description ACL Name Enter the string to create a profile for ACL.
- Page 87 Item Description Enter the keywords to use in the search function. Click to add a new management ACE by entering the following data: • Priority • Action • Service • Port • IP Version • IPv4 • IPv6 Click to edit the management ACE settings by entering the following data: •...
-
Page 88: Authentication Manager
4.10.3. Authentication Manager The authentication manager allows you to configure secure access for any host connected to a physical port. Multiple authentication is available for each port. Property The device supports 802.1x and MAC-based authentication methods. In the Property page, you can specify authentication type, enable Guest VLAN function, specify a VID and select the format for MAC address entry. - Page 89 Item Description Click the drop-down menu to specify how the MAC-based MAC-Based User ID user ID should be expressed in EAP message between AAA Format server and switch. Apply Click to save the values and update the screen. Enter the keywords to use in the search function. Click to edit the authentication port mode settings by entering the following data: •...
- Page 90 Port Setting The page allows the network administrator to controls port setting, based on 802.1X, for Ethernet port authentication. To view the menu, navigate to Security > Authentication Manager > Port Setting. Figure 73 - Security > Authentication Manager > Port Setting Item Description Click to edit the authentication port settings by entering the...
- Page 91 Sessions To view the menu, navigate to Security > Authentication Manager > Sessions. Figure 74 - Security > Authentication Manager > Sessions Item Description Click the drop-down menu to select the number of entries to Showing display (All, 10, 30, 50, 100). Enter the keywords to use in the search function.
-
Page 92: Port Security
4.10.4. Port Security The Port Security setting allows you to enable the function and set a limit on the number of MAC addresses a port can learn. The range is 0 to 256. The default is 0, which indicates that only static addresses are supported on the interface. When a port exceed the defined number of learned address, an action on that violation can also be defined (discard packets, forward packets, or shutdown port). - Page 93 Select an entry to edit. The following screen displays. Figure 76 - Security > Port Security > Edit Item Description Port Displays the selected port. Displays if the setting is enabled (must be selected) or State disabled. Enter the maximum number of MAC Addresses the port is MAC Address allowed to store.
-
Page 94: Protected Port
4.10.5. Protected Port The page allows the network administrator to configure protected port setting to prevent the selected ports from communication with each other. Protected port is only allowed to communicate with unprotected port. To view the menu, navigate to Security > Protected Port. Figure 77 - Security >... -
Page 95: Storm Control
4.10.6. Storm Control Storm Control helps to suppress possible broadcast, unknown multicast or unknown unicast storm by applying a rate limit on those packets. To view the menu, navigate to Security > Storm Control. Figure 78 - Security > Storm Control Item Description Click the radio buttons to select the mode of the storm... - Page 96 Item Description Click to edit the storm control port settings by entering the following data: • State • Broadcast Edit • Unknown Multicast • Unknown Unicast • Action Web-based Switch Configuration...
-
Page 97: Dos
4.10.7. A Denial of Service (DoS) attack is a hacker attempt to make a device unavailable to its users. DoS attacks saturate the device with external communication requests, so that it cannot respond to legitimate traffic. These attacks usually lead to a device CPU overload. - Page 98 Item Description Drop the packages if the TCP source port is equal to the TCP destination port. TCP Blat Click the radio button to enable the function. Drop the packets if the destination MAC address is equal to the source MAC address. DMAC = SMAC Click the radio button to enable the function.
- Page 99 Port Setting The page allows a user to configure and display the state of DoS protection for interfaces. The configuration result for each port will be displayed on the table listed on this web page. To view the menu, navigate to Security > DoS > Port Setting. Figure 80 - Security >...
-
Page 100: Dhcp Snooping
4.10.8. DHCP Snooping DHCP snooping is able to validate DHCP messages obtained from untrusted sources and filter out invalid messages. For DHCP snooping to function properly, it is suggested to connect DHCP servers to the device through trusted interfaces; because untrusted DHCP messages will be forwarded to trusted interfaces only. - Page 101 Item Description Click to edit the DHCP port settings by entering the following data: • Trust Edit • Verify Chaddr • Rate Limit Statistics The page displays all statistics recorded by DHCP snooping function. To view the menu, navigate to Security > DHCP Snooping > Statistics. Figure 82 - Security >...
- Page 102 Option82 Property The page allows a user to set string as remote ID for DHCP option82. For example, use a switch-configured hostname or specify an ASCII text string as remote ID. To view the menu, navigate to Security > DHCP Snooping > Option82 Property. Figure 83 - Security >...
- Page 103 Option82 Circuit ID To view the menu, navigate to Security > DHCP Snooping > Option82 Circuit ID. Figure 84 - Security > DHCP Snooping > Option82 Circuit ID Item Description Click the drop-down menu to select the number of entries to Showing display (All, 10, 30, 50, 100).
-
Page 104: Ip Source Guard
4.10.9. IP Source Guard By using the source IP address filtering function, IP source guard can prevent a malicious host from feigning a legal host with its IP address and performing malicious attack. Port Setting To view the menu, navigate to Security > IP Source Guard > Port Setting. Figure 85 - Security >... - Page 105 IMPV Binding The page allows the network administrator to set the filtering conditions (binding type, MAC address, IPv4 address) for packets through the specified LAN port. To view the menu, navigate to Security > IP Source Guard > IMPV Binding. Figure 86 - Security >...
- Page 106 Save Database The page allows the network administrator to configure the DHCP Snooping database. To view the menu, navigate to Security > IP Source Guard > Save Database. Figure 87 - Security > IP Source Guard > Save Database Item Description Click the radio buttons to select the database type.
-
Page 107: Acl
4.11. An Access Control List (ACL) is a sequential list of permit or deny conditions that apply to IP addresses, MAC addresses, or other more specific criteria. This switch tests ingress packets against the conditions in an ACL one by one. A packet will be accepted as soon as it matches a permit rule, or dropped as soon as it matches a deny rule. -
Page 108: Mac Ace
4.11.2. MAC ACE The page shows ACE based on MAC address. You may choose ACL, permit, and deny particular packet or frame, even shutdown the port. To view the menu, navigate to ACL > MAC ACE. Figure 89 - ACL > MAC ACE Item Description ACL Name... -
Page 109: Ipv4 Acl
4.11.3. IPv4 ACL The page shows the Access Control List (ACL) based on Layer 2 to Layer 4 filtering, the IPv4. The ACL is composed by many Access Control Element (ACE) rules. You may create a new ACL here; then add multiple ACEs. To view the menu, navigate to ACL >... - Page 110 Item Description Click to add a new IPv4 ACE by entering the following data: • Sequence • Action • Source MAC • Protocol • Source IP • Destination IP • Type of Service • Source Port • Destination Port • TCP Flags •...
-
Page 111: Acl Binding
4.11.5. ACL Binding The page allows you to bind Access Control Lists created in previous section to an interface (physical port or aggregation). To view the menu, navigate to ACL > ACL Binding. Figure 92 - ACL > ACL Binding Item Description Enter the keywords to use in the search function. -
Page 112: Qos
4.12. QoS (Quality of Service) functions to provide different quality of service for various network applications and requirements and optimize the bandwidth resource distribution so as to provide a network service experience of a better quality. 4.12.1. General Property To view the menu, navigate to QoS > General > Property. Figure 93 - QoS >... - Page 113 Item Description Enter the keywords to use in the search function. Click to edit the QoS port settings by entering the following data: • CoS Edit • Trust • CoS • IP Precedence Queue Scheduling The device supports multiple queues for each interface. The higher numbered queue represents the higher priority.
- Page 114 CoS Mapping The page allows user to configure how ingress frames with CoS/802.1p tag map to QoS queues, and QoS queues to CoS/802.1p on egress frames. Actual effectiveness is based on how QoS is configured in previous QoS section. This page provides settings for the user to configure mapping only.
- Page 115 IP Precedence Mapping The page allows user to configure how ingress packets with IP Precedence tag map to QoS queues, and QoS queues to IP Precedence on egress packets. Actual effectiveness is based on how QoS is configured in previous QoS section. This page provides settings for user to configure mapping only.
-
Page 116: Rate Limit
4.12.2. Rate Limit Ingress / Egress Port The page allows a user to configure ingress/egress port rate limit. The ingress rate limit is the number of bits per second that can be received from the ingress interface. Excess bandwidth above this limit is discarded. The configuration result for each port will be displayed on the table listed on the lower side of this web page. -
Page 117: Diagnostics
4.13. Diagnostics 4.13.1. Logging Property To view the menu, navigate to Diagnostics > Logging > Property. Figure 98 - Diagnostics > Logging > Property Item Description State Click the radio button to enable the logging function. Console Logging State Click the radio button to enable the logging function. Click the drop-down menu to select the severity of message Minimum Severity which you want to filter out for review. - Page 118 Remote Server To view the menu, navigate to Diagnostics > Logging > Remote Server. Figure 99 - Diagnostics > Logging > Remote Server Item Description Enter the keywords to use in the search function. Click to add a new remote server by entering the following data: •...
-
Page 119: Mirroring
4.13.2. Mirroring To view the menu, navigate to Diagnostics > Mirroring. Figure 100 - Diagnostics > Mirroring Item Description Enter the keywords to use in the search function. Click to edit the mirroring settings by entering the following data: • State Edit •... -
Page 120: Ping
4.13.3. Ping After the ping test is complete, the results from the test are displayed as seen in the following figure under Ping Results. To view the menu, navigate to Diagnostics > Ping. Figure 101 - Diagnostics > Ping Item Description Click the radio buttons to select the IP address type for Address Type... -
Page 121: Traceroute
4.13.4. Traceroute To view the menu, navigate to Diagnostics > Traceroute. Figure 102 - Diagnostics > Traceroute Item Description Click the radio buttons to select the IP address type for Address Type sending ping to check if the network path is ok. Enter the hostname or IP address of the SNMP server based Server Address on the protocol selected above. -
Page 122: Copper Test
4.13.5. Copper Test To view the menu, navigate to Diagnostics > Copper Test. Figure 103 - Diagnostics > Copper Test Item Description Port Click the drop-down menu to select the port for copper test. Copper Test Click to perform the copper test action. 4.13.6. -
Page 123: Udld
4.13.7. UDLD Property To view the menu, navigate to Diagnostics > UDLD > Property. Figure 105 - Diagnostics > UDLD > Property Item Description Message Time Enter the variable to specify the message time. Apply Click to save the values and update the screen. Enter the keywords to use in the search function. -
Page 124: Management
Neighbor To view the menu, navigate to Diagnostics > UDLD > Neighbor. Figure 106 - Diagnostics > UDLD > Neighbor Item Description Enter the keywords to use in the search function. Refresh Click to refresh the display. 4.14. Management 4.14.1. User Account To view the menu, navigate to Management >... -
Page 125: Firmware
Item Description Click to edit the user account settings by entering the following data: • Password Edit • Confirm Password • Privilege Delete Click to delete the desired entries. 4.14.2. Firmware Upgrade / Backup The page allows a user to upgrade or backup the firmware image on the device to remote TFTP server or host file stem through HTTP protocol. - Page 126 Active Image To view the menu, navigate to Management > Firmware > Active Image. Figure 109 - Management > Firmware > Active Image Item Description Active Image Click the radio buttons to select as primary firmware. Apply Click to save the values and update the screen. Web-based Switch Configuration...
-
Page 127: Configuration
4.14.3. Configuration Upgrade / Backup To view the menu, navigate to Management > Configuration > Upgrade / Backup. Figure 110 - Management > Configuration > Upgrade / Backup Item Description Click the radio buttons to select upgrade firmware or backup Action configuration. - Page 128 Save Configuration Standard industrial switch devices save running configuration settings in RAM. The Save Configuration function provides setting option to save the running configuration from RAM to FLASH or even FLASH to RAM. To view the menu, navigate to Management > Configuration > Save Configuration. Figure 111 - Management >...
-
Page 129: Snmp
4.14.4. SNMP Simple Network Management Protocol (SNMP) is an “Internet-standard protocol for managing devices on IP networks”. Devices that typically support SNMP include routers, switches, servers, workstations, printers, modem racks and more. SNMP is used mostly in network management systems to monitor network-attached devices for conditions that warrant administrative attention. - Page 130 View This page allows the network administrator to create MIB views (Management information base) and then include or exclude OID (Object Identifier) in a view. To view the menu, navigate to Management > SNMP > View. Figure 112 - Management > SNMP > View Item Description Click the drop-down menu to select the number of entries to...
- Page 131 Item Description Click to add a new SNMP group by entering the following data: • Group • Version • Security Level • View Click to edit the SNMP group settings by entering the following data: • Version Edit • Security Level •...
- Page 132 Item Description Click to edit the SNMP community settings by entering the following data: • Type Edit • View • Access • Group Delete Click to delete the desired entries. User The page allows a user to configure SNMP user profile. To view the menu, navigate to Management >...
- Page 133 Engine ID The page allows a user to configure and display SNMP local engine ID. To view the menu, navigate to Management > SNMP > Engine ID. Figure 116 - Management > SNMP > Engine ID Item Description Local Engine ID Click the radio button to enable manually specified local engine ID.
- Page 134 Trap Event The page allows a user to add or delete an SNMP trap receiver IP address and community name. To view the menu, navigate to Management > SNMP > Trap Event. Figure 117 - Management > SNMP > Trap Event Item Description Click the radio button to reboot the device when...
- Page 135 Item Description Click to add a new SNMP user by entering the following data: • Address Type • Server Address • Version • Type • Community / User • Security Level • Server Port • Timeout • Retry Click to edit the SNMP user settings by entering the following data: •...
-
Page 136: Time Range
4.14.5. Time Range To view the menu, navigate to Management > Time Range. Figure 119 - Management > Time Range Item Description Enter the keywords to use in the search function. Click to add a new time range by entering the following data: •... -
Page 137: Federal Communication Commission Interference Statement
5. Federal Communication Commission Interference Statement This equipment has been tested and found to comply with the limits for a Class B digital device, pursuant to Part 15 of FCC Rules. These limits are designed to provide reasonable protection against harmful interference in a residential installation. This equipment generates, uses, and can radiate radio frequency energy and, if not installed and used in accordance with the instructions, may cause harmful interference to radio communications. - Page 138 R&TTE Compliance Statement This equipment complies with all the requirements of DIRECTIVE 1999/5/EC OF THE EUROPEAN PARLIAMENT AND THE COUNCIL of March 9, 1999 on radio equipment and telecommunication terminal equipment and the mutual recognition of their conformity (R&TTE). The R&TTE Directive repeals and replaces in the directive 98/13/EEC (Telecommunications Terminal Equipment and Satellite Earth Station Equipment) As of April 8, 2000.
Need help?
Do you have a question about the GS-7424 and is the answer not in the manual?
Questions and answers