Table of Contents
Advertisement
Quick Links
INSTALLATION, OPERATION AND MAINTENANCE MANUAL
Save manual for future reference
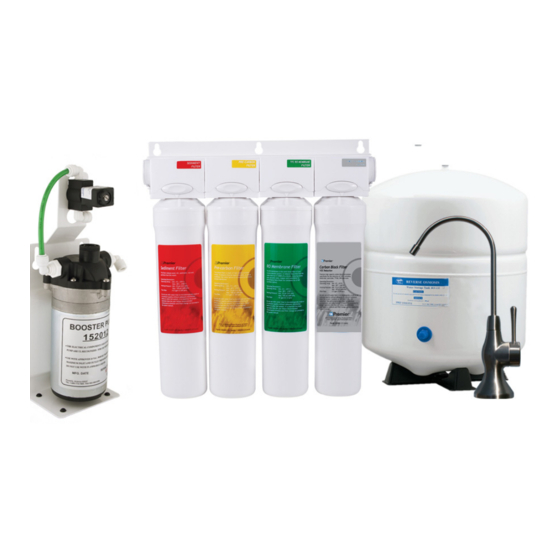
ZeroWaste
Model: Zero Pure Plus
IMPORTANT
If you are unsure about installing your WATTS water filter, contact
a WATTS representative or consult a professional plumber.
CAUTION
!
Discard small parts remaining after the installation.
NOTICE
Failure to install the system correctly voids the warranty.
Handle all components of the system with care. Do not drop,
drag or turn components upside down.
Be sure the floor under the water filter system is clean, level
and strong enough to support the unit.
Refer to enclosed warranty for operating parameters to ensure proper use with your water supply.
Watts Premier
www.premierh2o.com
P/N WP199520
®
Reverse Osmosis Unit
8716 W Ludlow Drive Suite #1
WARNING
!
Please read carefully before proceeding with
installation. Your failure to follow any attached
instructions or operating parameters may lead to the
product's failure.
Keep this Manual for future reference.
WARNING
!
Do not use with water that is microbiologically unsafe or of
unknown quality without adequate disinfection before or
after the system.
Peoria, AZ 85381
USA: Tel. (800) 752-5582
Canada: Tel. (905) 332-4090
Manual Edition: 09/20/2016
Advertisement
Table of Contents

Related Manuals for Premier ZeroWaste Zero Pure Plus


Summary of Contents for Premier ZeroWaste Zero Pure Plus
- Page 1 Be sure the floor under the water filter system is clean, level and strong enough to support the unit. Refer to enclosed warranty for operating parameters to ensure proper use with your water supply. Watts Premier 8716 W Ludlow Drive Suite #1 USA: Tel. (800) 752-5582 www.premierh2o.com...
-
Page 2: Table Of Contents
Table of Contents BEFORE INSTALLATION Overview ..........................................1 Using Quick-Connect Fittings ....................................2 System Maintenance ......................................2 Installation Notes ........................................2 Operational Parameters ......................................3 Contents of the Reverse Osmosis (RO) System ..............................3 Tools Recommended For Installation ..................................3 INSTALLATION System Diagram ........................................4 Drill a Hole for the Faucet in a Porcelain Sink ................................5 Top Mount Twist Faucet Installation ..................................6 Adapt-a-Valve Installation ......................................7 Green Tube Connection (Cold Supply) ..................................8... -
Page 3: Before Installation
Arsenic, Chromium, Cryptosporidium or Giardia. There may also be some local water issues such as high levels of Lead and Copper. This Premier water treatment system has been designed and tested to provide you with high quality drinking water for years to come. The following is a brief overview of the system. -
Page 4: Using Quick-Connect Fittings
1-800-752-5582. Installation Notes • Not recommended for use on homes equipped with tankless water heaters. Contact Watts Premier for specific details regarding this unit and tankless water heaters. -
Page 5: Operational Parameters
Contents of the Reverse Osmosis (RO) System Please make sure all of the items listed below are contained in the box. If any of the items are missing please contact Watts Premier at 800-752-5582 prior to installing. Tank - White ‰... -
Page 6: Installation
INSTALLATION INSTALLATION System Diagram TRANSFORMER BLUE - 1/4” TUBE TANK PRESSURE FAUCET SWITCH TANK FILTER LID ADAPT ADAPT VALVE VALVE GREEN- 1/4” TUBE FEED COLD WATER HOT WATER ANGLE-STOP ANGLE-STOP DOUBLE-CHECK VALVE (SUPPLY) (RETURN) RED- 1/4” TUBE BRINE - RETURN Parts List Item Part# Description... -
Page 7: Drill A Hole For The Faucet In A Porcelain Sink
INSTALLATION Drill a Hole for the Faucet in a Porcelain Sink For Marble Counter-tops, we recommend contacting a qualified contractor for drilling a hole in a NOTICE marble counter-top. Note: Most sinks are predrilled with 1½” or 1¼” diameter hole that you can use for your Drinking Water faucet. (If you are already using it for a sprayer or soap dispenser, see Step 1). -
Page 8: Top Mount Twist Faucet Installation
INSTALLATION Top Mount Twist Faucet Installation The faucet being used is an air-gap faucet, but is being used NOTICE for this non air-gap installation. The red and black color coded ports on the faucet will remain unused. ONLY the blue port will be used. -
Page 9: Adapt-A-Valve Installation
INSTALLATION Adapt-a-Valve Installation Do not use Teflon tape with the Adapt-A-Valve™. NOTICE Faucet Line Faucet Connection Faucet Line Faucet Connection Line from Angle Stop Valve Line from Angle Stop Valve Parts List for Adapt-A-Valve Angle Stop Item Description Valve Brass Adapter with black washer Angle Stop Plastic Adapt-A-Valve &... -
Page 10: Green Tube Connection (Cold Supply)
INSTALLATION Green Tube Connection (Cold Supply) Step 15: Location the 1/4” Green tube in the parts bag. Insert one end of the green tube into the plastic adapt-a- valve that is attached to the cold water supply. Connections at Pump Assembly Make sure all tubes are pushed in all the way to the NOTICE tube stop... -
Page 11: Tank Ball Valve Installation
INSTALLATION Tank Ball Valve Installation Step 22: Teflon tape must be applied in a clockwise direction. Wrap (7 to 12 turns) around the male pipe threads (MPT) on the stainless steel fitting on top of the tank. Step 23: Thread the quick connect ball valve (supplied in the parts bag) onto the stainless steel connector on the tank. -
Page 12: Operation
OPERATION OPERATION Startup Instructions WARNING To prevent the possibility of electrical shock, clean up any water on cabinet floor and dry all water from outside of RO unit. Congratulations! You have completed the installation of your new Reverse Osmosis system. Please Follow the Startup Instructions. -
Page 13: Maintenance
This reverse osmosis system contains a replaceable component (the RO membrane) which is critical to the effi- ciency of the system. Replacement of this reverse osmosis membrane should be with one of identical specifica- tions as defined by Premier to assure the same efficiency and contaminant reduction performance. Page 11... -
Page 14: Ro Membrane Replacement (2 - 5 Years)
Premier recommends replacing the membrane when TDS reduction falls below 75%. A water sample may be sent to Premier for a free diagnosis of your membranes performance. To send a water sample, use 2 clean containers and fill 1/2 cup of tap water in one container and 1/2 cup of RO water in 2nd container. Clearly label each sample. -
Page 15: Check Air Pressure In The Tank
MAINTENANCE Step 8: Drain the system completely and then follow the startup procedure - filling then draining two full tanks of water. Step 9: Replace the post-carbon filter once complete. Check Air Pressure in the Tank Check air pressure only when tank is empty of water! NOTICE Check air pressure in the storage tank when you notice a decrease in available water from the RO system. -
Page 16: Replacing The Faucet Battery
MAINTENANCE Replacing the Faucet Battery Step 1: Turn the handle on the storage tank ball valve to the “off” position and lower faucet handle to “on” position. ALIGNMENT NOTCH Step 2. Remove the faucet handle cover at the slot - (A). Note: Water will CR2032 BATTERY dribble out of the spout, use caution when handling the electronic (PN# 116080) -
Page 17: Technical & Warranty Information
TECHNICAL & WARRANTY INFORMATION TECHNICAL & WARRANTY INFORMATION Troubleshooting Before disconnecting any tubes, make sure to unplug the power then turn off the water valves NOTICE and depressurize the system Problem Possible Causes Solution 1. Low/Slow Production Low Water pressure Incoming water pressure to unit must be at least 40 psi. - Page 18 TECHNICAL & WARRANTY INFORMATION 5. Noise from pump Pump is vibrating against adja- Make sure the pump is attached to the cent object bracket and standing on the rubber feet at the bottom of the bracket. If pump is hanging on wall, add padding (such as foam) between bracket and wall to dampen vibration.
-
Page 19: Performance Data Sheet
99.0 7.43 50 psi 11 ± 1mg/L 0.5 NTU Depending on water chemistry, water temperature, and water pressure Premier’s R.O. Systems production and performance will vary. REFER TO OWNER’S INSTALLATION/SERVICE MANUAL FOR FURTHER MAINTENANCE REQUIREMENTS AND WARRANTY INFORMATION. Page 17... -
Page 20: Voc Performance Data Sheet
TECHNICAL & WARRANTY INFORMATION VOC Performance Data Sheet INFLUENT CHALLENGE MAXIMUM PERMISSIBLE IN SUBSTANCE PERCENT REDUCTION CONCENTRATION PRODUCT WATER (MG/L UNLESS NOTED) ALACHLOR >98% 0.05 0.001 ATRAZINE >97% 0.003 BENZENE >99% 0.081 0.001 BROMODICHLOROMETHANE (TTHM) >99.8% 0.300 +/- 0.30 0.015 BROMOFORM (TTHM) >99.8% 0.300 +/- 0.30... -
Page 21: Arsenic Fact Sheet
This Watts Premier reverse osmosis system is designed to remove up to 98% of pentavalent arsenic. It will not convert trivalent arsenic to pentavalent arsenic. Under laboratory standard testing conditions, this system reduced 0.30 mg/L (ppm) pentavalent arsenic to under 0.010 mg/L (ppm) (the USEPA standard for drinking water). -
Page 22: Service Record
Service Record Date of Purchase: _______________ Model Number: ZERO PURE PLUS Serial Number: _______________ Date of Install: _________________ Installed by: __________________ Date Changed: Sediment Pre-Filter Carbon Pre-Filter Membrane VOC Post-Filter (6 Months) (6 Months) (2-5 Years) (12 Months) ... - Page 23 THIS PAGE INTENTIONALLY LEFT BLANK...
-
Page 24: Limited Warranty
For warranty service, call 800-752-5582 for a return authorization number. Then, ship your unit to our factory, freight and insurance prepaid, with proof of date of original purchase. Please include a note stating the problem. Watts Premier will repair it, or replace it, and ship it back to you prepaid.
Need help?
Do you have a question about the ZeroWaste Zero Pure Plus and is the answer not in the manual?
Questions and answers