
Related Manuals for Zip ChillTap 804721


Summary of Contents for Zip ChillTap 804721
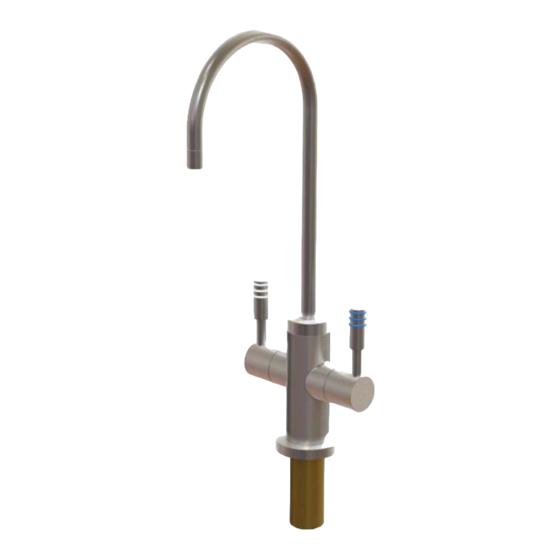
- Page 1 ® Zip ChillTap Sparkling Residential - Filtered chilled still and chilled sparkling water Affix Model Number Label Here 804721 804721 09.16 v1.0...
-
Page 2: Table Of Contents
Contents Pre-Installation Notes ......3 Read These Warnings First ....4 Product Specifications. -
Page 3: Pre-Installation Notes
Pre-Installation Notes A. Read the instructions. B. Note: All fittings are supplied with the appliance kit except an isolation valve. C. Check the water quality to determine if extra filtration will be required. D. Check the appliance rating plate and ensure correct power is available for the appliance. -
Page 4: Read These Warnings First
6. This appliance must be earthed. 7. If the power supply cord is damaged it must be replaced by a Zip Service Provider or a qualified electrician. 8. The power cord and general power outlet must be in a safe and accessible position after installation. -
Page 5: Section 1 - Tap Installation
Section 1 Tap Installation Special Tools In addition to common tools, the following will be required: • 25mm diameter sheet metal hole punch for sink tops. (Not supplied) O-RING • 25mm diameter hole saw for timber bench tops. (Not supplied) LOWER RUBBER WASHER... -
Page 6: Section 2 - Ventilation
Section 2 Ventilation • When installing air flow ducts, the following tools will be required: • Jigsaw and 12mm Drill • Keyhole or Wall Board saw. - Ventilation Proper air circulation must be provided for all Chilled models. The system will operate correctly only if the recommended air gaps are achieved during Installation. -
Page 7: Extra Ventilation
Ventilation - The following instructions are critical if there is insufficient cupboard air circulation. If the air flow, using the silicon door buffers, is insufficient, it will be necessary to fit a standard ChillTap vent kit, which ensures heat dissipation through natural convection via installed vents. For high use applications, where the cupboard space temperature is near 35°C, or higher, the inlet vent (See Item B below) and silicon buffers, need to be fitted. - Page 8 Ventilation Typical Cut out procedure for 1. Mark out and cut the air inlet and door outlet holes as shown 2. Ensure the air inlet vent and air outlet vent are positioned at opposite ends of the same cupboard space. 3.
-
Page 9: Section 3 - Co 2 Cylinder
Section 3 CO 2 Cylinder WARNING: This cylinder must be installed in an open plan area or in an enclosed room, with a volume no less than 20m 3 . If more than 1 gas cylinder containing CO 2 is present within the same location, the recommended ventilated area should be in proportion to the number of gas cylinders stored in that location. - Page 10 CO 2 Cylinder Test for gas leaks: Using soapy water perform a leak test. Turn the gas OFF. Apply the soapy water to the gas connections using a sponge or brush. Cover all of the gas joints with a liberal amount of suds. Turn ON the gas.
-
Page 11: Section 4 - Undersink Unit Installation
Section 4 Undersink Unit Installation If caps are removed to allow lifting handles to be installed during installation of the unit, ensure they are refi tted when unit is in position. On / Off Switch John Guest (JG) fittings General instructions for John Guest connections Ensure all John Guest NOTE:... -
Page 12: Chiller Installation
Undersink Unit Installation - Chiller Installation To avoid water leaks, Note: take care when bending rigid Place the chiller unit into the cupboard with the proposed outlet tap position as close plastic tubing. The tube must not as possible, to minimise the length of tubing exposed between the chiller unit and the be kinked or crushed around a outlet tap. -
Page 13: Chilled Sparkling
Undersink Unit Installation 4. Connect the white tube to the carbonation valve as shown in FIG.2. Push the white tube fully into the in carbonation valve. Make sure all connections are pushed in past the “O”ring to full depth. 5. Arranging tubes in the most direct route between tap outlet and unit. The tap connection is now complete. -
Page 14: Section 5 - Commissioning
Section 5 Commissioning Test and Commission: Do NOT turn power or water on to the unit. The carbonator must be purged first with the CO 2 gas. Failure to do so will result in poor tasting water. Turn the sparkling water lever on (white ringed lever) The CO 2 will start to run out of the tap. -
Page 15: Adjusting The Flow Rate
Commissioning Adjusting the fl ow rate Rotate to adjust The carbonation valve has an adjustable fl ow rate. The optimum setting for the valve water fl ow is 1.6 litres per minute. Using a 6mm Allen key or a large fl at blade screw driver, you can adjust the fl... -
Page 16: Section 6 - Maintenance
Not changing filtration cartridges when required, may cause the water to become biologically unsafe. If the Zip ChillTap is switched off for a long period of time (e.g. More than a weekend), run water through the chilled water outlet for at least 5 minutes before consumption. -
Page 17: Air Filter Change
Maintenance Air Filter Change: The Zip ChillTap air filter is conveniently located on the outside of the condenser. The filter screen is a sliding fit in the plastic housing on the left hand side of the under sink unit. The screen may be removed for cleaning, by sliding it forward. This needs to be inspected at least quarterly, cleaned and replaced if damaged. -
Page 18: Trouble Shooting
Mains water not User or Service Connect or turn on water supply. connected or turned on Technician Water pressure regulator Service Contact local Zip Service Provider. failed Technician Unit frozen up Service Contact local Zip Service Provider. Technician No sparkling water... -
Page 19: Cleaning
Allow unit sufficient time to recover. has be expended Cleaning Never use strong, corrosive or abrasive cleaning materials on the Zip ChillTap. Wipe clean the outer surfaces with a sponge or a soft cloth using a mild soap and water. -
Page 20: Contact Details
Free Call: 1 800 42 43 44 WMKA21821 As Zip policy is one of continuous product improvement, changes to specifi cations may be made ATS 5200.105 without prior notice. Images in this booklet have been modifi ed and may not be true representations of the fi...
Need help?
Do you have a question about the ChillTap 804721 and is the answer not in the manual?
Questions and answers