Table of Contents
Advertisement
Quick Links
eçêáòçå
∆
jìäíáJãÉÇá~=
aêó=fã~ÖÉê=
rëÉêÛë=j~åì~ä
®
Codonics
Catalog Number HORIZON MNLU
May 21, 2018
Version 3.0.2 USB Flash Drive
Version 2.1.3 ZIP Disk
Codonics, Inc.
17991 Englewood Drive
Middleburg Heights, OH 44130 USA
440.243.1198 Phone
440.243.1334 Fax
Email info@codonics.com
www.codonics.com
Advertisement
Table of Contents
Troubleshooting

Related Manuals for Codonics Horizon


Summary of Contents for Codonics Horizon
- Page 1 eçêáòçå ∆ jìäíáJãÉÇá~= aêó=fã~ÖÉê= rëÉêÛë=j~åì~ä ® Codonics Catalog Number HORIZON MNLU May 21, 2018 Version 3.0.2 USB Flash Drive Version 2.1.3 ZIP Disk Codonics, Inc. 17991 Englewood Drive Middleburg Heights, OH 44130 USA 440.243.1198 Phone 440.243.1334 Fax Email info@codonics.com...
- Page 2 Horizon Patents: www.codonics.co/ip/patents Horizon, DirectVista, ChromaVista, the Codonics logo, and “We bring the future into focus” are registered trademarks, and Codonics, Variable Multiformatting, VMF, Fixed Multiformatting, FMF, Medical Color Matching, MCM, SlideMaker, and Bracketing are trademarks of Codonics, Inc.
-
Page 3: Control Panel
Voltage Warning.................. xviii Dangers Electriques................xix Laser Warning..................xxi Dangers au Laser................. xxii Temperature Warning ................. xxiii Dangers Température ................. xxiii Compliance ..................xxiv Serial Number, Configuration, Date Code, and Modification Codes ..xxv ESD Caution ..................xxvi Horizon Imager User’s Manual... - Page 4 Location Precautions................xxxv Environnement de Fonctionnement ..........xxxvi Cleaning Precautions ................ xxxvii Précautions d’Entretien ..............xxxviii Media ....................xxxviii Codonics Paper/White Film Media............ xxxix File Transfer via FTP and LPR..............xl Color Management.................. xl Image Scaling ..................xli Hardware Variations................xli Disposal Requirements ................
-
Page 5: Table Of Contents
Moving Smart Card to a Swap Imager............2-25 Preparing the Imager for Shipment ............2-26 Chapter 3: Basic Imager Operations Horizon Imager Components..............3-1 Powering the Imager On and Off..............3-3 Powering On the Imager ..............3-3 Observing the Imager’s Operating Status in the Status Screen ... 3-4 Common Cassette Status Messages.......... -
Page 6: Table Of Contents
Alert and Fault Messages and the Fault Tone........3-12 Control Panel Display................. 3-13 Status Screen ................3-13 Main Menu ................... 3-14 Control Panel Keys ................3-16 Navigating the Control Panel Display..........3-18 Cancelling Your Changes in a Screen ......... 3-21 Exiting the Menus ................ -
Page 7: Table Of Contents
Hierarchy of Settings Used by the Horizon Imager ......5-8 Chapter 6: Printing via PostScript Introduction to PostScript ................6-2 Hierarchy of Parameter Settings Used by the Horizon Imager .... 6-3 Specifying the Media Type and Size ............ 6-3 Printing from Windows Applications ............6-4 Specifying Horizon PostScript Parameters .......... -
Page 8: Table Of Contents
Printing MCM Bracketing Sheets Using PostScript......9-11 Chapter 10: Preventive Maintenance Recommended Maintenance Schedule............ 10-1 Horizon Cleaning Kits................. 10-2 Cleaning Print Head and Nosepiece ............10-3 Cleaning the Platen and Donor Guide Bar ..........10-8 Cleaning the Pick Tires................10-13 Cleaning the Barcode Reader Window .......... -
Page 9: Table Of Contents
Contacting Technical Support ..............12-30 Anonymous FTP ................12-31 Chapter A: Menu Hierarchy Chapter B: Specifications Specifications (English) ................B-1 Specifications (French) ................B-4 Chapter C: System Job Settings Files Chapter D: Print Job Parameters Chapter : Index Horizon Imager User’s Manual... - Page 10 Contents...
- Page 11 2. To scroll through the menu options, press the keys. options The selector arrow ( ) moves up and down through the list. The bottom portion of the control panel display shows a message associated with the currently selected menu option. Horizon Imager User’s Manual...
- Page 12 For example: TIP: Specifying print settings in a multi-user environment If the Horizon imager is accessed by multiple users, it is typically better for individual users to enter print values through the DICOM application interface rather than change the default settings through the control panel.
-
Page 13: Changing Default Settings
1. From your workstation, open a UNIX or MS-DOS command window. To query imager status 2. Enter the command telnet hostname telnet IP Address using Telnet (using either the Horizon imager hostname or IP Address). 3. At the login prompt, enter the command status Horizon Imager User’s Manual xiii... - Page 14 Bold type is used for emphasis, command names, and paths or filenames. For example: • The Horizon imager default settings can be changed both at the control panel and using text files. • The hostname and IP Address must be added to the /etc/hosts file.
- Page 15 If you need more detailed or more technical information on a feature or topic, or wish to perform more advanced operations, refer to the Horizon Imager Technical Manual (Catalog no. HORIZON MNLT). The Technical Manual serves as a companion document to this manual Horizon Imager User’s Manual...
- Page 16 For technical assistance with the Horizon, call Codonics Technical Support at the following number: Phone: +1.440.243.1198 Toll Free: 800.444.1198 (USA only) Technical Support is available anytime. Technical Support is also available online via email and the Codonics web site: Email: support@codonics.com...
- Page 17 The following figure shows the locations of the imager’s safety and compliance labels. Shock warning label Compliance label ESD label Hot surface warning label Laser warning label 2 Laser warning label 1 Horizon Imager User’s Manual xvii...
- Page 18 WARNING Grounding reliability can be achieved only when the Horizon is connected to a receptacle marked “Hospital Only” (that is, “Hospital Grade”). WARNING The power cord connected to the Horizon is the main disconnect for the system. WARNING To disconnect overall power to the Horizon prior to servicing it, power off the system (refer to “Powering Off the Imager”...
- Page 19 IEC 60601-1-1. If in doubt, contact a qualified technician or Codonics Technical Support for approved configurations. WARNING Do not touch a patient while also accessing the internal components that are under the top cover or receive trays.
- Page 20 ATTENTION Une mise à la terre fiable est possible seulement pendant que le Horizon est connecté aux appareils marqué "Hospital Only" (de qualité hositalière). ATTENTION Le fil électrique connecté à le Horizon est le système de coupure principal de l’appareil. ATTENTION Pour débrancher le fil électrique avant le soutien, se déconnecter et puis éteint le système (renvoyer à...
- Page 21 The laser apertures are marked with a single label, shown below. There are three apertures that correspond to the three cassette locations, one for each, on the same side of the Horizon imager as this label. Safety interlocks are marked by the following label. They are located on the same side of the Horizon imager as this label.
- Page 22 Horizon que cette étiquette. Verrouillages de sécurité sont marqués par l’étiquette suivante. Ils sont situés sur le même côté de l’imageur Horizon que cette étiquette. Les emplacements des deux étiquettes laser sont présentés dans la figure sur page xvii.
- Page 23 Because the Horizon imager is a thermal print device, the surface of the thermal print head heat sink gets hot. Avoid directly touching any components not colored green when accessing the interior of the imager if the imager has been printing. (During some preventative maintenance tasks, you will be touching internal components with cleaning pads or swabs.)
- Page 24 `çãéäá~åÅÉ Codonics is in compliance with various regulations, of which details are listed in Appendix B. The Compliance label, which is affixed at the back of the imager, is shown below. Compliance label xxiv Preface...
- Page 25 20 numbers. When any of these numbers are blocked out, that identifies a modification that was made to the unit. • The date code in YYYY-MM format below the factory date code symbol. Serial number Configuration Modification number codes Horizon Imager User’s Manual...
- Page 26 Connections to other pieces of equipment are made at the rear of the Horizon imager. These connectors are marked with a precautionary ESD warning symbol, as shown below. Do not touch any of the pins of these connectors. When making connections to the imager, it is best done while the imager is plugged in but not powered on.
- Page 27 The Horizon imager generates and uses radio frequency energy, and if not installed and used properly, that is, in strict accordance with the manufacturer’s instructions, may cause interference to radio and television reception. It has been type tested and found to...
- Page 28 Class B limits of IEC60601-1-2 and CISPR 11. A declaration of conformity with the requirements of the Directive has been signed by the Director of Operations. Horizon is approved for export via FDA Certificates to Foreign Government and registered as a medical device for import.
- Page 29 WARNING Portable RF communications equipment (including peripherals such as antenna cables and external antennas) should be used no closer than 30 cm (12 inches) to any part of the Horizon, its cables, or accessories. Otherwise, degradation of the performance of this equipment could result.
- Page 30 Electromagnetic Immunity Standards and Test Levels: (Continued) Test / Standard Compliance Level Radiated RF Immunity 3 V/m IEC 61000-4-3 80 MHz - 2.7 GHz 80 % AM at 1 kHz Proximity fields from RF wireless Complies equipment IEC 61000-4-3 Electrical Fast Transient / Burst AC Port: ±...
- Page 31 • If the power cord needs to be replaced, replace it only with another Codonics power cord manufactured specifically for your imager’s power configuration. • If the imager is smoking or making unusual sounds, power off and unplug the imager immediately.
- Page 32 • With the imager top cover open or the receive trays removed, touch only those internal components that are colored green (shown in the following figure). Remove rings, ties, jewelry, and other items, and tie back hair, so that they do not fall into or get caught in the imager.
- Page 33 • Si le cordon d’alimentation doit être remplacé, il ne remplacer que par une autre cordon d’alimentation Codonics fabriqués spécialement pour la configuration de la puissance de votre imageur. •...
- Page 34 • Avec le couvercle ouvert ou les plateaux reçoivent retiré, ne touchez que les composants internes qui sont colorés en vert (montré dans la figure suivante). Enlever les bagues, cravates, bijoux et autres objets, et s’attacher les cheveux, afin qu’ils ne tombent pas dans ou à...
- Page 35 10 cm (4 in.) from walls to ensure proper ventilation. CAUTION Adequate ventilation is required for proper operation of the imager. CAUTION When positioning the Horizon Imager, ensure there is adequate space to access the rear power switch.
- Page 36 ATTENTION Une ventilation adéquate est nécessaire pour le bon fonctionnement de l’imageur. ATTENTION Lors du positionnement de l'imageur Horizon, laisser un espace adequate pour accéder à l'interrupteur d'alimentation à l'arrière. • Toujours placez l’appareil dans une zone propre et non-humide.
- Page 37 à des vibrations, car cela peut nuire l’impression des média. • Horizon satisfait aux limites de sécurité électrique de la norme IEC60601-1 et CISPR 11 et est adapté à l’emplacement des soins du patient. Vérifiez avec les ordonnances locales et les directives d’installation pour confirmer les exigences endroit approuvé.
- Page 38 mê¨Å~ìíáçåë=ÇÛbåíêÉíáÉå • Il y a beaucoup des choses plastiques utilisant avec la fabrication de l’imageur. L’emploi des chiffons chimiques, de benzène, des diluants, des insecticides, ou des autres solvants peuvent causer les dommages à l’extérieur ou les déformations. Le caoutchouc ou le PVC qui ont beaucoup de contact avec l’imageur causeront les dommages.
- Page 39 • Codonics film media is designed to be viewed using a light box suitable for viewing medical diagnostic images. • Codonics paper/white film media is designed to be viewed under cool-white, fluorescent light.
- Page 40 cáäÉ=qê~åëÑÉê=îá~=cqm=~åÇ=imo • Different users who share a user name when transferring files to the imager may cause unpredictable and erroneous printed output. The imager associates information with the user name. Each user should have a unique user name when connecting to the imager via FTP and LPR.
- Page 41 USB flash drives are referred to as installation media or backup media, depending on the operation being performed. NOTE: If the imager has both a ZIP drive and a USB port, always use the ZIP disk to install software and save configuration settings. Horizon Imager User’s Manual...
- Page 42 European Disposal Requirements Codonics imagers and electronic accessory devices are not to be discarded or recycled; rather they are to be returned to the manufacturer. Contact Codonics directly or by the link provided for the latest information concerning: •...
- Page 43 CAUTION Approved FDA Class 2 device - Federal law restricts this device to be sold for use by or on the order of a physician. The intended use of the Horizon Series Imagers is high-resolution hardcopy imaging of digital image source material and through the conversion of electronic signals from a wide variety of direct/indirect medical imaging modality outputs.
- Page 44 The Horizon XL is a special model adding 14 x 36-in. and 14 x 51-in. true size “long” media that permits digital direct orthopaedic application hardcopy, including diagnosis and analysis of scoliosis, weight bearing spine/hip/knee, and long bone/hip prosthetic and orthopedic appliances work-up and surgical planning.
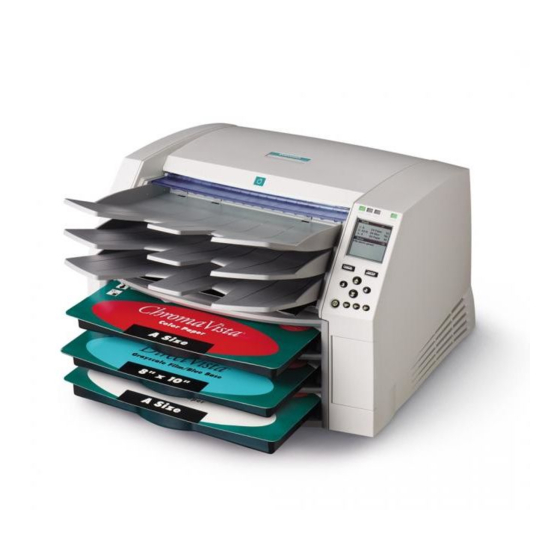
- Page 45 Congratulations on your purchase of the Horizon Multi-media Dry Imager—the most compact, versatile imager in the world! We are pleased you chose the Horizon imager from Codonics. We are confident that your new imager will provide fast, reliable printing for your demanding imaging applications. The Horizon imager is capable of printing images with outstanding clarity and detail.
- Page 46 Note that there are several models of the Horizon imager, each with different features. This manual describes all of the available features, so some may not apply to your model. fã~ÖÉê=cÉ~íìêÉë pí~íÉJçÑJíÜÉJ^êí=mêáåíáåÖ=qÉÅÜåçäçÖó Codonics DirectVista grayscale paper/white film and film, and...
-
Page 47: Printing Via Ftp
The Horizon imager supports output to paper/white film and film media in a wide variety of sizes. For a complete list, refer to “Ordering Media” on page 4-12. b~ëó=^ÅÅÉëë=Ñêçã=~=s~êáÉíó=çÑ=fã~ÖÉ= pçìêÅÉë The Horizon imager can print extraordinary images from a variety of image sources, including: •... -
Page 48: Imager Features
NOTE: The number of connections may vary, depending on the imager features that you purchased. pìééçêí=Ñçê=j~àçê=fã~ÖÉ=cáäÉ=cçêã~íë The Horizon imager supports printing images that are in the following image file formats: • DICOM (including DICOM images submitted via FTP or LPR) •... - Page 49 Intel processor. • The Horizon imager eliminates the pixelation often seen when enlarging images by using sophisticated scaling algorithms such as Lanczos, Bilinear, Bicubic, and Mitchell. These scaling techniques provide flexibility for applications from medical imaging to photo reproduction.
- Page 50 Smart Card, refer to the Horizon Imager Technical Manual. b~ëó=pçÑíï~êÉ=réÇ~íÉë=~åÇ=`çåÑáÖìê~íáçå= _~Åâìéë The Horizon imager includes a Zip drive or ports for a USB flash drive to support software updates and backing up imager configuration information. This provides the following benefits: •...
- Page 51 To prepare for the Horizon imager installation, review the following guidelines and requirements: • If this is a new installation, you will need to identify a table, stand, or countertop on which to place the imager. CAUTION Make sure that the table can support the weight of the imager [approximately 66.7 kg (147 lbs) with receive trays and three full supply cassettes...
- Page 52 The device is shipped in two cartons. The larger Horizon imager shipping carton contains: • Horizon •...
- Page 53 5. Open the Smart Card access door at the lower right front of the imager and make sure that the Smart Card is fully seated in its slot. Smart Card in slot—Horizon Smart Card in slot—Horizon with Zip drive with no Zip drive...
- Page 54 6. Retrieve the power cord from the imager box, and plug its right-angle connector into the power connection at the rear of the imager. Setting Up the Imager...
- Page 55 9. Remove any packing material that is inside the imager. NOTE: If using a UPS, make sure that it is plugged into a suitable receptacle and powered on. If necessary, refer to its accompanying documentation. Horizon Imager User’s Manual...
- Page 56 10. Using a platen roller wipe (refer to “Horizon Cleaning Kits” on page 10-2), gently clean the imager basement of any dust or debris. CAUTION Do not scratch or nick the sheet metal. Scratches and nicks in the basement will damage the printed side of ChromaVista sheets.
- Page 57 13. Place the receive trays into the imager, as shown in the following figure. Receive trays 14. Close the top cover. You are now ready to connect the Ethernet cable to the imager. Refer to the next topic. Horizon Imager User’s Manual...
-
Page 58: Powering The Imager On And Off
`çååÉÅíáåÖ=íÜÉ=bíÜÉêåÉí=`~ÄäÉ The Horizon imager supports the following network cables and hubs: • Category 5, RJ-45 [also referred to as unshielded twisted pair (UTP)] network patch cables and crossover cables • 10/100/1000 Base-T Ethernet hubs CAUTION Make sure that the imager is powered off before connecting the Ethernet cable. - Page 59 Optionally, you could still connect the imager and the single workstation using two standard Ethernet patch cables and a hub. This would allow for future expansion of the network. You are now ready to power on the imager. Refer to the next topic. Horizon Imager User’s Manual...
- Page 60 mçïÉêáåÖ=lå=íÜÉ=fã~ÖÉêÔcáêëí=qáãÉ 1. Press the power rocker switch located at the back of the imager to the (on) position. To power on the imager Power rocker switch 2-10 Setting Up the Imager...
-
Page 61: Powering On The Imager
`äÉ~åáåÖ=íÜÉ=mä~íÉå After powering on the imager for the first time, you should clean the platen. For instructions on how to clean the platen, refer to “Cleaning the Platen and Donor Guide Bar” on page 10-8. Horizon Imager User’s Manual 2-11... - Page 62 This topic explains how to add the imager to a simple network. For adding the imager to a complex network, refer to the Horizon Imager Technical Manual. NOTE: If your network is managed by a network administrator or an information technology (IT) department, it would be considered a complex network.
- Page 63 In addition to specifying the imager’s IP address, the imager’s subnet mask and gateway IP address may have to be specified. For more information about configuring the Horizon imager in a complex network, refer to the Horizon Imager Technical Manual.
- Page 64 Internet convention. So, you might assign the IP addresses as follows: • 192.168.1.200 to the Horizon imager • 192.168.1.201 to an image viewing workstation on the network • 192.168.1.202 to a second workstation •...
- Page 65 The Network Settings menu displays. Note that the current settings are displayed in square brackets. Network Settings Network Settings Speed [Auto Sense]... Addresses... Reset Network Settings Set network addresses of this Imager. Press MENU to exit menus Horizon Imager User’s Manual 2-15...
- Page 66 Press MENU to exit menus NOTE: The Horizon imager can have more than one IP address assigned to it. For a simple network, it is assumed that you are assigning only one IP address. If so, you enter it as the Base IP Address value.
- Page 67 Reset Network Settings option in the Network Settings menu. péÉÅáÑóáåÖ=fm=^ÇÇêÉëëÉë=Ñçê=líÜÉê=aÉîáÅÉë= çå=íÜÉ=kÉíïçêâ Just as you did for the Horizon imager, you must specify the IP addresses for each of the other devices on the network. How you do this varies, depending on the device and its operating system.
- Page 68 After the Horizon imager is set up and powered on, you should print the Imager Status test print to verify imager operation and save a record of the imager’s information. There are several other test patterns to choose from to allow you to check the quality of printed images.
- Page 69 IP address information is properly configured. • If you cannot print to the Horizon imager from any device, check that the imager is properly connected to the network and that its IP address information is properly configured.
- Page 70 `Ü~åÖáåÖ=íÜÉ=pÉêîáÅÉ=m~ëëïçêÇ The Horizon imager is shipped with a service login account that provides web browser and Telnet access to service utilities on the imager. The service default password should be changed as soon as possible to prevent compromising security access to the imager.
- Page 71 _~Åâìé=jÉÇá~ 1. If your Horizon has a Zip drive: Open the Smart Card panel door at the lower right front of To save the imager. configuration settings Insert a 100-MB Zip disk into the Zip drive, with the label side to the right, until it “clicks”...
- Page 72 If your Horizon does not have a Zip drive, insert a USB flash drive into one of the USB ports on the rear panel of the imager. connectors 2. At the imager’s control panel, press and hold the key, and...
- Page 73 Only reuse a backup media if you are certain that you would not want to restore the configuration settings already stored on it. Keep all backup media in a safe place. Horizon Imager User’s Manual 2-23...
- Page 74 _~Åâìé=jÉÇá~ 1. If your Horizon has a Zip drive, open the SmartCard access door at the lower right front of the imager and insert the 100-MB To restore backup Zip disk into the imager Zip drive. configuration settings If your Horizon does not have a Zip drive, insert the backup USB flash drive into one of the USB ports on the rear panel.
- Page 75 To move the insert it into the swap imager. Smart Card to a swap imager Smart Card in slot — Horizon Smart Card in slot — Horizon with Zip drive with no Zip drive 3. Power on the swap imager.
- Page 76 If you have to ship the imager for any reason (for example, to return the imager to Codonics for service), you must use the original imager box and packing materials. If you do not have the original box and packing materials, contact your Codonics representative for instructions on how to return the imager.
- Page 77 6. Make sure that the thermal print head has parked. The thermal print head should be secure with no wobble. Make sure thermal print head is secure and does not wobble Thermal print head Horizon Imager User’s Manual 2-27...
- Page 78 CAUTION If the thermal print head is not parked, power on the imager, then repeat steps 2 and 3 to properly power off the imager so that it does park. 7. Look down into the imager just in front of the thermal print head and make sure that the ribbon carriage is fully down to the bottom of the imager.
- Page 79 Top cover Control panel Receive tray 1 Receive tray 2 Receive tray 3 Supply slot 1 Supply slot 2 Smart Card Supply panel door slot 3 Names and Locations of the Imager’s Main Components—Front Horizon Imager User’s Manual...
- Page 80 Connectors Power rocker switch Names and Locations of the Imager’s Main Components—Rear USB ports Network connector Speed indicator: On—100 Mbps Off—10 Mbps Activity indicator: On—Link Flashing—Activity Off—No link Console (service only) (for connection to UPS serial control cable) Rear Connectors Basic Imager Operations...
- Page 81 2 to 3 minutes. When the Status screen displays, the imager is ready to receive images. NOTE: There are ways to get more detailed information about the imager’s operating status. For more information, refer to the Horizon Imager Technical Manual. Horizon Imager User’s Manual...
- Page 82 lÄëÉêîáåÖ=íÜÉ=fã~ÖÉêÛë=léÉê~íáåÖ=pí~íìë= áå=íÜÉ=pí~íìë=pÅêÉÉå The Status screen allows you to observe the imager status. The top portion of the Status screen—the Supply window—displays the status of the three supply cassettes and whether a color ribbon is installed. The bottom portion of the screen—the Status window— displays printing status messages and the imager’s operational state.
- Page 83 Also could mean that the imager software is out of date (out-of-date software might not support a new media type, even if the new media type’s feature key is enabled). Horizon Imager User’s Manual...
-
Page 84: Color Ribbon Status
`çäçê=oáÄÄçå=pí~íìë The following table lists the color ribbon status indications. Table 3-2. Color Ribbon Status Indications Indication Explanation Blank; the imager does not support ChromaVista color media. Ribbon loaded. Ribbon type indicated (for example, CMY for cyan/magenta/yellow). Ribbon loaded but the ribbon is spent. Ribbon not loaded (and the imager does support ChromaVista color media). - Page 85 NOTE: Always use the key at the control panel to power on/off the imager. The power rocker switch at the back of the imager should always be in the (on) position, unless the imager is being serviced or moved. Horizon Imager User’s Manual...
- Page 86 TIP: Bypassing the Power menu To start the shutdown process without having to display the Power menu, press and hold the key for a few seconds, until you see shutdown messages appear in the control panel display. CAUTION If the imager is powered off using the key, unprinted queued jobs are saved and will finish printing once the imager is powered on again (you can purge all jobs).
- Page 87 Reboot 3. With the option selected, press the key. Reboot ENTER Shutdown messages are displayed. When the shutdown operation is complete, the imager reboots. The reboot process takes approximately four to five minutes. Horizon Imager User’s Manual...
- Page 88 råÇÉêëí~åÇáåÖ=íÜÉ=`çåíêçä=m~åÉä The following illustration shows the control panel display, keys, and indicators. Indicators Refer to p. 3-11 Display Refer to p. 3-13 Keys Refer to p. 3-16 Power key Refer to pp. 3-3, 3-7, and 3-9 3-10 Basic Imager Operations...
-
Page 89: Control Panel Indicators
• Off: The imager is powered off. • Flashing: The imager is actively receiving, processing, or printing jobs; or powering on, off, or rebooting. If jobs are stopped, the A CTIVE indicator will not flash. Horizon Imager User’s Manual 3-11... - Page 90 TIP: Controlling the Fault tone volume or turning it off You can control the volume of the Fault tone, or turn it off. For more information, refer to the Horizon Imager Technical Manual. For more information about alert and fault messages and how to respond to them, refer to Chapter 12.
-
Page 91: Control Panel Display
Operational state (OK, ALERT, or FAULT) Status window: status messages displayed here To get additional information about the currently selected status message, press the HELP key. For more information, refer to “Using Online Help” on page 3-23. Horizon Imager User’s Manual 3-13... -
Page 92: Main Menu
j~áå=jÉåì When the MENU key is pressed, the Main Menu displays. You use the Main Menu to perform the most basic and frequently used imager operations. Menu Selector arrow; Default Media... Open Top Cover... use the keys to Load/Remove Ribbon... scroll the selector arrow Utilities... - Page 93 Menu screens screen, the AULT indicator will light and you will hear the Fault tone. However, to see the Fault message, you must press the MENU key to exit the menus and display the Status screen. Horizon Imager User’s Manual 3-15...
-
Page 94: Control Panel Keys
`çåíêçä=m~åÉä=hÉóë The following table describes the control panel keys. Note that the control panel keys have backlighting: • A key is backlit when it is enabled and functional within the current state of the imager. • A key is not backlit when it is disabled, given the imager’s current state. - Page 95 Fault state. When the imager is paused but normal operation can be PAUSE resumed, the key flashes. Displays context-sensitive help, based on state of the HELP imager and the control panel display. Horizon Imager User’s Manual 3-17...
- Page 96 k~îáÖ~íáåÖ=íÜÉ=`çåíêçä=m~åÉä=aáëéä~ó From the control panel, you press the appropriate keys to access menus, make menu selections, and enter data into the imager. To demonstrate how to navigate the control panel display, let’s assume you want to change the imager’s IP address. Here is what you would do.
- Page 97 Set network addresses of this Current values are displayed in square Imager. brackets Press MENU to exit menus 5. Press the keys to select the menu option you want. In this example, you would select Addresses Horizon Imager User’s Manual 3-19...
- Page 98 6. Press the key. ENTER The next menu allows you to enter the IP address. Network Addresses Base IP Address: [0].0.0.0 Gateway: 0.0.0.0 Bold change brackets Subnet Mask: indicate that you can edit the bracketed value 255.255.255.0 Number of IP Addresses: 1 Set base IP address Old value: 0.0.0.0 UP/DOWN to alter octet, LEFT/RIGHT...
-
Page 99: Cancelling Your Changes In A Screen
• Current settings are displayed in square brackets. Bold square brackets indicate that you are in edit mode and can change the setting. Horizon Imager User’s Manual 3-21... -
Page 100: The Pause State
qÜÉ=m~ìëÉ=pí~íÉ You must pause the imager: • If you want to replace a supply cassette. If you pull the cassette out while the imager is picking the sheet, it could cause a jam. Or, if the sheet is already printing and you pull the cassette, it could cause an artifact to be printed on the sheet. - Page 101 Fault state. For information about how to adjust the time-out period (typically, one minute), refer to the Horizon Imager Technical Manual. rëáåÖ=låäáåÉ=eÉäé...
- Page 102 3-24 Basic Imager Operations...
- Page 103 Supply Slots and Cassettes Media used with the Horizon imager is prepackaged in factory-sealed, disposable cassettes. Barcode (on side) Cassette cover: do not remove Horizon Imager User’s Manual...
- Page 104 CAUTION Use only Codonics media. Do not use plain paper, office transparencies, or other unapproved media as damage, improper operation, or malfunction may result. For information about the approved Codonics media types and sizes, and how to order cassettes, refer to “Ordering Media” on page 4-12.
- Page 105 The imager is printing oÉÅÉáîÉ=qê~óë The Horizon imager has three receive trays. By default, sheets are printed to the receive tray that corresponds with the supply slot used. For example, if a sheet was fed from a cassette in supply slot 1, then the printed sheet is output to receive tray 1.
- Page 106 fåëÉêíáåÖ=çê=`Ü~åÖáåÖ=`~ëëÉííÉë 1. Press the PAUSE key, and wait until the imager enters the Paused state. To change a supply NLINE indicator turns off and the Status screen indicates cassette that the imager is paused. If a sheet is currently being printed, the sheet will complete printing before the imager enters the Paused state.
- Page 107 5. Slide the cassette into the supply slot until you feel the cassette settle into the retaining detent. NOTE: Not all cassettes are the same length, so larger cassettes will extend out further than shorter ones. 6. Press the key to resume printing. PAUSE Horizon Imager User’s Manual...
-
Page 108: Changing The Default Media Type And Size
aÉíÉêãáåáåÖ=tÜáÅÜ=`~ëëÉííÉ=íç=rëÉ When a print job is sent, the media type and size are specified in the print job. • If the specified media type and size are supported by the imager and the required supply cassette is not loaded, the imager will display a message on the Status screen prompting you to insert the appropriate cassette or ribbon. - Page 109 The leader will break away from the sheet. To remove the break-off leader NOTE: Always bend the leader to remove it—do not tear it off—to avoid having stray pieces left on the sheet. Horizon Imager User’s Manual...
- Page 110 `Ü~åÖáåÖ=íÜÉ=oáÄÄçå=E`Üêçã~sáëí~F When the ribbon on the ribbon spools has been consumed and needs to be changed: • The imager enters the Alert state. • The word “OUT” flashes in the Status screen title bar next to the ribbon symbol ( ) instead of displaying the ribbon type.
- Page 111 4. Remove the old ribbon, as shown in the following figure. Spring-loaded spindles 5. Load the new ribbon, as shown in the following figure. Spring-loaded spindles Black takeup spool towards rear Horizon Imager User’s Manual...
- Page 112 6. To take up any ribbon slack, rotate the top of the take-up spool’s wheel (that is, the front wheel) towards the back of the imager, as shown in the following figure. Supply spool wheel (Do not use this wheel) Take-up spool wheel Rotate take-up...
-
Page 113: Resume Printing
The only time you need to remove the ribbon is if you are cleaning internal components or the ribbon has been consumed. Otherwise, you can leave the ribbon in the imager, even when printing to DirectVista grayscale media. Horizon Imager User’s Manual 4-11... - Page 114 The Horizon imager supports a variety of paper/white film and film for both grayscale and color prints. Not all Horizon imager configurations support all media types and sizes. If your Horizon imager does not support the media type and/or size you want to use, contact your Codonics representative.
- Page 115 ChromaVista color media is available in packages that contain 2 media cassettes and 1 color ribbon. ChromaVista cassettes contain 50 sheets of paper/white film. To order media, contact Codonics at: Phone: +1.440.243.1198 Toll Free: 800.444.1198 (USA only) Fax: +1.440.243.1334...
- Page 117 ^ééäáÅ~íáçåë The printing procedures covered in this chapter assume that the DICOM support option is installed in your Horizon imager and that you are sending print jobs from a DICOM application. DICOM applications typically run on an imaging device or on an image viewing workstation.
- Page 118 A device or application is said to be DICOM-compliant when the manufacturer declares that its device will follow the rules defined in the DICOM standard for its device type. The Horizon imager is DICOM Print Service Class-compliant. It is anticipated that most...
- Page 119 • The device that will service the print request and print the image on a sheet—for example, the Horizon imager. In DICOM terms, this device is referred to as a Print Service Class Provider. To identify the DICOM Print Service Class User application, the application is assigned a unique name—the Calling AE (application...
- Page 120 Horizon imager. To properly configure a DICOM application to support printing to the Horizon imager, you need to know the Called AE Titles that can be used to identify the imager, and its TCP port number.
- Page 121 How you select a Horizon imager as a destination, then send a print job to it, is unique to your specific DICOM user application. For details, refer to your key operator, DICOM user application vendor, or the accompanying DICOM application documentation.
-
Page 122: Specifying The Media Type And Size
DICOM user application (for example, the media type and size, or the contrast setting for an image). However, it is possible that there is a job setting supported by the Horizon imager that cannot be specified in your DICOM application. Using the Horizon imager’s Job Settings feature, you can work around this... - Page 123 You may see several destination imager devices in your DICOM application, all of which actually print to the same Horizon imager. They just represent different Job Settings files, each assigned its own Called AE Title, so that you can use various job settings that are supported by the imager but that you cannot specify from within the application’s standard interface.
-
Page 124: Dicom Conformance Statement
For DICOM print jobs, the Horizon Imager uses the following sequence to determine the values for sheet and image settings to use when printing a sheet: 1. Looks in the specified Job Settings file. 2. For any sheet or image settings not specified in the Job Settings file, looks in the DICOM print session information (for settings defined within the DICOM user application). - Page 125 • The PostScript support option is installed in your Horizon imager. • The Horizon imager has been configured as a Windows or Macintosh desktop printer on your workstation using the Horizon PostScript print driver. • You are sending print jobs from a Windows (Windows 98, Me, NT 4.0, 2000, or XP) or Macintosh (OS 8, 9, or X) application.
- Page 126 4. The raster image data is sent to the device’s print engine, which in turn prints the pixels on the page media. There have been three PostScript technologies released since its inception—levels 1, 2, and, the most recent version, 3. The Horizon imager supports all three levels. Printing via PostScript...
- Page 127 For more information about the imager’s default settings, refer to Chapter 8. NOTE: You can access any of the Horizon imager’s sheet and image parameters from a Windows or Macintosh application when sending a print job. Therefore, using Job Settings files with PostScript is not necessary and so is not supported.
-
Page 128: Changing Horizon Postscript Parameters—Windows 98 And Me
Once the Horizon imager is set up as a Windows printer on your workstation (which is described in several Horizon PostScript Technical Briefs, one for each type of Windows system), you can send images to it for printing from any Windows application. - Page 129 There are other, non-Horizon-related parameters included in the set of available PostScript print parameters. Because unpredictable results may occur, it is recommended that you change the defaults for only those Horizon imager parameters listed in Table 6-1 on page 6-6. •...
- Page 130 Table 6-1. Horizon Imager Windows PostScript Parameters Parameters Settings Description Page (Paper) Size HZ-8x10_DVpaper Specifies the Horizon media type and size to use. HZ-A_DVpaper Use one of the Horizon page sizes. Avoid using HZ-A4_DVpaper non-Horizon paper sizes and special types, such as HZ-11x14_DVpaper Letter, as these may give unpredictable results.
- Page 131 Table 6-1. Horizon Imager Windows PostScript Parameters (cont.) Parameters Settings Description Crop Margin True, False Eliminates white margin around region of interest. Advanced feature. Refer to the Horizon Imager Technical Manual for more information. Margin Size 0 to 50 (pixels), in...
- Page 132 Table 6-1. Horizon Imager Windows PostScript Parameters (cont.) Parameters Settings Description Sheet Coverage Standard, NP, or Corresponds to the imager’s Coverage sheet parameter. Fullbleed Determines whether there will be a border between images and edges of the sheet, or images will bleed off the sheet edges.
- Page 133 `Ü~åÖáåÖ=eçêáòçå=mçëípÅêáéí=m~ê~ãÉíÉêëÔtáåÇçïë VU= ~åÇ jÉ NOTE: This procedure assumes that the PostScript driver for the Horizon imager has already been installed on the workstation. For more information, refer to the “Windows 98 Driver Installation—Horizon” or “Windows Me Driver Installation—Horizon” Technical Brief.
- Page 134 More Options The More Options dialog box displays. 6. Select the output bin, or use the printer default, then click 7. To specify any of the other Horizon PostScript settings, go to the Device Options tab. 6-10 Printing via PostScript...
- Page 135 The settings you have saved will be in effect for the current session of the application from which you are printing. If you open a new session of the application or print from a different application, the parameters revert to their default settings. Horizon Imager User’s Manual 6-11...
- Page 136 `Ü~åÖáåÖ=eçêáòçå=mçëípÅêáéí=m~ê~ãÉíÉêëÔtáåÇçïë kq NOTE: This procedure assumes that the PostScript driver for the Horizon imager has already been installed on the workstation. For more information, refer to the “Windows NT Driver Installation—Horizon” Technical Brief. 1. Initiate the print job from the Windows application.
- Page 137 5. To specify any of the other Horizon PostScript settings, go to the Advanced Settings tab. Note that you can also select the Horizon media from the Paper option on the Advanced Settings tab. Size Horizon Imager User’s Manual 6-13...
- Page 138 6. Scroll down to the list. Printer Features 7. To change a parameter’s setting, select the parameter from the list. Printer Features The available settings are listed in the list. Change Setting 8. Select the desired setting from the list. Change Setting 9.
- Page 139 `Ü~åÖáåÖ=eçêáòçå=mçëípÅêáéí=m~ê~ãÉíÉêëÔtáåÇçïë OMMM= ~åÇ=um NOTE: This procedure assumes that the PostScript driver for the Horizon imager has already been installed on the workstation. For more information, refer to the “Windows 2000 Driver Installation—Horizon” or “Windows XP Driver Installation—Horizon” Technical Brief. 1. Initiate the print job from the Windows application.
- Page 140 Once the Horizon imager is set up as a printer on your Macintosh (which is described in the two Macintosh Driver Installation— Horizon Technical Briefs, one for OS 8 and 9 and one for OS X), you can send images to it for printing from any Macintosh application.
- Page 141 Examples of the Page Setup dialog box are shown below. Select from the Horizon media size and type combinations in the Paper (OS X) or (OS 8 and 9) pop-up menu. Size Paper Page Setup Dialog Box—OS X Page Setup Dialog Box—OS 8 and 9 Horizon Imager User’s Manual...
- Page 142 When printing from a Macintosh application, the Horizon-specific PostScript print parameters are available from: • For OS X, the panel in the Print dialog box. Printer Features Note that you may have to click an button on the Advanced Print dialog box to access the panel.
- Page 143 Table 6-2 on page 6-21 describes each of the parameters. For additional information about Horizon print parameters, refer to Appendix D and to the Horizon Imager Technical Manual. Horizon Imager User’s Manual 6-19...
- Page 144 Table 6-2 on page 6-21. • Some of the “Selectable Values” shown in Table 6-2 may depend on available Horizon imager options and thus may not appear on some systems. • Settings made at print time via the Print dialog boxes will take precedence over settings made at the imager.
- Page 145 Settings Description Paper Size Settings (Page Setup dialog box) Paper Size HZ-8x10_DVpaper Specifies the Horizon media type and size to use. HZ-A_DVpaper Use one of the Horizon page sizes. Avoid using HZ-A4_DVpaper non-Horizon paper sizes and special types, such as HZ-11x14_DVpaper Letter, as these may give unpredictable results.
- Page 146 Table 6-2. Horizon Imager Macintosh PostScript Parameters (cont.) Parameters Settings Description Margin Size 0 to 50 (pixels), in Works with Crop Margin to create small border around increments of 5 region of interest. Advanced feature. Refer to the Horizon Imager Technical Manual for more information.
- Page 147 Table 6-2. Horizon Imager Macintosh PostScript Parameters (cont.) Parameters Settings Description Priority Low, Medium, High Priority of job sent to imager. Higher priority jobs are printed first. Image Settings (Print dialog box) Gamma 0.1 to 6.0, in increments Affects image brightness.
- Page 148 The presets are accessible from any OS X application. So, for example, you can use the Preset function to save a preset for each combination of Horizon PostScript print settings that you commonly use. To save the current settings as a preset, select...
- Page 149 FTP (File Transfer Protocol) is a protocol that enables you to login to the Horizon imager from your workstation and send image files to be printed. You can also send text files containing custom commands and parameters used to set up your sheets and process the images.
- Page 150 IP address of the Horizon imager to which you want to send the print job. NOTE: If you have configured a host alias for the Horizon imager on your workstation or you are using Domain Name Service (DNS), you can enter the imager’s host name instead of the IP address.
- Page 151 (one image stacked on another); logical device 23 corresponds to a 2 x 3-image sheet (6-up format—2 columns by 3 rows). For more information about FMF, refer to the Horizon Imager Technical Manual. • To specify a Job Settings file, append a period (.) and the Job Settings file name after the logical device number.
- Page 152 There are some other common operations that you may want to perform during an FTP session. For complete information about how to send print jobs using FTP, refer to the Horizon Imager Technical Manual. péÉÅáÑóáåÖ=íÜÉ=jÉÇá~=qóéÉ=~åÇ=páòÉ=rëáåÖ= To set the media type and size to use for a given print job using FTP, you have two options: •...
- Page 153 Instructions for setting up LPR to work with the Horizon imager are provided in the Horizon Imager Technical Manual. To print jobs to the Horizon imager using LPR, use the lpr command as follows: lpr -Pname [-#c] [-s] imagefile1 [imagefile2] ...
- Page 154 There are some other common operations that you may want to perform using the LPR. For complete information about how to send print jobs using LPR, refer to the Horizon Imager Technical Manual. péÉÅáÑóáåÖ=íÜÉ=jÉÇá~=qóéÉ=~åÇ=páòÉ=rëáåÖ= To set the media type and size to use for a given print job using LPR, you have two options: •...
- Page 155 (for example, media size and type, scaling, gamma, contrast, and so on). The Horizon imager has a complete set of default settings that contain values for every media type/size, sheet, and image parameter of a print job. The default settings are stored in the imager and can be viewed and changed through the control panel.
- Page 156 DICOM application or a PostScript printer’s settings, or use a Job Settings file that contains the values you need. For information about Job Settings files, refer to the Horizon Imager Technical Manual. Default Print Job Settings...
- Page 157 `Ü~åÖáåÖ=íÜÉ=aÉÑ~ìäí=jÉÇá~=qóéÉ=~åÇ=páòÉ Media refers to the various types and sizes of Horizon film and paper/white film. One default media is specified for grayscale images, and one for color images. When the imager receives a grayscale image, it prints the image to the default grayscale media type and size, unless otherwise specified.
- Page 158 3. Select the media type you want to use as the default. The various sheet sizes for that media type are displayed. The current default value is enclosed in square change brackets. For example, selecting DV Film Blue displays the list of sheet sizes shown below.
- Page 159 Film View [Front] Adjust overall brightness and darkness of print. Press MENU to exit menus NOTE: For information about the parameters and their possible settings, refer to Appendix D or to the Horizon Imager Technical Manual. Horizon Imager User’s Manual...
- Page 160 3. Scroll through the parameters for this media type, and change the default settings, as needed. For example, to change the Gamma default setting, select the menu entry and then, in the setting menu, use Gamma Gamma keys to enter a new value inside the change brackets.
- Page 161 DICOM application or a PostScript printer’s settings, or use a Job Settings file that contains the values you need. For information about Job Settings files, refer to the Horizon Imager Technical Manual. oÉëÉííáåÖ=íÜÉ=aÉÑ~ìäí=jÉÇá~=pÉäÉÅíáçåë You can reset the Default Media selections for grayscale or color images back to the factory-default selections.
- Page 162 oÉëÉííáåÖ=íÜÉ=aÉÑ~ìäí=rëÉê=pÉííáåÖë You can reset the Default User Settings for all media types back to the factory-default settings. 1. At the imager’s control panel, press and hold the key, and while holding it press the MENU key. To reset the Default User The Main Menu with administrative options displays.
- Page 163 ^ÇàìëíáåÖ=fã~ÖÉ= ^ééÉ~ê~åÅÉ You can use the Horizon Bracketing™ function to assist you in determining the gamma, contrast, saturation, and MCM (Medical Color Matching) settings that will result in the desired appearance for printed images. This chapter explains how to print gamma/contrast/saturation (GCS;...
- Page 164 For best results when viewing printed images, follow these guidelines: • Codonics film media is designed to be viewed using a light box suitable for viewing medical diagnostic images. • Codonics paper/white film media is designed to be viewed under cool-white, fluorescent light.
- Page 165 For ChromaVista color prints, you can then use the gamma/saturation bracketing sheet to determine the gamma and saturation settings that result in the best color appearance for your application. NOTE: For optimal image quality, use the typical range of settings described in Appendix D. Horizon Imager User’s Manual...
-
Page 166: Gcs Bracketing Sheets
Gamma/Contrast Bracketing Sheet mêáåíáåÖ=d`p=_ê~ÅâÉíáåÖ=pÜÉÉíë=rëáåÖ= af`lj To print GCS bracketing sheets from DICOM: • Use the special Horizon bracketing format, identified by the Called AE Title SpecialBracket. • Configure the Image Display Format to CUSTOM\9 from within your DICOM user application. -
Page 167: Changing Default User Settings For A Media Type
If you do not specify the media type and size for the bracketing sheet from within the DICOM user application, then the Horizon imager determines whether the image is grayscale or color. The imager then uses the Default Media defined for that type of image, and the Default User Settings defined for that media type and size. - Page 168 (2) changing the Default Media and Default User Settings as the imager control panel (refer to Chapter 8); (3) using Job Settings files (refer to the Horizon Imager Technical Manual). Making these changes does not affect jobs already in the print queue.
- Page 169 (1) from the DICOM user application or PostScript printer settings; (2) changing the Default Media and Default User Settings as the imager control panel (refer to Chapter 8); (3) using Job Settings files (refer to the Horizon Imager Technical Manual). Making these changes does not affect jobs already in the print queue.
- Page 170 4. Set gamma and saturation to the settings used to create the acceptable image. 5. Send a print job that includes various images that are typical for your application. Check the appearance of these images and make any necessary fine adjustments to gamma and saturation until the images are acceptable.
-
Page 171: Mcm Bracketing Sheets
Codonics MCM is an advanced image processing feature that adjusts printed output colors to more accurately match monitors. This process corrects differences in hue, saturation, and intensity between the imager and a computer monitor. The MCM parameter determines for which monitor type MCM should be optimized. - Page 172 MCM Bracketing Sheet 9-10 Adjusting Image Appearance...
- Page 173 If you do not specify the media type and size for the bracketing sheet from within the DICOM user application, then the Horizon imager determines whether the image is grayscale or color. The imager then uses the Default Media defined for that type of image, and the Default User Settings defined for that media type and size.
-
Page 175: Recommended Maintenance Schedule
Clean the pick tires • Every 1500 sheets, or more often in dirty page 10-13 conditions. • If the imager has trouble picking sheets from a cassette. Clean the barcode reader Every 12 months. page 10-15 window Horizon Imager User’s Manual 10-1... -
Page 176: Horizon Cleaning Kits
The following cleaning kits are available to help you properly maintain the Horizon imager: • The Horizon Platen and Print Head Cleaning Kit (catalog no. SP-00118) includes the special thermal print head and platen roller wipes that you will need to clean the thermal print head, platen, donor guide, and pick tires. - Page 177 (refer to the figure on page xxxii). Remove rings, ties, jewelry, and other items, and tie back hair, so that they do not fall into or get caught in the imager. Horizon Imager User’s Manual 10-3...
- Page 178 If color ribbon is loaded, go to step 4. Otherwise, go to step 7. 4. Remove the ribbon, as shown in the following figure. Spring-loaded spindles NOTE: Care should be taken with the ribbon to protect it from dust and dirt when it is not loaded in the imager.
- Page 179 Repeat the back and forth motion until the print bead is completely clean. Note that the cleaning pad may become discolored. WARNING When cleaning the print head, avoid the extreme ends of the print head, which are sharp. Horizon Imager User’s Manual 10-5...
- Page 180 CAUTION Use only the print head cleaning wipe when cleaning the thermal print head. Also, do not touch the glass surface of the thermal print head with your fingers; it could damage the print head. To avoid touching the glass surface, you may want to wear gloves when cleaning the thermal print head.
- Page 181 12. Reload the ribbon, as shown in the following figure. Spring-loaded spindles Black takeup spool towards rear 13. Close the top cover. After a few seconds, the Status screen displays and printing resumes if jobs are queued. Horizon Imager User’s Manual 10-7...
- Page 182 `äÉ~åáåÖ=íÜÉ=mä~íÉå=~åÇ=açåçê=dìáÇÉ= 1. Press the MENU key. The Main Menu displays. To clean the platen and 2. Select the menu option. Open Top Cover donor guide After selecting this option: • The imager pauses, first completing the sheet if one is currently printing.
- Page 183 The Move Ribbon Carriage menu displays. Menu Open Top Cover Move Ribbon Carriage Moves carriage up... Moves carriage down... Move Ribbon Carriage Caution: Watch fingers, hair and loose clothing when moving. Press MENU to exit menus Horizon Imager User’s Manual 10-9...
- Page 184 6. Press the key to move the ribbon carriage down and out of the way. 7. Looking in from the side of the imager, locate the orange or white platen roller and donor guide bar, shown in the following figure. Donor Platen guide bar...
-
Page 185: Cleaning Print Head And Nosepiece
7 through 10 in the procedure in “Cleaning Print Head and Nosepiece” on page 10-3. 13. To reload the color ribbon, go to the Move Ribbon Carriage menu and press the key to move the ribbon carriage up so you can reload the ribbon. Horizon Imager User’s Manual 10-11... - Page 186 14. Reload the ribbon, as shown in the following figure. Spring-loaded spindles Black takeup spool towards rear 15. Close the top cover. After a few seconds, the Status screen displays and printing resumes if jobs are queued. 10-12 Preventive Maintenance...
- Page 187 (refer to the figure on page xxxii). Remove rings, ties, jewelry, and other items, and tie back hair, so that they do not fall into or get caught in the imager. Horizon Imager User’s Manual 10-13...
- Page 188 3. Place the receive trays on a flat surface, as shown in the following figure. Correct Incorrect 4. Remove any cassettes from the supply slots. 5. Locate the pick tires. There are three pickers, one for each supply slot. The topmost picker is shown in the following figure.
- Page 189 3. Press the MENU key. The Main Menu displays. 4. Select the following options: Utilities Clean Barcode Reader Instructions for cleaning the barcode reader are displayed. Horizon Imager User’s Manual 10-15...
- Page 190 5. Follow the instructions at the control panel. • At some point in the instructions, you will be prompted to remove the receive trays. Receive trays WARNING With the receive trays removed, touch only those internal components that are colored green (refer to the figure on page xxxii). Remove rings, ties, jewelry, and other items, and tie back hair, so that they do not fall into or get caught in the imager.
- Page 191 • When you remove the receive trays, place them on a flat surface, as shown in the following figure. Correct Incorrect • Refer to the following figure to help you locate the barcode. Barcode reader Horizon Imager User’s Manual 10-17...
- Page 192 `äÉ~åáåÖ=íÜÉ=oÉÅÉáîÉ=qê~óë Remove the receive trays. Using a platen roller wipe (refer to “Horizon Cleaning Kits” on page 10-2), clean the receive trays of any dust or debris. Use compressed air to blow inside the sheet metal at the inside bottom of the receive trays—referred to as the hide track—to remove any dust, then wipe the trays.
- Page 193 ChromaVista sheet, the imager backs up the unfinished sheet into the basement for all but the final color pass. Using a platen roller wipe (refer to “Horizon Cleaning Kits” on page 10-2), gently clean the basement of any dust or debris.
- Page 195 Only the film calibration procedure is covered in this manual. For more information about the other calibrations, and some of the other automatic compensations made by the imager, refer to the Horizon Imager Technical Manual. Horizon Imager User’s Manual 11-1...
- Page 196 cáäã=`~äáÄê~íáçå=EaáêÉÅísáëí~=cáäã=låäóF Film calibration is the process of characterizing a given combination of imager and DirectVista grayscale film to allow the imager to compensate for imager-to-imager variation and supply cassette-to-cassette variation. When a DirectVista grayscale film cassette is loaded into the imager for the first time, the imager will print a test sheet and read that test sheet with the built-in densitometer, then recalibrate based on the results.
-
Page 197: Troubleshooting Tables
You can display help text for any of the messages displayed in the Status window. Simply move the selector arrow to the message for which you want further explanation, then press the HELP key. Horizon Imager User’s Manual 12-1... - Page 198 mêáåíáåÖ=~å=fã~ÖÉê=pí~íìë=qÉëí=mêáåí You can print an Imager Status test print to verify general imager operation and to document the current configuration. For more information, refer to “Printing the Imager Status Test Print” on page 2-18. qêçìÄäÉëÜççíáåÖ=q~ÄäÉë Table 12-1. Startup and Print Job Troubleshooting Problem Possible Causes Solutions...
- Page 199 “Powering On the Imager—First Time” on page 2-10). Then, press the key at the control panel. If this still does not clear the condition, contact technical support (refer to “Contacting Technical Support” on page 12-30). Horizon Imager User’s Manual 12-3...
- Page 200 Check that the Horizon imager’s network settings are correct. Check that the Horizon imager’s IP address is set correctly at the host sending the print job. Print job sent to another imager. Check that the imaging device is configured properly.
- Page 201 Horizon imager Called AE Title that through the control panel. Horizon imager Called AE Title are does not specify any Job Settings overriding the imager’s User Default...
-
Page 202: Cleaning The Platen And Donor Guide Bar
Table 12-2. Sheet Jam Troubleshooting Problem Possible Causes Solutions Sheet jams or misfeeds. Cassette is not seated properly. Slide the cassette out, then back into the slot to make sure it is seated properly. The imager is being operated in an area Check the media for curling or other of high or low humidity that is outside of distortion. - Page 203 (refer to “General Cleaning Procedures” on page 10-18). Dark or light soft-edged Contamination on thermal print head. Clean the thermal print head (refer to vertical streak on all “Cleaning Print Head and Nosepiece” sheets. on page 10-3). Horizon Imager User’s Manual 12-7...
- Page 204 Table 12-3. Image Quality Troubleshooting (cont.) Problem Possible Causes Solutions Clear, hard-edged vertical Blown element on the thermal print Need new thermal print head or cable. white streak on all sheets. head or bad cable. Contact technical support (refer to “Contacting Technical Support”...
-
Page 205: Cleaning The Barcode Reader Window
Additional sheets were inserted into the For quality control reasons, you cannot the media is supply cassette beyond what was add sheets to a supply cassette. contaminated or that the originally packaged. sheet count has been exceeded. Horizon Imager User’s Manual 12-9... - Page 206 “Changing the Ribbon (ChromaVista)” loaded, when a ribbon is on page 4-8]. loaded. The ribbon currently loaded is not a You must use Codonics ribbon. Codonics ribbon. Failed ribbon sensor. Contact technical support (refer to “Contacting Technical Support” on page 12-30).
-
Page 207: General Cleaning Procedures
“Invalid smart card.” Incorrect Smart Card is inserted from Reinsert the imager’s original Smart another model imager. Card. Smart Card is damaged. Contact technical support for a replacement (refer to “Contacting Technical Support” on page 12-30). Horizon Imager User’s Manual 12-11... -
Page 208: Status Message Tables
Table 12-5. Miscellaneous Troubleshooting (cont.) Problem Possible Causes Solutions Experiencing connection Running DICOM Lite on imager, and Contact technical support about errors at console or need more connections than is upgrading to full DICOM (refer to workstation from which provided by DICOM Lite. “Contacting Technical Support”... - Page 209 Ribbon loaded. Ribbon type indicated (for example, CMY for cyan/magenta/yellow). Ribbon loaded but the ribbon is spent. Ribbon not loaded (and the imager does support ChromaVista color media). State of ribbon being determined. WAIT Ribbon loaded but in an error condition. Horizon Imager User’s Manual 12-13...
- Page 210 `äÉ~êáåÖ=~=pÜÉÉí=g~ã A sheet may occasionally get jammed in the imager. If this happens: • The imager goes offline. • A fault message displays. • The area at which the jam occurred is indicated in the Status window. (There may be intermediate messages, such as “Media jam occurred, please wait...,”...
- Page 211 Diverter Platen Hide track Cassettes Print head Media guides Cassette doors Basement Pickers Pick tires Cross-Section of Imager, Showing Internal Media Path Clearing a jam from these likely locations is described in the following topics. Horizon Imager User’s Manual 12-15...
- Page 212 `äÉ~êáåÖ=~=g~ã=Ñêçã=~=`~ëëÉííÉ NOTE: When a jam occurs, the imager disengages all motors to allow you to safely pull out the sheet. 1. Gently pull out the supply cassette indicated in the message on the Status screen. To clear a jam indicated by 2.
- Page 213 4. Remove the receive trays, as shown in the following figure. Receive trays 5. Place the receive trays on a flat surface, as shown in the following figure. Correct Incorrect 6. Remove all cassettes from the supply slots. Horizon Imager User’s Manual 12-17...
- Page 214 7. Look down in the imager to locate either the trailing or leading edge of the sheet: • If you see the trailing edge in the lower part of the imager, lift the pickers (refer to the figure on page 12-15) and gently remove the sheet, or push the corresponding cassette flap down and feed the sheet back out the supply slot opening.
- Page 215 (refer to the figure on page xxxii). Remove rings, ties, jewelry, and other items, and tie back hair, so that they do not fall into or get caught in the imager. 2. Remove the receive trays, as shown in the following figure. Receive trays Horizon Imager User’s Manual 12-19...
- Page 216 3. Place the receive trays on a flat surface, as shown in the following figure. Correct Incorrect 4. Remove all cassettes from the supply slots. 5. Check to see if the sheet is sticking out from one of the cassettes or supply slots.
- Page 217 CAUTION Never put a sheet back in the cassette. Dust or oil from your finger will affect the image quality. 8. If the top cover is open, close it. After a few seconds, the Status screen displays and printing resumes if jobs are queued. Horizon Imager User’s Manual 12-21...
- Page 218 oÉáåëí~ääáåÖ=jÉÇá~=dìáÇÉë When clearing sheet jams, the media guides could accidently come out of their slots. Media guides 1. Slide the media guide into the imager through the cassette slots, as shown in the following figure. To reinstall the media guides 12-22 Troubleshooting...
- Page 219 DO NOT DAMAGE SENSOR CAUTION Be careful not to scratch the polished sheet metal or damage the sensor near the upper guide notch. 3. Rotate the top leg into place, as shown below. Horizon Imager User’s Manual 12-23...
- Page 220 CAUTION Make sure you do not over-rotate the media guide, as shown below. 4. Repeat the procedure for the second media guide. 12-24 Troubleshooting...
- Page 221 ENTER All print jobs are purged, and the Utilities menu is displayed again. CAUTION Use care when running the Purge Print Jobs function. This function will purge other users’ print jobs as well as yours. Horizon Imager User’s Manual 12-25...
- Page 222 When a cassette is inserted into a supply slot, the Horizon imager reads the barcode to determine which media is loaded. If the imager cannot read the barcode, a barcode error message is displayed for that supply cassette entry in the Status screen.
- Page 223 Then use the key to move the change brackets to the next character position (or use key to move to the previous position). 7. When you are finished entering the entire barcode value, press key. ENTER Horizon Imager User’s Manual 12-27...
- Page 224 The barcode information you entered is saved and you should now be able to use the cassette. sáÉïáåÖ=içÖÖÉÇ=bêêçê=jÉëë~ÖÉë You can view the most recent 100 messages entered into the error log. 1. Press the MENU key. The Main Menu displays. To view the error log 2.
- Page 225 Imager Info... Network Info: Ethernet: Auto-detect speed MAC Address: 00:00:B0:00:00:0B IP Address: 192.168.1.2 Subnet Mask: 255.255.0.0 Gateway: 0.0.0.0 Processor Temperature: 31°C Motherboard Temperature: 28°C (Note: temperature readings updated every 15 seconds) Press MENU to exit menus Horizon Imager User’s Manual 12-29...
-
Page 226: Viewing Imager Information Online
`çåí~ÅíáåÖ=qÉÅÜåáÅ~ä=pìééçêí For questions regarding your Horizon Imager, please first refer to this manual, which describes the features and operations. This chapter includes troubleshooting tips for common problems. If you cannot find the answer to your question in this manual, please visit the Codonics web site at . -
Page 227: Anonymous Ftp
^åçåóãçìë=cqm When trying to solve a support question, your technical support representative may ask you to upload files to the Codonics anonymous FTP site at ftp.codonics.com Valid logins for anonymous FTP are: anonymous For the password, enter your full email address. - Page 228 Also, to save storage space, reduce upload time, and simplify file handling, images and readme files should be archived and compressed into one file: • From Windows, use the PKZIP (*.zip) archive and compression format. • From UNIX and Linux, use the tar command to archive the files into one file, then the compress command or an application such as gzip to compress the archive file.
- Page 229 Go to page A-6 through Utilities... page A-9 Test Prints... Go to page A-10 USB Drive Print From Feature Management... Go to page A-11 Network Settings... Preferences... Go to page A-12 Go to page A-2 Press (power) key Horizon Imager User’s Manual...
- Page 230 Power Press (power) key Imager shuts down Power Off Reboot Imager reboots Menu Menu Default User Settings Default User Settings DV Film Blue... Media Type DV Film Clear... List of each sheet and image parameter supported DV Paper... by the media type. CV Paper...
- Page 231 Moves carriage up. Moves carriage down. Menu Open Top Cover Rotate Platen Moves platen forward. Moves platen back. Menu Menu Load/Remove Ribbon Load/Remove Ribbon Move Ribbon Carriage Move Ribbon Carriage... Moves carriage up. Moves carriage down. Horizon Imager User’s Manual...
- Page 232 Menu Custom Job Settings New... Menu View/Edit... Custom Job Settings Delete... Copy... Name Delete all ‘[M]YSETTINGS1 _ _ _ _’ Submenus of other Custom Job Settings menu options are shown on the next page. Menu Custom Job Settings Menu Media DV Film Blue...
- Page 233 New submenu options are shown names. on the previous page. Menu Custom Job Settings Copy Copy is added to Job Settings [MYSETTINGS1] list with name Copyx MYSETTINGS2 MYSETTINGS3 Lists other Job Settings names. Prompt to confirm delete Horizon Imager User’s Manual...
- Page 234 Menu Utilities Film Calibration Calibrates film [Cassette 1] in selected cassette Cassette 2 Cassette 3 Imager Info Information displayed includes: • Serial no. • License code • Software version • IP addresses • Ethernet address • Imager internal temperatures • Hardware information Menu Utilities Film Calibration...
- Page 235 Calibration Prints [Cassette 1] Cassette 2 Cassette 3 Prints calibration prints from selected cassette Menu Utilities Print Length Calibrate Calibration Prints... Calibration Data... Reset Calibration Calibration Data Field for entering calibration number Prompt to confirm reset Horizon Imager User’s Manual...
- Page 236 Menu Utilities Film Calibration... Imager Info... Error Log... Menu Purge Print Jobs Clean Barcode Reader Utilities Enter Supply Barcode... Densitometer Calibrate Print Head Calibrate... Calibrate Print Length Calibrate... Calibration Print Densitometer Calibrate... [Cassette 1] Save/Load Config... Cassette 2 Save Log Files Cassette 3 System Log Level...
- Page 237 Sets log level [Normal] Verbose Submenus of other Utilities menu options are shown on the previous pages. Menu Utilities Set Date/Time Menu Date [14] May 2003 Utilities Set Date/Time Date... Time... Menu Utilities Set Date/Time Time [01]:02 PM Horizon Imager User’s Manual...
- Page 238 Menu Test Prints Menu DV Film Blue... Test Prints DV Film Clear... Media Type DV Paper... [8x10] CV Paper... Prompts for number 11x14 of copies 14x17 Menu Test Prints Media Type Media Size Imager Status... Multi-Modality... SMPTE Multi-Format... Step Wedge... Mixed Patterns...
- Page 239 100-Base T [Auto Sense] Network Settings Network Settings Network Settings Speed [Auto Sense]... Base IP Address: Addresses... [0].0.0.0 Reset Network Settings Gateway: 0.0.0.0 Subnet Mask: 255.255.255.0 Number of IP Addresses: 1 Prompt to confirm reset Horizon Imager User’s Manual A-11...
- Page 240 Menu Preferences Auto Film Calibrate [On] Menu Preferences Entry Timeout [10] Menu Preferences Resume Timeout [60] Menu Menu Preferences Speaker Volume Preferences Auto Film Calibrate... Entry Timeout... Menu [High] Resume Timeout... Speaker Volume... Preferences Key Beep... Key Beep Fault Tone... Key Backlight...
- Page 241 Media Types: DirectVista film (blue and clear) DirectVista grayscale paper/white film ChromaVista color paper/white film (optional) ≥ 3.1 OD with DirectVista film Dmax: ≥ 20 years for DirectVista film when stored under ANSI Archival: extended-term storage conditions Horizon Imager User’s Manual...
- Page 242 Supply Cassettes: All media is pre-packaged in factory-sealed, disposable cassettes Interfaces: 10/100 Base-T Ethernet (RJ-45) 10/100/1000 Base-T Ethernet (on some hardware variations) Serial diagnostic port UPS monitor port Network Protocols: Standard: FTP, LPR Optional: DICOM, Windows networking printing Image Formats: Standard: TIFF, GIF, PCX, BMP, PGM, PPM, XWD, JPEG, PNG, SGI (RGB), Sun Raster (RAS), Targa (TGA) Optional:...
- Page 243 -22.2 to 50.6°C (-8 to 123°F) Humidity: 5% to 85% noncondensing Intentional Horizon transmits radio frequency energy at 13.56 MHz using Transmitters: ASK modulation. Maximum Effective Radiated Power: 200mW Medical Compliance FDA cleared to market per 510(k) K021054 and K060440,...
- Page 244 Tailles: 8 x 10-in. 11 x 14-in. 14 x 17-in. A paper/film blanc A4 paper/film blanc Horizon XL seulement: 14 x 36-in. 14 x 51-in. Types de Media : (bleu et clair) DirectVista film en niveaux de gris DirectVista papier...
- Page 245 Entrée universelle: 100-120/200-240 V ~ 47/63 Hz, 600 W impression, 150 W en attente Poids: 35.8 kg (79 lbs). Dimensions: 36.8 cm H, 52.1 cm W, 61 cm L (14.5 in. H, 20.5 in. W, 24 in. L) Horizon Imager User’s Manual...
- Page 246 Température: -22.2 to 50.6°C (-8 to 123°F) Humidité: 5% to 85% sans condensation Émetteurs Horizon transmet l'énergie radiofréquence à 13,56 MHz Intentionnels: en utilisant la modulation ASK. Puissance rayonnée effective maximale: 200mW Conformité Médical Le respect intégral des dispositifs médicaux de classe 2, y et Réglementation:...
- Page 247 The table on the following pages lists the system Job Settings files that come with the Horizon imager. Note that there is a system Job Settings file for each supported media type and size combination. As such, they contain only the Media Type and Media Size parameters.
- Page 248 System Job Settings File Corresponding Use Print_SCP Used for DICOM. Does not contain any print parameter settings. If the media type or size is not included in the DICOM attributes sent to the imager, the imager detects the image type and selects the media type and size as follows: •...
- Page 249 Sets print job priority to low receive-1 Forces sheet output to receive tray 1 receive-2 Forces sheet output to receive tray 2 receive-3 Forces sheet output to receive tray 3 syngofilm Special OEM-specific job settings Horizon Imager User’s Manual...
- Page 251 NOTE: Border Fill, Coverage, LUT, and Rotate are considered advanced parameters and should be changed only by a key operator. For a complete explanation of the print job parameters, refer to the Horizon Imager Technical Manual. Horizon Imager User’s Manual...
- Page 252 Table D-1. Job Parameters Parameter Description Possible Values Default Size of the selected media to DirectVista Film (Blue Default Media Size use. or Clear): Media set at • 8x10 the control • 11 x 14 panel. • 14 x 17 Sizes •...
- Page 253 Full bleed edges. (setting valid only for ChromaVista color paper/white film only; outside edges of images will bleed off sheet edges) (imager emulates 300 dpi resolution; for NP-series imager legacy support) Horizon Imager User’s Manual...
- Page 254 Table D-2. Sheet Parameters (cont.) Parameter Description Possible Values Default Maximum image density value. 100 (lightest) to Dmax 310 (darkest) This setting has the greatest NOTE: Values from effect on the gray-levels closer to black. Higher settings 311 up to 400 can be increase the density of the dark set;...
- Page 255 (visually linear output) images on a sheet. Look-up Linear tables are customized data (measurably linear curves that affect an image’s output, via a appearance. densitometer) Custom1 through Custom9 (assigned to custom LUTs created by OEM vendors) Horizon Imager User’s Manual...
- Page 256 Table D-3. Image Parameters Parameter Description Possible Values Default Function that smooths out None None Antialias jaggy edges of image objects. (no antialiasing is performed) Can eliminate artifacts and improve appearance, Better especially when printing text or (a compromise graphic objects with hard between antialiasing edges.
- Page 257 DICOM printing only. Inverts the pixel values of an Positive Positive Polarity image between Positive (no adjustment) and Negative Negative (reverses the polarity). Negative polarity can be useful in certain applications such as nuclear medicine. Horizon Imager User’s Manual...
- Page 258 Table D-3. Image Parameters (cont.) Parameter Description Possible Values Default Specifies whether image Auto Auto Rotate should be rotated 90° (rotate image to make counterclockwise on the sheet. as large as possible) Only valid if printing a scaled Never single-image sheet (logical Always device 2).
- Page 259 (4X or less)] Mitchell (uses a cubic Mitchell function; very smooth output while maintaining dynamic range and sharpness; for any scaling application, especially when scaling factors are 2X or greater) Horizon Imager User’s Manual...
- Page 260 Table D-3. Image Parameters (cont.) Parameter Description Possible Values Default Scaling (cont.) Bicubic Lanczos (uses a cubic B-spline function; smoothest output, but tends to smooth over fine details; use when smoothest output is required) Lanczos (uses a sinc function; most theoretically correct filter;...
- Page 261 Macintosh PostScript, U6-21 setting in Windows PostScript, U6-6 arrow keys, U3-16 /etc/printcap arrow selector in menus, U3-14 adding Horizon imager, T11-3 aspect parameter creating LPR printers, T11-3 35mm SlideMaker Setup command, T9-35 creating spooling directories, T11-6 FMF Setup command, T9-15...
-
Page 262: Overview
U10-2 cleaning, U10-15 to U10-18 Called AE Titles cleaning schedule, U10-1 configuring imager, T4-1 base IP address for Horizon imager, T2-9, T2-10, DefaultColor, T4-2 U2-15 DefaultGrayscale, T4-2 basement, U2-6 Job Settings file names, T4-2 cleaning, U10-19 Job Settings files‚... - Page 263 T3-4 anonymous FTP site, U12-31 enable/disable key beep, T3-3 email address, U-xvi illustration, U3-10 fax number, TA-2 imager operating status, U12-1 phone numbers, TA-2, U-xvi, U4-13, U10-2 indicators, U3-11 product information, U-xvi keys, U3-16 to U3-17 Horizon Imager User’s Manual...
- Page 264 U3-21 DICOM navigating, U3-18 to U3-21 Attributes log file sample, T18-11 conventions used in this manual, U-xi to U-xiv attributes mapped to Horizon settings, T4-7 to copies parameter T4-8 35mm SlideMaker Setup command, T9-35 configuring for printing, T4-1 to T4-9 FMF Setup command, T9-13 configuring imager’s Called AE Title, T4-1...
- Page 265 Macintosh PostScript, U6-21 file transfer viewing in Windows PostScript, U6-6 precautions, U-xxxvii DSC comments Fill command using to define Horizon print parameters, T5-19 VMF, T9-19 to T5-26 VMF, examples, T9-25 DSC, see Document Structuring Conventions VMF, parameters, T9-24...
- Page 266 FMF Setup command, T9-13 changing sheet format, T10-5 gateway, T2-1, T2-3, U2-11 example sending User Settings file, T7-7 IP address for Horizon imager, T2-10, U2-12 file transfer precautions, U-xxxvii GDI, see Graphics Device Interface FMF session example, T10-8...
-
Page 267: Preparing For Installation
PostScript driver file in Macintosh, serial number label, U-xxv T5-7 setting preferences, T3-1 to T3-4 installing PPD file in Macintosh, T5-7 settings mapped to DICOM attributes, T4-7 to installing PPD file in Windows, T5-1 T4-8 Horizon Imager User’s Manual... - Page 268 Horizon imager (cont.) image parameters (cont.) sheet layout components, T6-6 selection process, T6-28 to T6-32 sheet layout components illustrated, T6-7 specifying, T6-1 Smart Card, T1-7, T17-1 to T17-4, U1-6 TCR, TC-4 Smart Card panel door, T12-4, T18-3, U2-3, image processing capabilities, U1-5...
-
Page 269: Receive Trays
Horizon base address, T2-9, U2-15 UC-3 resetting to Horizon imager defaults, T2-12 using to specify media in DICOM, T4-6 specifying for Horizon imager, T2-10 to T2-12, valid parameter names in text files, TC-1 to TC-4 U2-12 to U2-16 viewing at control panel, T8-7... -
Page 270: Loading Media
/etc/printcap file example, T11-5 location precautions, U-xxxii /etc/printcap method for creating printers, T11-3 log files, T18-1 adding Horizon imager to /etc/printcap, T11-3 copying to backup media, T18-3 administrative utility method for creating DICOM Attributes log file sample, T18-11 printers, T11-6... - Page 271 U9-1 color, T1-3, U1-3 DICOM methods for selecting, T4-3 to T4-7 Macintosh grayscale, T1-3, U1-3 installing Horizon imager as PostScript printer, handling and storage, U4-1 to U4-13 T5-7 loading cassettes, U2-16 installing Horizon PostScript driver, T5-7 ordering, TA-2, U4-12 to U4-13...
-
Page 272: Ordering Media
T18-6 network speed indicator, U3-2 for Codonics anonymous FTP site, U12-31 network speed, specifying for Horizon imager, T2-12 for FTP, using to specify Horizon logical device, to T2-13 T5-8, T7-6, T8-1, T8-14, T9-5, T9-7, T9-8, networks... -
Page 273: Printing From Macintosh Applications
Power menu, bypassing, U3-7 port number, T4-1, U5-4 power rocker switch, U2-9 portrait parameter powering off the Horizon imager, U3-7 FMF Setup command, T9-13 powering on for first time, U2-9 VMF Canvas command, T9-23 powering on the Horizon imager, U3-3... - Page 274 T19-11 Resume Timeout preferences setting, T3-3 print parameters resuming printing, U3-23 default settings, U8-1 to U8-8 returning the imager to Codonics, U2-25 print parameters in PostScript DSC comments, RGB values T5-19 to T5-26 specifying, T6-8...
- Page 275 FTP, T9-7, T10-2 sheet formatting printing via LPR, T9-7 35mm SlideMaker, T9-35 single unscaled images and logical devices, T9-1 FTP, canceling a print job, T10-5 caption placement, T13-2 FTP, changing Job Settings file, T10-5 Horizon Imager User’s Manual I-15...
-
Page 276: Testing Network Printing
T13-2 StuffIt application, U12-32 printing, T9-7 subnet mask, T2-6 to T2-8, U2-12 printing via FTP, T9-8, T10-2 setting for Horizon imager, T2-10 printing via LPR, T9-8 subnetworks, T2-6 to T2-8 Skip Blank Pages parameter Sun Raster image (RAS) format, T1-5... - Page 277 T1-7, T16-1 to T16-4, U1-6 Place command examples, T9-29 UPS (uninterruptible power supply), U2-5 Place command parameters, T9-25 UPS connector, U3-2 Print command, T9-20 USB flash drive Print command parameters, T9-30 uses, T1-7 printing, T9-18 Horizon Imager User’s Manual I-17...
- Page 278 VMF Fill command, T9-24 saving configuration settings to, U2-19 Windows Zip drive applications generating non-standard and Smart Card panel door, T12-4, T18-3, PostScript, T5-2 to T5-6 U2-20 installing Horizon imager as PostScript desktop uses, T1-7, T16-1, U-xxxviii, U1-6 printer, T5-1 f-18 Index...
Need help?
Do you have a question about the Horizon and is the answer not in the manual?
Questions and answers