
Subscribe to Our Youtube Channel
Related Manuals for Qlogic QLA200 HBA


Summary of Contents for Qlogic QLA200 HBA
- Page 1 User’s Guide FIBRE CHANNEL HBA INSTALLATION Q L A 2 0 0 F a m i l y C o v e r s t h e f o l l o w i n g o p e r a t i n g s y s t e m s : ❑...
-
Page 2: Technical Support
Customers should contact their authorized maintenance provider for technical support of their QLogic products. QLogic-direct customers may contact QLogic Technical Support; others will be redirected to their authorized maintenance provider. Visit the QLogic support Web site listed in Contact Information section for the latest firmware and software updates. Availability QLogic Technical Support is available from 7:00 AM to 7:00 PM Central Standard Time, Monday through Friday, excluding QLogic-observed holidays. - Page 3 QLA200 User’s Guide 2-Gbps Fibre Channel to PCI-X Host Bus Adapter FL0054601-00 B Page i...
- Page 4 QLogic Corporation reserves the right to change product specifications at any time without notice. Applications described in this document for any of these products are for illustrative purposes only.
-
Page 5: Table Of Contents
Installing the QLA200 HBA ........ - Page 6 Removing the Driver ......... 5.4.1 Removing the QLA200 HBA and the NetWare Driver ... . . 5.4.2 Removing the NetWare Driver .
- Page 7 QLA200 HBA Installation........
- Page 8 QLA200 User’s Guide 2-Gbps Fibre Channel to PCI-X Host Bus Adapter Notes Page vi FL0054601-00 B...
-
Page 9: Introducing The Qla200
■ The QLA200 is 32-bit, 133-MHz PCI-X 1.0 to Fibre Channel optical media. The QLA200 HBA is a robust, dependable addition to your storage area network (SAN). The features and performance are optimized for small and medium enterprise (SME) markets. With auto-install software, plug-and-play features, and an enhanced level of technical support, the QLA200 HBA makes expanding your SAN easy and affordable. -
Page 10: What's In The Box
1 – Introducing the QLA200 What’s in the Box? What’s in the Box? Make sure you have everything you need to install the QLA200 HBA (see figure 1-1). SYSTEM SERVICE AND WARRANTY BROCHURE SANsurfer Fibre Channel HBA Software CD QUICK START GUIDE AND USER’S GUIDE... -
Page 11: Qla200 Hba Components
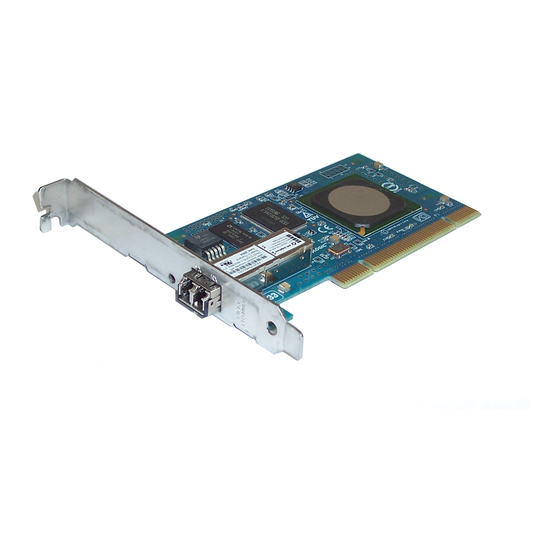
QLA200 HBA components referenced throughout this section. Each QLA200 HBA has a unique serial number; its location on the HBA is noted in figure 1-2. Take a minute to write down the serial number of the QLA200 HBA on the inside cover of this document. -
Page 12: System Requirements
1 – Introducing the QLA200 System Requirements System Requirements Your system must have the following functionality to support the QLA200 HBA: One of the following: ■ PCI 32-bit data and 33/66 MHz clock frequency ❑ PCI-X and 66/100/133 MHz clock frequency ❑... -
Page 13: Hba Installation
Section 2 HBA Installation Installing the QLA200 HBA Perform the following steps to install the QLA200 HBA in your PC: Step 1. Prepare the system for the QLA200 HBA. Power down the peripherals, then the computer. ❑ Remove the computer cover and save the screws. -
Page 14: Low-Profile Bracket Installation
Make sure the mounting tabs with the threaded holes are positioned on the far side (the side opposite the transceiver) of the QLA200 HBA. Align the screw holes of the QLA200 HBA and the bracket, then insert ❑ and tighten the screws. Correct torque is 3.6-in/lbs. -
Page 15: Qla200 Hba Installation
SLOT COVERS SYSTEM CHASSIS Figure 2-2. QLA200 HBA Installation Place the QLA200 HBA into the slot. Carefully press the HBA into the ❑ slot until it seats firmly. Secure the QLA200 HBA to the chassis. Follow the PC manufacturer’s ❑... - Page 16 Red Hat/SuSE Linux Novell NetWare If the information displayed is not correct and you have checked the QLA200 HBA’s configuration, see section 6 for troubleshooting information. section 7 for detailed instructions on how to customize the QLA200 HBA and its attached devices using the Fast!UTIL BIOS utility.
-
Page 17: Sansurfer Hba Install Wizard (Windows 2000/Server 2003)
3.2. Installing the Driver If you have installed the QLA200 HBA in a Windows 2000/Server 2003 operating system, follow these instructions to launch the SANsurfer HBA Install Wizard, which installs the HBA driver automatically. When the system is powered on, the Microsoft Found New... -
Page 18: Sansurfer Fibre Channel Hba Software Screen
3 – SANsurfer HBA Install Wizard (Windows 2000/Server 2003) Installing the Driver Step 1. Insert the SANsurfer Fibre Channel HBA Software CD in an appropriate drive. The SANsurfer Fibre Channel HBA Software screen displays (see figure 3-2). Figure 3-2. SANsurfer Fibre Channel HBA Software Screen If the SANsurfer Fibre Channel HBA Software screen does not display, do the following: Select the drive where the SANsurfer Fibre Channel HBA Software CD... -
Page 19: Sanblade Fibre Channel Hba Management Software And Drivers Screen
3 – SANsurfer HBA Install Wizard (Windows 2000/Server 2003) Installing the Driver Step 3. In the table titled 2Gb FC - QLA200 Series, click the appropriate operating system: Windows 2000 or Windows Server 2003. The SANblade Fibre Channel HBA Management Software and Drivers screen displays (see figure 3-4). -
Page 20: Initial Driver Installation Dialog Box
3-7). Figure 3-7. Select Driver Dialog Box Select the driver location by selecting one the following radio buttons: Default Driver (provided with wizard), From the Qlogic website, or Browse. If your system has internet access, QLogic recommends selecting the From the QLogic website radio button. -
Page 21: Driver Server Proxy Settings Dialog Box
3 – SANsurfer HBA Install Wizard (Windows 2000/Server 2003) Installing the Driver If you select the From the QLogic website button and your system ❑ has a proxy server, select the Specify Proxy Settings check box. The Server Proxy Settings dialog box displays (see figure 3-8). -
Page 22: Install Status (Unsuccessful) Dialog Box
Figure 3-11. Install Status (Unsuccessful) Dialog Box There are three reasons why the driver installation can fail: The OS cannot find the QLA200 HBA. Make sure that the QLA200 HBA ❑ is seated properly (be sure to power down the computer before checking the HBA). -
Page 23: Updating The Driver
You must have internet access if you want to update the driver from the QLogic web site. NOTE Step 1. Insert the SANsurfer Fibre Channel HBA Software CD in an appropriate drive. -
Page 24: Removing The Driver
HBA removal also removes the driver. You do not have to use the Device Manager, Hardware Wizard, or SANsurfer HBA Install Wizard to uninstall the QLA200 HBA. After you have removed the HBA and restarted your computer, Windows NOTE 2000/Server 2003 recognizes that the HBA has been removed. -
Page 25: Driver Versions That Do Not Require A Loopback Connector
Perform the following steps to run a loopback test and a read/write buffer test on the QLA200 HBA and its attached devices: Step 1. Insert the SANsurfer Fibre Channel HBA Software CD in an appropriate drive. -
Page 26: Select Hbas To Test Dialog Box
3 – SANsurfer HBA Install Wizard (Windows 2000/Server 2003) Performing Diagnostics The SANsurfer HBA Install Wizard starts automatically. If the wizard does not start and you are running the wizard from the CD, do the following: Select the drive where the SANsurfer Fibre Channel HBA Software CD ❑... -
Page 27: Diagnostic Test Results, Detailed
3 – SANsurfer HBA Install Wizard (Windows 2000/Server 2003) Performing Diagnostics For more information, right-click the port number in the Adapter column. More detailed diagnostic results are displayed (see figure 3-16). Figure 3-16. Diagnostic Test Results, Detailed Click Close. Be sure to remove the loopback connector when you are done running diagnostic tests. - Page 28 3 – SANsurfer HBA Install Wizard (Windows 2000/Server 2003) Performing Diagnostics Notes 3-12 FL0054601-00 B...
-
Page 29: Red Hat/Suse Linux Driver Installation
Installing and Uninstalling the Driver with the Source RPM Package Install and build the QLogic Linux driver from the source RPM package. The only requirement for the RPM is the kernel-source, which is usually installed when the kernel is installed on the system. -
Page 30: Installing The Source Rpm Package
4 – Red Hat/SuSE Linux Driver Installation System Driver Parameter max_scsi_luns 4.2.1 Installing the Source RPM Package Perform the following steps to mount the source RPM package and install the driver source: Step 1. Insert the SANsurfer Fibre Channel HBA Software CD in an appropriate drive. -
Page 31: Multiple Lun Support Through The Kernel
4 – Red Hat/SuSE Linux Driver Installation System Driver Parameter max_scsi_luns 4.3.1 Multiple LUN Support Through the Kernel The kernel must be configured to enable multiple LUN support so that nonzero LUNs can be configured and accessible. Use the make menuconfig command to build a kernel that has the option under SCSI Support enabled to probe all LUNs on SCSI devices. -
Page 32: Proc Filesystem Support
Proc Filesystem Support The /proc filesystem for the driver can be found in the /proc/scsi/qla2300/ directory. This directory contains a file for each QLogic Fibre Channel HBA in the system. Each file presents information about the adapter and transfer statistics for each discovered LUN. -
Page 33: Netware Driver Installation
The NetWare driver files are located on the SANsurfer QLA200 (CD) and on the QLogic web site. Be sure to check the QLogic web site for the most up-to-date version of the driver. This section describes how to download the driver from the QLogic web page or the SANsurfer Fibre Channel HBA Software CD to a floppy disk (disk). -
Page 34: Installing The Driver
Step 3. Follow the standard NetWare instructions to begin the installation. Step 4. Do one of the following: If the server will be booting from a device attached to the QLA200 HBA, perform the following steps to enable the BIOS and specify the boot device: a. -
Page 35: Installing The Driver On An Existing Netware Server
Power up the server. The HWDETECT or NWCONFIG program automatically detects the QLA200 HBA, and locates and loads the driver. If the programs do not find the driver (the QL2300.HAM file is missing from the Storage adapters: field of the drivers page), follow the instructions in section 5.3.3... -
Page 36: Removing The Driver
Make sure the QL2300.HAM and QL2300.DDI files are in the C: directory. Step 3. Start the server and manually load the driver once for each QLA200 HBA in the system. Each time you load the driver, note the slot number for future reference. -
Page 37: Removing The Qla200 Hba And The Netware Driver
5.4.2. 5.4.2 Removing the NetWare Driver If you are not removing the QLA200 HBA from the server, or you removed the QLA200 HBA and HWDETECT did not remove the driver load instance, perform the following steps: Step 1. Start NWCONFIG. Select NCF Files Options. Select Edit STARTUP.NCF File to edit the file STARTUP.NCF. -
Page 38: Driver Parameters
5 – NetWare Driver Installation Driver Parameters Driver Parameters The NetWare driver has two types of optional parameters: System parameters (specified when the driver is loaded) (see section 5.5.1) ■ NVRAM parameters (stored in the HBA’s NVRAM) (see section 5.5.2) ■... - Page 39 QL2X00.CFG, and allows all devices to be reported to NetWare. The QL2X00.CFG file is located in the default DOS directory (C:\NWSERVER); this file is written by QLogic SANsurfer software or the CFG.NLM test tool. /IGNCFG parameter example: LOAD QL2300.HAM SLOT=3 /LUNS /IGNCFG...
- Page 40 QL2X00.CFG. All devices not specified in this file are ignored. If this file does not exist, all devices are ignored. The QL2X00.CFG file is located in the default DOS directory (C:\NWSERVER); this file is written by QLogic SANsurfer software or the CFG.NLM test tool. /REQCFG parameter example: LOAD QL2300.HAM SLOT=3 /LUNS /REQCFG...
- Page 41 5 – NetWare Driver Installation Driver Parameters Table 5-1. QL2300.HAM Driver Parameters (Continued) Parameter Type Description /COMPLEXTAG Instance This parameter enables SCSI complex tag queuing. Complex tag queuing works as follows: the HACB preserve order control flag enables ordered queuing, and the HACB priority control flag enables head of queueing.
-
Page 42: Nvram Parameters
5 – NetWare Driver Installation Driver Parameters 5.5.2 NVRAM Parameters The QLogic HBA NVRAM settings are modified by entering Fast!UTIL during the QLA200 HBA BIOS initialization. Table 5-2 lists the settings and how they affect the NetWare driver. Table 5-2. NVRAM Parameters... -
Page 43: Troubleshooting
HBA or the device, then restart your system. If the BIOS is enabled, devices attached to the QLA200 HBA are displayed on the screen. Is the QLA200 HBA installed correctly in the PCI slot? Is it seated firmly in the slot? ■... -
Page 44: System Configuration Problems
6 – Troubleshooting Problems After Installation 6.1.2 System Configuration Problems Is the motherboard configured properly? ■ All PCI-compliant and PCI-X-compliant systems automatically detect 32-bit HBAs and set the appropriate bus speed (for example, 33 MHz or 133 MHz). Check the motherboard for proper configuration (see section 2). -
Page 45: Software Applications And Utilities
Fast!UTIL Options menu to display). If you have more than one QLA200 HBA, Fast!UTIL asks you to select the QLA200 HBA you want to configure. After changing the settings for each QLA200 HBA and exiting the utility, Fast!UTIL reboots your system to load the new parameters. -
Page 46: Configuration Settings
■ QLA200 HBA is disabled, freeing space in upper memory. This setting must be enabled if you are booting from an FC hard disk attached to the QLA200 HBA. The default is Disabled. Spinup Delay. When this setting is enabled, the BIOS waits for up to five minutes ■... -
Page 47: Restore Default Settings
Boot option to boot from the QLA200, and your system does not boot from the QLA200 HBA, you may need to enter your system BIOS setup utility to select the Fibre Channel disk attached to the QLA200 HBA to be the boot device. -
Page 48: Fibre Disk Utility
CRC, disparity, and length errors. Select Host Adapter If you have multiple QLA200 HBAs in your system, use this setting to select and then configure or view the settings of a specific QLA200 HBA. FL0054601-00 B... -
Page 49: Compliance, Specifications, And Agency Certification
Bus transfer rate: 200 MBps maximum at half-duplex 400 MBps maximum at full-duplex, 2-Gbps Single-chip design that includes a QLogic RISC processor, Fibre Channel protocol manager, PCI/PCI-X DMA controller, and integrated serializer/deserializer (SERDES) and electrical transceivers that operate at a fixed data rate of 2 Gbps... -
Page 50: Transceiver Label
Relative humidity (noncondensing) Storage humidity (noncondensing) Transceiver Label The transceiver on the QLA200 HBA is a Class I laser product. It complies with IEC 825-1 and FDA 21 CFR 1040.10 and 1040.11. The transceiver must be operated under recommended operating conditions. -
Page 51: Agency Certification
A – Compliance, Specifications, and Agency Certification Agency Certification Agency Certification The following sections contain a summary of EMC/EMI test specifications performed on QLA200 (FL0110403) to comply with radiated emission, radiated immunity and product safety standards. A.4.1 EMI and EMC Requirements (Preliminary) The QLA200 conforms to the following requirements: FCC Part 15, Class A ■... - Page 52 A – Compliance, Specifications, and Agency Certification Agency Certification Notes FL0054601-00 B...
- Page 54 FL0054601-00 B...
Need help?
Do you have a question about the QLA200 HBA and is the answer not in the manual?
Questions and answers