Sign In
Upload
Download
Table of Contents
Contents
Add to my manuals
Delete from my manuals
Share
URL of this page:
HTML Link:
Bookmark this page
Add
Manual will be automatically added to "My Manuals"
Print this page
×
Bookmark added
×
Added to my manuals
Manuals
Brands
Saleae Manuals
Measuring Instruments
Logic
User manual
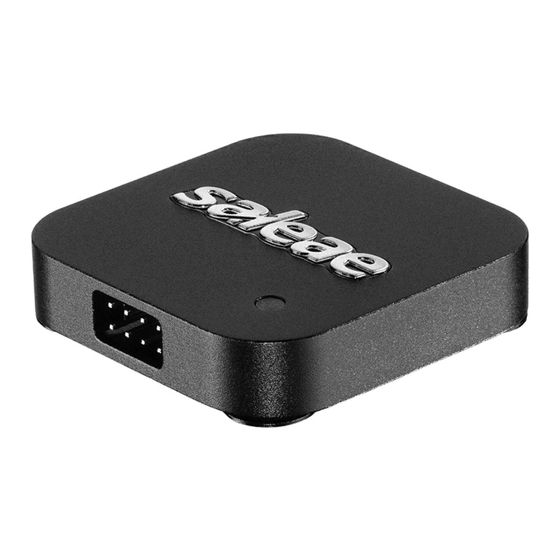
Saleae Logic User Manual
Hide thumbs
1
2
3
4
5
6
7
8
9
10
11
12
13
14
15
16
17
18
19
20
21
22
23
24
25
26
27
28
29
30
31
32
33
34
35
36
37
38
39
40
41
42
43
44
45
46
47
48
49
50
51
52
53
54
55
56
57
58
59
60
61
62
63
64
65
66
67
68
69
Table Of Contents
70
page
of
70
Go
/
70
Contents
Table of Contents
Bookmarks
Table of Contents
Table of Contents
Product Summary
What's in the Box?
Purchasing Additional Accessories
Electrical Isolation
Ground Current Safety
Common Ways a Ground Loop Can Exist
Safety Summary & Warranty
Testing Multiple Duts
Common Ways Damage Can Occur
Identifying if a Ground Loop Is Present
Identifying if the DUT Is Isolated from the PC
Using an Isolated Wall Adapter to Power the DUT
Downloading the Latest Software
Installing for Windows
Installing for Mac
Software Download & Installation
Installing for Linux
Navigating the Logic Software
Renaming Tabs
Rearranging Channels
Changing Channel Size
Hiding Channels
Editing Channel Labels
Connecting Logic to the PC
Check Calibration Status
Device Calibration
Manually Download the Calibration File
Transferring the Calibration File from One PC to Another
Having Trouble?
Wire Harness
Connecting the 2X4 Harness
Connecting Accessories
Signal Integrity with the 2X4 Harness
Connecting the 1X9 Harness
Signal Integrity with the 1X9 Harness
Test Clips
Connecting to Headers
Ultra-Fine Pitch and Other Difficulties
Collecting Data & Device Settings
Device Settings
LED Settings and Color
Closing the Device Settings Popover
Digital Trace Colors
Trigger on Edge
Using the Trigger
Skipping the Trigger
Start Searching for the Trigger
Trigger on Pulse Width
Stopping the Capture
Searching with a Trigger
Turning off the Trigger
Real-Time View (in Beta)
Zooming in and out
Panning Left and Right
Navigating Your Data - Zooming, Panning, Rearranging, & Resizing
Jumping between Digital Edges
Scrolling through Channels
Analog Instantaneous Measurements
Digital Instantaneous Measurements
Measurements, Timing Markers, and Bookmarks
Using Annotations
Using Timing Markers
Using Bookmarks
Using Measurements (Persistent)
Supported Digital Measurement Calculations
Supported Analog Measurement Calculations
Saving Captures
Opening Captures
Saving, Loading, and Exporting Data
Exporting in CSV Format
Exporting in MATLAB Format
Exporting in VCD Format
Exporting in Binary Format
Additional Data Export Notes
Exporting Analyzer Results
Saving and Loading Software Settings
Analyzer Settings
Using Protocol Analyzers
Changing the Global Radix
Edit the Analyzer Name
Starting an Analyzer at a Specific Point in the Software
Viewing Protocol Analyzer Results
Searching Analyzer Results
Filter Analyzer Results to a Specific Range
Simulating Protocol Analyzer Data
Simulation Data & Demo Mode
Collecting Data and Device Settings
Capture Settings Configuration Guide
Time and Memory Saving Tools
Faster Post-Processing of Analog Captures
Faster Post-Processing of Decoded Protocols
Keyboard Shortcuts
Reducing Capture File Disk Usage
Keyboard Shortcuts
Connector Dimensions
Advertisement
Quick Links
1
Table of Contents
2
Product Summary
3
Connecting the Logic Hardware
4
Connecting Accessories
5
Collecting Data & Device Settings
6
Using the Trigger
Download this manual
User's Guide
Revised June 7, 2018
For the latest content, please refer
to the User's Guide on our support
site here:
Saleae User's Guide
Page 1 of 69
Table of
Contents
Previous
Page
Next
Page
1
2
3
4
5
Advertisement
Table of Contents
Need help?
Do you have a question about the Logic and is the answer not in the manual?
Ask a question
Questions and answers
This manual is also suitable for:
Logic16
Logic 4
Logic pro 16
Saleae001
Saleae009
Sal-00109
...
Show all
Sal-00111
Sal-00112
Sal-00110
Sal-00113
Sal-00114
Sal-00115
Sal-00116
Logic pro 8
Logic 8
Table of Contents
Save PDF
Print
Rename the bookmark
Delete bookmark?
Delete from my manuals?
Login
Sign In
OR
Sign in with Facebook
Sign in with Google
Upload manual
Upload from disk
Upload from URL

Need help?
Do you have a question about the Logic and is the answer not in the manual?
Questions and answers