Table of Contents
Advertisement
1 1/2 HP DUST COLLECTOR
1 1/2 HP Dépoussiéreur
Recolector de polvo de 1 1/2 HP
Français (21)
Español (41)
Instruction manual
Manuel d'utilisation
Manual de instrucciones
www.DeltaMachinery.com
INSTRUCTIVO DE OPERACIÓN, CENTROS
DE SERVICIO Y PÓLIZA DE GARANTÍA.
LÉASE ESTE INSTRUCTIVO
ANTES DE USAR EL PRODUCTO.
50-767
Advertisement
Table of Contents

Subscribe to Our Youtube Channel
Related Manuals for Delta 50-767


Summary of Contents for Delta 50-767
- Page 1 1 1/2 HP Dépoussiéreur Recolector de polvo de 1 1/2 HP Français (21) Español (41) Instruction manual Manuel d’utilisation Manual de instrucciones www.DeltaMachinery.com INSTRUCTIVO DE OPERACIÓN, CENTROS DE SERVICIO Y PÓLIZA DE GARANTÍA. LÉASE ESTE INSTRUCTIVO 50-767 ANTES DE USAR EL PRODUCTO.
-
Page 2: Table Of Contents
® If you have any questions relative to its application DO NOT use the product until you have written DELTA Power Equipment Corporation and we have advised you. Contact us online at www.DeltaMachinery.com or by mail at Technical ®... -
Page 3: General Safety Rules
NIOSH/OSHA approved respiratory of accessories and attachments not recommended by protection appropriate for the dust exposure, and wash DELTA ® may cause damage to the machine or injury to the exposed areas with soap and water. user. -
Page 4: Additional Specific Safety Rules
ADDITIONAL SPECIFIC SAFETY RULES Failure to follow these rules may result in serious personal injury. DO NOT USE THIS UNIT TO FILTER 10. INSPECT THE DUST BAG FOR CUTS, RIPS, OR METAL DUST. Combining wood and metal dust can TEARS. Replace damaged bags or vacuum hoses. create an explosion or fire hazard. -
Page 5: Grounding Instructions
POWER CONNECTIONS A separate electrical circuit should be used for your machines. This circuit should not be less than #12 wire and should be protected with a 20 Amp time lag fuse. If an extension cord is used, use only 3-wire extension cords which have 3-prong grounding type plugs and matching receptacle which will accept the machine’s plug. -
Page 6: Functional Description
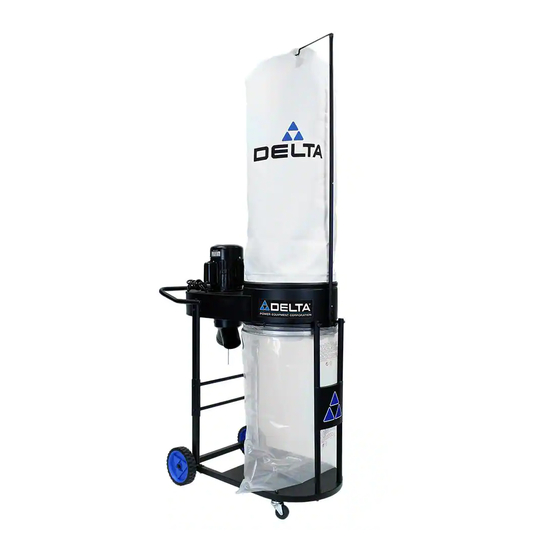
Industrial Model 50-767 Dust Collector will connect to woodworking machines that accept a 4” diameter hose. The 50-767 comes with one 1 micron filter bag and two 6 mil plastic collection bag. NOTICE: The photo on the manual cover illustrates the current production model. All other illustrations contained in the manual are representative only and may not depict the actual labeling or accessories included. -
Page 7: Carton Contents
CARTON CONTENTS 1. Blower Housing Assembly 2. Base Frame 3. Front Support Assembly 4. Rear Blower Housing Support (2) 5. Rear Stand Cross Support 6. Dust Collection PE Bag 7. Dust Filter Bag 8. Retainer Strap 9. Handle 10. “Y” Inlet Adapter 11. -
Page 8: Assembly
ASSEMBLY For your own safety, do not connect the machine to the power source until the machine is completely assembled and you read and understand the entire instruction manual. ASSEMBLY TIME ESTIMATE 30 minutes to 1 hour This machine is heavy. Use two or more people when lifting. ATTACHING THE CASTERS 1. - Page 9 ASSEMBLY (continued) ATTACHING REAR BLOWER HOUSING SUPPORT 1. Place base frame on side. 2. Align Rear blower housing support with through holes. 3. Insert M8 hex socket head screw through base support and base frame as shown. 4. Place M8 flat washer and M8 lock nut on bottom side (Fig 3).
- Page 10 ASSEMBLY (continued) ATTACHING MOTOR BLOWER ASSEMBLY TO STAND NOTE: TWO PEOPLE ARE NEEDED FOR THIS STEP 1. Place motor blower assembly onto stand. 2. Align the brackets on the blower housing, on the motor end, to the rear blower housing supports. 3.
- Page 11 ASSEMBLY (continued) 8. Place M6 hex socket head screw through hole of blower housing bracket and thread into rear blower housing support (Fig 9). 9. Tigten screw. 10. Repeat on other side. FIGURE 9 ATTACHING HANDLE 1. Insert handle into both brackets on blower housing (Fig 10).
- Page 12 ASSEMBLY (continued) ATTACHING THE DUST INTAKE PORTS Disconnect the machine from the power source! 1. Place the “Y” adapter on the dust intake port as shown in Fig. 13 opposite to the motor. Make sure that the “Y” adapter fits on the intake flange and holes line up between the “Y”...
- Page 13 ASSEMBLY (continued) ATTACHING THE DUST COLLECTION BAG Disconnect the machine from the power source! A. USING CLOTH COVERED FLEXIBLE RING: 1. Place the cloth-covered bag retainer ring inside the opening of the clear plastic dust collection bag. Fold about 6 inches of the bag around the retainer ring (Fig 14).
- Page 14 ASSEMBLY (continued) ATTACHING THE TOP FILTER BAG Disconnect the machine from the power source! 1. Insert the hanger rod hook through the material on top of the filter bag (Fig 16). FIGURE 16 2. Insert the upper hanger rod into the lower hanger rod ensuring that the lock button is in place and secure (Fig 17).
- Page 15 ASSEMBLY (continued) 4. Work the open end of the filter bag into the top groove of the dust collector drum until it is secure and sealed. Bend and fold, as necessary, the internal bag retainer ring to fit it into place as shown in Fig 20 & 21. NOTE: Bag ring must fit into housing groove completly to ensure a proper seal with no leaks.
- Page 16 ASSEMBLY (continued) ATTACHING THE HOSE TO THE INTAKE PORT Disconnect the machine from the power source! Model 50-767 provides two 4” dust ports. To attach the hose (SOLD SEPARATELY): Loosely attach the hose clamp around one end of the flexible hose (Hose sold seper- ately).
-
Page 17: Operation
Do not use this unit to vacuum hazardous, toxic, or carcinogenic materials (asbestos, pesticide, or lead-based paint debris). TROUBLESHOOTING For assistance with your machine, visit our website at www.DeltaMachinery.com for a list of service centers or ® call the DELTA Power Equipment Corporation help line at 1-800-223-7278. -
Page 18: Maintenance
SERVICE AND REPAIRS ® All quality tools will eventually require servicing and/or replacement of parts. For information about DELTA Power Equipment Corporation, its factory-owned branches, or to locate an Authorized Warranty Service Center, visit our website at www.DeltaMachinery.com or call our Technical Service Manager at 1-800-223-7278. All repairs made by our service centers are fully guaranteed against defective material and workmanship. -
Page 19: Accessories
DELTA machine, machine part, or machine accessory which in normal ® use has proven to be defective in workmanship or material, provided that the customer returns the product prepaid to a DELTA factory service ®... - Page 20 99 Roush Street Anderson, SC 29625 (800) 223-7278 www.DeltaMachinery.com ® Copyright © 2015 DELTA Power Equipment Corporation DPEC003728 Issued 4-1-2015...
Need help?
Do you have a question about the 50-767 and is the answer not in the manual?
Questions and answers