
Related Manuals for Elo Touch Solutions IDS 3201L


Summary of Contents for Elo Touch Solutions IDS 3201L
- Page 1 USER GUIDE Elo Touch Solutions Interactive Digital Signage Computer Module IDS 3201L/4201L/5501L/7001L/7001LT UM600040 Rev A User Guide–Computer Module UM600040 A, Page 1 of 33...
- Page 2 Elo Touch Solutions, Inc. Disclaimer The information in this document is subject to change without notice. Elo Touch Solutions, Inc. and its affiliates (collectively "Elo") makes no representations or warranties with respect to the contents herein, and specifically disclaims any implied warranties of merchantability or fitness for a particular purpose.
-
Page 3: Table Of Contents
Table of Contents Chapter 1 - Introduction ................4 Chapter 2 – Unpacking ................5 Chapter 3 – Computer Module Installation ........6 Chapter 4 – Technical Support ............... 20 Chapter 5 – Safety & Maintenance ............21 Chapter 6 – Regulatory Information ........... -
Page 4: Chapter 1 - Introduction
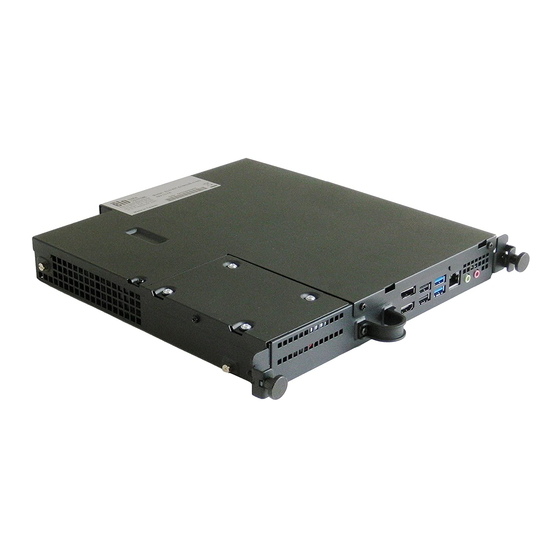
Chapter 1 - Introduction Product Description Interactive Digital Signage Computer Module Generation 2 (ECMG2) Refresh is designed to slide into the bay on the rear of the Interactive Digital Signage Generation 2 Refresh touchmonitors, without any effect on the monitor’s form factor or requiring any extra cabling, turning your Interactive Digital Signage TouchMonitor into an Interactive Digital Signage All-In-One TouchComputer. -
Page 5: Chapter 2 - Unpacking
Chapter 2 – Unpacking Unpacking the Digital Signage Computer Module Check that the following items are present and in good condition: • Computer Module • Quick Install Guide • PC Box Cable Cover User Guide–Computer Module UM600040 A, Page 5 of 33... -
Page 6: Chapter 3 - Computer Module Installation
Chapter 3 Computer Module Installation Installation 1. Use a Phillips head screwdriver to remove the access cover plate on the back of the touchmonitor. 2. Slide the Computer Module all the way into the bay until it snaps into place. 3. - Page 7 Connector Panel & Interfaces Touchmonitor & Computer Module Connections 1. Once the Computer Module has been installed, connect the AC power cable between the touchmonitor’s POWER IN connector and the AC power source. NOTE: Computer Module can be installed when the AC power cable is connected (Hot pluggable).
- Page 8 ® Operating System Setup – Windows The initial setup of the operating system takes approximately 5 minutes. Additional time might be needed for different touchcomputer hardware and operating system configurations. You will need to plug in an external mouse and/or keyboard into the Computer Module connector panel to execute these steps.
- Page 9 Choosing the computer name You will be prompted to enter the computer’s name. Create a password for the system You will be prompted to create a password for the system. This is optional. If no password is desired, press the “Next” button. User Guide–Computer Module UM600040 A, Page 9 of 33...
- Page 10 Agreeing to Terms and Conditions You will be prompted to agree to the Windows license terms. Click I Accept to continue Choosing the Windows Update settings You will be prompted to select the Windows Update settings. User Guide–Computer Module UM600040 A, Page 10 of 33...
- Page 11 Selecting the Time Zone When the following window appears, you can set the Computer Module’s time zone, date, and time. Click Next to finish. Windows Setup completes the OS installation. User Guide–Computer Module UM600040 A, Page 11 of 33...
- Page 12 Installing Touchscreen Technology Software Drivers on Elo Computer Modules running Windows 7 Visit the Elo Touch Solutions website www.elotouch.com for: • The latest touch driver version • Additional touch driver information • Detailed touch driver installation guides • Touch drivers for other operating systems The Computer Module comes with Elo Touch Driver already installed.
- Page 13 Selecting the Language Windows will prompt you to select your language of preference. See reference image below. Agreeing to Terms and Conditions You will be prompted to agree to the Windows license terms. Click I Accept to continue. User Guide–Computer Module UM600040 A, Page 13 of 33...
- Page 14 Personalizing the Computer Windows allows you to personalize your computer by selecting a theme color and giving your PC a name. Click Next to continue. Choosing the Windows Settings You will be prompted to select the Windows settings User Guide–Computer Module UM600040 A, Page 14 of 33...
- Page 15 Charm Bars can be accessed. For more information, refer to the User Manual which can be found in the Program Files folder within the Elo Touch Solutions folder. Operating System Setup – No OS No Operating System (No OS) units will require an operating system to be installed on them.
-
Page 16: Setting Up The Operating System
Injecting a New Language Windows can only run one language at any given time. The Elo Touch Solutions language injection feature can be used to modify your language preference. English is set as the default language, but you can change this language according to your preferences. - Page 17 4. Select either Restore OS 32bit or Restore OS 64bit depending on your OS environment. 5. The following User Interface (UI) will appear: User Guide–Computer Module UM600040 A, Page 17 of 33...
- Page 18 6. Select Inject Language and the following UI will appear. User Guide–Computer Module UM600040 A, Page 18 of 33...
- Page 19 7. Click the drop-down list and select the preferred language. 8. Click Inject Selected Language 9. While the injecting process, DO NOT use your keyboard or mouse as this may cause an error in the language injection process. 10. After successful installation of the language package, press any key to exit the window.
-
Page 20: Chapter 4 - Technical Support
Chapter 4 – Technical Support If you are experiencing trouble with your touchmonitor, refer to the following suggestions. If the problem persists, please contact your local dealer or contact Elo Touch Solutions Customer Service. Solutions to Common Problems Problem Suggested Troubleshooting... -
Page 21: Chapter 5 - Safety & Maintenance
Chapter 5 – Safety & Maintenance Safety To avoid risk of electric shock, follow all safety notices and do not disassemble the touchmonitor or Computer Module. They are not user-serviceable. The slots located on the sides and top of the touchmonitor case are for ventilation. Do not block or insert anything into the ventilation slots. - Page 22 Caution There is risk of explosion if battery is replaced by an incorrect type. Dispose of used batteries at the end of its useful life according to local laws and regulations. Waste Electrical & Electronic Equipment Directive (WEEE) This product should not be disposed of with household waste. It should be deposited at a facility that enables recovery and recycling.
- Page 23 least 16 GB of space available) 4. After the flash drive is plugged in, you will see the below window. Click “Format Drive” to continue the process. PLEASE NOTE THAT THIS WILL ERASE ALL DATA CONTAINED IN THE FLASH. 5. Click “Create Restore Media” to proceed. This step will take about 10-20 minutes, depending on your system configurations and flash drive performance.
- Page 24 Note: All data will be deleted during the recovery process. User should back up files when necessary. Elo Touch Solutions does not accept liability for lost data or software. Note: The end user must adhere to Microsoft's Licensing Agreement User Guide–Computer Module...
-
Page 25: Recovering The Operating System
Recovering the Operating System If for any reason the touchcomputer’s operating system needs to be recovered TO FACTORY SETTINGS, you can recover your system by following procedures below. PLEASE NOTE THAT ALL CUSTOMER SETTINGS AND DATA WILL BE LOST DURING THIS PROCESS. Please be sure to backup all data, settings, and customer-installed software before proceeding. - Page 26 6. Select Restore OS. The system will automatically test your hardware. Once the process completes, click the Start button to perform the system recovery function. 7. The following process will reformat the primary hard drive. Please back up your data before performing the recovery process.
- Page 27 Elo Recovery Solution. Click the Exit button to restart your system. All data is deleted during the recovery process. The user should back up files when necessary. Elo Touch Solutions does not accept liability for lost data or software. The end user must adhere to Microsoft's Licensing Agreement.
-
Page 28: Chapter 6 - Regulatory Information
Chapter 6 - Regulatory Information I. Electrical Safety Information: Compliance is required with respect to the voltage, frequency, and current requirements indicated on the manufacturer’s label. Connecting a device to a power source that does not meet requirements other than those specified herein may result in improper operation, damage to the equipment or pose a fire hazard. - Page 29 as required by EMC Directive 2004/108/EC as indicated in European Standard EN 55022 Class A and the Low Voltage Directive 2006/95/EC as indicated in European Standard EN 60950-1. General Information to all Users: This equipment generates, uses, and can radiate radio frequency energy.
- Page 30 may also present a lethal shock hazard to the user.) If you need additional help, consult your dealer, manufacturer, or an experienced radio or television technician. III. Agency Certifications The following certifications and marks have been issued or declared for this monitor: Europe CE Japan VCCI Taiwan BSMI...
- Page 31 Explanation of Markings (1). In accordance with the SJ/T11364-2006 requirement, the electronic information products are marked with the following pollution control logo. The Environment-Friendly Use Period for this product is 10 years. The product will not leak or mutate under normal operating conditions listed below, so that the use of this electronic information product will not result in any severe environmental pollution, any bodily injury, or damage to any assets.
-
Page 32: Chapter 7 - Warranty
Chapter 7 – Warranty Information For warranty information, go to http://www.elotouch.com/Support/warranty.asp User Manual – Computer Module UM600040 A, Page 32 of 33... -
Page 33: Specifications
• Upcoming events • Press releases • Software drivers Getting in Touch with Us To find out more about the extensive range of Elo touch solutions, visit our website at www.elotouch.com, or simply call the office nearest you: North America Tel 800-ELO-TOUCH...
Need help?
Do you have a question about the IDS 3201L and is the answer not in the manual?
Questions and answers