Table of Contents
Advertisement
Quick Links
6000 K, 6010 K, 6040 K,
6050 K, 6051 K
Glaskeramik-Einbau-Kochmulden
Fitted Glass Ceramic Cooking Units
Tables de cuisson vitrocéramiques à
encastrer
Piani di cottura componibili in
vetroceramica
Glaskeramiek-inbouwkookplaten
Inbyggda glaskeramik-kokhällar
Kalusteisiin sijoitettavat keraamiset
keittotasot
Einbau- und Gebrauchsanweisung
Installation Directives and Instructions
for Use
Notice de montage et d'utilisation
Istruzioni per il montaggio e per l'uso
Inbouw- en gebruiksaanwijzing
Monterings- och bruksanvisning
Asenus- ja käyttöohje
Advertisement
Table of Contents

Related Manuals for Electrolux 6000 K


Summary of Contents for Electrolux 6000 K
- Page 1 6000 K, 6010 K, 6040 K, 6050 K, 6051 K Glaskeramik-Einbau-Kochmulden Fitted Glass Ceramic Cooking Units Tables de cuisson vitrocéramiques à encastrer Piani di cottura componibili in vetroceramica Glaskeramiek-inbouwkookplaten Inbyggda glaskeramik-kokhällar Kalusteisiin sijoitettavat keraamiset keittotasot Einbau- und Gebrauchsanweisung Installation Directives and Instructions for Use Notice de montage et d’utilisation...
-
Page 2: Table Of Contents
Before Fitting Fitting Connection 19 /20 Safety Instructions For the Fitter For the User Description of Equipment 6000 K, 6010 K, 6040 K, 6050 K, 6051 K Glass Ceramics Attributes How to Operate The Switch Table of Settings Residual-Heat Display... -
Page 3: Fitting Instructions
Fitting Instructions R R R R R 2 2 2 2 2... - Page 4 Fitting Instructions 1 = Work Top 2 = Insulation 3 = Placement Area 4 = Tensioning Element...
-
Page 5: Before Fitting
Before Fitting These fitted cooking units are intended for placement in the cutout of a table top (Illustration 3). The unit must be connected by an authorized electrician, since this ensures that both the statutory regulations and the connection conditions of the local electricity supply company are observed. - Page 6 Fitting Instructions 1. Place the cooking unit on the working surface with the glass ceramics surface facing downwards. 2. Remove the covers from the mains connections on the underside of the device; the terminals for the main line should now be visible. Attach the connecting cable, using a length of approx.
-
Page 7: Safety Instructions
Safety Instructions For the Fitter The safety regulations require the manufacturer to give the following advice: For fitment of the unit in furniture, these fitting instructions must be observed. For the User The surfaces of the cooking areas become hot during use. Take care;... -
Page 8: Description Of Equipment
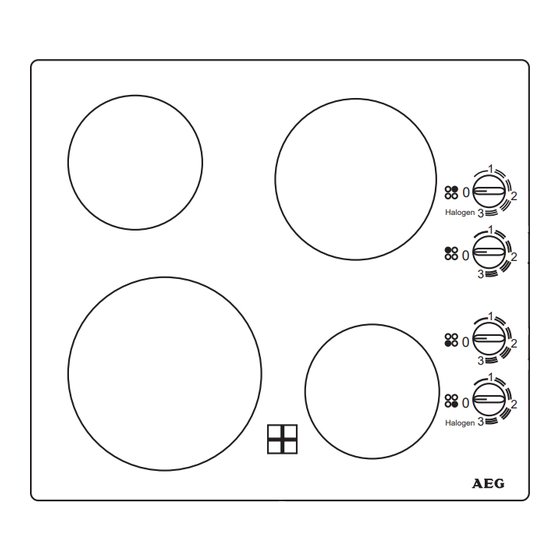
Description of Equipment 6000 K 1 = Cooking zone, 145 mm Ø, 1200 W 2 = Cooking zone, 180 mm Ø, 1800 W 3 = Switch 4 = Residual heat display R R R R R 5 5 5 5 5 6010 K 1 = Cooking zone, 145 mm Ø,... -
Page 9: 6050 K, 6051 K
6050 K 1 = Cooking zone, 145 mm Ø, 1200 W 2 = Halogen cooking zone, 145 mm Ø, 1200 W Halogen 3 = Halogen cooking zone, 180 mm Ø, 1800 W 4 = Fast-heating cooking zone, 210 mm Ø, 2300 W 5 = Switch Halogen 6 = Residual heat display... -
Page 10: Glass Ceramics
Glass Ceramics Attributes This new generation of cooking units places a completely even cooking surface at your disposal. With its glass-smooth, non-porous surface, this specific glass ceramics composition offers exceptionally high thermal shock resistance. And it also has the following practical advantages: It is hygienic, easy to clean, permits ready handling of cooking utensils, provides greater safety and fits well into your kitchen environment, thanks to its attractive... -
Page 11: How To Operate
How to Operate The Switch Settings for the Control Switch: • Weak • Simmering • Strong • Weak • Frying • With this switch you can select the right Weak • heat output steplessly. It can be turned to the left or right. The switch has 2 catch •... -
Page 12: Dual-Circuit Connection
How to Operate / The Right Pots and Pans Switch for Dual-Circuit Cooking (6010 K/6051 K) To switch on the small heating circuit (120 mm Ø) use the left-front switch. To add the larger heating circuit (210 mm Ø) turn the switch in question beyond the “3“ to the symbol . -
Page 13: Cleaning And Care Of Glass Ceramics Surfaces
Cleaning and Care Basic Principles 1. Clean the cooking surface thoroughly before using it for the first time; thereafter clean it regularly. 2. Never use aggressive cleaning agents, such as coarse scrubbing agents or scratchy pot cleaners. 3. Thoroughly clean the entire cooking area once a week. Use “Sidol-Edelstahl- glanz“, “Stahl-Fix“... -
Page 14: Spots And Stains
Cleaning and Care Spots and Stains Lime spots, shiny mother-of-pearl-like patches shimmering metallic discolourations (pot wear and tear) that appeared while cooking can best be removed while the cooking area is still warm (not hot). Use again “Sidol-Edelstahlglanz“, “Stahl-Fix“ or “WK-Top“. Repeat the cleaning procedure if necessary, precisely following the procedure described under point 3. -
Page 15: What To Do When
What to do when . . . / After Sales Service Faults you can Remedy Yourself ... the control lamps don’t light up? 1. You have perhaps not tried all of the relevant switches? 2. The fuse in the domestic electrical installation (fuse box) has been triggered..
Need help?
Do you have a question about the 6000 K and is the answer not in the manual?
Questions and answers