
Related Manuals for RADWAG PM 10.C32


Summary of Contents for RADWAG PM 10.C32
-
Page 1: User Manual
C32 Series Balances Precision balances of PM C32 series USER MANUAL IMMU-23-04-11-17-EN www.radwag.com... - Page 2 Congratulations and thank you for selecting RADWAG product. You have purchased a device that has been designed and manufactured to give you years of service. Please read this User Manual carefully, this shall guarantee reliable operation. NOVEMBER 2017 - 2 -...
-
Page 3: Table Of Contents
Contents GENERAL INFORMATION..................... 7 1.1. Dimensions ..................7 1.2. Connectors Arrangement ................ 9 1.3. Diagrams of Connection Cables ............... 9 1.4. Intended Use ..................9 1.5. Precautions ..................9 1.6. Warranty Conditions ................10 1.7. Supervision Over Metrological Parameters ..........11 1.8. - Page 4 10. LOG IN OPERATION ....................28 11. WEIGHING OPERATION ..................... 29 11.1. Good Weighing Practice ............... 29 11.2. Units ....................30 11.3. Weighing Unit Selection ............... 30 11.4. Weighing Units Accessibility ..............31 11.5. Start Unit Selection ................31 11.6. Gravitational Acceleration ..............31 11.7.
- Page 5 17.5. Setting Reference Sample Mass by Acquiring Mass of a Single Part from Database ....................58 17.6. Parts Counting Procedure ..............58 18. CHECKWEIGHING ....................... 59 18.1. Mode Related Settings ................. 59 18.2. Checkweighing – Quick Access Keys ............59 18.3.
- Page 6 28.1.1. Adding a New Record ..............86 28.1.2. Export ..................86 28.1.3. Import..................86 28.1.4. Delete a Record ................ 87 28.1.5. Delete a Database ..............87 28.2. Products .................... 87 28.3. Operators ..................88 28.4. Packaging ..................88 28.5. Customers ..................88 28.7.
-
Page 7: General Information
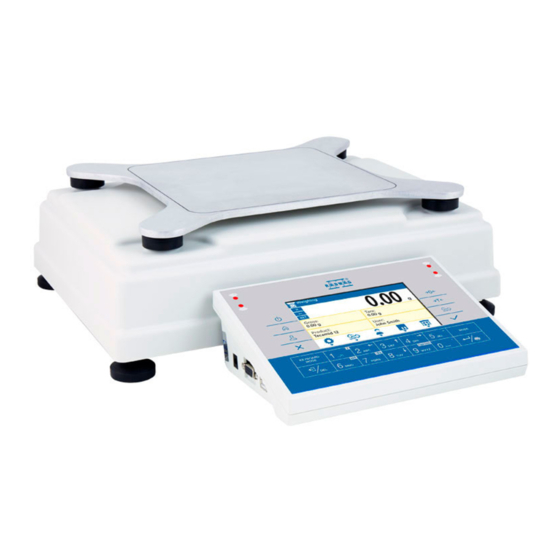
1. GENERAL INFORMATION 1.1. Dimensions PM xx.C32, d=0.01g PM xx.C32, d=0.1g - 7 -... - Page 8 PM xx.C32, d=0.5g, d=1g Indicator - 8 -...
-
Page 9: Connectors Arrangement
1.2. Connectors Arrangement 1 – Ethernet RJ45 connector 4 – power supply socket 2 – RS232 (COM1) connector 5 – I/O, RS232 (COM2) connector 3 – USB type A connector 6 – USB type B connector 1.3. Diagrams of Connection Cables Caution: "Ethernet –... -
Page 10: Warranty Conditions
EX zones. 1.6. Warranty Conditions A. RADWAG feels obliged to repair or exchange all elements that appear to be faulty by production or by construction. B. Defining defects of unclear origin and means of their elimination can only be realized with assistance of manufacturer and user representatives. -
Page 11: Supervision Over Metrological Parameters
1.7. Supervision Over Metrological Parameters Metrological parameters need to be checked in determined time intervals. Inspection frequency depends on ambient conditions in which the weighing instrument is operated, kind of carried out processes and adopted quality management system. 1.8. User Manual Significance Even if you are experienced and have already worked with this type of weighing instrument, you are still obliged to read this user manual carefully prior switching the device on. -
Page 12: Standard Delivery Components List
3.2. Standard Delivery Components List • balance • standard weighing pan, open-work weighing pan – PM 10.C32 and PM 15.C32 models exclusively, • power supply, • user manual - CD version. 3.3. Unpacking Cut the adhesive tape. Take the device out of the packaging. Open the accessory box, take the device components out of it. -
Page 13: Maintenance Activities
3.5. Maintenance Activities In order to clean the weighing instrument risk-free, proceed as follows: 1. Uninstall the weighing pan and other detachable components; (the components differ depending on a balance model, read section: UNPACKING AND INSTALLATION. Be careful while installing the components so as not to cause any damages to the balance mechanism. -
Page 14: Connecting The Weighing Instrument To The Mains
After connecting the balance to the mains, RADWAG logo is displayed. Next you shall see the home screen and ZERO indication with a respective reading unit (the reading unit depends on the balance model). -
Page 15: Connecting Additional Hardware
3.8. Connecting Additional Hardware Use only accessories and peripheral equipment recommended by the manufacturer. The balance must be disconnected from the mains before connecting or disconnecting any peripherals (printer, PC computer, computer keyboard of USB type, additional display). Upon connecting the peripherals, plug the balance to the mains. 4. -
Page 16: Home Screen
Press to change the weighing unit. Press to confirm the message. Press to confirm the weighing result (PRINT). Press to confirm the message (ENTER). Press to cancel the messages. Press to change the working mode. Programmable key assigned to an on-screen button key –... -
Page 17: Weighing Result Window
Symbol informing that PC keyboard is connected. Symbol informing that printer is connected. Symbol informing that communication with a PC computer is on. 6.2. Weighing Result Window Weighing result window provides all weighing-related data. 6.3. Workspace The workspace is to be found underneath the weighing result window. The workspace comprises 4 programmable widgets. -
Page 18: Operating The Menu
7. OPERATING THE MENU In order to navigate the program menu, use the operation panel. 7.1. Entering the Menu In order to enter the menu press key of the operation panel. Background colour of the first menu position differs from the remaining ones. To navigate the program menu use the keys that operate as arrow keys. -
Page 19: Entering Numeric And Text Characters And Signs
7.3. Entering Numeric and Text Characters and Signs Depending on a type of data entered to balance memory the software offers two different edit boxes: • numerical box (for entering part mass values, tare values, etc.). • text box (for entering printout template, universal variable value, etc.). Button functions change depending on the edit box type. -
Page 20: Text Box
Press to enter digit 6. Press to enter digit 7. Press to enter digit 8. Press to enter digit 9. Press to enter digit 0. Press to enter „.” (dot) sign, hold the key for a few seconds. Press to delete one character. Press to exit, the box remains unmodified. -
Page 21: Diacritical Signs Table
Keys: Press to enter . , { } : ° - . Press to enter a b c. Press to move the cursor to the left, hold the key for a few seconds. Press to enter d e f. Press to move the cursor up, hold the key for a few seconds. -
Page 22: Special Signs Table
7.3.4. Special Signs Table In order to activate special signs table while editing text box it is necessary to press and hold key. Where: Inactive ąëñ Press to switch to diacritical signs keyboard. 7.4. Return to the Weighing Mode Any changes made in balance's memory are automatically saved upon returning to the home screen. -
Page 23: Label
8.1.1. Label Field displaying information updated in a real time in the course of weighing device operation (selected product name, gross weight value, etc.). <Workspace components> submenu for a field comprising <Label> widget features the following options: Information Enter this parameter to read info on selected widget type and dimensions. Settings Enter this parameter to specify which widget-assigned data is to be displayed. -
Page 24: Text Box
Liquid density Sinker volume Number Average Difference Threshold Formulation - Default label settings 8.1.2. Text Box Field displaying weighing-related information. As an operator you can freely program the field content (texts and variables of line 1 and line 2). Caution: For detailed description of text editor read section 'Operating the Menu'. - Page 25 Information Enter this parameter to read info on selected widget type and dimensions. Settings This submenu allows you to choose between two functions: 1. Bar graph type: Linear presentation of the weighing range 2. Zoom: Enabling/disabling bar graph zoom in order to provide more clear visualisation of the Min threshold - Max threshold range.
-
Page 26: Keys
8.2. Keys Programmable numeric keys (0 - 9). These are so called quick access keys for triggering the most often performed operations. Numeric keys 1 - 5 are additionally provided with graphic symbol which you can see in the bottom bar of the display. Procedure: •... -
Page 27: Default Screen Settings
Determine part mass Reference sample quantity - 5 pcs. Reference sample quantity – 10 pcs. Reference sample quantity – 20 pcs. Reference sample quantity – 50 pcs. Reference sample quantity – 100 pcs. checkweighing thresholds Set MIN threshold Set MAX threshold Set target mass... -
Page 28: Program
Procedure: • Enter <Display/Default screen settings> submenu, a respective warning is displayed: <Continue?>. • Press key for confirmation. • Default workspace values and default function keys for a particular working mode are set. Next, <Display> submenu is shown automatically. 9. PROGRAM Program menu is divided into function groups. -
Page 29: Weighing Operation
Log Out operation: • Go to home screen, press key, wait for the operators database to open. • Select <Log out> option ( 1st position on the operators list). • The home screen is displayed. Permissions Levels There are 4 permissions levels: Administrator, Advanced Operator, Operator, None. Access to operator-related parameters, databases and program functions is conditioned by permissions level: Permissions level... -
Page 30: Units
Load the weighing pan steadily avoiding shocks: Place weighed loads centrally on the weighing pan: Avoid side loading, in particular side shocks: 11.2. Units UNITS parameter group enables you to specify which mass units are to be available in the course of operation, and to define two custom units. -
Page 31: Weighing Units Accessibility
Tael Singapore [tls] * - units accessibility is conditioned by the weighing instrument type. 11.4. Weighing Units Accessibility You can declare which units are to be accessible upon pressing key. Units with parameter value set to <Yes > option are available for selection in particular working modes, i.e. -
Page 32: Zeroing Operation
with use of 3 characters maximum. By default the custom units are marked as: [u1] – custom unit 1 and [u2] – custom unit 2. 11.8. Zeroing Operation To zero mass indication press key. Zero indication and the following pictograms are displayed: Zeroing operation means determining new zero point, recognized by the weighing device as precise zero. -
Page 33: Weighing Profile
Procedure 1 - upon taking the tared load off the weighing pan: • Press key. • the <Net> marker gets deleted, new zero point is determined. Procedure 2 - with tared load resting on the weighing pan: • Press key. •... - Page 34 • Fast – profile set to enable fast measurement of mass of any size regardless of the selected working mode. Fast profile gets activated automatically at the first balance start-up. For Fast profile, the parameters settings enable obtaining the final result as fast as possible.
-
Page 35: Weighing Mode Settings- Readout
11.11. WEIGHING Mode Settings- Readout The software allows setup of operating parameters (filters, value release and autozero function, deleting the last digit and other settings) separately for each working mode. As an operator you can modify all profile settings only for User profile, when it comes to the remaining default profiles (Fast, Fast dosing, Precision) they can only be modified partially, i.e. -
Page 36: Proximity Sensors
The software offers an autozero function (Auto) ensuring precise mass indication. The function has been designed to enable automatic control and correction of zero indication. If the function is enabled, the following measurement results are compared to each other at declared time intervals, e.g. -
Page 37: Print Mode
• When the weighing device detects weight value lower than gross weight value set in <AUTO THRESHOLD> parameter, the entered tare value gets automatically deleted (Net pictogram is no longer displayed). • Load the weighing pan with packaging of another product, upon indication stabilization, packaging mass is automatically tared (Net pictogram is displayed in the upper part of the display). -
Page 38: Minimum Sample Weight
(MSW) value and tare values for which the MSW value is to be obligatory. For standard PM C32 series the values are zero. Only authorized RADWAG employee or operator with Administrator permissions level, providing that balance factory settings enable this, can carry out procedure aiming to determine minimum sample weight and next enter the respective data. - Page 39 In case of such settings, the minimum sample weight is valid only when you weigh samples in a tare container of weight value comprised within the above specified range. If taring function IS NOT used, or if the tare container's weight ranges between 1000.00 g - Max, then pictogram informing on use of minimum sample weight goes blank.
-
Page 40: Miscellaneous Parameters
Weight value lower than the MSW value Weight value higher than the MSW value specified for a particular tare range. specified for a particular tare range. Pictograms Providing MSW-related Information: Weight value lower than the specified MSW value. Weight value higher than or equal to the specified MSW value. MISCELLANEOUS PARAMETERS Parameters facilitating balance operation. - Page 41 Date Enter this parameter to set current date. Settings box: Using the operation panel's numeric keypad enter the new date and press key to confirm Time Enter this parameter to set current time. Time and date parameters modification proceeds likewise. Date Format Enter this parameter to set date format [YYYY.MM.DD / YYYY.DD.MM / DD.MM.YYYY / MM.DD.YYYY];...
- Page 42 NONE - automatic shutdown inactive, 1; 2; 3; 5; 10 - time given in minutes. If the indication is stable during the declared time interval, the screen is shut down automatically. In order to switch the weighing instrument on, press key of the operation panel.
- Page 43 Upon procedure completion, the parameter screen is displayed, value informing on recorded autotest number (to be found in <RESULT> field) is increased by <1>. To view particular results, press <RESULTS> field and select the given autotest. To print a report go to <Details> screen and press printer pictogram that is to be found in the bottom.
-
Page 44: Permissions Levels
PERMISSIONS LEVELS <Permissions> submenu is available for operators logged as Administrator. This group of parameters allows you to determine access rights for particular operators. In order to set permissions levels enter < /Permissions> submenu. 13.1. Anonymous Operator Parameter allowing you to assign unlogged weighing device operator (so called anonymous operator) with permissions level. -
Page 45: Select Database Record
13.5. Select Database Record Parameter allowing you to set permissions levels enabling particular operators to select given database entries. 'Select database record' parameter is available for the following databases: products, packaging, customers, universal variables. Procedure: • Enter <Permissions/Select database record> submenu. •... -
Page 46: External Adjustment
14.2. External Adjustment External adjustment is carried out using an external mass standard of the right accuracy and weight value, which value depends on balance model and capacity. Correction is carried out semi-automatically, successive process stages are signalled with prompts. Caution: External adjustment is possible for balances that are not a subject to the conformity assessment (verification). -
Page 47: Automatic Adjustment Time
14.6. Automatic Adjustment Time <Automatic adjustment time> parameter determines time interval between successive automatic internal adjustments. The time interval is declared in hours and ranges between 0.5 and 12 hours. To set time interval for automatic adjustment: select <Automatic adjustment time> option, ... -
Page 48: Header, Footer, Glp Printouts
SIGNATURE An area for the signature of an operator carrying out the adjustment. For detailed information on how to enter project name read section 7 of this user manual. For the parameters described above, one of these values Report example: must be selected: (NO) –... - Page 49 Balance type printout. Header BALANCE TYPE Footer Balance serial number. Header BALANCE S/N Footer Logged-in operator name. Header OPERATOR GLP printout Footer Currently selected product name. Header PRODUCT GLP printout Footer Currently selected customer name. Header CUSTOMER GLP printout Footer Currently selected customer name.
-
Page 50: Non-Standard Printouts
For instruction on how to enter non-standard Footer printouts read later section of this user manual. For the parameters described above, one of these values must be selected: (NO) – do not print; (YES) – print Printout examples: Header GLP printout Footer 15.3. - Page 51 {16} Statistics: Sum {17} Statistics: Average {18} Statistics: Min {19} Statistics: Max {20} Statistics: SDV {21} Statistics: D {22} Statistics: RDV {32} Serial number {35} Parts counting: Reference sample mass {36} Percent weighing: Reference mass {45} Target value {46} Tolerance {50} Product: Name {51}...
- Page 52 {151} Form feed for PCL printers {155} Cooperation with RADWAG CONNECT software Each of them can consist of approximately 1900 characters (letters, digits, special signs, spaces). You can apply non-standard characters, i.e. special signs, which allows you to print variable data.
-
Page 53: Variables
A computer keyboard of USB type can be connected to a balance, this enables easier and quicker editing of the printouts. Willing to insert any text, it is necessary to select a respective menu option and, using the keyboard, type the text. 15.4. -
Page 54: Working Modes Accessibility
Peak Hold Means of operation: max temporary indication occurring in the course of the weighing process is held on a display. Formulations Means of operation: by mixing specified ingredients you can obtain particular mixture, in order to program given formulation it is necessary to give mass values for particular ingredients. -
Page 55: Working Mode Parameters
o Using either key, select the working mode that is to be operated (grey field). o Press key to confirm 16.3. Working Mode Parameters Each working mode has programmable parameters determining its functioning. For overview of WEIGHING mode parameters, read section 9 of this user manual. Settings related to remaining working modes are to be found in respective sections describing particular working modes. -
Page 56: Parts Counting - Quick Access Keys
o YES, weight value of single piece to be updated, o NO, weight value of single piece not to be updated. Means of operation of ACAI function: 1. pieces quantity upon adding must increase, 2. pieces quantity upon adding cannot increase more than twice, 3. - Page 57 • Put the container (intended for the reference sample) on a weighing pan and tare it. • Press button (Determine part mass), <Reference sample quantity> edit box featuring an on-screen numeric keyboard is displayed. • Enter respective value and press key to confirm changes.
-
Page 58: Setting Reference Sample Mass By Acquiring Mass Of A Single Part From Database
• Single part mass must be equal or greater than 0.1 reading unit. Unless this condition is met, the weighing device displays a message: <Single part mass too low>. 17.5. Setting Reference Sample Mass by Acquiring Mass of a Single Part from Database Each product recorded in a database of products features set of information which allow to identify it. -
Page 59: Checkweighing
Caution: It is necessary to tare any additional elements (packaging) prior to counting process start. With single part mass set, put parts to be counted into tare container weight of which has been stored by balance memory. Number of weighed pieces is displayed on a screen. You can print stable measurement (stability pictogram displayed), to do it press key. -
Page 60: Making Use Of Checkweighing Thresholds
18.3. Making Use of Checkweighing Thresholds There are two methods for making use of the checkweighing thresholds: − selecting product < > with Min and Max threshold declared, − entering numeric value for the thresholds using < > or < >... -
Page 61: Dosing
• - press to modify Max Threshold value, do it using an on-screen numeric keypad. Enter the value, press key. Home screen of the Checkweighing mode is displayed automatically. DOSING < Dosing> is a working mode that facilitates dispensing process, wherein the dispensing takes as long as it is necessary to obtain a pre-defined target weight. -
Page 62: Percent Weighing Against Reference Sample Mass
• Bar graph colour corresponds to the current status of mass: yellow: mass value lower than 'target value - tolerance value', green: mass value within permissible tolerance range: 'target value + tolerance value', red: mass value greater than 'target value + tolerance value'. Procedure 2 –... - Page 63 Info field provides the following information: • Net weight • Reference mass • Product • Operator • Buttons: print header, print footer, set reference mass, determine reference mass (set as 100 %), databases - 63 -...
-
Page 64: Mode Related Settings
20.1. Mode Related Settings The supplementary settings enable you to adjust the working mode to your needs and requirements. For means of operation of these functions read point 11 WEIGHING Mode Settings. 20.2. Percent Weighing – Quick Access Keys Each working mode features automatically displayed set of default keys. The set can be modified by assigning out-of-list quick access keys to the on-screen buttons. - Page 65 Procedure 2 – accepting mass of load resting on the weighing pan as a reference mass • Press button (Determine reference mass (set as 100%)), message 'Load reference mass' is displayed. • Load the weighing pan with the product to be weighed, wait for a stable indication and press either key.
-
Page 66: Solids Density
• Product-related reference mass is automatically recorded and displayed in reference mass field. • 0.000 % indication is displayed (for unloaded pan). • From now on the weighed products mass is compared to the reference mass, the weight difference is displayed in [%]. SOLIDS DENSITY <Solids density>... -
Page 67: Solids Density Determination
requires particular permissions level. List of quick access keys it to be found in section 8 of this user manual. 21.3. Solids Density Determination Prior the procedure start, it is necessary to set process-related parameters: − Liquid type o Distilled water o Ethanol o Other liquid with determined density −... -
Page 68: Liquids Density
12. Upon confirmation of the second indication, the software automatically calculates measured solid density, which is next displayed together with a respective message, report on measurement is sent to a selected printer port. Exemplary report The report can be printed repeatedly, press either key. -
Page 69: Mode Related Settings
22.1. Mode Related Settings The supplementary settings enable you to adjust the working mode to your needs and requirements. Sinker volume Parameter allowing to enter volume of the sinker. For means of operation of the remaining functions read point 11 WEIGHING Mode Settings. 22.2. -
Page 70: Animal Weighing
Exemplary report The report can be printed repeatedly, press either key. To finish density determination process, press either key. Home screen of the Density Determination mode is displayed. The next measurement can be started now. The balance operates with previously entered settings (sinker volume) thus providing quicker start of the measurement. -
Page 71: Animal Weighing - Quick Access Keys
o YES: operation performed automatically, o NO: operation performed manually. Operation performed automatically The object is measured automatically when put on a weighing pan and when the indication exceeds the set threshold value (respective message is displayed). Upon completed measurement procedure, message 'Result' is displayed: Measurement of the next object can be carried out upon unloading the weighing pan and pressing either key. -
Page 72: Statistics
3. Upon completed mass determination process, „freezed” weighing result is displayed, the mass is automatically printed. The weighing result can be printed repeatedly, press either key. 4. The next measurement can be carried out when either < > key is pressed: - for manual operation press button,... -
Page 73: Measurement Series Parameters
24.3. Measurement Series Parameters For each series of measurements it is possible to overview the results, print a report, delete results of all statistics. Procedure 1: 1. Press button (Results). 2. Results of performed measurements are displayed, bottom bar features delete and print buttons (providing that keyboard function has been changed to Fn value). -
Page 74: Mode Related Settings
Info field provides the following information: • Net weight • Threshold • Gross weight • Operator • Buttons: print header, print footer, product, delete, databases 25.1. Mode Related Settings The supplementary settings enable you to adjust the working mode to your needs and requirements. -
Page 75: Formulations
The start of the next process of peak hold measurement is possible only after removing the load from the weighing pan and pressing button. This causes returning to the home screen of <Peak Hold> mode. Pictogram <Max> is automatically deleted. FORMULATIONS <... -
Page 76: Formulations - Quick Access Keys
Multiplier – parameter designed to allow preparation of multiple quantity of particular mixture within one weighing process: o YES: on selecting a formulation for processing, the software asks you to specify multiplier value, each ingredient is next multiplied by this value in the course of weighing, i.e. -
Page 77: Using Formulations In The Course Of Weighing
2. Code – click code button, new window opens, go to the window and enter code number. 3. Ingredients – click ingredients button, list of formulation ingredients is displayed (for new formulation the list is empty), add the ingredients: • Press <Add> button, •... - Page 78 − formulation not recorded in the Formulation Database – manual preparation, − formulation recorded in the Formulation Database, − formulation recorded in the Formulation Database – carried out using multiplier function. Select a particular formulation, weigh each of its ingredients. Wait for the indication to stabilize, next press key.
- Page 79 • Repeat the steps for remaining mixture ingredients. • Having completed dosing, press either key. • Wait to see the following message: Press either key to boost mixture mass to a specified weight value. • The main window displays net weight of already weighed ingredients, respective message is provided at the bottom bar: •...
- Page 80 Procedure 2 – formulation recorded in the Formulation Database. Basic option. Following the prompts: • Load the weighing pan with a container intended for the ingredients. • Go to quick access bar and press button (Start). • List of Formulations is displayed, select the formulation that is to be carried out. •...
- Page 81 • When mixture dispensing gets completed, formulation report is printed and recorded in a database (read the next section of this manual to view an example of the report), the following message is displayed: • To proceed to other operations, press either key.
- Page 82 • Home screen is displayed, container weight gets tared automatically. <Formulation> field provides formulation name, <Target value> field provides total weight value for a selected formulation, which total weight value is multiplied by the entered multiplier; navigation bar features messages guiding you through the process, and names of particular mixture ingredients.
-
Page 83: Performed Formulations Report
26.5. Performed Formulations Report Upon each completed formulation process the program generates a report. The report is recorded in <Formulation reports> database. Report file name contains date and time of particular process performance. Report example: --------------- Formulation Report ----------------- Operator Nowak Jan Formulation name Test 1... -
Page 84: Basic Totalizing
BASIC TOTALIZING < Basic Totalizing> is a working mode allowing you to sum net weights of measured samples. This function enables adding maximum 9999 ingredients in one cycle or such quantity of samples for which the total weight value is short enough to be displayed on 8-segment display. -
Page 85: Databases
• Next, take off the first sample and load the weighing pan with the second one. Wait for a stable indication and press key to confirm. • Add the remaining samples of the measurement series. Upon adding all of the samples, end basic totalizing procedure by following the below steps: Press button, results of performed measurements are displayed, bottom bar features delete and print buttons. -
Page 86: Database Connected Operations
• Products (5 000 records) • Operators (100 records) • Packaging (100 records) • Customers (1 000 records) • Formulations (100 records, maximum 25 ingredients per formulation) 28.1. Database Connected Operations The program enables the following operations to be carried out: adding new record, exporting data from databases, importing data to databases, deleting one record from the database, deleting all records from database, printing record data. -
Page 87: Delete A Record
• Press button. • The program automatically reads the file and the data is imported to the balance. Respective prompts are displayed for confirmation of successfully completed operation. CAUTION: In order to import databases, go to IMPORT/EXPORT submenu. IMPORT/EXPORT submenu is activated upon connecting the USB flash drive to the indicator. -
Page 88: Operators
28.3. Operators Operators database stores list of users allowed to operate the weighing device. Parameters defined for an operator: Name (43 characters maximum) Code (15 characters maximum) Password (15 characters maximum) Permissions level (options: None, Operator, Advanced operator, Administrator) ... -
Page 89: Reports
Alibi xxxxxx.ali Where: xxxxxx – weighing device serial number Files can be read using ALIBI Reader, PC software designed by RADWAG. You can download the software from RADWAG website: www.radwag.pl. Formulations Reports Formulation reports provide information about carried out formulations. Each report can be previewed and printed. -
Page 90: Ambient Conditions
11. Status 29.2. Ambient Conditions Ambient conditions reports database provide information about various environment-related parameters. Depending on the balance type the ambient conditions report can show values of temperature, humidity, atmospheric pressure. If the given balance is connected to a THB module then its indications are recorded to the database too. -
Page 91: Alibi
11. Result control, information specifying within which threshold limit the obtained result is comprised: MIN – below min threshold (possible only if <Result control> is set to <NO> value) OK – within min and max threshold MAX – above max threshold (possible only if <Result control> is set to <NO> value) 12. -
Page 92: Ethernet Port Settings
− Data bits - 7, 8 bits − Stop bits - 1, 2 bits − Parity - None, Odd, Even 30.2. ETHERNET Port Settings Procedure: • Select <Ethernet> port, set respective transmission parameters: − DHCP - Yes / No − IP Address - 192.168.0.2 −... - Page 93 Caution: The above presented values serve informative purposes only. Set the transmission parameters in accordance with your local network. Procedure: • Select <Wireless communication> port. • Enter <NETWORK CONFIGURATION> parameter and set DHCP parameter value: With DHCP set to NO value, enter manually: <IP>; <MASK>; <DEFAULT GATE> parameters.
-
Page 94: Usb Ports
• If you are waiting too long for the communication to be established it means that incorrect parameters must have been entered (e.g. password). • If you fail to establish the communication, contact RADWAG service team. The selected network and connection parameters are stored by the balance program. The program connects to the network in accordance with the stored parameters each time the balance is switched on. - Page 95 In order to make connection of balance and computer possible, it is necessary to install virtual COM port in a computer. To carry out this procedure, you need a respective driver installer which may be either downloaded from the website www.radwag.pl or taken from a CD storing the manuals: RADWAG USB DRIVER x.x.x.exe. Procedure: 1.
- Page 96 Select a respective folder and click 'Next' button to proceed. 'Ready to Install' window: In order to run installation process, press „Install” button and clicking respective keys, follow the install wizard. 2. Having completed driver installation, connect the balance to a computer, use maximum 1.8-meter long USB A/B cable (if the balance is already connected, disconnect it, next reconnect it using USB cable).
-
Page 97: Peripheral Devices
3. The system detects the new USB device and automatically starts searching for a respective driver. 4. Go to Device Manager and check number assigned to virtual COM port. For this very case it is STMicroelectronics Virtual COM Port (COM8). 5. - Page 98 DELAY – if the transferred information is incomplete, i.e. part of it gets lost (due to auto-entering or auto-formatting of data by computer program) during cooperation with Excel type program, set the parameter value to <2>. If the transferred information is still incomplete, the parameter value must be higher. The value ranges between 0 (quick data transfer) and 9 (slow data transfer –...
-
Page 99: Printer
*.csv format (file that can be opened using Excel). Wireless communication – wireless communication port for transferring data from balance to: a dedicated RADWAG software (e.g. PW WIN operated on a computer connected to balance via wireless communication), printer featuring wireless communication port, or network printer. - Page 100 USB B – USB 2 port, type B, for connecting a computer with a dedicated RADWAG software, e.g. PW-WIN. USB FREE LINK - USB port, type B, for connecting a computer. Tool for entering data, it functions as a keyboard. Upon proper modification of non-standard printout...
- Page 101 Settings of <Prefix> and <Suffix> parameters are valid for all printouts sent via the weighing device, e.g.: calibration reports, statistics etc., and header, footer and GLP printouts. Caution: It must be remembered that inserting paper crop command to <SUFFIX> parameter (control code) results in sending the code after each printout.
-
Page 102: Record Of Measurement Data Onto A Usb Flash Drive
• prefix – 1B7412 If on the printout in the place of the last digit there are any unexpected signs (for verified balances), then <CONTROL CODES> parameter must incorporate, apart from the code page, code of the UK signs chart: 1B5203. In such case the <CONTROL CODES> parameter is set as follows: prefix –... -
Page 103: Barcode Scanner Port
Caution: In RADWAG-adopted standard, the prefix is 01 sign (byte) hexadecimal format, the suffix is 0D sign (byte) hexadecimal format. For detailed description of 'balance' - 'barcode scanner' communication read APPENDIX 01 of this user manual. -
Page 104: Filtering
Procedure: • Enter <Peripherals / Barcode Scanner / Field selection> submenu, list of fields for search is displayed. Available values: None, Product, Operator, Customer, Packaging, Formulation. 31.4.6. Filtering Parameter allowing you to declare search criteria. Procedure: • Enter <Peripherals / Barcode Scanner / Filtering> submenu, list of search criteria is displayed. -
Page 105: Ambient Conditions Module
NONE, COM 1, COM 2. Caution: The balance cooperates with RADWAG additional display. Ensuring correct cooperation between the weighing device and the additional display requires baud rate parameter value to be set to 115200 bit/s for the port to which the additional display is plugged. -
Page 106: Ambient Conditions
32. AMBIENT CONDITIONS Parameters group which has been designed to enable you to turn on readout of ambient conditions recorded by the ambient conditions module. Using this submenu, you can also specify tolerance high and low threshold of both temperature and humidity, and a change rate for these values per hour. - Page 107 temperature values the thermometer pictogram is red. Max temperature – maximum temperature value, for higher temperature values the thermometer pictogram is red. Temperature delta t/h – maximum temperature change rate, for higher change rate the balance displays blinking red thermometer pictogram. Min humidity –...
-
Page 108: Communication Protocol
General Information A. A character based communication protocol (balance-indicator) is designed for establishing communication between a RADWAG balance and a peripheral device. B. The protocol consists of commands sent from a peripheral device to the weighing device and responses from the weighing device. -
Page 109: Response Format
Give accessible units Set unit Give current unit Activate sound signal Send all implemented commands Give balance type Give max capacity Give program version Set AUTOZERO function Set ambient conditions state Give set ambient conditions state Set filter Give current filter setting Set value release Give current value release setting Set last digit... - Page 110 COMMANDS OVERVIEW Zero Balance Format: Z CR LF Response options: Z_A CR LF - command understood and in progress Z_D CR LF command carried out Z_A CR LF - command understood and in progress Z_^ CR LF command understood but zeroing range is exceeded Z_A CR LF - command understood and in progress Z_E CR LF...
- Page 111 S_I CR LF - command understood but not accessible at this moment MASS FRAME - response: mass value in basic measuring unit Response format: 7-15 18 19 stability space space character mass space unit CR LF marker Example: S CR LF - command sent from a computer S_A CR LF - command understood and in progress...
- Page 112 Format: SUI CR LF Response options: SUI_I CR LF command understood but not accessible at this moment - command carried out, immediate response: mass value in current MASS FRAME measuring unit Response format: 7-15 stability space character mass space unit CR LF marker Example:...
- Page 113 Set Min Checkweighing Threshold Format: DH_XXXXX CR LF, where: _ - space , XXXXX - mass format Response options: DH_OK CR LF - command carried out ES CR LF - command not recognised (mass format incorrect) Set Max Checkweighing Threshold Format: UH_XXXXX CR LF, where: _ - space, XXXXX - mass format Response options:...
- Page 114 Format: RM_XXXXX CR LF, where: _ - space, XXXXX - mass format Response options: RM_OK CR LF - command carried out - command understood but not accessible at this moment (e.g. mode other RM_I CR LF than PERCENT WEIGHING) ES CR LF - command not recognised (mass format incorrect) Value Release Format: SS CR LF...
- Page 115 Lock Balance Keypad Format: K1 CR LF Response options: K1_I CR LF - command understood but not accessible at this moment K1_OK CR LF - command carried out Command locks the balance keypad (proximity sensors, touch panel) until the moment of turning the balance off or until sending K0 command.
- Page 116 12_” Checkweighing” <CR><LF> OK <CR><LF> - command carried out Set Working Mode Command overview: Command sets particular working mode. Format: OMS_n <CR><LF> Response options: OMS_OK <CR><LF> - command carried out - error in-course of command execution, no parameter OMS_E <CR><LF> or incorrect format - command understood but not accessible at this OMS_I <CR><LF>...
- Page 117 Format: US_x <CR><LF> Response options: US_ x_OK <CR><LF> - command carried out, returns accessible units US_E <CR><LF> - error in-course of command execution, no parameter or incorrect format US_I <CR><LF> - command understood but not accessible at this moment x - parameter, units symbols: g, mg, ct, lb, oz, ozt, dwt, tlh, tls, tlt, tlc, mom, gr, ti, N, baht, tola, msg, u1, u2, next Caution: If x=next the command swaps to another available unit on the list (it simulates...
- Page 118 Format: PC CR LF Command: PC CR LF - send all implemented commands - command carried out, the indicator displays Response: PC_A_”Z,T,S,SI…” all implemented commands. Give Balance Type Format: BN <CR><LF> Response options: BN_A_”x” <CR><LF> - command understood, response: weighing device type BN_I <CR><LF>...
- Page 119 Command: A_1<CR><LF> - turn autozero function on Response: A_OK<CR><LF> - autozero function is on AUTOZERO function operates until it is turned off by A 0 command. Set Ambient Conditions State Format: EV_n <CR><LF> Response options: EV_OK <CR><LF> - command carried out - error in-course of command execution, no parameter or incorrect EV_E <CR><LF>...
- Page 120 The command changes settings for a current working mode if, for a particular balance type, filter settings are assigned to the working mode. Example: Command: FIS_3<CR><LF> - set average filter Response: FIS_OK<CR><LF> - average filter set Give Current Filter Setting Command overview: Command gives information about currently set filter.
- Page 121 x - parameter, symbol of current value release setting Example: Command: ARG<CR><LF> - give current value release setting Response: ARG_2_OK<CR><LF> - current value release setting: fast+reliable Set Last Digit Format: LDS_n <CR><LF> Response options: LDS_OK <CR><LF> - command carried out - error in-course of command execution, no parameter or incorrect LDS_E <CR><LF>...
- Page 122 Command: PRG CR LF - give profile name Response: PRG _A_”Fast” – profile name –-”Fast” Profile Selection Format: PROFILE_Name CR LF where: _ - space (enter name in a form provided by the balance – lower-case letters and upper-case letters, spaces; e.g. Fast; Fast dosing, User, Precision). Response options: PROFILE OK CR LF - command understood, new profile set...
-
Page 123: Manual Printout / Automatic Printout
- command carried out, response: mass value and remaining data where: _ - space 33.4. Manual Printout / Automatic Printout PM C32 series balance enables generating manual or automatic printouts. • Manual printout: upon indication stabilization press key. • Automatic printout is generated automatically in accordance with the settings for automatic printout (read section 11). -
Page 124: Peripheral Devices
Mass printout format: 4 -12 stability space character mass space unit marker Stability [space] if stable marker [?] if unstable [^] if high limit is out of range [v] if low limit is out of range Character [space] for positive values [-] for negative values Mass 9 characters with decimal point, right justification... - Page 125 - 125 -...
-
Page 126: Additional Equipment
5. A special protocol is required in order the code be received by RADWAG equipment. It is required to program an appropriate prefix and suffix. In RADWAG-adopted standard, the prefix is 01 sign (byte) hexadecimal format, the suffix is 0D sign (byte) hexadecimal format. - Page 127 7. Programming of scanners is performed by reading special barcodes. 8. Scanners marketed together with RADWAG systems are always configured according to the rules above. Barcode with required prefix and Barcode without required Code type suffix in hexadecimal format -fixes in ASCII format...
- Page 128 - 128 -...
- Page 129 - 129 -...
Need help?
Do you have a question about the PM 10.C32 and is the answer not in the manual?
Questions and answers