Table of Contents
Advertisement
Quick Links
Advertisement
Table of Contents

Related Manuals for RADWAG PM C32


Summary of Contents for RADWAG PM C32
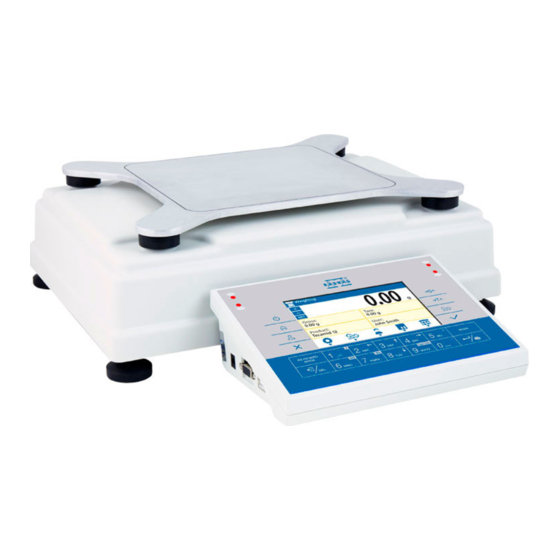
- Page 1 IMMB-09-01-09-20-EN Start up Guide Precision Balances • PM C32...
- Page 2 To view a complete User Manual go to the website or scan QR code: radwag.com/en/manuals/3670...
- Page 3 1. CONTENT Models: PM C32 (max ≤ 15 kg) Precision balance Weighing pan Power adapter* ×1 ×1 ×1 Models: PM C32 (max: 25-50 kg) Precision balance Weighing pan Power adapter* ×1 ×1 ×1 Models: PM 60.1.C32 (max ≥ 60 kg)
-
Page 4: Recommendations And Warnings
Models: PM C32 (max ≥ 60 kg) Keep the packaging should a warranty claim or service be required. 3. RECOMMENDATIONS AND WARNINGS Operate the device in a room where the temperature ranges between 10–40 °C +104 (50–104 °F) and where the relative humidity is below 80%. Temperature must change slowly and gradually. -
Page 5: Remove Transport Lock
4. ACTIVITIES TO BE DONE PRIOR TO OPERATION 4.1. Remove transport lock Models: PM C32 (max = 60 kg only) 4.2. Grounding spring check Models: PM C32 (max: 10 - 50 kg only) Check whether the grounding spring takes its intended location. -
Page 6: Preparing For Work
Models: PM C32 (max: 25-50 kg) Models: PM C32 (max = 60 kg) 6. PREPARING FOR WORK Place the device at the workstation, wait until it reaches room temperature. 6.1. Temperature stabilization up to 1- 8 h Prior to switching the device on,... -
Page 7: Balance Levelling
6.2. Balance levelling Models: PM C32 (max: 10 - 50 kg) To level the balance, turn its feet and keep turning the feet until an air bubble takes the central position. Models: PM C32 (max = 60 kg) To level the balance, turn its... -
Page 8: Panel Keys
7. PANEL AND SCREEN 7.1. Panel keys Proximity sensor Proximity sensor Switching on / off Zeroing Main menu Taring Log in Weighing unit Cancel Confirm Text / Numeric Working mode keyboard mode Text / Numeric keyboard with navigation keys ENTER / PRINT Back / delete 7.2. -
Page 9: Basic Operations
8. BASIC OPERATIONS 8.1. Adjustment Press the key under the icon to start Wait for the adjustment completion. the adjustment. 8.2. Zeroing 0.68 0.68 Make sure that the weighing pan is empty The balance has been zeroed. and press key. 8.3. -
Page 10: Units Selection
8.4. Working modes selection Weighing Parts counting Dosing Animal weighing Checkweighing Solids density Formulations Liquids density Percent weighing Peak hold Statistics Using key enter working modes menu. Using keys select working mode and press key to confirm. 8.5. Units selection The balance enables selecting the following weighing units: •... -
Page 11: User Settings
Operators 1111 Using numeric keyboard enter “1111” password You have logged as the administrator. and press key to confirm. 9.2. User settings Prior balance users setup, log in as Administrator (point 9.1.). Databases Products Users Packaging Customers Press the key under the icon to enter Using keys, go to “Users”... - Page 12 Name John Smith Code Password ****** Permissions User Using keyboard enter user name and User name has been entered. press key to confirm. Following the above procedure, set remaining parameters: Code: Enter user ID Password: Enter user password Access levels: Set respective access level (user, advanced, admin) 9.3.
- Page 13 Working modes Weighing Availability Readout Weighing Proximity sensors Parts counting Autotare Checkweighing Print mode When stable Using keys select “Weighing” mode, Using keys select “Proximity sensors”, and press key to confirm. and press key to confirm. Right sensor Left sensor None Accept / Print Right sensor...
- Page 14 10. PERIPHERAL DEVICES CONNECTORS Power adapter Computer Printer Computer Printer Additional Barcode display scanner Wi-Fi® Keyboard Computer Printer Computer Barcode Printer scanner ® ® Wi-Fi is a registered trademark of Wi-Fi Alliance.
-
Page 15: Device Cleaning
11. DEVICE CLEANING 11.1. General recomendations Prior to cleaning, it is necessary to Use soft cloths made of microfiber, Apply the cleanser onto the cloth first. disconnect th e balance from the natural fiber or man-made fiber. Avoid Avoid applying the cleanser directly mains. - Page 16 www.radwag.com...
Need help?
Do you have a question about the PM C32 and is the answer not in the manual?
Questions and answers