Table of Contents
Advertisement
Quick Links
Operating Manual
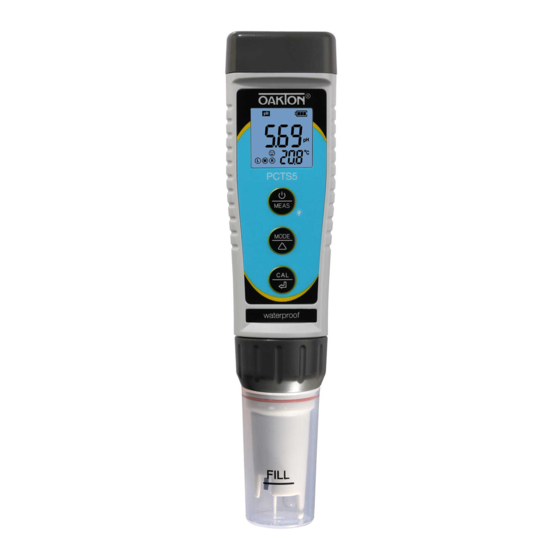
PCTSTestr
5 Pocket Tester
™
(pH/Conductivity/TDS/Salinity/Temperature)
Thank you for purchasing the Oakton PCTSTestr 5
Multiparameter Pocket Tester. Please carefully read this
operating manual before using the product to obtain an
accurate and reliable test result and avoid unnecessary
damage to the meter or probe.
Features
• Five measuring parameters: pH, conductivity, TDS, salinity,
and temperature
• Large easy-to-read LCD with 2-color backlight
• Replaceable single-junction sensor saves you money
• Auto power-off function conserves battery life
• IP67 waterproof rating
Keypad Functions
Short press = <2 seconds
Long press = >2 seconds
1. Short press to turn on the tester and long press to turn
off the tester.
MEAS
2. When turned off, long press to enter parameter setting mode.
3. In measurement mode, short press to turn on backlight.
1. In measurement mode, short press to switch parameter from
MODE
pH to Cond to TDS to Sal.
2. In mode setting, short press to change parameter
(unidirectional).
1. Long press to enter calibration mode.
CAL
2. In calibration mode, short press to confirm calibration.
3. When measured value is locked (HOLD icon), short
<
press to unlock.
Preparation Before Use
If it is first-time use or the tester hasn't been used for a long time, pour
some 3M KCL solution in the probe cap (about
1/5 of the probe cap) and soak the probe for 15 to 30 minutes.
When not in use, we recommend storing the probe in 3M KCL stor-
age solution (preferably Oakton Electrode Storage Solution SKU
00653-04) in the probe cap to maintain the sensor's accuracy. But
even if stored dry, it won't do any permanent damage to the sensor.
It will only temporarily cause the probe to lose its sensitivity, which
can always be restored by soaking in the storage solution.
If the soaking solution was contaminated, please replace immediately.
1
Conductivity Calibration
1. Press MODE/ key to switch to conductivity measurement mode.
Rinse the probe in distilled water and dry it.
2. Pour a small amount of 1413 μS/cm and 12.88 mS/cm
conductivity calibration solutions into separate calibration bottles.
3. Long press CAL/ key to enter calibration mode, short press
/MEAS to exit.
4. Dip the probe into 1413 μS/cm calibration solution. Stir gently,
leave it to stand. Wait for the measurement stability icon () to
appear and stay on the display (see Fig 1); then short press CAL/ to
complete the 1st calibration. Tester returns to measurement mode,
and indication icon "M" appears on bottom left side of display.
5. After calibration, dip the probe in 12.88 mS/cm conductivity calibra-
tion solution. If the value is accurate, it is not necessary to conduct a
2nd point calibration. If it is inaccurate, follow the steps above to com-
plete the 2nd point of calibration using 12.88 mS/cm buffer solution.
Indication icons "M" and "H" will appear on bottom left side of display.
*1000 μS/cm = 1 mS/cm
Conductivity Measurement
Press
/MEAS key to turn on the tester. Rinse the probe in distilled
water and dry it. Dip the probe in sample solution, stir gently, and
allow it to stand still in the solution until a stable reading is reached.
Take reading after stability icon () comes up and stays. Press
MODE/ key to switch from Conductivity to TDS and Salinity.
Notes
A. The TDS and Salinity measurements are converted from the
conductivity measurements via a certain conversion factor.
B. The tester can calibrate 84 μS/cm, 1413 μS/cm and 12.88 mS/cm
conductivity calibration solution. User can conduct 1 to 3 points
of calibration (refer to table below). Usually calibrating the tester
with 1413 μS/cm conductivity standard solution alone will meet
the testing requirement.
Calibration
Calibration
indication icon
standard
L
84 μS/cm
M
1413 μS/cm
H
12.88 mS/cm
C. The tester has been calibrated before leaving the factory. Gener-
ally, users can use the tester directly or users can test conductivity
standard solutions first. If the error is large, then calibration is
needed.
D. For conductivity calibration solutions, we recommend that users
replace new solutions after each use to maintain the standard
solution's accuracy. Do NOT pour the used calibration solutions
back into the solution bottles in case of contamination.
4
pH Calibration
1. Short press
/MEAS key to turn on the meter. Rinse the probe in
distilled water and use tissue paper to gently dab off excess water
(never rub or wipe the sensor).
2. Pour a small amount of pH 7.00 and pH 4.00 buffer solutions in
separate calibration bottles.
3. Long press CAL/ key to enter calibration mode; short press
/MEAS key to exit.
4. Dip the probe in pH 7.00 buffer solution (SKU 00654-04), stir gently,
and allow it to stand still in the buffer solution until a stable reading
is reached. When stability icon () appears and remains on the
screen (see Fig 1); then short press CAL/ key to complete the
1-point calibration. The tester returns to measurement mode and
indication icon "M" will appear at the bottom left of the screen, indi-
cating the middle point of calibration has been completed.
5. To perform a 2-point calibration after the pH
7.00 buffer, rinse the probe in distilled water
and dry it. Long press CAL/ key to enter cal-
ibration mode.
6. Dip the probe in pH 4.00 buffer solution (SKU
00654-00), stir gently, and allow it to stand
still in the buffer solution. When the stability
icon () appears and remains on the screen,
short press CAL/ key to complete 2-point
calibration. The tester returns to measure-
ment mode and indication icons "L" and "M"
will appear at the bottom left of the screen.
7. If necessary, rinse the probe in distilled water and dry it, and dip
the probe in 10.01 buffer solution (SKU 00654-08) to complete 3rd
point of calibration according to above steps. Indication icons "L",
"M", and "H" will appear at the bottom left of the screen.
Notes
A. Tester will automatically recognize pH buffer solution. User can
perform 1-, 2-, or 3-point calibration. But for the 1st point calibra-
tion, only 7.00 pH solution can be used. Then use other buffer
solutions to conduct 2nd or 3rd point calibration. Tester will
automatically recognize five kinds of pH buffer solutions.
Refer to the table below:
USA
Calibration
series
1-point
1) 7.00 pH
1) 7.00 pH
2) 4.00 or
1.68 pH
2-point
1) 7.00 pH
2) 10.01 or
12.45 pH
1) 7.00 pH
2) 4.00 or
3-point
1.68 pH
3) 10.01 or
12.45 pH
E. Temperature compensation factor: The default setting of the temper-
ature compensation factor is 2.0%/ºC. User can adjust the factor based
on test solution and experimental data in parameter setting P4.
Solution
NaCl
5% NaOH
Dilute ammonia
10% Hydrochloric acid
5% Sulfuric acid
F. TDS and conductivity are linear related, and the conversion factor
is 0.40 to 1.00. Adjust the TDS factor in parameter setting P5 based
on the requirements in different industries. The factory default set-
ting is 0.71. Salinity and conductivity are linear related, and the
conversion factor is 0.5. The tester only needs to be calibrated in
Conductivity mode, then after calibration of conductivity, the
meter can switch from conductivity to TDS or salinity.
Conversion Example: if conductivity measurement is 1000 μS/cm,
then the default TDS measurement will be 710 ppm (under the
default 0.71 conversion factor), and the salinity be 0.5 ppt.
G. For the self-diagnosis information, please refer to the
table below:
Symbol
Self-diagnostic information
Wrong conductivity buffer
Er 1
solution, which exceeds the
recognizable range of the meter.
CAL/ key is pushed before
Er 1
measurement is stable ( comes
up and stays on screen).
Measuring
range
0 to 200 μS/cm
200 to 2000 μS/cm
2 to 20 mS/cm
pH
6.6
pH
7
☺
Figure 1
☺
NIST
Indication
Recommended
series
icons
Accuracy ≥0.1 pH
1) 6.86 pH
M
1) 6.86 pH
Range
2) 4.01 or
L M
<7.00 pH
1.68 pH
1) 6.86 pH
Range
2) 9.18 or
M H
>7.00 pH
12.45 pH
1) 6.86 pH
2) 4.01 or
Wide measurement
1.68 pH
L M H
range
3) 9.18 or
12.45 pH
2
Temperature compensation factor
2.12%/°C
1.72%/°C
1.88%/°C
1.32%/°C
0.96%/°C
Checking and methods to fix
1. Check if buffer solution is
correct.
2. Check if electrode is
damaged.
Wait for the stability () icon
to come up and stay, then
press CAL/ key.
5
B. For pH Calibration buffer solutions, we recommend that user
replaces new buffer solution after each use to maintain the stan-
dard buffer's accuracy. Do not pour the used calibration solutions
back into the solution bottles in case of contamination.
C. This pH probe will NOT give accurate and stable readings for dis-
tilled or deionized water. This is because distilled and deionized
water do not have enough ions present for the electrode to func-
tion properly. Specialized pH probes and techniques are needed
for distilled/deionized water measurement.
D. When testing purified water like spring water or drinking water, it
will take longer for the readings to stabilize (typically 3 to 5 min-
utes) because there are very few ions left to be detected by the
sensor in the purified water.
E. Do NOT store pH probe in distilled water to prevent permanent
damage to the probe.
F. For self-diagnosis information, please refer to table:
Symbol
Self-diagnostic information
Checking and methods to fix
1. Check if calibration solution is
correct (1st point of pH
Wrong calibration solution
Er 1
calibration must be pH 7.00).
or the range of calibration
2. Check if electrode is damaged.
solution exceeds standard.
3. Check if there is any air bubble
in the glass bulb pH sensor.
CAL/ key is pushed before
Wait for the stability () icon
Er 2
measurement is stable ()
to come up and stay, then press
comes up and stays on
CAL/ key.
screen).
*If you find any air bubble in the glass bulb of the pH sensor, simply invert the
probe for a few times to remove it. The existence of an air bubble in the glass
bulb will significantly decrease the accuracy of measurement.
* The 1st point calibration must be 7.00 pH. Perform the 2nd point calibration
(4.00 pH) immediately after the 1st point. Do NOT turn off the meter before
you conduct 2nd point calibration. If the meter is turned off after 1st point cali-
bration, user will need to restart the calibration process with the 7.00 pH first
and the 4.00 pH following after. Calibrating directly in pH 4.00 after turning
meter off and back on will cause "Er1".
pH Measurement
1. Short press CAL/ key to turn on the tester. Rinse the probe in
distilled water and dry it. Dip the probe in sample solution, stir
gently, and allow it to stand still in the solution. Take readings
after stability indicator icon () appears and stays on the screen.
3
Setting the Parameters
When tester is turned off, long press
/MEAS key to enter parame-
ter setting. Short press MODE/ key to switch from P1 to P2...P8.
Short press CAL/ key and parameter will flash, then short press
MODE/ key to choose desired parameter. Short press CAL/ key to
confirm parameter selection. Long press
measurement mode.
Symbol
Menu setting
P1
Select pH buffer standards
P2
Select Automatic Lock (HOLD)
P3
Select backlight
P4
Set temperature compensation factor
P5
Set TDS factor
P6
Select salinity unit
P7
Select temperature unit
P8
Restore to factory default
Notes
A. Select standard pH buffer solution (P1).
There are two options of standard buffer solutions: USA series and
NIST series. Refer to following chart:
pH Standard Buffer Solution Series
Icons
USA series
L
1.68 pH or 4.00 pH
Three-point
7.00 pH
M
calibration
H
10.01 pH or 12.45 pH
B. Automatic Lock (P2)
Select "On" to activate auto lock function. When reading is stable for
more than 10 seconds, the tester will lock the value automatically, and
"HOLD" icon will appear on the bottom left of the screen. Press CAL/
key to cancel HOLD on reading.
C. Backlight (P3)
Select "Off" to turn off backlight function, "On" to turn on backlight
function, or "1" to have backlight last for 1 minute.
D. Temperature Unit (P6)
Select °C or °F; the factory default is °C.
E. Factory Default Setting (P7)
Select "Yes" to recover instrument calibration to theoretical value
(pH value in zero potential is 7.00, slope is 100%), parameter setting
return to initial value. This function can be used when instrument
does not work well in calibration or measurement. Calibrate and
measure again after resetting the unit to factory default status.
6
/MEAS key to return to
Factory
Selection
default
USA – NIST
USA
Off – On
Off
Off – 1 – On
1
0.00 to 4.00%
2.00%
0.40 to 1.00
0.71
ppt – mg/L
ppt
°C – °F
°C
No – Yes
No
NIST series
1.68 pH or 4.01 pH
6.86 pH
9.18 pH or 12.45 pH
Advertisement
Table of Contents

Related Manuals for Oakton PCTS5


Summary of Contents for Oakton PCTS5
- Page 1 D. When testing purified water like spring water or drinking water, it 4. Dip the probe in pH 7.00 buffer solution (SKU 00654-04), stir gently, Thank you for purchasing the Oakton PCTSTestr 5 will take longer for the readings to stabilize (typically 3 to 5 min- and allow it to stand still in the buffer solution until a stable reading Multiparameter Pocket Tester.
-
Page 2: Specifications
Oakton Instruments, any malfunctioned or damaged prod- Accuracy ±0.01 pH ±1 digit uct attributable to responsibility of Oakton Instruments, for a period 1, 2, or 3 points; of two years from the delivery (a six-month limited warranty applies...
Need help?
Do you have a question about the PCTS5 and is the answer not in the manual?
Questions and answers