Table of Contents
Advertisement
Quick Links
Operating Manual
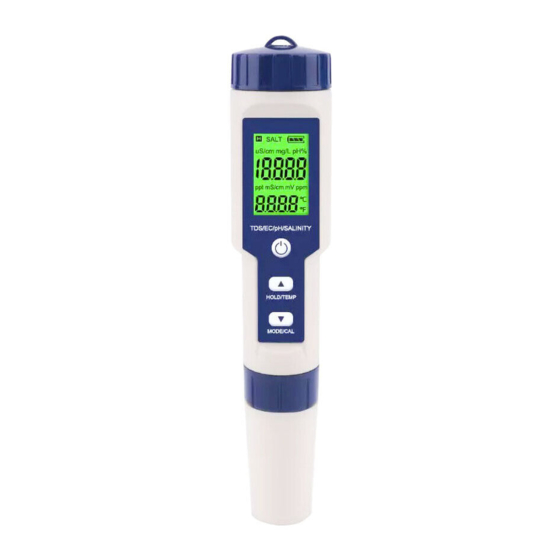
EcoTestr CTS1 Pocket Tester
TM
Special Notes
•
The batteries have been pre-installed. Please pull out the
insulating paper before first-time use. When replacing batteries,
the positive side (+) of every single battery must face up. Please
check the detail in "Battery Installation" section.
•
Before shipment, the factory adds in some water droplets to the
tester's cap. This ensures that the probe keeps its sensitivity. This
practice of adding several drops of water into the cap to keep
sensor activation is highly recommended when storing the tester.
Keypad Functions
Short press =< 2 seconds
Long press => 2 seconds
1. Short press to turn on; long press to turn off.
2. When turned off, long press to enter setup mode.
MEAS
3. In mode setting , short press to change parameter.
1. In measurement mode, long press to enter calibration mode,
CAL
short press to switch Conductivity, TDS and Salinity.
MODE
2. In calibration mode, short press to confirm calibration.
3. In mode setting, short press to confirm parameter selection.
Calibration
1. The tester only needs to be calibrated for conductivity, then
press
to switch to Conductivity → TDS→ Salinity.
2. Press
and switch to conductivity mode, rinse the probe in
distilled water and shake off excess water.
3. Long press
to enter calibration mode; short press
4. Dip the probe into 1413 μS/cm calibration solution. Stir gently,
leave it to stand. Wait for the measurement stability icon () to
appear and stay on the display, then short press
the 1st calibration. Tester returns to measurement mode, and
calibration icon "M" appears on the bottom left side of display.
5. Rinse probe in distilled water and shake off excess water. Repeat
#3 and #4 to complete 2nd calibration in 12.88 ms/cm calibration
solution. Tester returns to measurement mode, and calibration
icon "M" and "H" will appear on the bottom left side of display.
Measurement (Conductivity, TDS & Salinity)
1. Short press
to turn on the tester, short press
the desired measurement mode (Conductivity, TDS or salinity).
Rinse probe in distilled water and shake off excess water.
2. Stir the probe in the sample solution gently, leave it to stand. Wait
for the stability icon () to stay on screen, then take the reading.
3. Rinse off the probe thoroughly in distilled water after each test.
Notes:
•
If probe response is slow, we recommend soaking the probe in
12.88 mS/cm solution for 15 to 30 minutes to restore its
sensitivity. Re-calibrate the tester after rinsing. Please add
several drops of water into the cap to keep sensor activation
when storing the tester.
•
The tester adopts 1413 μS/cm and 12.88 mS/cm standard
calibration solutions. User can use 1 or 2 point calibrations as
needed. For most circumstances, calibrating in 1413 μS/cm to
complete 1st point calibration will meet testing requirements.
•
The tester has already been calibrated before leaving factory.
User can use the tester immediately or can test it in the standard
calibration solutions to evaluate its accuracy. If error is large,
calibrate the tester before using.
•
We recommend replacing the calibration solution after 5 to 10
calibrations to maintain accuracy.
•
The surface coating of probe sensor bar is firm platinum black
processed with special techniques. It improves measuring
performance and coating firmness. If the probe is contaminated. it
can be gently brushed with a soft brush in warm soap water or
alcohol.
Setting the Parameter
When test is off, long press
press
to switch P1-P2...P5, short press
flash →press
confirm parameter selection → long press
measurement mode.
Symbol
P1
P2
P3
P4
P5
Notes:
•
Conductivity range (P1) description: Aut - all ranges: 0~2000
μS/cm, 0.01~20.00mS/cm. Once the readings are greater than
2000 μS/cm, the unit will automatically become mS/cm.
1 mS/cm = 1000 μS/cm. μS - only μS/cm range: 0~2000 μS/cm;
mS/cm - only mS/cm range: 0.01~20.00 mS/cm.
•
TDS factor (P2) description: User can adjust TDS factor by
experimental data or experience. The following chart lists some
to exit.
commonly used TDS factors for reference:
Conductivity of the solution
to complete
•
Restore to factory default (P5) description: Select "Yes" in P5 to
restore the calibration to the theoretical values and parameter
setting to original values. When tester's calibration or
measurement performs abnormally, this function can be adopted
to switch to
so the tester returns to factory default setting and then users can
conduct calibration or take measurements again.
Self-Diagnostic Messages
Self-diagnosis
Symbol
information
Wrong calibration
solution, or measured
value is not within the
range of the tester
before measurement
is stable ( appears
and stays)
to enter setup mode → short
to choose desired parameter → short press
Menu setting
Select conductivity range*
Aut* – μS – mS
Select TDS factor
Select salinity unit
Select temperature unit
Restore to factory default
0 to 100
µS/cm
100 to 1000
µS/cm
1 to 10 m
S/cm
10 to 100 m
S/cm
How to fix
• Check if calibration solution is
correct.
• Check if probe is damaged.
is pressed
Wait for the measurement stability
icon () to appear and stay,
then press
and parameter will
to
to return to
Selection
Factory default
Aut
0.71
0.40~1.00
ppt – g/L
ppt
℃ – ℉
/
No – Yes
No
TDS factor (P2)
0.60
0.71
0.81
0.94
Advertisement
Table of Contents

Related Manuals for Oakton EcoTestr CTS1


Summary of Contents for Oakton EcoTestr CTS1
- Page 1 The tester has already been calibrated before leaving factory. User can use the tester immediately or can test it in the standard calibration solutions to evaluate its accuracy. If error is large, EcoTestr CTS1 Pocket Tester calibrate the tester before using. •...
- Page 2 Oakton Instruments reserves the right to update the information in this manual without giving notice in advance. www.coleparmer.com...
Need help?
Do you have a question about the EcoTestr CTS1 and is the answer not in the manual?
Questions and answers