Advertisement
Quick Links
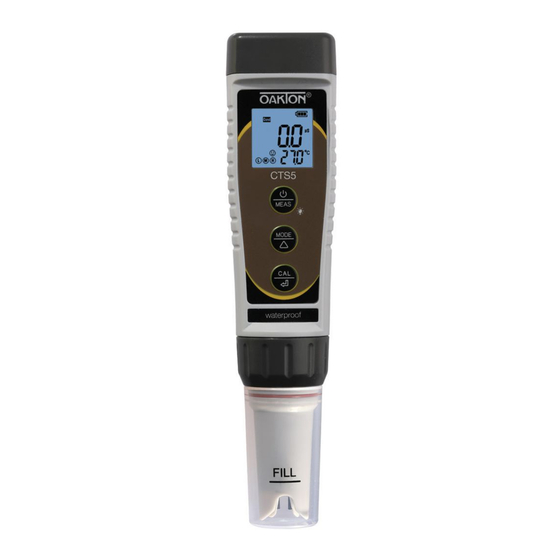
Operating Manual
CTSTestr
5 Pocket Tester
™
Thank you for purchasing the Oakton
CTSTestr
®
Pocket Tester. Please carefully read this operating manual before
using the product to obtain an accurate and reliable test result
and avoid unnecessary damage to the tester or probe.
Features
• Measuring parameters:
• Replaceable single-junction
conductivity, TDS, salinity,
sensor saves you money
temperature
• Auto power-off function
• Large easy-to-read LCD with
conserves battery life
2-color backlight
• IP67 waterproof rating
Keypad Functions
Short press = <2 seconds
Long press = >2 seconds
1. Short press to turn on the tester and long press to turn off the
tester.
MEAS
2. When turned off, long press to enter parameter setting mode.
3. In measurement mode, short press to turn on backlight.
1. In measurement mode, short press to switch from COND
MODE
to TDS to SAL.
2. In parameter setting mode, short press to change parameter
(unidirectional).
1. Long press to enter calibration mode.
CAL
2. In calibration mode, short press to confirm calibration.
3. When measured value is locked (HOLD icon), short press to
<
unlock.
Conductivity Calibration
1. Press MODE/ key to switch to conductivity measurement mode.
Rinse the probe in distilled water and dry it.
2. Pour a small amount of 1413 μS/cm and 12.88 mS/cm conductivity
calibration solution into calibration bottles.
3. Long press CAL/ key to enter calibration mode, short press
/MEAS key to exit.
4. Dip the probe in 1413 μS/cm conductivity calibration solution,
stir gently and allow it to stand still in the solution until a stable
reading is reached. When stability icon () appears and remains
on the screen, short press CAL/ key to complete the one-point
calibration. The tester returns to measurement mode and
indication icon "M" will appear at the bottom left of the screen.
5. For a 2-point calibration. After 1st point calibration, dip the probe
in 12.88 mS/cm conductivity calibration solution. If the value is
accurate, it is not necessary to conduct a 2nd point calibration. If
it is inaccurate, repeat steps #3 and #4 above to complete the
2nd point of calibration using 12.88 mS/cm buffer solution.
Conductivity Measurement
1. Press
/MEAS key to turn on the tester. Rinse the probe in
distilled water and dry it.
2. Dip the probe in sample solution, stir gently, and allow it to
stand still in the solution until a stable reading is reached and
the stability indicator () remains on, then take a conductivity
reading.
5 Multiparameter
™
3. Press MODE/ key to switch from Conductivity to TDS to Salinity
parameters.
Notes
• The TDS and salinity measurements are converted from the
conductivity measurements via a certain conversion factor.
• The tester can calibrate 84 μS/cm, 1413 μS/cm, and 12.88 mS/cm
conductivity calibration solution. User can conduct 1 to 3 point
calibrations (see table below). Usually calibrating the tester with
1413 μS/cm solution alone meet testing requirements.
Calibration
indication icon
L
M
H
• The tester has been calibrated before leaving the factory. Generally,
users can use the tester directly or users can test conductivity buffer
solutions first. If the error is large, then calibration is needed.
• For conductivity calibration solutions, we recommend that users
replace with new solution after each calibration to keep the
standard solution's accuracy. Do NOT pour the used calibration
solution back into the solution bottle in case of contamination.
• For temperature compensation factor, the default setting of the
temperature compensation factor is 2.0%/°C. User can adjust the
factor based on test solution and experimental data in parameter
setting P3.
Solution
NaCl
5% NaOH
Dilute ammonia
10% Hydrochloric acid
5% Sulfuric acid
• TDS and conductivity are linear related, and the conversion factor
is 0.40 to 1.00. Adjust the factor in parameter setting P4 based
on the requirements in different industries. The factory default
setting is 0.71. Salinity and conductivity are linear related, and the
conversion factor is 0.5. The tester only needs to be calibrated in
Conductivity mode, then after calibration of conductivity, the tester
can switch from conductivity to TDS or salinity.
• 1000 μS/cm = 1 mS/cm; 1000 ppm = 1 ppt
Calibration
Measuring
standard
range
84 μS/cm
0 to 200 μS/cm
1413 μS/cm
200 to 2000 μS/cm
12.88 mS/cm
2 to 20 mS/cm
Temperature compensation factor
2.12%/°C
1.72%/°C
1.88%/°C
1.32%/°C
0.96%/°C
• Conversion Example: If conductivity measurement is 1000 μS/cm
then the default TDS measurement will be 710 ppm (under the
default 0.71 conversion factor), and the salinity be 0.5 ppt.
Setting the Parameters
When tester is off, long press
/MEAS key to enter parameter set-
ting mode. Short press MODE/ key to switch from P1 to P2...P7.
Short press CAL/ key and parameter will flash, then short press
MODE/ key to choose desired parameter. Short press CAL/ key to
confirm selection. Long press
/MEAS key to exit parameter setting
mode.
Symbol
Menu setting
Selection
P1
Auto lock (HOLD)
Off – On
P2
Backlight
Off – 1 – On
Temperature
P3
0.00 to 4.00%
compensation factor
P4
TDS factor
0.40 to 1.00
P5
Salinity unit
ppt – mg/L
P6
Temperature unit
°C – °F
Restore to factory
P7
No – Yes
default
Notes
• For Automatic Lock (P1), select "On" to activate auto lock function.
When reading is stable for more than 10 seconds, the tester will
lock the value automatically, and "HOLD" icon will appear on the
bottom left of the screen. Press CAL/ key to cancel HOLD on
reading.
• For Backlight (P2), select "Off" to turn off backlight function,
"On" to turn on backlight function, or "1" to have backlight last
for 1 minute.
• For Factory Default (P7), select "Yes" to restore the calibration to
theoretical values and parameter settings to initial values. When
tester's calibration or measurement performs abnormally, this
function can be adopted so the tester returns to factory default
setting and then users can conduct calibration or take measure-
ments again.
,
2
Factory default
Off
1 (1-min auto-off)
2.00%
0.71
ppt
°C
No
Advertisement

Related Manuals for Oakton CTS5


Summary of Contents for Oakton CTS5
- Page 1 () remains on, then take a conductivity ting mode. Short press MODE/ key to switch from P1 to P2…P7. reading. Short press CAL/ key and parameter will flash, then short press Thank you for purchasing the Oakton CTSTestr 5 Multiparameter ®...
-
Page 2: Ordering Information
Oakton Instruments, any malfunctioned or damaged prod- CTS5 CTSTestr 5 pocket multiparameter tester 35634-42 uct attributable to responsibility of Oakton Instruments, for a period Wrong conductivity 1. Check if standard solution is Er 1 — Replacement sensor for CTSTestr 5...
Need help?
Do you have a question about the CTS5 and is the answer not in the manual?
Questions and answers