Advertisement
Quick Links
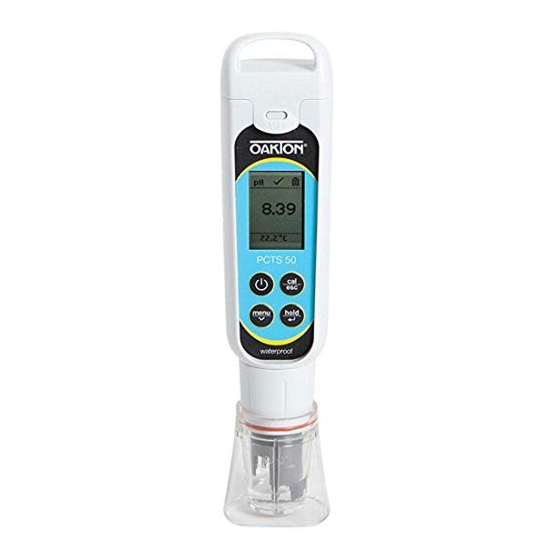
Operating Instructions
CTSTestr
50 Pocket Testers
™
Applications
• Aquaculture
• Electroplating rinse tanks
• Aquariums
• Printing industry
• Aquariums and fish farms
• Swimming pools
• Boiler blow-down
• Verification of reverse osmosis
system operation
• Drinking water
• Water & wastewater treatment
• Hydroponics
Getting Started
The CTSTestr 50 Pocket Tester has been factory calibrated and usually works well
out of the box. However, after extended periods of non-use, it is best to remove the
sensor cap and soak the sensor in warm tap water for 10 minutes or so. Prior to
taking the measurements, periodic callibaration with certified standards is
recommended for best accuracy.
Measurement Parameter Setting
1. Press ON/OFF ( ) to power on the tester.
2. Press MENU/v to enter setup window. Press HOLD/ to select Measure. The
display shows Cond, TDS and Salinity.
3. Scroll down by pressing MENU/v to toggle between Cond, TDS and Salinity.
Press HOLD/ to select Cond.
4. The display shows the selected measure with a
.
Key Info
menu
hold
hold
Scroll
MENU
Measure
Cond
Settings
Accept
HOLD
TDS
Temp Set
Salinity
EXIT
CAL
Reset
TDS Factor Setting
1. Press MENU/v to enter setup window. Scroll down by pressing MENU/v to
select Settings.
2. Press HOLD/ to select Settings. The display shows TDS factor and
Backlight.
3. Press HOLD/ to select the default TDS factory setting or MENU/v to adjust
the setting.
4. Press HOLD/ to confirm the selection of the setting. The display shows the
set TDS factor with a
.
Key Info
hold
hold
menu
Measure
Adjust
Scroll
MENU
TDS Factor
Settings
TDS Factor
Backlight
Accept
HOLD
Temp Set
0.71
Reset
EXIT
CAL
1065O100_MAN_35634-55,-65.indd 1
Backlight Settings
1. Press MENU/v to enter setup window. Scroll down by pressing MENU/v to
select Settings.
2. Press HOLD/ to select Settings. The display shows TDS Factor and Backlight.
3. Scroll down by pressing MENU/v to toggle between TDS Factor and Backlight.
Press HOLD/ to select Backlight.
4. The display shows ON and OFF. Scroll down by pressing MENU/v to toggle
between ON and OFF. Backlight ON increases readability in low-light conditions.
5. Press HOLD/ to select the desired backlight option. The display shows the
selected backlight option with a
Temperature Settings
1. Press MENU/v to enter setup window. Scroll down by pressing MENU/v to
select Temp Set. Press HOLD/ to select Temp Set. The display shows Set °C/°F,
Temp Cal and Temp Coeff.
2. Press HOLD/ to select Set °C/°F. Scroll down by pressing MENU/v to toggle
between °C and °F.
3. Press HOLD/ to select temperature unit. The display shows the selected
temperature setting with a
Temperature Calibration
1. Press MENU/v to enter setup window. Scroll down by pressing MENU/v to
select Temp Set.
2. Press HOLD/ to select Temp Set. The display shows Set °C/°F, Temp Cal and
Temp Coeff.
3. Scroll down by pressing MENU/v to toggle between Set °C/°F, Temp Cal and
Temp Coeff. Press HOLD/ to select Temp Cal.
4. The lower display shows the current measured temperature reading based on the
last set offset and the upper display shows the current measured temperature
reading based on factory default calibration.
5. Dip the tester into a solution of known temperature and allow time for the built-in
temperature sensor to stabilize.
6. Press MENU/v to adjust the temperature value or press the HOLD/ to confirm the
calibrated value as the new temperature value of the solution.
Note: To exit this program without confirming the calibration, press CAL/ESC.
Cond
Temp Coefficient
1. Press MENU/v to enter setup window. Scroll down by pressing MENU/v to
select Temp Set.
2. Press HOLD/ to select Temp Set. The display shows Set °C/°F, Temp Cal and
Temp Coeff.
3. Scroll down by pressing MENU/v to toggle between Set °C/°F, Temp Cal and
Temp Coeff.
4. Press HOLD/ to select Temp Coeff or MENU/v to adjust the Temp Coeff.
hold
5. Press HOLD/ to confirm the Temp Coeff value. The new value is automatically
0.66
confirmed with a
.
Key Info
hold
menu
hold
hold
Measure
TDS Factor
Backlight
Scroll
MENU
OFF
Settings
Accept
HOLD
Temp Set
Backlight
ON
Reset
OFF
EXIT
CAL
.
Key Info
menu
hold
hold
hold
Measure
Scroll
MENU
Set °C/°F
°C
Settings
°C
Temp Cal
Accept
HOLD
Temp Set
°F
Reset
Temp Coeff
EXIT
CAL
Key Info
menu
hold
hold
hold
Measure
Scroll
MENU
Set °C/°F
Temp Cal
23.4°C
Settings
23.4 °C
Temp Cal
Accept
HOLD
Temp Set
23.4 °C
Temp Coeff
Reset
EXIT
CAL
.
Key Info
hold
menu
hold
hold
Measure
Scroll
MENU
Set °C/°F
Adjust
2.00
Settings
Temp Cal
Temp Coeff
Accept
HOLD
Temp Set
Temp Coeff
2.00
Reset
EXIT
CAL
Calibration for Conductivity, TDS, or Salinity
For best results, periodic calibration with an accurate standard is recommended prior
to measurement. Use the calibration standard value that is close to your intended
sample value.The tester will retain one calibration value in each mode (conductivity,
TDS, salinity) when the instrument is powered off. The conductivity value can be
calibrated automatically or manually, while the TDS & salinity values require manual
calibration. The tester will begin in the measurement mode that was used when it was
powered off. See "Measurement Parameter Setting" to change the desired parameter.
Automatic Calibration for Conductivity
1. Remove the cap and press ON/OFF ( ) to power on.
2. Dip the sensor in at least 30 mm of calibration standard.
3. Stir gently and press CAL/ESC key to begin the calibration.
4. The display will show CAL followed by the default value. CAL is indicated on the
display during calibration mode.
5. If the reading is within the calibration range of the automatically recognized
standards; 80 (84 μS/cm), 1410 (1413 μS/cm), or 12.90 (12.88 mS/cm), the
is displayed when the automatic calibration standard value has been detected.
6. Press HOLD/ to accept the auto conductivity standard and finish the calibration.
7. Display returns to Measurement window.
CAL
CAL
cal
Place the tester in
esc
the calibration STD
μS/cm
to start or press
844
to escape.
cal
esc
1413
Manual Calibration
When the conductivity reading is outside calibration range of the automatic conductivity
standards or when TDS or salinity is used, the tester will require manual adjustment.
1. Repeat steps 1 to 4 from "Automatic Calibration for Conductivity".
2. Press MENU/v to manually adjust the value to the desired reading.
Note: The adjustment will decrease only, however the adjustment will eventually cycle
to the highest available value after decreasing by 40% of the initial value.
3. Press HOLD/ to accept and finish the calibration when the desired value is selected.
Note: To abort calibration, press CAL/ESC to escape.
4. Once the calibration is finished and user has accepted the changes, measurement
window will now show the calibrated reading.
Note: The auto conductivity standards are 84 μS/cm, 1413 μS/cm & 12.88 mS/cm.
CAL
CAL
CAL
cal
Place the tester in
μS/cm
esc
μS/cm
the calibration STD to
844
start or press
to
844
cal
esc
820
escape.
1413
CTS Measurement
1. Press ON/OFF ( ) to power the tester on if needed.
2. Dip the electrode about 2 cm to 3 cm into the test solution. Stir and let the reading
stabilize. The timer icon will blink during this time. Once the reading is stabilized, the
timer stops blinking and
will appear to indicate the stability of the reading.
CAUTION: Testing dry samples is not accurate and can lead to sensor
damage or breakage. Soils must be wet and free of particulates that may
scratch the glass sensor. Excessive force into dry samples can cause glass
breakage.
3. Note the CTS value or press HOLD/ to freeze the reading. To release the
reading, press HOLD/ again.
4. Press ON/OFF ( ) for 3 seconds to turn off tester. If key is not pressed for 8.5 minutes,
the tester will automatically shut off to conserve batteries.
For Sales & Service Contact
2650 E. 40th Ave. • Denver, CO 80205
Phone 303-320-4764 • Fax 303-322-7242
1-800-833-7958
www.geotechenv.com
icon
COND
μS/cm
844
23.5 °C
COND
μS/cm
844
24.8 °C
COND
μs/cm
820
24.8 °C
9/5/2017 3:07:24 PM
Advertisement

Subscribe to Our Youtube Channel
Related Manuals for Oakton CTSTestr 50


Summary of Contents for Oakton CTSTestr 50
-
Page 1: Operating Instructions
Temperature Calibration 1. Repeat steps 1 to 4 from “Automatic Calibration for Conductivity”. The CTSTestr 50 Pocket Tester has been factory calibrated and usually works well 1. Press MENU/v to enter setup window. Scroll down by pressing MENU/v to out of the box. However, after extended periods of non-use, it is best to remove the select Temp Set. - Page 2 General HOLD Function Display Graphics, dot matrix 80 x 100 pixel The CTSTestr 50 Pocket Tester uses four Auto off 8.5 minutes (from last key press) AAA 1.5 V batteries. This feature helps to freeze the display for a delayed observation.
Need help?
Do you have a question about the CTSTestr 50 and is the answer not in the manual?
Questions and answers