Table of Contents
Advertisement
Quick Links
Advertisement
Table of Contents

Related Manuals for Minuteman Kleen Sweep 35W


Summary of Contents for Minuteman Kleen Sweep 35W
- Page 1 Parts and Instruction Manual Kleen Sweep 35W...
- Page 2 This manual is furnished with each new MINUTEMAN Kleen Sweep 35W. This provides the necessary operating and preventive maintenance instructions. Operators must read and understand this manual before operating or servicing this machine. This machine was designed to give you excellent performance and efficiency. For best results and minimal cost, please follow the general guidelines below: ·...
- Page 3 Parts and Instruction Manual...
-
Page 4: Table Of Contents
Electrical .............................. 2 Batteries .............................. 2 Operator Responsibility ........................2 Special Instructions for Handling Batteries ..................2 Kleen Sweep 35W – How it Works ....................3 First Operation ............................ 3 Assembly ............................3 Installing / Servicing the Batteries ....................3 Operation of the Kleen Sweep 35W .................... - Page 5 Circuit Diagram ..........................27 Wiring Diagram ..........................28 Minuteman International Made Simple Commercial Limited Warranty ........29 Parts and Instruction Manual...
-
Page 6: Important Safety Instructions
Charge the batteries in a well-ventilated area with the battery cover removed completely. Do not clean machine with a pressure washer. Authorized personnel must perform repairs and maintenance. Use Minuteman supplied replacement parts. SAVE THESE INSTRUCTIONS Parts and Instruction Manual... -
Page 7: Proper Use
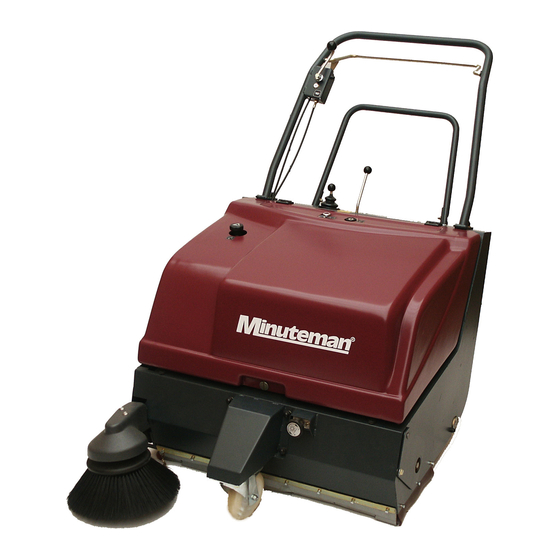
Proper Use The Kleen Sweep 35W vacuum sweeper has been designed exclusively for sweeping floor surfaces, including production facilities, warehouses, parking areas, and pedestrian areas, to collect dry and moist matter. Whatever sort of use beyond the specified range will be deemed improper use; the manufacturer cannot be held liable for consequential damage. -
Page 8: Kleen Sweep 35W - How It Works
Kleen Sweep 35W – How it Works The side broom is going to collect dirt out of corners & niches and carries it into the track of the main broom. Fine dust involved is extracted by a suction fan and held back by a filter. Dust-free only air will exit the machine. -
Page 9: Operation Of The Kleen Sweep 35W
Operation of the Kleen Sweep 35W 1. Traction Drive control bow 2. Control lever for side broom 1. Key Switch 2. Pilot Light, Green Parts and Instruction Manual Page 4... -
Page 10: Controls
1. Hand wheel for broom roller vertical adjustment 2. Pedal to set parking brake. Controls Traction drive control bow to connect / disconnect wheel drive • pull bow on handlebar up = engages traction drive • return bow = disengages traction drive (machine will stop = safety mode) Control lever for side broom Lowers and lifts the side broom... -
Page 11: Pilot Light, Green
Turns ON, when: Key switch is ON Key-switch Connect and disconnect the drive motor and to secure the machine against unauthorized use. How to Use the Kleen Sweep 35W Turn motor ON and OFF • Turn key-switch to “I” = electric motor runs •... -
Page 12: Empty Dirt Hopper
To remove the broom roller: Tilt the Kleen Sweep 35W back on the handlebar, as shown. Remove 4 ea. cylinder Hexagon screws, rotate roller through 180, and remove cylinder Hexagon screws from the other half. Pull drive pin out of broom shaft. -
Page 13: Adjust Sweeping Track
4. Sealing Strip, Left Hand 5. Broom Roller Replacing the Side Broom • Tilt the Kleen Sweep 35W back on its handlebar (also refer to previous section, “replace broom roller”) • Remove attaching bolt (1) underneath side broom • Pull-off side broom •... -
Page 14: Replacing The Side Broom V-Belt
Replacing the Side Broom V-Belt • Tilt the Kleen Sweep 35W back on its handlebar (refer to section, “Replace Broom Roller”) • Remove hood (3 ea. Screws) • Lift side broom and uncock round belt • Remove round belt and assemble new one. -
Page 15: Maintenance
Maintenance Compliance with our recommended maintenance and service schedule will guarantee a dependable machine all the time. It is better and cheaper to take precautions instead of facing costly repair work. If your in-house facilities are unable to perform the work per maintenance schedule, your authorized distributor will be glad to conclude a maintenance agreement with you. -
Page 16: Exploded Views
Exploded Views Traction Drive Parts and Instruction Manual Page 11... -
Page 17: Traction Drive Bom
Traction Drive BOM Item Part No. Qty. Description Item Part No. Qty. Description 105-477 Battery tray 10-450 Hex. bolt 73-094 Detent washer 107-555 Connector 05-309 Hex. bolt 92-761 Switch 05-375 Washer 04-290 Washer 53-168 Belt pulley 05-151 Hex. nut 53-173 Bolt 08-365 Plug housing... -
Page 18: Travel Drive
Travel Drive Parts and Instruction Manual Page 13... -
Page 19: Travel Drive Bom
Travel Drive BOM Item Part No. Qty. Description 105-100 Lever 85-157 Fork head 05-303 Hex. bolt 105-102 Bolt 04-656 DU-Bushing 105-101 Holder 05-378 Washer 02-234 Retaining ring 05-308 Hex. bolt 05-341 Lock washer 52-926 Countersunk screw 07-244 Retaining ring 12-483 Ball bearing 95-878 Rim half... -
Page 20: Chassis - Covering
Chassis - Covering Parts and Instruction Manual Page 15... -
Page 21: Chassis - Covering Bom
Chassis - Covering BOM Item Part No. Qty. Description Item Part No. Qty. Description 85-368 Plate 05-308 Hex. bolt 15-774 Countersunk screw 13-161 Protective cap 04-455 Countersunk screw 05-375 Washer 02-923 Hinge 11-211 Guide roller 02-169 Ignition switch 105-544 Holder 74-589 Key (set) 53-101... -
Page 22: Steering Handle
Steering Handle Parts and Instruction Manual Page 17... -
Page 23: Steering Handle Bom
Steering Handle BOM Item Part No. Qty. Description 12-223 Ball end 53-161 Shift lever 05-152 Hex. nut 15-120 Washer 07-790 DU-bushing 07-244 Retaining ring 105-265 Steering handle 105-264 Bow, handle 05-302 Hex. bolt 107-084 Bowden cable 53-165 Shift shaft 05-373 Washer 53-454 Cotter pin... -
Page 24: Sweep Roller With Travel Drive
Sweep Roller with Travel Drive Parts and Instruction Manual Page 19... -
Page 25: Sweep Roller With Travel Drive Bom
Sweep Roller with Travel Drive BOM Item Part No. Qty. Description Item Part No. Qty. Description 53-129 Belt pulley 13-310 Retaining ring 05-758 Tensioning sleeve 53-137 Threaded bolt 07-654 Screw 15-280 Hex. bolt 92-852 Bearing 105-507 Plate 05-373 Washer 12-607 Ballwasher 05-152 Hex. -
Page 26: Filter Installation
Filter Installation Parts and Instruction Manual Page 21... -
Page 27: Filter Installation Bom
Filter Installation BOM Item Part No. Qty. Description 15-467 Ball element 69-678 Lever 28-228 Profile bar 05-152 Hex. nut 05-310 Hex. bolt 05-375 Washer 02-506 Tightening pin 69-667 Spring 04-680 Spiral pin 85-442 Retaining washer 69-679 Hold plate 05-151 Hex. nut 05-989 Tightening strap 107-276... -
Page 28: Lifter Hopper
Lifter Hopper Parts and Instruction Manual Page 23... -
Page 29: Lifter Hopper Bom
Lifter Hopper BOM Item Part No. Qty. Description 105-516 Bow handle 55-116 Countersunk screw 105-517 Bracket 12-601 Countersunk screw 105-523 Rubber strap 105-524 Rubber covering 05-378 Washer 105-522 Wheel 74-008 Safety washer 15-181 Hex.bolt 107-553 Lifter hopper 10-950 Countersunk screw 15-769 Hollow disc 53-160... -
Page 30: Side Brush Drive
Side Brush Drive Parts and Instruction Manual Page 25... -
Page 31: Side Brush Drive Bom
Side Brush Drive BOM Item Part No. Qty. Description 91-194 Covering hood 07-621 Hollow disc 15-774 Countersunk screw 02-234 Retaining ring 70-636 Ball bearing 12-632 Retaining ring 91-192 Brush arm 53-117 Shaft 05-152 Hex. nut 10-176 Adjusting shim 53-120 Belt pulley 10-145 Retaining ring 67-089... - Page 32 Circuit Diagram Parts and Instruction Manual Page 27...
- Page 33 Wiring Diagram Parts and Instruction Manual Page 28...
-
Page 34: Minuteman International Made Simple Commercial Limited Warranty
Minuteman International, Inc. warrants to the original purchaser/user that the product is free from defects in workmanship and materials under normal use. Minuteman will, at its option, repair or replace without charge, parts that fail under normal use and service when operated and maintained in accordance with the applicable operation and instruction manuals.
Need help?
Do you have a question about the Kleen Sweep 35W and is the answer not in the manual?
Questions and answers