
Related Manuals for ETC Lustr+


Summary of Contents for ETC Lustr+
- Page 1 ® Source Four User Manual Version 1.8.0 Part Number: 7460M1200-1.8.0 Rev: I Released: 2018-02...
- Page 2 ® ® ET C a n d S o u r c e F o u r a re re g i s te re d tr ad e ma rk s o f El e c t ro n i c Th e at r e Co n t ro l s , I n c . i n t h e Un i t ed S t a t e s a n d o t h e r c o u n t r i e s .
-
Page 3: Table Of Contents
Table of Contents Introduction ......1 Quick Setups ........1 Lustr+ and Series 2 Lustr. - Page 4 Installation ........14 Basic Assembly ........14 Mounting Hardware.
- Page 5 Operation......40 Chapter 4 Home Screen Displays......40 All Fixtures (Excluding Daylight and Tungsten) .
- Page 6 Source Four LED User Manual v1.8.0...
-
Page 7: Introduction
Introduction Source Four LED Profile by ETC Congratulations on your purchase of a product. The Source Four LED Profile’s x7 Color System™ seven-hue technology produces a light and color quality that conventional LED systems cannot duplicate. This unique color system produces bright, broad-spectrum whites and intense colors equally well, rendering pigments, objects, and skin tones in a natural way. -
Page 8: Studio Hd, Series 2 Daylight Hd, And Series
Daylight and Tungsten Some of the options include: • Multiple dimming curve options • Presets and sequences for stand-alone operation • Strobe • Loss-of-data behavior options • Power regulation modes; three output options that offer a choice between maximum light output for lower duty cycles and maximum thermal stability and output consistency for higher duty cycles Models... -
Page 9: Fixture Components
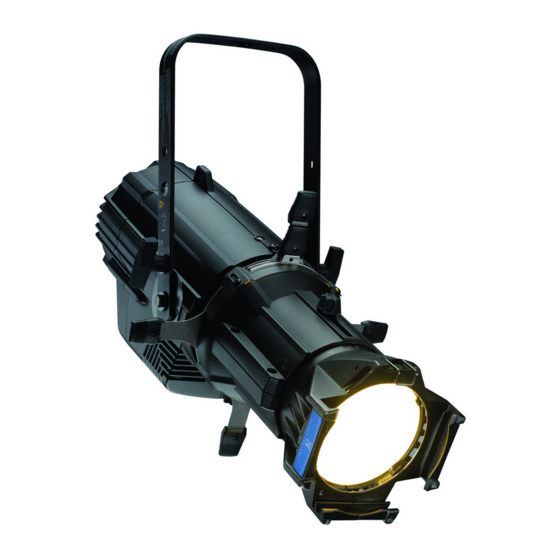
Fixture Components Safety cable loop Yoke Accessory retainer Yoke locking knob Color frame holder Figure-1.1 Components of the Source Four LED Profile fixture Keypad Status indicators Power In DMX In Power Thru DMX Thru Figure-1.2 Components of the rear panel Back Light Bulb Enter... -
Page 10: Applications
Applications • Theaters • Convention centers • Studios • Theme parks • Schools • Museums • Houses of worship • Temporary events • Hotels Document Conventions Notices Throughout this manual, the following are used to alert you to notes and safety notices. Note: Notes are helpful hints and information that is supplemental to the main text. -
Page 11: Safety
• Suspend the fixture from a suitable structure using only the hardware rated for the weight of the fixture. • In addition to primary suspension, attach a safety cable (ETC part number 7060A1022 or other approved safety cable or device) to the fixture housing. -
Page 12: Contacts
To search more widely try the ETC web site at etcconnect.com. For technical questions about Source Four LED Profile fixtures, contact ETC Technical Services directly at one of the offices listed below. Emergency service is available from all ETC offices outside of normal business hours. -
Page 13: Quick Start
Hang or mount the fixture using the provided hardware and approved hardware accessories. Attach an approved safety cable when applicable. Insert additional accessories (top hat, etc.) into the holder, if desired. Connect Attach the power cable to the Power In connector. -
Page 14: Set Dmx Address
Set DMX Address From the main screen, press [ ] to open the Main Menu. On the Main Menu, scroll to DMX Start Address and then press [ Use [ ] or [ ] to scroll to the desired address. Press [ ] to select the address number. -
Page 15: Quick Setups
Quick Setups On the Main Menu, scroll to Quick Setups. Press [ Scroll to the desired setup and then press [ An asterisk (*) next to the setup name indicates that setup is active. Press [ ] to return to the home screen. The top line of the home screen displays the name of the active setup. - Page 16 Studio Quick Setup From the home screen: • To adjust the Intensity, press [ ] or [ The range is 0 to 100%. • To adjust the White Point, press [ ] or [ The range is 2700 to 6500K. •...
-
Page 17: Installation And User Interface
• 20,000-hour LED life (Series 2 Lustr) • 24 Osram OSLON Square and 36 Luxeon Rebel LEDs (Tungsten HD) Optical • Compatible with all ETC Source Four lens tubes. For best results, use the preferred lens tubes. See Preferred Fixed Beam Lenses page 15 Control •... -
Page 18: Typical Power Consumption
Typical Power Consumption Lustr+ 120V 240V Idle Power / Current 4.27W / 0.084A 4.38W / 0.079A 4.2W / 0.068A 100% Boost Power / Current 130.8W / 1.48A 129.9W / 1.11A 126.4W / 0.576A Series 2 Lustr 120V 240V Idle Power / Current 6.77W / 0.144A 6.9W / 0.149A 6.5W / 0.155A... -
Page 19: Note About Led Fixtures
Note About LED Fixtures All LED sources experience some lessening of light output and some color shift over time. Source Four LED Profile fixtures have complex thermal management systems to minimize these changes. With typical usage, a Series 1 fixture will still achieve at least 70% of its initial output after 50,000 hours of use (B50, L70). -
Page 20: Installation
Installation Basic Assembly Yoke Safety cable Retainer bolt loop Shutters Pattern holder slot Color frame Drop-in iris slot Shutter barrel assembly Light engine body Lens tube Yoke locking knob Barrel rotation knob Beam focus knob NOTE: Safety cable is not included. Color frame holder Figure-2.1 Basic assembly WARNING:... -
Page 21: Install Lens Tube
Install Lens Tube Any of the ETC Source Four lens tubes can be installed into the shutter barrel of the Source Four LED Profile. For better results, use one of the preferred lens tubes listed below. Phillips screw Beam focus knob Figure-2.2 Secure lens tube with zoom knob and Phillips screw... -
Page 22: Aim Adjustments
Aim Adjustments The fixture can be tilted up and down to aim the light where it is needed. The adjustment is the same for the yoke or floor stand. To assist aiming the fixture, you can turn it on without having to be Focus page 51 connected to DMX control or enabling a preset. -
Page 23: Focus The Beam
Figure-2.5 Pattern holders Note: Pattern projections generally look best when used with the included Soft Focus diffuser. Note: Because the Source Four aperture is 3 inches wide, ETC recommends using A-size patterns for maximum pattern effectiveness. Installation and User Interface... -
Page 24: Install A Soft Focus Diffuser
Install a Soft Focus Diffuser To clean up edge effects, use the soft focus diffuser in the A-size pattern holder. If combining the diffuser with a pattern, put the diffuser behind the pattern. The soft focus diffuser allows you to maintain sharp focus of the pattern while eliminating edge effects. -
Page 25: Rotate The Shutter Barrel Assembly
Add an Accessory Accessory slot Iris Figure-2.7 Accessory slot The accessory slot is located on the top of the shutter barrel and in front of the pattern holder slot. It accommodates either a drop-in iris or a motorized pattern device. When the slot is not in use, a small sheet metal cover secured with two Phillips screws prevents light leakage. -
Page 26: Adjust The C-Clamp (North America)
Adjust the C-clamp (North America) C-clamp Pipe bolt Yoke bolt and lock washer Pan screw Figure-2.9 Adjusting the c-clamp The c-clamp attaches the fixture to the mounting pipe and allows fixture adjustments when mounted. Secure the c-clamp to the yoke with the provided yoke bolt and lock washer. Place the c-clamp on the mounting pipe and secure by tightening the pipe bolt. -
Page 27: Installation Clearances
Installation Clearances Cooling and Duty Cycle Source 4 LED fixtures are fan cooled and can operate all channels at full power continuously in ambient temperatures up to 40°C (104°F). If ambient conditions exceed 40°C (104°F) or fail to allow sufficient airflow over a long period of time, the fixtures may shut down and remain off until they return to a safe operating temperature. -
Page 28: Dimensions And Hanging Clearances
Dimensions and Hanging Clearances Use the following dimensions to allow proper clearances around the fixture. Allow additional space for cables. 10.6” 268 mm 7.9” 200 mm 24.2” 615 mm 12.1” 308 mm 17.1” 434 mm 10.8” 6.9 ” 274 mm 174 mm 19.56”... -
Page 29: Safety Cable
Safety Cable A safety cable (or other approved safety device) should be attached to the fixture housing and wrapped around the hanging structure (pipe). An appropriate attachment loop is provided on the protruding tab of the fixture housing. Take care to leave as little slack as possible in the safety cable to avoid the cable catching the yoke of the fixture. -
Page 30: Power And Data Cabling Requirements
Power and Data Cabling Requirements Power The Source 4 LED fixture operates on AC power, 100–240VAC/50–60Hz. The fixture must be connected to a non-dimmable power source in order to avoid damage to its internal power supply and other electrical components. WARNING: The fixture must be connected to a non-dimmable power source in order to avoid damage to its internal power supply and other electrical components. -
Page 31: Connections
Connections All connections and user controls are located on the back of the fixture. Status indicators DMX In Power In DMX Thru Power Thru Figure-2.13 Power and DMX connections on back of fixture Connect AC input power and DMX data cables to the appropriate ports. Connect the incoming DMX data cable to the DMX Input connector. -
Page 32: Dmx Addressing
DMX Addressing Addresses must be set between 1 and 510. Each Source Four LED Profile fixture must be considered a separate DMX device for the purpose of DMX line-loading calculations. DMX line-loading practice dictates that no more than 32 devices can be daisy-chained together. Consequently, no combination of Source Four LED Profile fixtures totaling more than 32 DMX devices should be configured in one DMX line. - Page 33 Co lor Mi xe s The following table shows the color mixes for the fixture. Color Lustr+ Series 2 Lustr Studio HD White Lime Red Orange Amber Amber Mint Green Green Blue Cyan Cyan Indigo Blue Blue — Indigo Indigo —...
- Page 34 The RGB profile effectively addresses all seven colors via three channels of control. The RGB profile produces medium-quality color crossfades. It makes the Source Four LED Profile fixtures compatible with conventional RGB console profiles while maintaining enhanced color production from the fixture. Color Matching page 29 Also see...
- Page 35 Plus Seven Plus Seven adds precision color-control override channels to the HSI, HSIC, RGB, and Studio profiles. When in one of the above profiles, enabling Plus Seven adds an additional seven channels to the profile (i.e., HSI profile with Plus Seven becomes a 14-channel profile). To enable Plus Seven, place the Plus Seven Control channel at a value above 51%.
-
Page 36: Daylight And Tungsten
Daylight and Tungsten Direct Control The first DMX channel always controls Intensity from 0 to 100%. Data Channel Control Value Function Fixture address Intensity Intensity 0 to 100% Fixture address + 1 Strobe Variable strobe control 0 to 255 Force fan on at various Fixture address + 2 Fan control speeds... -
Page 37: Dmx Profile Tables
DMX Profile Tables Lustr+ and Series 2: Lustr, Daylight HD, Tungsten HD, and Studio HD Channel Assignments Notes Profile Channels Direct control of each individual color with a separate master intensity channel. Color Channel Assignments Direct calibration of LEDs is not active in this mode. in Direct Mode page 33 The ten-channel profile will produce the... - Page 38 Channel Assignments Notes Profile Channels Adds seven additional color control channels in RGB, HSI, and HSIC input profile settings. For example, HSI with ‘Plus Seven’ enabled becomes a 15-channel profile. The desired color and intensity are achieved by using the HSI or RGB channels Plus Seven Profile 7 additional Plus Seven...
-
Page 39: Channel Assignments In Direct Mode
Channel Assignments in Direct Mode Channel Series 1 Series 1 Series 2 Series 2 Series 2 Number Studio HD Lustr+ Lustr Daylight HD Tungsten HD Red Orange White Lime (not used) Red Orange Mint Amber Amber Mint Mint Blue Green Green Blue Blue... -
Page 40: Install Accessories
Lustr+ and Series 2: Lustr, Studio HD, Daylight HD, and Tungsten HD Channel HSIC Studio Direct Intensity Color 1 Hue fine Hue fine Green Color temp Color 2 Saturation Saturation Blue Tint Color 3 Intensity Intensity Color 4 Strobe* Strobe* Strobe* Strobe* Color 5... -
Page 41: Chapter 3 Basic Menu Navigation
Chapter 3 Basic Menu Navigation User Interface Overview The Source Four LED Profile user interface (UI) consists of an LCD and keypad. All of the basic information is displayed on the LCD and the keypad is used to navigate through the menus. Use the LCD and keypad to program the fixture for your specific application. -
Page 42: Keypad Lockout
Figure-3.2 Keypad buttons Home Opens the home screen. Back Cancels the current operation and returns to the previous screen. Multiple presses of the back button will eventually take you to the status display. Increases a value or menu choice by one. Pressing and holding the button increases the rate of change. -
Page 43: Status Indicators
Status Indicators Figure-3.3 Status Indicators on the back of the fixture The status indicators are three small, colored LEDs on the user interface that indicate the status of: • Power: Illuminates blue when AC power is supplied to the fixture. •... -
Page 44: Status (Home) Screens
Status (Home) Screens The status (home) screens display when you press [ ] or when there is no activity for a specific time, Local Settings page 65 which you set in Local Settings. For more information, see . The home screens display the status of multiple fixture settings. -
Page 45: Menu Navigation
(:) and a value. The keypad is used to edit specific objects on the operation menu, such as DMX address, Preset and Sequence numbers, fade and delay times, etc. Once an edit has been made, press [ ] to accept the selection. -
Page 46: Operation
Chapter 4 Operation Home Screen Displays Depending on the fixture settings, the following are displayed in the system message area on the respective home (status) screens. All Fixtures (Excluding Daylight and Tungsten) High Parameter Stage XT Arch Studio General Impact Profile Studio Direct Control (Dir) -
Page 47: Main Menu
Red Shift Red shift replicates the warming of an incandescent filament’s color temperature change as it dims. For Red Shift page 50 more information, see Strobe Strobe flashes the output of the LED array. For more information, see Strobe page 44 Fan Control The fan can be forced on via DMX control or by adjusting settings under the Advanced Settings menu. -
Page 48: Quick Setups
Quick Setups Quick Setups are groupings of predefined fixture performance settings, based on typical applications. Use the Quick Setups menu to select the desired setup. When a setup is active, the status bar at the bottom of the screen indicates the DMX channels, their functions, and arrangements that the setup Use Quick Setups page 8 uses. -
Page 49: Advanced Menu
Advanced Menu The Advanced Menu provides access to various fixture settings and specific operations. The Advanced Menu is accessed from the Main Menu by pressing [ ] or [ ] to select Advanced Settings and then pressing [ Copy All Settings page Copy All Settings appears on the screen only when DMX is not present. - Page 50 DMX Profile The current DMX profile is displayed on the DMX Settings menu. You can customize the setting by DMX Profiles page 26 selecting a different profile. For detailed information about each profile, see On the DMX Settings menu, scroll to DMX Profile. DMX Settings DMX Start Address: Profile:...
-
Page 51: Fan Control
Fan Control Fan Control adds another DMX channel of control when set to DMX. Alternate settings are Slow, Fast, Fan Control page 30 and Automatic. For more information, see On the DMX Settings menu, scroll to Fan. DMX Settings DMX Start Address: DMX Profile: Direct Strobe Mode:... - Page 52 U s i n g P l u s S e v e n C o n t r o l On your lighting console, select a starting color point for the fixture output using the standard control channels for RGB, HSI, etc. Set the first additional channel to a value between 51 and 100% to activate Plus Seven.
-
Page 53: Led Settings
LED Settings Use the LED Settings menu to adjust fixture performance. From the LED Settings menu, you can set the following: • Output • Curve • Output Frequency • Red Shift • White Point Advanced Menu LED Settings DMX Settings Output: Regulated LED Settings... - Page 54 Note: In all Output settings, if the fixture gets too warm and internal components approach unsafe operating temperatures, the total power to the LED array is gradually reduced and proportionate brightness levels between the various colors of LEDs are maintained as much as possible in order to preserve the overall color mix; however, some minor shifts in output may occur.
- Page 55 Q u i c k Quick uses the standard dimming curve but with no lag or smoothing. All changes are instant and correlated exactly with the control input signal. Quick is best for extreme high impact and video-based control. On the LED Settings menu, scroll to Curve. LED Settings Output: Regulated...
- Page 56 Output Freq Output Frequency is the frequency in Hz at which the LED array pulses, or blinks, as a function of Pulse- Width Modulation (PWM). The frequency is adjustable in order to avoid visible flicker on video and film. When altering the frequency in order to reduce noticeable flicker on camera, often only a small change is required.
-
Page 57: Presets & Sequences
White Point (excluding Daylight and Tungsten) White Point controls the appearance (color temperature) of white-light output when saturation is at or near zero. This option is available when using the HSI and RGB profiles. The choices are 2950K, 3200K, 5600K, and 6500K. On the LED Settings menu, scroll to White Point. - Page 58 Presets (excluding Daylight and Tungsten) A Preset is a single, static look or color mix. The Source Four LED Profile fixture comes with 24 default configurations. Only one Preset can be active at a time. You can activate any of the Preset color mixes and customize each one.The following table lists the default Preset color mixes, most of which are also available as Quick Color options.
- Page 59 Presets (Daylight and Tungsten only) The Daylight and Tungsten fixtures come with 24 available slots for Presets. Only one Preset can be active at a time. You can activate any of the Presets and customize each one. Daylight and Tungsten fixtures have Presets that can define both Intensity and Strobe values.
- Page 60 D e l a y T i m e Delay time is the length of time the fixture waits on the previous setting before initiating the crossfade to the Preset. The default is 0 seconds. On the Presets menu, scroll to Delay Time and press [ Presets Preset: * 23...
- Page 61 Do one of the following: • Scroll to Save Changes and press [ • Press [ ] to exit the screen without saving the changes. E d i t ( D a y l i g h t a n d T u n g s t e n o n l y ) Use Edit to change the brightness and strobe settings of the LED array.
- Page 62 Save DMX as Preset You can take a snapshot of the incoming DMX signal when the fixture is in HSI mode and save it as a preset value. On the Presets screen, scroll to Preset and press [ Presets Preset: * 23 Status: Active...
- Page 63 R a t e Rate is the execution of the Presets’ Fade Times and Delay Times within the Sequence, relative to their settings within the actual Presets. The available Rate range is 2 to 500%. The default is 100%. A Rate of 100% represents running the Sequence with timing exactly as specified within the Presets. A Rate above 100% represents running the Sequence with faster timing than specified within the Presets.
- Page 64 P r e s e t Preset is the number of a Preset, whether it is a predefined or a custom color mix. On the Sequences menu, scroll to Preset and press [ Sequences Sequence: Action: Not Active Rate: 100% Step: Preset: Link Time:...
- Page 65 Sequences Sequence: Status: Active Rate: 100% Step: Preset: State: Loop Copy to Other Fixture Figure-4.27 Setting Sequences End State On the Sequences menu, scroll to Preset and press [ With the Preset number selected press [ ] or [ ] until you reach 0. Press [ Link Time on the screen is replaced with End State.
-
Page 66: Quick Color (Excluding Daylight And Tungsten)
Quick Color (excluding Daylight and Tungsten) Quick Color allows you to easily select a color and its intensity from a predefined menu. This feature overrides any presets or sequences previously selected and is only available when there is no external page 52 DMX signal to the fixture. -
Page 67: Diagnostics
Master/Slave Operation When similar fixtures’ DMX or data connections are linked together and there is no external DMX signal going to them, one fixture automatically controls all other fixtures in the chain when a Preset or Sequence is initiated. M a s t e r Master is the one fixture that controls all fixtures in the daisy chain. - Page 68 Current DMX In The Current DMX In screen displays the values of the current DMX input by channels. The values dynamically change as the DMX input changes. This screen is a read-only screen, which displays the following: • The Control Input setting •...
- Page 69 Test Test is used to test the fixture and display its output values. Test overrides all other control to the fixture. The action options are All Off, All On, Chase, and Ind Cntl (Individual control). The default is All Off. To exit the Test screen, press [ ] twice.
- Page 70 I n d i v i d u a l C o n t r o l ( I n d C n t l ) Use Individual Control to select each LED series and then adjust its intensity. On the Test screen, scroll to Action. Press [ ] until the Ind Cntr option displays.
-
Page 71: Local Settings
About Fixture The About screen displays the following information. This is a read-only screen. • The software version number • The fixture serial number • The assigned fixture RDM number • The color bias of the LED array About Fixture DMX START: 001 Ver: 1.5.0.0.0.05 (0) Ser: 000021xxx... - Page 72 BLght time out You can change the length of time the LCD backlight remains on after a UI button has been pressed. The options are 30 seconds, 1 minute, 5 minutes, 15 minutes, and never. The default is 1 minute. With BLght time out selected, press [ Local Settings Backlight:...
- Page 73 CAUTION: Although it may be desirable in some applications to eliminate all stray light from the back of the fixture, turning the Status Indicators OFF prevents them from communicating potentially critical information. Use discretion when selecting the OFF setting. OverTemp You can change how an over-temperature situation is indicated in order to control stray light.
-
Page 74: Copy All Settings
Copy All Settings When DMX is not applied you can copy all settings, except DMX address, to all of the other fixtures in the same data chain in one step. This includes everything from Presets and Sequences to Quick Setups and Advanced options. - Page 75 Operation From Home Status Screen (Studio Stand-alone) When operating without an external control signal, the intensity of the white light can be adjusted immediately and directly by pressing the UI buttons on the fixture while on the home screen. In this setup, all the UI buttons change their functions from other setups.
- Page 76 Studio DMX Control When controlled via DMX, the first three channels adjust the output in the following order. Channel 5 controls strobe. Channel Output Intensity (Brightness) White Point Tint Strobe When adjusting white point via DMX, the full gamut of 2725 to 6450K is available, but common settings of 3200K and 5600K are quickly accessible at the lowest and highest pairs of DMX values, respectively.
-
Page 77: Daylight And Tungsten Only
Daylight and Tungsten only The Studio profile allows quick adjustment of Intensity. The Studio profile can be operated in a stand- alone mode from the user interface or can be controlled via DMX. Operation From Home Status Screen (Studio Stand-alone) When operating without an external control signal, the quality of the white light can be adjusted immediately and directly by pressing the UI buttons on the fixture while on the home screen. -
Page 78: Error Messages
The software can be updated with ETC’s UpdaterAtor Software. UpdaterAtor allows you to remotely update the Source Four LED fixture. UpdaterAtor is installed on your computer and connected from the computer to the fixture with a special cable. For more information, contact ETC’s Technical service Contacts page 6 department.For specific ETC contact information, see... -
Page 79: Cleaning The Field Lens
Cleaning the Field Lens The field lens is accessed by removing the shutter barrel from the light engine body. Use a clean micro-fiber cloth to clean the lens. Isopropyl alcohol may be used on the cloth. Do not spray the cleaning solution directly onto the lens or the interior of the fixture. Remove the retainer bolt and lens rotation knob. -
Page 80: Inspecting And Cleaning The Electronics
Inspecting and Cleaning the Electronics A can of compressed air or oil-free air from an air compressor set at a low setting can be used to blow through the vent holes and remove dust or other debris from the interior of the fixture. -
Page 81: Appendix A Menu Flow Chart
Appendix A Menu Flow Chart The following illustrations show each of the menus that are displayed on the Source Four LED fixture LCD and the path to each one. Home and Main Menus (Excluding Daylight and Tungsten) HSI Reg Stnd –– Str Master No Sequence is Active No Preset is Active... -
Page 82: Home And Main Menus
Home and Main Menus (Daylight and Tungsten Only) Dir Reg Stnd –– Str Master No Sequence is Active No Preset is Active System OK 1/3 Intensity Main Menu DMX Start Address: Quick Setups Advanced Settings Main Menu DMX Start Address: *Studio Quick Setups Stage... -
Page 83: Advanced Menu
Advanced Menu (Excluding Daylight and Tungsten) Main Menu DMX Start Address: Quick Setups Advanced Settings DMX Settings Advanced Menu DMX Settings DMX Start Address: LED Settings DMX Profile: HSIC Presets and Sequences Strobe: Enabled Diagnostics Data Loss: Instant Local Settings Plus Seven: Enabled Copy All Settings... -
Page 84: Advanced Menu (Daylight And Tungsten Only)
Advanced Menu (Daylight and Tungsten Only) Main Menu DMX Start Address: Quick Setups Advanced Settings DMX Settings Advanced Menu DMX Settings DMX Start Address: LED Settings DMX Profile: Direct Presets and Sequences Strobe Mode: Enabled Diagnostics Data Loss: Instant Local Settings Fan Mode: Auto Copy All Settings... -
Page 85: Presets Menu (Excluding Daylight And Tungsten)
Presets Menu (Excluding Daylight and Tungsten) Presets Copy All Settings appears only Preset: * 23 when DMX is not present. Status: Active Fade Time: 00:02 Delay Time: 00:00 Edit Advanced Menu Copy to Other Fixture DMX Settings LED Settings Presets and Sequences Diagnostics Presets Local Settings... -
Page 86: Presets Menu (Daylight And Tungsten Only)
Presets Menu (Daylight and Tungsten Only) Advanced Menu DMX Settings LED Settings Presets and Sequences Diagnostics Local Settings Copy All Settings Copy All Settings appears only when DMX is not present. Presets and Sequences Focus: Presets Sequences Preset 1 is Active No Sequence is Active Presets Preset:... -
Page 87: Sequences Menu And Quick Color Menu
Sequences Menu and Quick Color Menu Note: The Quick Color Menu is not available in Daylight or Tungsten Fixtures The Quick Color menu is not available on Daylight or Tungsten fixtures. Presets and Sequences Focus: Presets Presets and Sequences Sequences Focus: Quick Color Presets... -
Page 88: Diagnostics Menu
Diagnostics Menu Advanced Menu DMX Settings LED Settings Presets and Sequences Diagnostics Local Settings Copy All Settings Current DMX In Diagnostics DMX Ch Level Current DMX In Network Statistics Test Recalibrate Fixture About Fixture Diagnostics Diagnostics Current DMX In Network Statistics Network Statistics Overruns: Test... -
Page 89: Diagnostics Test
Diagnostics Test Advanced Menu DMX Settings LED Settings Presets and Sequences Diagnostics Local Settings Diagnostics Diagnostics Current DMX In Test Action: Chase Network Statistics Chase: 15 steps/sec Test Individual Control Recalibrate Fixture About Fixture Diagnostics Test Action: Chase Chase: 15 steps/sec Individual Control Diagnostics Test... -
Page 90: Diagnostics Recalibrate Fixture
Diagnostics Recalibrate Fixture Advanced Menu DMX Settings LED Settings Presets and Sequences Diagnostics Local Settings Diagnostics Diagnostics Current DMX In Recalibrate Fixture Network Statistics This Will Calibrate Test LED Array Recalibrate Fixture About Fixture Are You Sure? LED Calibration LED 1 ..Pass LED 2 ..Pass... - Page 91 Menu Flow Chart...
- Page 92 Tel +852 2799 1220 Service: (Asia) service@etcasia.com Web: etcconnect.com © 2018 Electronic Theatre Controls, Inc. Product information and specifications subject to change. ETC intends this document to be provided in its entirety. 7460M1200-1.8.0 Rev I Released 2018-02 ...
Need help?
Do you have a question about the Lustr+ and is the answer not in the manual?
Questions and answers