Table of Contents
Advertisement
Quick Links
LIST OF PRODUCTS
* Digital Multimeter
* Digital AC & AC/DC Clampmeter
* AC Clamp Adaptor
* AC/DC Current Adaptor
* Thermo Anemometer
* Thermo Hygrometer
* Distance Meter
* Digital Lux Meter
* Network Cable Tester
* Power Factor Regulator
* Earth Resistance Tester
* Digital Panel Meters
* DC Power Supplies
* High Voltage Detector
* Calibrators
* Gas Analysers
* Frequency Counter
* Function Generator
* Phasing Sticks
* Battery Tester
* Waterproof Pen Testers
* Solar Power Meter
* EMF Detector
* Wood, Paper & Grain Moisture Meter
* Transistorised Electronic Analog & Digital Insulation
Resistance Testers(upto 10 KV)
* Digital Sound Level Meter & Sound Level Calibrator
* Digital contact & Non-contact Type Tachometer
* Digital Non-contact (infrared) Thermometer
* Maximum Demand Controller/Digital Power Meter
* Digital Hand Held Temperature Indicators
17, Bharat Industrial Estate, T. J. Road, Sewree (W),
Mumbai-400015. INDIA
Sales Direct: (022)24156638 Tel.:(022) 2412 4540, 2418 1649
Fax: 91-22-2414 9659
E-mail : kusam_meco@vsnl.net,
Website : www.kusamelectrical.com;
® ®
www.kusam-meco.co.in
AN ISO 9001:2008 COMPANY
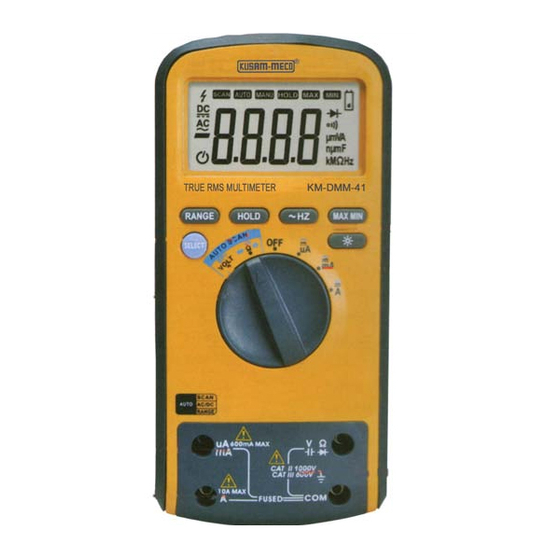
AUTO SCAN DIGITAL
MULTIMETER
MODEL - KM-DMM-41
OPERATION MANUAL
® ®
Advertisement
Table of Contents

Subscribe to Our Youtube Channel
Related Manuals for Kusam-meco KM-DMM-41


Summary of Contents for Kusam-meco KM-DMM-41
- Page 1 * Wood, Paper & Grain Moisture Meter * Transistorised Electronic Analog & Digital Insulation Resistance Testers(upto 10 KV) MODEL - KM-DMM-41 * Digital Sound Level Meter & Sound Level Calibrator * Digital contact & Non-contact Type Tachometer * Digital Non-contact (infrared) Thermometer...
-
Page 2: Table Of Contents
TABLE OF CONTENTS TAKE MEASUREMENT CAREFULLY AND YOU'LL SPARE YOUR TITLE PAGE NO. METER AND YOURSELF SOME PAIN Nearly every electrical engineer has a hand held Multimeter. We 1. GENERAL INSTRUCTIONS..........sometimes take them for granted, until we damage them or "burn them out"... - Page 3 1) GENERAL INSTRUCTIONS TABLE OF CONTENTS This instrument complies with IEC 61010-1: 2001, CAT III 1000V and CAT TITLE PAGE NO. VI 600V overvoltage standards. See specifications. To get the best service from this instrument, read carefully this user's 3.2.4 Continuity check............manual and respect the detailed safety precautions.
-
Page 4: During Use
CAT III :- Three-phase distribution, including single-phase When the range of the value to be measured is unknown, check that the commercial lighting range initially set on the multimeter is the highest possible or, wherever Equipment in fixed installations, such as switchgear and polyphase possible, choose the autoranging mode. -
Page 5: Symbols
personnel, after having taken into account the instructions in this Use just one 6F22 battery, proprerly installed in the Meter's battery case present manual. , to the Meter A "qualified person" is someone who is familiar with the installation, Replace the battery as soon as the battery indicator ( ) appears. -
Page 6: Lcd Display
The front panel is shown as in figure 2-1 explanation being as LCD screen is shown as in Figure 2-2, with its every symbol's follows:- meaning shown as in the Table 1: 1) LCD display:- used for displaying the measuring results and various No. -
Page 7: Function Description
2.3.5) MAX / MIN 1) When the meter is turned off and the rotary switch is not in position This key is for measuring maximum value and minimum value. of OFF, press SELECT key for 2 seconds to turn on the meter and 1) Press it to enter Max/Min mode and simultaneously display the press the key once more >... -
Page 8: Data Hold Mode
3.1.2) DATA HOLD mode 2) To exit the manual ranging mode, press and hold down RANGE Data Hold mode makes the meter stop updating the display. Enabling key for two seconds. The Meter returns to the auto range mode Data Hold function in autorange mode makes the meter switch to and AUTO is displayed. -
Page 9: Ac And Dc Voltage Measurement
3) Make the detector in the top of the meter approach to the wire. If 3) Connect the black and red test leads to the COM and V terminals respectively. the detector senses electric field, the strength will be showed on LCD by "-"... -
Page 10: Continuity Check
3.2.4) Continuity check resistance reading represents the total resistance of all paths between To avoid electrical shock and / or damage to the instrument, the probes. disconnect circuit power and discharge all high-voltage To measures resistance (set up the Meter as shown in figure 3-3) : capacitors before testing for continuity. -
Page 11: Capacitance Measurement
3.2.6) Capacitance measurement use the diode test to check diodes, transistors, and other semiconductor devices. The diode test sends a current through the semiconductor To avoid electrical shock and / or damage to the instrument, junction, then measures the voltage drop across the junction, A good disconnect circuit power and discharge all high-voltage silicon junction drops between 0.5V and 0.8V. -
Page 12: Current Measurement
Current is the flow of electrons through a conductor. To measure current (set up the Meter as shown in Figure 3-7): 1) Turn off power to the circuit. Discharge all high voltage capacitors. Auto 2) Set the rotary switch to the A, mA or A range. 10.12 3) Select the auto scan mode or press the SELECT key to select DCA or ACA measuring mode. -
Page 13: Technical Specifications
6) Turn on power to the circuit; then read the display. Be sure to note 4.2) Electrical specifications the measurement units at the right side of the display ( A, mA or A). Accuracy is specified for one year after calibration, at operating When only the figure "OL"... -
Page 14: Resistance
4.2.3) Resistance 4.2.7) Current Range Resolution Accuracy Range Resolution Accuracy 600.0 600 A 0.1 A ± (1.0%rdg+3dgts) 6.000k 6000 A ± (1.5%rdg+3dgts) ± (1.2%rdg +2 dgts) 60.00k 60mA 0.01mA 600.0k 600mA 0.1mA ± (1.8%rdg+5dgts) 6.000M 10mA ± (2%rdg+5dgts) 60.00M ACA: 4.2.4) Continuity check Range Resolution... -
Page 15: Linear Frequency
1) Set rotary switch to the OFF position. 4.2.8) Linear Frequency. 2) Disconnect test leads and / or any connectors from the terminals. Range Accuracy Resolution 3) Use a screwdriver to unlock the four screws on the rear cover. 6kHz 0.001HZ 4) Take out the rear cover from the meter. -
Page 16: Test Certificate
WARRANTY MUMBAI Each “KUSAM-MECO” product is warranted to be free from defects in TEST CERTIFICATE material and workmanship under normal use & service. The warranty period is one year (12 months) and begins from the date of despatch of AUTO SCAN DIGITAL MULTIMETER goods.
Need help?
Do you have a question about the KM-DMM-41 and is the answer not in the manual?
Questions and answers