Table of Contents
Advertisement
Advertisement
Table of Contents

Subscribe to Our Youtube Channel
Related Manuals for Hubsan H002


Summary of Contents for Hubsan H002
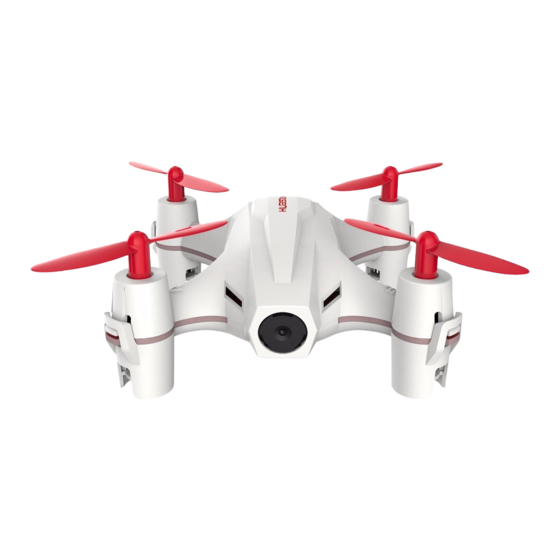
- Page 1 NANO Q4 CAM PLUS NO. H002...
-
Page 2: Table Of Contents
Content Introduction------------------------------------------------ Safety Notes------------------------------------------------- Safety check before flying------------------------------ --- Charge the Li-Po battery-------------------------------------- Remote Controller---------------------------------------- -- Camera-- ---------------------------------------------------- Start to Fly-------------------------------------------------- Advanced Performance Setup----------------------------------- - Propellers--------------------------------------------------- Exploded View--------------------------------------------- - Troubleshooting-------------------------------------------- Spare Part List---------------------------------------------- -... -
Page 3: Introduction
Introduction Thank you for buying the HUBSAN products. It is designed as an easy-to-use, multi-functional RC model, capable of hovering, fast forward and acrobatic flight maneuvers. Please read the manual carefully and follow all the instructions. Be sure to keep the manual for future reference. -
Page 5: Safety Check Before Flying
4 Charge the Li-Po Battery 3.7v180mAh Li-Po Battery Connect the battery to the Hubsan USB charger, then connect the USB charger to USB devices, such as a computer or mobile power charger.It takes around 30 minutes to fully charge the battery. The USB LED indicator is in red when charging and light off when the batter y is fully charged. -
Page 6: Remote Controller
Power-on/off Long press the power button to turn on/off the quad. (As shown in the picture) 5 Remote Controller Mode 1 Mode 2... - Page 7 Input Key Functio Mode/ Control Function Push the stick forward or backward and the quadcopter Mode 2 will ascend or decend; Push thestick left or right and the quadcopter will rotate left or right. Push the stick forward or backward and the quadcopter Mode 2 will flyforward or backward;Push the stick left or right Elevator/ Aileron Stick...
-
Page 8: Camera
Calibrating Procedures: Mode 2: Push the left stick to the most right corner, and move the right stick left to right quickly, the 4 LED indicators on quadcopter will blink alternately, calibrationsucceeded when the indicators stop blinking. Mode 1: Push the left stick to the most right corner, put the right stick to the lowest and move left to right quickly, the 4 LED indicators on quadcopter will blink alternately, calibration succeeded when the indicators stop blinking. -
Page 9: Start To Fly
7 Start to Fly Power-On The quadcopter is designed with Power-On safety system, it ensures the motors will not start undelss safety signals detected. 7.1.1Turn on/off the remote controller by pushing power switch to left/right. Make sure the Throttle stick is in the full down position, power on the remote controller, then quadcopter. - Page 10 Right Rotation Mode 2 Mode 1 Left Rotation The Rudder stick controls the rotate direction Push the stick to the left and the X4 will rotate left Push the stick to the right and the X4 will rotate right Pushing harder will cause the X4 to rotate faster in the corresponding directions. Forward Backward Mode 2...
-
Page 11: Advanced Performance Setup
Headless Mode Headless Mode means the quadcopter default any directions (corresponding to the directions of transmitter sticks) asits up head when the mode is activated. 2 front LED blink simultaneously when in Headless Mode. Mode 2 Mode 1 Short press the Throttle stick for to enter/exit headless mode. Short press the Throttle stick to enter into the headless mode, indicated by two“Beeps”. - Page 12 Backward Flip Push the Elevator stick backward quickly. Release the stick to the center after flip. Mode 1 Mode 2 Left Flip Push the Aileron stick to the left quickly. Release the stick to the center after flip. Mode 1 Mode 2 Right Flip Push the Aileron stick to the right quickly.
-
Page 13: Propellers
10 Propellers (1) Attach the propellers to the corresponding motors that are marked A and B; (2) Tighten the propellers to the motor shaft. ● Make sure that the A and B propellers are installed correctly. The quadcopter will not fly if propellers are improperly installed. -
Page 14: Exploded View
Exploded View Part Name Part Name Propeller A Li-Po Battery PCBA Propeller B Camera 0614 Motor A 0614 Motor B Lower Body Shell Upper Body Shell Screw... -
Page 15: Troubleshooting
H002 TRROUBLESHOOTING 1. Transmitter and Quadcopter can not pair Throttle position needs to be fully down. Please do not move any sticks or trims during initial power-on binding. 2. Gyro not Working Well 1)Battery voltage is too low; 2)Re-bind; 3)Land the quadcopter on the ground with the throttle stick fully down, take off again after 3 seconds. - Page 16 1)The SD card can’t be read by the quad. Please use MicroSD card (2-16GB, Class 4, UHS-1), Do not use any privated MicroSD. 2)Replace camera module 3)Format Micro-SD in the computer H002 Spare Part List H002-01 H002-02 H002-07 Body Shell Set...
- Page 17 FCC Statement Changes or modifications not expressly approved by the party responsible for compliance could void the user's authority to operate the equipment. This equipment has been tested and found to comply with the limits for a Class B digital device, pursuant to Part 15 of the FCC Rules. These limits are designed to provide reasonable protection against harmful interference in a residential installation.
Need help?
Do you have a question about the H002 and is the answer not in the manual?
Questions and answers