Table of Contents

Subscribe to Our Youtube Channel
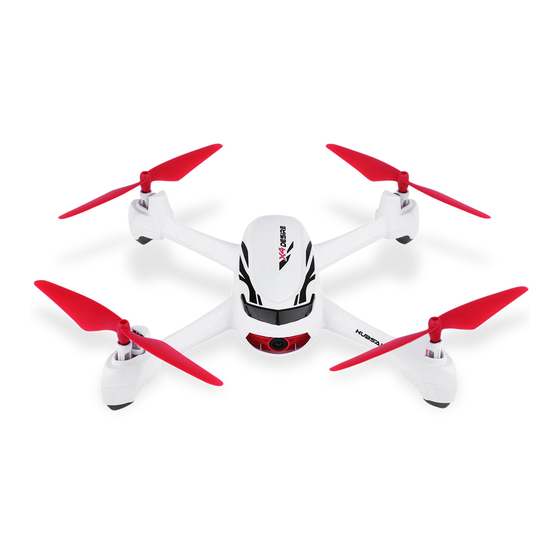
Related Manuals for Hubsan X4 DESIRE H502E


Summary of Contents for Hubsan X4 DESIRE H502E
- Page 1 ® Ages 14+ READ THE INSTRUCTION MANUAL CAREFULLY PLEASE VISIT WWW.HUBSAN TO UPGRADE THE HUBSAN X4 DESIRE ITEM NO.: H502E ARM/DISARM MOTORS, SEE PAGE 06 RTH FUNCTION, SEE PAGE 09 COMPASS CALIBRATION, SEE PAGE 12 TRANSMITTER CALIBRATION, SEE PAGE 13...
-
Page 2: Compass Calibration Before Fly
COMPASS CALIBRATION BEFORE FLY Compass calibration is required after the binding as instructed on the transmitter. 1.) Rotate the X4 horizontally until the " Set Compass 2" displays on the screen. 2.) Put the X4 nose down and rotate it vertically until the " Set Compass 2 " disappears. -
Page 3: Important Safety Notes
Hubsan X4 Desire Please read the instruction manual carefully! IMPORTANT SAFETY NOTES OPERATION: Be extremely careful and responsible when using the drone. Small electronic components can be damaged by crashing or by dropping the X4 into water. To avoid further damages, please replace broken parts immediately. -
Page 4: Items Included In The Box
INTRODUCTION Thank you for buying the HUBSAN product. It is designed as an easy-to-use,multi-functional RC model, capable of hovering and acrobatic flight maneuvers. Please read the manual carefully and follow all the instructions. Be sure to keep the manual for future reference. -
Page 5: Quad Copter Motor Led Indicator
The quad copter battery is a rechargeable lLi-Po battery with 610mAh capacity and 7.4V voltage. The battery should only be charged with the HUBSAN charger to avoid overcharge. Please make sure the battery is fully charged before first time use. - Page 6 1 shows. ● Make sure that the A and B propellers are installed correctly. The X4 will not fly if propellers are improperly installed. ● Hazardous moving parts keep fingers and other body part away. © 2016 Hubsan...
-
Page 7: Start To Fly
Do not stop the motors during the flight to avoid crashing. Push the sticks lightly. Release the sticks after the motors are armed or disarmed. © 2016 Hubsan... -
Page 8: Basic Flight
Push the stick right and the X4 will fly to the right. The X4 should be horizontal and keep the Left Right current status when the stick is in the center. The angle of stick movement corresponds to the angle of tilt and flight speed. © 2016 Hubsan... -
Page 9: Advanced Performance Setup
2.) Home Point is recorded when armed the motors with no less than 6 GPS satellites. 3.) You should be in an open place to search for the GPS satellites, it’ll take 3 mins to finish the searching, and the GPS signal strength depends on the flying environment. © 2016 Hubsan... -
Page 10: Failsafe Mode
X4 in safe flight area. If the quantity of GPS satellites drops below six for more than 20 seconds while the X4 is returning home, the X4 will descend automatically. The X4 will not avoid obstacles automatically while in failsafe mode. © 2016 Hubsan... -
Page 11: Transmitter Overview
[5] Elevator Trim [6] Aileron Trim Motor LED Switch MODE 1 [7] LCD [1] Photo/Video [8] RTH 2Throttle/Rudder Stick 9 Elevator/Aileron Stick [4] Power Switch [3] Rudder Trim/ Motor LED Switch [5] Elevator Trim [6] Aileron Trim MODE 2 © 2016 Hubsan... -
Page 12: Install The Tx Battery
Press the Elevator stick 0.5 second to shift between Normal Mode and Expert Mode, indicated by one “beep”. When it enters into Expert Mode, “Expert” will be displayed on LCD. MODE 2 MODE 1 Normal Mode Expert Mode © 2016 Hubsan... -
Page 13: Quadcopter Calibration
1) Push the left stick to the most right side, and move the right stick left to right quickly until the 4 LED indicators blink slowly simultaneously 2) Calibration succeeded when the 4 LED indicators stop blinking and remain lighted. Flying in the area nearby magnetic field would interfere the compass which need re-calibration as above instructed. © 2016 Hubsan... -
Page 14: Transmitter Calibration
The LCD will display “H”, rotate both sticks in circles for three times, then release both sticks, press any trim for 1.5 seconds until one “Beep” heard which indicates a successful calibration. The transmitter mode can be shifted according to the above operation. © 2016 Hubsan... -
Page 15: Exploded View
EXPLODED VIEW © 2016 Hubsan... - Page 16 Motor Gear Motor B Motor Shaft A Li-Po Battery Bearing Screw PA1.4*7 Screw PB1.4*3 Screw PA1.4*5 2.4G Attenna Upper Body Shell Screw PM1.4*5 GPS Shielding Case Screw PA1.4*4 Battery Cover Motor Shaft B Lens Holder Screw PM1.4*5 © 2016 Hubsan...
-
Page 17: H502E Spare Part Chart
H502-10 H502-11 H502-12 H502-13 H502E-06 H502-14 Motor Gear B Motor Shaft LED Kit 2.4G RX Camera Module GPS Module 720P H502E-07 H502-18 H502-19 H501S-13 H502-16 USB Charger Screwdriver Compass Module Battery H502E-05 H502-21 Crash Pack Battery Pack © 2016 Hubsan... -
Page 18: Fcc Information
The owner of old appliances is responsible to bring the appliances to thise collecting points or to similar collection points. With this little personal effort, you contribute to recycle valuable raw materials and the treatment of toxic substances. © 2016 Hubsan... - Page 20 User manual is subject to change without prior notice due to unforseen product upgrades. Download the latest user manual from WWW.HUBSAN.COM VERSION 1.2 EN...
Need help?
Do you have a question about the X4 DESIRE H502E and is the answer not in the manual?
Questions and answers