
Related Manuals for Digital Projection E-Vision Laser 6500 Series


Summary of Contents for Digital Projection E-Vision Laser 6500 Series
-
Page 1: User Manual
E-Vision Laser 6500 Series High Brightness Digital Video Projector USER MANUAL Rev B August 2017 117-763B... - Page 2 HDBaseT™ and the HDBaseT Alliance logo are trademarks of the HDBaseT Alliance. All other product names used in this manual are the properties of their respective owners and are acknowledged. E-Vision Laser 6500 Series User Manual Rev B August 2017 — i —...
- Page 3 Please write down your projector model number and serial number and keep the information for maintenance purposes in the future. Should the equipment be lost or stolen, the information could also be used for the police report. Model number: Serial number: E-Vision Laser 6500 Series User Manual Rev B August 2017 — ii —...
- Page 4 Pulsed, due to frame rate Pulse width 1.34ms Pulse repetition rate 120Hz Maximum laser energy 0.698mJ Total internal power >100w Apparent source size >10mm, at lens stop Divergence >100 mili Radian E-Vision Laser 6500 Series User Manual Rev B August 2017 – iii –...
-
Page 5: Digital Projection
Do not stare at operating lamp. Ne pas fixer la lampe en fonctionnement. May be harmful to the eyes. Peut être nocif pour les yeux. E-Vision Laser 6500 Series User Manual Rev B August 2017 — iv —... - Page 6 1. Will power-off the system individually when the top cover is removed. 2. Will power-off the system individually when the lens is removed or not install correctly. E-Vision Laser 6500 Series User Manual Rev B August 2017 – v –...
- Page 7 The projector can be raised or lowered by rotating the adjustable feet. DO NOT attempt to fully remove the feet. E-Vision Laser 6500 Series User Manual Rev B August 2017 — vi —...
- Page 8 Make sure there is no object blocking air input within 30 cm. Keep the inlet away from other heat sources Avoided heavy dust area E-Vision Laser 6500 Series User Manual Rev B August 2017 – vii –...
- Page 9 Direct or indirect hit of a laser beam on to the projector lens can severely damage the Digital Mirror Devices (DMD™). Sunlight Warning Avoid using the E-Vision Laser 6500 Series in direct sunlight. Sunlight on the projector lens can severely damage the Digital Mirror Devices (DMD™). E-Vision Laser 6500 Series User Manual Rev B August 2017 —...
- Page 10 This printer-friendly format is both for your convenience and to help save paper, thereby protecting the environment. It is suggested that you only print sections that are relevant to your needs. E-Vision Laser 6500 Series User Manual Rev B August 2017...
-
Page 11: Table Of Contents
..............................58 EPLACING THE ILTER .............................. 60 SING THE HYSICAL Using the Kensington Security Slot ......................... 60 Using the Security Bar Lock ............................. 60 TROUBLESHOOTING ..............................61 E-Vision Laser 6500 Series User Manual Rev B August 2017 — x —... - Page 12 ................................73 REGULATORY COMPLIANCE ............................74 FCC W .................................. 74 ARNING .................................... 74 ANADA ..............................74 AFETY ERTIFICATIONS APPENDIX I ..................................75 RS-232C P ................................75 ROTOCOL E-Vision Laser 6500 Series User Manual Rev B August 2017 – xi –...
-
Page 13: Getting Started
Caution: Avoid using the projector in dusty environments. E-Vision Laser 6500 Series User Manual Rev B August 2017 — 1 —... -
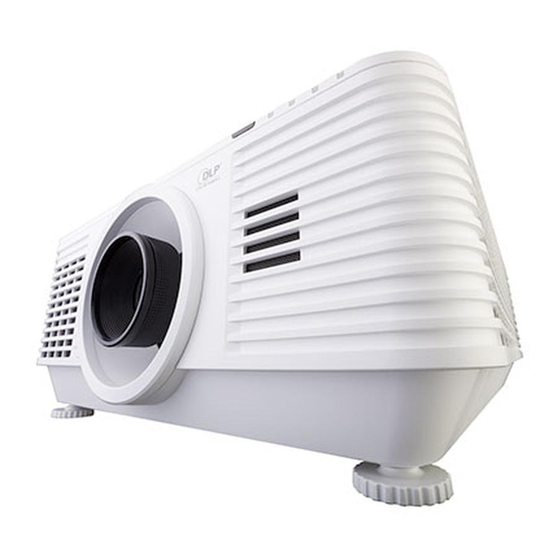
Page 14: Views Of Projector Parts
Adjusts the image position. Important: Ventilation openings on the projector allow for good air circulation, which keeps the projector light source cool. Do not obstruct any of the ventilation openings. E-Vision Laser 6500 Series User Manual Rev B August 2017 — 2 —... -
Page 15: Top View
Receives IR signal from remote control. Vertical Lens Shift Adjusts the image position vertically. (UP / DOWN) Horizontal Lens Shift Adjusts the image position horizontally. (LEFT / RIGHT) E-Vision Laser 6500 Series User Manual Rev B August 2017 – 3 –... -
Page 16: Side View-On-Screen Display (Osd) Buttons And Io
Power Turn the projector on or off. Navigates and changes settings in the OSD. Quick Menu – For Horizontal Keystone. AUTO Optimizes image size, position, and resolution. E-Vision Laser 6500 Series User Manual Rev B August 2017 — 4 —... - Page 17 Do not use this jack for anything other than intended use. Warning: As a safety precaution, disconnect all power to the projector and connecting devices before making connections. E-Vision Laser 6500 Series User Manual Rev B August 2017 – 5 –...
-
Page 18: Bottom View
60 seconds. E-Vision Laser 6500 Series User Manual Rev B August 2017... - Page 19 The drawing showing the dimensional requirements is not an actual stand design drawing. Air intake Air intake 110mm 300mm [4.33"] [11.81"] Air exhaust Air intake [Front View] [Side View] Horizontal adjuster E-Vision Laser 6500 Series User Manual Rev B August 2017 – 7 –...
-
Page 20: Remote Control Parts
Laser Notice No. 50, dated June 24, 2007 Caution: Use of controls, adjustments or performance of procedures other than those specified herein may result in hazardous laser light exposure. E-Vision Laser 6500 Series User Manual Rev B August 2017 — 8 —... - Page 21 Navigates and changes settings in the OSD. Adjusts Horizontal Keystone. ENTER Enters and confirms settigns the OSD Enables the Mobile High- Definition Link technology feature for smart devices. E-Vision Laser 6500 Series User Manual Rev B August 2017 – 9 –...
- Page 22 To enter the MHL mode, the following buttons are available for controlling your smart device, Arrow Up, Down, Left, Right ), MENU, EXIT , M HL control buttons. keys ( E-Vision Laser 6500 Series User Manual Rev B August 2017 — 10 —...
-
Page 23: Remote Control Operating Range
The projector can be operated using the remote control or the buttons on the top of the projector. All operations can be carried out with the remote control; however, the buttons on the projector are limited in use. E-Vision Laser 6500 Series User Manual Rev B August 2017 – 11 –... -
Page 24: Setup And Operation
1. Only use AAA batteries (Alkaline batteries are recommended). 2. Dispose of used batteries according to local ordinance regulations. 3. Remove the batteries when not using the projector for prolonged periods. E-Vision Laser 6500 Series User Manual Rev B August 2017 — 12 —... -
Page 25: Installing Or Removing The Optional Lens
Align the flange and correctly position at the 11 o’clock position as Flange shown in the picture. Rotate the lens clockwise until you feel it click into place. E-Vision Laser 6500 Series User Manual Rev B August 2017 – 13 –... -
Page 26: Removing The Existing Lens From The Projector
Push the LENS RELEASE button to the unlock position. Grasp the lens. Rotate the lens counterclockwise. The existing lens will be disengaged. Pull out the existing lens slowly. E-Vision Laser 6500 Series User Manual Rev B August 2017 — 14 —... -
Page 27: Starting And Shutting Down The Projector
(See Setting the OSD Language on page 25) Setting an Access Password (Security Lock) on page if security lock is enabled. E-Vision Laser 6500 Series User Manual Rev B August 2017 – 15 –... - Page 28 POWER button. The projector turns off. Caution: Do not unplug the power cord until the POWER LED stops flashing – indicating the projector has cooled down. E-Vision Laser 6500 Series User Manual Rev B August 2017 — 16 —...
-
Page 29: Setting An Access Password (Security Lock)
▲▼ button to select Security Lock. Press the cursor ◄► button to enter and enable or disable security lock function. A password dialog box automatically appears. E-Vision Laser 6500 Series User Manual Rev B August 2017 – 17 –... - Page 30 5. In case you forget the password, please contact the service center. The service center will validate the owner and help reset the password. E-Vision Laser 6500 Series User Manual Rev B August 2017 — 18 —...
-
Page 31: Adjusting The Projector Level
To raise the level of the projector, twist the adjusters counter clockwise. To lower the level of the projector, lift the projector and twist the adjusters clockwise. E-Vision Laser 6500 Series User Manual Rev B August 2017 – 19 –... -
Page 32: Adjusting Projected Image Position Using Lens Shift
Please consult the Shift Range diagram below for further clarification. Screen -15% 15%xH 100% 55%xH Hx5% +55% Distance E-Vision Laser 6500 Series User Manual Rev B August 2017 — 20 —... -
Page 33: Adjusting The Horizontal Image Position
The max. H down shift=Hx15% The max. W shift=Wx5% When max. W shift is Wx5% max. H shift=Hx50% When max. H shift is Hx55% max. W shift=Hx0% E-Vision Laser 6500 Series User Manual Rev B August 2017 – 21 –... -
Page 34: Adjusting The Zoom, Focus And Keystone
V (Vertical) or H (Horizontal) keystone. Remote control and OSD panel The keystone control appears on the display. Press for V Keystone correcting image. Press for H Keystone correcting image. E-Vision Laser 6500 Series User Manual Rev B August 2017 — 22 —... -
Page 35: Adjusting The Volume
The volume control appears on the display. Press the buttons to adjust Volume +/-. Press the MUTE button to turn off the volume (This feature is available only on the remote). E-Vision Laser 6500 Series User Manual Rev B August 2017 – 23 –... -
Page 36: On-Screen Display (Osd) Menu Settings
Horizontal/Vertical Position items in the Computer menu can only be modified when connected to a PC. Items that are not available cannot be accessed and are grayed out. E-Vision Laser 6500 Series User Manual Rev B August 2017 — 24 —... -
Page 37: Setting The Osd Language
Language is highlighted. 3. Press the cursor button until the language you want is highlighted. 4. Press the MENU button four times to close the OSD. E-Vision Laser 6500 Series User Manual Rev B August 2017 – 25 –... -
Page 38: Osd Menu Overview
Hue, Saturation, Gain 0~100 Blue Hue, Saturation, Gain 0~100 Cyan Hue, Saturation, Gain 0~100 Magenta Hue, Saturation, Gain 0~100 Yellow Hue, Saturation, Gain 0~100 White Red, Green, Blue 0~100 E-Vision Laser 6500 Series User Manual Rev B August 2017 — 26 —... - Page 39 Test Pattern None, RGB Ramps, Color Bars, Step Bars, CheckBoard, Grid, Horizontal lines H Image Shift -50~50 V Image Shift -50~50 4 Corner Left-Top, Right-Top, Right-Bottom, Left-Bottom E-Vision Laser 6500 Series User Manual Rev B August 2017 – 27 –...
- Page 40 HDMI2/MHL Disable, Enable Disable, Enable VGA1 Disable, Enable Disable, Enable Composite Video Disable, Enable HDBaseT Disable, Enable Air Filter Timer Reset OK / Cancel Custom Light 25~100 E-Vision Laser 6500 Series User Manual Rev B August 2017 — 28 —...
-
Page 41: Image Menu
(Enter) / ► to enter the Advanced menu. See Press Advanced Feature on page Advanced (Enter) / ► to enter the color manager menu. See page Press for more Color Manager information on Color Manager E-Vision Laser 6500 Series User Manual Rev B August 2017 – 29 –... -
Page 42: Computer Menu
Press the cursor ◄► button to enter and adjust the A/D sampling dot. Tracking Press the cursor ◄► button to enter and adjust the Auto Sync Position to On or Off. Auto Sync E-Vision Laser 6500 Series User Manual Rev B August 2017 — 30 —... -
Page 43: Advanced Feature
Press the cursor ◄► button to enter and adjust the video tint/hue. Video Tint Press the ENTER / ► button to enter the White Balance sub menu. See White White Balance Balance on page E-Vision Laser 6500 Series User Manual Rev B August 2017 – 31 –... -
Page 44: White Balance
Press the ◄► buttons to adjust the Red Offset. R Offset Press the ◄► buttons to adjust the Green Offset. G Offset Press the ◄► buttons to adjust the Blue Offset. B Offset E-Vision Laser 6500 Series User Manual Rev B August 2017 — 32 —... -
Page 45: Color Manager
Press the◄► buttons to adjust the Hue, Saturation, and Gain. Select to enter the White Color Manager. White Press the ◄► buttons to adjust the Red, Green, and Blue. E-Vision Laser 6500 Series User Manual Rev B August 2017 – 33 –... -
Page 46: Settings 1 Menu
38. (Enter) / ► to enter the 4 Corner sub menu. See Press 4 Corner on page 39. 4 Corner Note: Without support when 3D mode activated. E-Vision Laser 6500 Series User Manual Rev B August 2017 — 34 —... -
Page 47: Keystone
Press the cursor ◄► button to enter and turn on or off the speaker. Mute Press the cursor ◄► button to select internal speaker output on or off. Internal Speaker E-Vision Laser 6500 Series User Manual Rev B August 2017 – 35 –... -
Page 48: Advanced 1 Feature
3D Setting Setting. Note: To enjoy the 3D function, first enable the Play Movie in 3D setting found in your DVD device under the 3D Disc Menu. E-Vision Laser 6500 Series User Manual Rev B August 2017 — 36 —... - Page 49 9. Passive 3D is not going to support thru 3D Sync In/Out. Note: Since different types of glass (DLP link or IR shutter glass) have their own setting instructions, Please follow the guide to finish the setup process. E-Vision Laser 6500 Series User Manual Rev B August 2017 – 37 –...
-
Page 50: Advanced 2 Feature
Press the cursor ◄► button to enter and set H Image Shift. H Image Shift Press the cursor ◄► button to enter and set V Image Shift. V Image Shift E-Vision Laser 6500 Series User Manual Rev B August 2017 — 38 —... -
Page 51: Corner
2. Press the cursor ▲ / ▼ buttons to adjust vertical and press the cursor ◄ / ► buttons to adjust horizontal. 3. Press MENU to save and Exit the settings. E-Vision Laser 6500 Series User Manual Rev B August 2017 – 39 –... -
Page 52: Settings 2 Menu
Note: When Light Mode set to Custom Light, Custom Light function Enable. Note : Extreme Dimming: Saving 50% light source power consumption by blank screen (press BLANK button) E-Vision Laser 6500 Series User Manual Rev B August 2017 — 40 —... -
Page 53: Status
Remote ID Showing Remote Controller ID Serial Number Showing serial number of product. Air Filter Hour Displays the number of hours the air filter has been in use. E-Vision Laser 6500 Series User Manual Rev B August 2017 – 41 –... -
Page 54: Advanced 1 Feature
4. After adjusting Remote ID from OSD, only if the OSD Menu has been closed then the new ID value can be taken effected and memorized. 5. The setting value “Default” means ID 0 on the remoter. E-Vision Laser 6500 Series User Manual Rev B August 2017 — 42 —... - Page 55 Enter a valid Gateway address if DHCP is turned off. Enter a valid DNS name if DHCP is turned off. (Enter) / ► to confirm settings. Apply Press E-Vision Laser 6500 Series User Manual Rev B August 2017 – 43 –...
-
Page 56: Supported External Devices
LAN/RJ45 port and remote/control the projector, as well as the related control commands supporting for each external device, kindly please get contact with the Support-Service team directly. E-Vision Laser 6500 Series User Manual Rev B August 2017 — 44 —... - Page 57 1. Connect an RJ45 cable to RJ45 ports on the projector and the PC (Laptop). 2. On the PC (Laptop), select Start → Control Panel →Network and Internet. E-Vision Laser 6500 Series User Manual Rev B August 2017 – 45 –...
- Page 58 4. In the Properties window, select the Networking tab, and select Internet Protocol (TCP/IP). 5. Click Properties. 6. Click Use the following IP address and fill in the IP address and Subnet mask, then click OK. E-Vision Laser 6500 Series User Manual Rev B August 2017 — 46 —...
- Page 59 (for example, Microsoft Internet Explorer with Adobe Flash Player 9.0 or higher). 11. In the Address bar, input the IP address: 10.10.10.10. 12. Press (Enter). The projector is setup for remote management. The LAN/RJ45 function displays as follows. E-Vision Laser 6500 Series User Manual Rev B August 2017 – 47 –...
- Page 60 Network Configuration Subnet Mask Default Gateway DNS Server Enabled (N/A) User Password New Password Confirm Enabled (N/A) Admin Password New Password Confirm For more information, please visit http://www.crestron.com. E-Vision Laser 6500 Series User Manual Rev B August 2017 — 48 —...
- Page 61 1. Make sure that user can access the homepage of LAN RJ45 function by web browser (for ex-ample, Microsoft Internet Explorer v6.01/v8.0). 2. From the Homepage of LAN/RJ45, click Alert Settings. 3. By default, these input boxes in Alert Settings are blank. E-Vision Laser 6500 Series User Manual Rev B August 2017 – 49 –...
- Page 62 Fill in all fields as specified. User can click Send Test Mail to test what setting is correct. For successful sending an e-mail alert, you must select alert conditions and enter a correct e-mail address. E-Vision Laser 6500 Series User Manual Rev B August 2017...
- Page 63 Make sure that “Windows Firewall” setting to be disabled in case of “TELNET” function filtering out by laptop/PC. Start => All Programs => Accessories => Command Prompt E-Vision Laser 6500 Series User Manual Rev B August 2017 – 51 –...
- Page 64 By default installation for Windows VISTA / 7 / 8, “TELNET” function is not included. But end-user can have it by way of “Turn Windows features On or Off” to be enabled. Open “Control Panel” in Windows VISTA / 7 / 8 Open “Programs” E-Vision Laser 6500 Series User Manual Rev B August 2017 — 52 —...
- Page 65 Limitation 3 for Telnet-Control: Minimum delay for next RS232 command must be more than 200 (ms). (*, In Windows built-in “TELNET.exe” utility, “Enter” key pressed will have “Carriage-Return” and “New-Line” code.) E-Vision Laser 6500 Series User Manual Rev B August 2017 – 53 –...
-
Page 66: Advanced 2 Feature
(Enter) / ► to enter the Source Filter menu. See page Press for more Source Filter information on Source Filter. Air Filter Timer (Enter) / ► to reset air filter timer. Press Reset E-Vision Laser 6500 Series User Manual Rev B August 2017 — 54 —... - Page 67 Press the cursor ◄► button to enter and enable or disable the Composite Video Composite Video source. Press the cursor ◄► button to enter and enable or disable the HDBaseT source. HDBaseT E-Vision Laser 6500 Series User Manual Rev B August 2017 – 55 –...
-
Page 68: Maintenance And Security
3. Rinse all detergent from the cloth and wipe the projector again. Caution: To prevent discoloration or fading of the case, do not use abrasive alcohol-based cleaners. E-Vision Laser 6500 Series User Manual Rev B August 2017 — 56 —... -
Page 69: Cleaning The Air Filter
If the filter is heavily clogged and unable to clean, replace a new filter. Note: Using a ladder is recommended to access the filter. Do not remove the projector from the wall mount. E-Vision Laser 6500 Series User Manual Rev B August 2017 – 57 –... -
Page 70: Replacing The Filter
Clean up the dust on the projector and around the air vents. Remove the screws from the filter module. Loosen Screws on the filter module. Remove the filter module from the projector E-Vision Laser 6500 Series User Manual Rev B August 2017 — 58 —... - Page 71 Do not wash the filter with the water or other liquid matter. Important : The Filter LED lights when the filter service time is on. If the filter is broken, please use a new one. E-Vision Laser 6500 Series User Manual Rev B August 2017 – 59 –...
-
Page 72: Using The Physical Lock
Using the Security Bar Lock In addition to the password protection function and the Kensington lock, the Security Bar Opening helps protect the projector from unauthorized use. See the following picture. E-Vision Laser 6500 Series User Manual Rev B August 2017 — 60 —... -
Page 73: Troubleshooting
Keep a record of the steps you take when troubleshooting: The information may be useful when calling for technical support or for passing on to service personnel. E-Vision Laser 6500 Series User Manual Rev B August 2017 – 61 –... -
Page 74: Led Error Messages
1. Position the projector so it is as perpendicular to the screen as possible. 2. Use the Keystone button on the remote control or projector to correct the problem. E-Vision Laser 6500 Series User Manual Rev B August 2017 — 62 —... -
Page 75: Light Source Problems
Include a description of the problem and a checklist of the steps you took when trying to fix the problem: The information may be useful to service personnel. For servicing, return the projector to the place you purchased it. E-Vision Laser 6500 Series User Manual Rev B August 2017 – 63 –... -
Page 76: Hdmi Q & A
HDMI trademark is properly used in the market. We recommend that consumers buy their cables from a reputable source and a company that is trusted. For more detail information check http://www.hdmi.org/learningcenter/faq.aspx#49 E-Vision Laser 6500 Series User Manual Rev B August 2017 — 64 —... -
Page 77: Specifications
Mini-jack Stereo x 1 Input Terminals Composite video x 1 HDMI (MHL) x 1, HDMI x 1 Audio RCA (R/L) x 1 3D Sync in x 1 HDBaseT x 1 E-Vision Laser 6500 Series User Manual Rev B August 2017 – 65 –... - Page 78 Wired Remote Out x 1 USB Type B for service x 1 Kensington Security Slot Security Security Bar Note: For questions regarding product specifications, please contact your local distributor. E-Vision Laser 6500 Series User Manual Rev B August 2017 — 66 —...
-
Page 79: Projection Distance Vs. Projection Size
6462 8185 Image Height (mm) 1346 2692 4308 2019 4039 5116 h (mm) 1346 2154 1010 2019 2558 O (mm) 1481 2369 1111 2221 2814 A (mm) E-Vision Laser 6500 Series User Manual Rev B August 2017 – 67 –... - Page 80 2692 4173 1010 1245 1346 2087 h (mm) O (mm) 1111 1370 1481 2295 A (mm) offset % = O/(2xh) × 100% O=A+h h=(1/2) × (image height) E-Vision Laser 6500 Series User Manual Rev B August 2017 — 68 —...
-
Page 81: Timing Mode Table
- - ○ ○ 1280 x 800 62.8 74.9 - - ○ ○ 1280 x 800 71.6 84.9 - - ○ ○ 1280 x 800 101.6 119.9 E-Vision Laser 6500 Series User Manual Rev B August 2017 – 69 –... -
Page 82: Rev B August
Displayable only. (4:3 only) The color of mean may have a little noise is acceptable. HDTV timing main check tool is DVD player, VG828 is secondary E-Vision Laser 6500 Series User Manual Rev B August 2017 — 70 —... -
Page 83: True 3D Video Compatibility Table
TAB mode is on 1280 x 720P @50Hz 1280 x 720P @60Hz 3D format is Frame 480i HQFS sequential Note: 3D glasses must be supported to 144Hz. E-Vision Laser 6500 Series User Manual Rev B August 2017 – 71 –... -
Page 84: Projector Dimensions
Digital Projection Projector Dimensions 470mm [18.50"] E-Vision Laser 6500 Series User Manual Rev B August 2017 — 72 —... -
Page 85: Lens Extensions
Digital Projection Lens Extensions 51.45 LONG ZOOM LENS 71.85 WIDE ZOOM LENS- 21.48 SEMI LONG LENS- 6.86 STANDARD LENS- 7.64 WIDE FIX LENS- E-Vision Laser 6500 Series User Manual Rev B August 2017 — 73 —... -
Page 86: Regulatory Compliance
Canada This class B digital apparatus complies with Canadian ICES-003. Safety Certifications FCC-B, cUL, UL, CB, CE, CCC, KC, PCT, NOM, China CECP, and C-tick. E-Vision Laser 6500 Series User Manual Rev B August 2017 – 74 –... -
Page 87: Rs-232C Protocol
Pn/F VXXG0009 56h Xh Xh 47h 30h 30h 30h 39h 0Dh n=xxxxxx@xxxx.x Set Alter Email VXXS0009n 56h Xh Xh 53h 30h 30h 30h 39h nh 0Dh xx.xx E-Vision Laser 6500 Series User Manual Rev B August 2017 — 75 —... - Page 88 9:User 10:User2 0:Presentation 1:Bright 2:Game 3:Movie 4.Vivid VXXS0108n 56h Xh Xh 53h 30h 31h 30h 38h nh 0Dh Set Display Mode 5:TV 6:sRGB 8:DICOM SIM 9:User 10:User2 E-Vision Laser 6500 Series User Manual Rev B August 2017 – 76 –...
- Page 89 VXXG0310 56h Xh Xh 47h 30h 33h 31h 30h 0Dh n=-25~+25 Pn/F keystone value Set horizontal VXXS0310n 56h Xh Xh 53h 30h 33h 31h 30h nh 0Dh n=-25~+25 keystone value E-Vision Laser 6500 Series User Manual Rev B August 2017 — 77 —...
- Page 90 VXXG0330 56h Xh Xh 47h 30h 33h 33h 30h 0Dh 0~120 Pn/F (min = n*5) Sleep Timer VXXS0330n 56h Xh Xh 53h 30h 33h 33h 30h nh 0Dh 0~120 (min = n*5) E-Vision Laser 6500 Series User Manual Rev B August 2017 – 78 –...
Need help?
Do you have a question about the E-Vision Laser 6500 Series and is the answer not in the manual?
Questions and answers