
Related Manuals for Tecnoware ATA 4.0 MM


Summary of Contents for Tecnoware ATA 4.0 MM
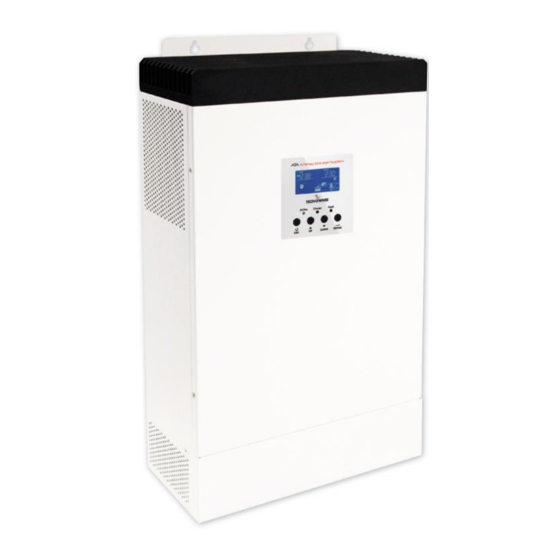
- Page 1 Uninterruptible Power Supply ATA Energy Storage System ATA 4.0 MM ATA 5.0 MM User’s manual Manuale utente...
- Page 2 ...
-
Page 3: Table Of Contents
Index User’s Manual - English................ 1 Safety Warnings ................1 Introduction ................2 General Characteristics ..............3 Receipt and site selection .............. 4 Operating .................. 5 Functioning with active PV panels ..........5 Functioning with inactive PV panels ..........6 Other Operating Modes ..............7 Only with PV panels ..............7 Only with the main (UPS) ............7 External Description .............. - Page 4 12.5 Batteries Connection ............. 38 12.6 AC Utility Line Connection ............40 12.7 Output Lines and Load Connection ..........41 12.8 PhotoVoltaic (PV) Panel Connection ..........42 12.9 Connections of Parallel Kit cables ..........42 12.10 Setting Parameter ..............43 12.11 Startup ................
- Page 5 Indice Manuale Utente – Italiano..............59 Avvisi di Sicurezza ................59 Introduzione ................60 Caratteristiche Generali ............... 61 Ricevimento e Collocazione ............62 Funzionamento ................. 63 Modalità SBU: funzionamento con Pannelli Attivi ......63 Modalità SBU: funzionamento con Pannelli non Attivi ....... 64 Altri Modi di Funzionamento ............
- Page 6 12.5 Connessione Batterie ............. 96 12.6 Connessione Alimentazione d’Ingresso ......... 98 12.7 Connessione Circuito d’Uscita e Carico ........99 12.8 Connessione Pannelli Fotovoltaici ..........100 12.9 Connessione Cavi del Kit ............100 12.10 Impostazione Parametro ............101 12.11 Messa in Servizio ..............102 12.12 Anomalie ed Allarmi del Sistema ..........
-
Page 7: User's Manual - English
There are no internal parts in ATA which are user serviceable. Any repair or maintenance work must be performed exclusively by qualified technical personnel authorized by TECNOWARE. TECNOWARE declines any responsibility if this warning is disregarded. The electric installation has to be done by qualified personnel. Follow all the Safety Standards (CEI ... -
Page 8: Introduction
ENGLISH 1 Introduction The ATA ENERGY STORAGE SYSTEM (ATA means Uninterruptible Power Supply) is the result of constant technological research aimed at obtaining the best performance at the lowest cost. ATA ENERGY STORAGE SYSTEM is an inverter with storage system and single-phase sinewave UPS functioning built specifically to protect and supply the most sophisticated electronic equipment: it provides to make an absolutely continuous power supply, regulated and free to any kind of interference (black-out, under voltage, over voltage, surge, spike, micro interruptions, interference). -
Page 9: General Characteristics
ENGLISH 2 General Characteristics ATA ENERGY STORAGE SYSTEM has all the advanced features which guarantee maximum reliability and safety: Inverter OFF-GRID with storage system Pure sinewave output Integrated MPPT system to search the best working point Different selectable functioning modes Selectable charging current Selectable charge priority Output frequency selectable from the front panel... -
Page 10: Receipt And Site Selection
ATTENTION: be careful in using a fixing system suitable to the mounting surface and to the weight of ATA. TECNOWARE declines any responsibility if these warnings are disregarded. The ATA is designed to operate in a protected environment. We therefore recommend installing it in a place with very little or no humidity, dust or smoke. -
Page 11: Operating
ENGLISH Fix ATA on the choice surface, through the use of screws and dowels. See the image below for the fixing point on the ATA. Do not obstruct ventilation holes. Do not insert objects or pour liquids in the ventilation holes. Do not rest any object on top of the ATA. -
Page 12: Functioning With Inactive Pv Panels
ENGLISH Functioning with inactive PV panels The equipment is powered by the ATA system by using the energy stored in the batteries until the photovoltaic panels are once again active. The stored energy can be used up to a minimum threshold of 30/40% (settable in settings). Only in the case of this energy not being sufficient will the equipment be powered automatically from the mains. -
Page 13: Other Operating Modes
ENGLISH 5 Other Operating Modes Only with PV panels ATA system use the PhotoVoltaic (PV) Panels energy to power the equipment; simultaneously charges the batteries. In the case the photovoltaic panels energy is not sufficient ATA use the batteries energy. To active this modality you need to set correctly the parameters 01 and 16 in the ATA settings. -
Page 14: External Description
ENGLISH 6 External Description Front Panel The front panel informs the user about operating status, alarm conditions and measurements. It also provides access to controls and configuration parameters. Front panel shown below consists of two parts: Graphic LCD panel provides complete information about the functioning status and existing alarms, Load and Battery level, Input, Output and Battery measurements. - Page 15 ENGLISH LCD Icon Function Description Input Source Information Indicates the AC input. Indicates the PV input Indicates input voltage, input frequency, PV voltage, battery voltage and charger current. Configuration Program and Fault Information Indicates the setting program. Indicates the warning and fault codes. Warning: flashing with warning code.
-
Page 16: Led Indicator And Buttons
ENGLISH 6.1.2 Led Indicator and Buttons Functions of the buttons are given below: LED Indicator Messages Solid On Output is powered by utility in Line mode. Flashing Output is powered by battery or PV in battery mode. Solid On Battery is fully charged. Flashing Battery is charging. -
Page 17: Rear Side
ENGLISH Rear Side Figure 3 – Rear Side Power On/Off Switch: to turn on or turn off the ATA Grounded AC Input: to connect the ATA to the AC utility line. PV Input: to connect the ATA to the PV panels. Battery Input: to connect the ATA to the batteries. -
Page 18: Electrical Installation
ATTENTION: for safety and efficiency it is recommended to use always cables with the cross section equal or thicker than the specified one into the following table. TECNOWARE declines any responsibility if these warnings are disregarded. The ATA models have inside the case only the electronic parts: the batteries are installed externally. - Page 19 The wires for ATA 4.0 MM must be designed to withstand currents up to 29A if using for AC Utility Line, up to 60A (PV panels), up to 75A (Batteries) and up to 18A (Output Line).
-
Page 20: Installation
ENGLISH 7.1 Installation PV PANELS PV PROTECTION SYSTEM LOAD RCCB RCCB (Residual Current ELECTRICITY (Residual Current Circuit Breaker) METER (existing) Circuit Breaker) 30mA (existing) 300mA (NEW) ATA ENERGY STORAGE SYSTEM AC MAINS LINE BOX BATTERIE ATA ATA CONNECTIONS AC MAINS INPUT PV PANELS INPUT PV+ PV- + BATTERY... - Page 21 ATA Output line and the loads (see figure 4). Connect ATA to the external Battery Box: We suggest to use ONLY Battery Box supplied by TECNOWARE. TECNOWARE declines any responsibilities if this rule is not followed. Before starting whichever operation be sure that the Battery circuit breaker of Battery Box is in “OFF”...
-
Page 22: First Start Up
There are no internal parts in the ATA which are user serviceable. Any repair or maintenance work must be performed exclusively by qualified technical personnel authorized by TECNOWARE. TECNOWARE declines any responsibility if this warning is disregarded. Disregard for these warnings may lead to a risk of electric shock to operators. -
Page 23: Functioning
ENGLISH 9 Functioning Turning ON and OFF To turn completely ON the ATA please do the following steps: Place the circuit breaker of external batteries in “ON” position. Place the circuit breakers of PV panels in “ON” position. Place the AC Input line circuit breaker of ATA in “ON”... -
Page 24: Load Testing
ENGLISH Load Testing The UPS indicates the Output Load level by graphic LCD (as described in the chapter 5). When the Output load is higher then nominal value the ATA warns of Overload condition by graphic LCD and by acoustic alarm as described in the “Warning Table” and in the “Troubleshooting” chapter. The UPS has the capability to accept an Overload less than 110% for 10 minutes. -
Page 25: Operation In Fault Mode
ENGLISH Operation in Fault Mode When Fault led illuminates and the buzzer beeps continuously, it means that there is a fatal error in the ATA. Users can get the Fault code from display panel. Please check the “Troubleshooting” chapter for details. Please check the loads, wiring, ventilation, mains supply, PC supply, Battery and so on after the fault occurs. -
Page 26: Communication Interfaces
The RJ45/RS232 and USB interface signals are isolated through photo-couplers. Connecting to the Web site www.tecnoware.com it is possible to download free of charge the updated Management Software for ATA, named WatchPower, compatible with the most popular Operating Systems. - Page 27 ENGLISH 10.1.2 Setting the operating parameters of ATA By clicking on the "Parameters Setting", you can select the same settings that can be set by the front panel. These settings affect the operation of the entire system. And it is possible to enable or disable alarms and functions (acoustic alarm, warning in the absence of AC mains line, power saving mode, backlight, reboot in case of overload and/or bypass, etc ...), to select the functioning mode (SBU, Utility, etc ...
-
Page 28: Rs485 Interface
ENGLISH 10.1.3 Recording and graphical representation of the values of the System ATA has a system of storing the historical operation values. It is possible to view these values graphically or extrapolate on Excel file. You can access the historical clicking on the "Data" button. In the graphic representation, you can select the type of parameter to be displayed going to perform filtering on the time in which you are interested. -
Page 29: Parallel System Connection
ENGLISH 11 Parallel System Connection 11.1 Introduction Maximum of 4 pcs of identical power and specification ATA can be connected in parallel: so the max handling power is 20KVA/16KW (for ATA 5.0 MM). 11.2 Parallel Kit The parallel kit consists of: Parallel Board Parallel Cable Sharing Current Cable... - Page 30 ENGLISH 3. Remove the screws, as shown below; then remove the 2-pin flat cable, remove the 14-pin flat cable and remove the electronic board placed under the communication board. 4. Remove the metal cover, as shown below. 5. Install the Parallel Board. User’s manual ATA Energy Storage System MM...
- Page 31 ENGLISH 6. Reconnect the 2-pin and 14-pin flat cables to the Parallel board and Communication board, as shown below. Scheda Parallelo Scheda Comunicazioni 7. Install again the Communication board where it had been previously removed. 8. Reassemble the metal cover, removed at the point 1. ATA Energy Storage System MM User’s manual...
-
Page 32: Installation Of Ata Units
ENGLISH 11.4 Installation of ATA units Refer to the figure below when installing the ATA units. NOTE: for promoting aeration and increasing the dissipation of heat produced by each ATA, it is appropriate to install the units leaving 20 cm of space between the units and 50 cm of space above and below of each unit. Be careful to install the units at the same height. - Page 33 ENGLISH The battery pack can be also realized with batteries connected in parallel. ATTENTION! The battery pack must be common to all inverters in parallel. The following table shows the recommended size for wires and battery terminals. Terminal: Recommended size for wires and battery terminals: RING TERMINAL AMPERES WIRE...
-
Page 34: Ac Utility Line Connection
ENGLISH 11.6 AC Utility Line Connection Connect the AC Utility Line to the power bars of the ATA units, and be sure to divide correctly LINE, NEUTRAL and EARTH connections. For safety we recommend to install a protection device (fuse) on the Input LINE connection of each ATA units and a protection device (fuse) on the NEUTRAL connection of the system. -
Page 35: Output Lines And Load Connection
ENGLISH 11.7 Output Lines and Load Connection Connect the Output Line (LINE, NEUTRAL and EARTH) of each ATA unit to the respective connection bar. For safety we recommend to install a protection device (fuse) on the Output LINE connection of each ATA unit. Refer to the diagram below. -
Page 36: Connections Of Parallel Kit Cables
ENGLISH 11.9 Connections of Parallel Kit cables Refer to the figure below to connect the cables included in the kit parallel. 2 ATA units in parallel mode: 3 ATA units in parallel mode: 4 ATA units in parallel mode: User’s manual ATA Energy Storage System MM... -
Page 37: Setting Parameter
ENGLISH 11.10 Setting Parameter This parameter can only be set if the ATA unit is in stand-by mode. NUMBER DESCRIPTION SELECTABLE OPTIONS Single Mode: When the units are used in parallel with single phase, please select “PAL” in program 28. It is required to have at least 3 inverters or Parallel Mode: maximum 4 inverters to support three-... - Page 38 ENGLISH When “ALL” is selected, parallel or 3-phase system will continue working according to rule of “solar first” setting only when all of inverters are connected to PV modules. For example, two units are connected in All of Inverters: parallel and set “SOL” in output source priority.
-
Page 39: Startup
ENGLISH 11.11 Startup 1. Before the Startup of the system: Check all the connections of the Parallel system. Be sure that the protection systems on the Input LINE connections are open and Input NEUTRAL connections are connected in common 2. -
Page 40: Faults And Alarms
ENGLISH ATTENTION: to prevent an overload condition occurs, we recommended to have the system up and running before you activate the devices to be supplied. ATTENZIONE: in this type of operation there are intervention times, then this may lead to interruptions of operation to those devices that are not capable of withstanding the presence of an intervention time. -
Page 41: Three Phases Connection
ENGLISH 12 Three Phases Connection 12.1 Introduction It is necessary to connect 3 pcs of identical power and specification ATA in parallel, installing an ATA for each phase: so the max handling power is 15KVA/12KW (for ATA 5.0 MM). 12.2 Parallel Kit The parallel kit consists of: Parallel Board Parallel Cable... - Page 42 ENGLISH 3. Remove the screws, as shown below; then remove the 2-pin flat cable, remove the 14-pin flat cable and remove the electronic board placed under the communication board. 4. Remove the metal cover, as shown below. 5. Install the Parallel Board. User’s manual ATA Energy Storage System MM...
- Page 43 ENGLISH 6. Reconnect the 2-pin and 14-pin flat cables to the Parallel board and Communication board, as shown below. Scheda Parallelo Scheda Comunicazioni 7. Install again the Communication board where it had been previously removed. 8. Reassemble the metal cover, removed at the point 1. ATA Energy Storage System MM User’s manual...
-
Page 44: Installation Of Ata Units
ENGLISH 12.4 Installation of ATA units Refer to the figure below when installing the ATA units. NOTE: for promoting aeration and increasing the dissipation of heat produced by each ATA, it is appropriate to install the units leaving 20 cm of space between the units and 50 cm of space above and below of each unit. Be careful to install the units at the same height. - Page 45 ENGLISH The battery pack can be also realized with batteries connected in parallel. ATTENTION! The battery pack must be common to all inverters in parallel. The following table shows the recommended size for wires and battery terminals. Terminal: Recommended size for wires and battery terminals: RING TERMINAL AMPERES WIRE...
-
Page 46: Ac Utility Line Connection
ENGLISH 12.6 AC Utility Line Connection Connect the Input LINE phase of the first ATA to the phase L1 of AC Three Phases Utility; connect the Input LINE phase of the second ATA to the phase L2; then connect the Input LINE phase of the third ATA to the phase L3. Connect the Input NEUTRAL phase of each ATA units and the NEUTRAL of AC Three Phases Utility to the NEUTRAL power bar. -
Page 47: Output Lines And Load Connection
ENGLISH 12.7 Output Lines and Load Connection Connect the Output LINE phase of each ATA unit to the respective Output Phase (L1, L2, L3) of the Three Phases Output Line. Connect the Output NEUTRAL phase of each ATA and the NEUTRAL of AC Three Phases Output the NEUTRAL power bar. Connect the EARTH of each ATA unit to the EARTH bar. -
Page 48: Photovoltaic (Pv) Panel Connection
ENGLISH 12.8 PhotoVoltaic (PV) Panel Connection Refer to the "Installation" section for the connections of the system of PV panels. ATTENTION: each ATA unit must be connected to its own system of panels of PV panels. You can not use only one system of PV panels in common for all ATA units. 12.9 Connections of Parallel Kit cables Refer to the figure below to connect the cables included in the kit parallel. -
Page 49: Setting Parameter
ENGLISH 12.10 Setting Parameter This parameter can only be set if the ATA unit is in stand-by mode. NUMBER DESCRIPTION SELECTABLE OPTIONS Single Mode: When the units are used in parallel with single phase, please select “PAL” in program 28. Parallel Mode: It is required to have at least 3 inverters or maximum 6 inverters to support three-... -
Page 50: Startup
ENGLISH When “ALL” is selected, parallel or 3-phase system will continue working according to rule of “solar first” setting only when all of inverters are connected to PV modules. For example, two units are connected in All of Inverters: parallel and set “SOL” in output source priority. -
Page 51: Faults And Alarm
ENGLISH ATTENTION: to prevent an overload condition occurs, we recommended to have the system up and running before you activate the devices to be supplied. ATTENZIONE: in this type of operation there are intervention times, then this may lead to interruptions of operation to those devices that are not capable of withstanding the presence of an intervention time. -
Page 52: Technical Characteristics
ENGLISH 13 Technical Characteristics Model ATA Energy Storage System Power 4000 VA 5000 VA Nominal power 3200 W 4000 W Dimensions (W x H x D) 29,5 x 54 x 14 cm Cooling Fan cooling Audible noise < 40 dBA a 1 m Weight 12,5 kg 13,5 kg... - Page 53 ENGLISH INTERFACING Interface (communication port) USB/RJ45 (RS232) WatchPower (compatible with WINDOWS, MAC OS X up to version 10.8, UNIX, Software LINUX, ecc.) External RS485 interface Yes (optional) PARALLEL CONFIGURATION Parallel interface Yes (optional) Parallel unit Up to 4 units ENVIROMENTAL SPECIFICATION Storage temperature From -15 to 60 °C Working temperature...
-
Page 54: Settings
ENGLISH 14 Settings After pressing and holding “ENTER” button for 3 seconds, the unit will enter setting mode. Press “UP” or “DOWN” button to select setting programs. And then, press “ENTER” button to confirm the selection or “ESC” button to exit. SETTING DESCRIPTION SELECTABLE OPTIONS... - Page 55 ENGLISH 60A (default) Maximum charging current: To configure total charging current for solar chargers. (If selected “SNU” into parameter 16 the max. charging current = utility charging current + solar charging current) 100A 110A 120A Appliances If selected, acceptable AC input voltage range will be within 90- 280VAC.
- Page 56 ENGLISH Restart disable Restart enable (default) Auto restart when overload occurs Restart disable Restart enable (default) Auto restart when over temperature occurs 50Hz (default) 60Hz Output frequency 30A (default) Maximum utility charging current 46V (default) Pre-setting voltage back to utility source when selecting “Solar first”...
- Page 57 ENGLISH 50V (default) Pre-setting voltage back to battery mode when selecting “Solar first” or “SBU priority” in program 01. Battery fully charged If this inverter/charger is working in Line, Standby or Fault mode, charger source can be programmed as below: Solar energy will charge battery as Solar first first priority.
- Page 58 ENGLISH Alarm on Alarm off (default) Buzzer Alarm If selected, no matter how users Return to default display switch display screen, it will screen (default) automatically return to default display screen (Input voltage /output voltage) after no button is pressed for Auto return to default display 1 minute.
- Page 59 ENGLISH If user-defined is selected in program 5, this program can be set up. Setting range is from 40.0V to 48.0V and increment of each Low DC cut-off voltage click is 0.1V. Low DC cut-off voltage will be fixed to setting value no matter what percentage of load is connected.
-
Page 60: Maintenance
ENGLISH 15 Maintenance 15.1 ATA Cleaning Before starting any cleaning operation, be sure that: 1. The AC Input Voltage for the ATA has been removed. 2. The Battery voltage for ATA has been removed. 3. The PV voltage for ATA has been removed. 4. -
Page 61: Troubleshooting
There are no internal parts in the ATA which are user serviceable. Any repair or maintenance work must be performed exclusively by qualified technical personnel authorized by TECNOWARE. TECNOWARE declines any responsibility if this warning is disregarded. SYMPTOM LCD/LED/BUZZER POSSIBLE CAUSE ACTION TO SOLVE 1. - Page 62 Technical Service. If the described anomalies should continue despite the advised troubleshooting, or should they manifest in any other form, please contact: TECNOWARE SERVICE www.tecnoware.com User’s manual ATA Energy Storage System MM...
-
Page 63: Conformity To The European Directives
ENGLISH Conformity to the European Directives TECNOWARE S.r.l. confirms that ATA ENERGY STORAGE SYSTEM models comply with the requirements set out in: the Low Voltage (Safety) Directive 2014/35/EU and following amendments, the EMC (Electro-Magnetic Compatibility) Directive 2014/30/EU and following amendments. - Page 64 ENGLISH User’s manual ATA Energy Storage System MM...
-
Page 65: Manuale Utente - Italiano
L’ATA non ha parti interne soggette a manutenzione da parte dell’utente. Interventi tecnici di qualsiasi tipo devono essere compiuti solo da personale tecnico specializzato ed autorizzato da TECNOWARE. In caso contrario TECNOWARE declina ogni sua responsabilità. L'installazione elettrica, nonostante la sua semplicità, deve essere eseguita esclusivamente da ... -
Page 66: Introduzione
ITALIANO 1 Introduzione L’ATA ENERGY STORAGE SYSTEM è il risultato di una costante ricerca tecnologica mirata all'ottenimento delle migliori prestazioni a costi estremamente contenuti. ATA ENERGY STORAGE SYSTEM è un inverter con accumulo e funzione UPS monofase ad onda sinusoidale progettato per alimentare e proteggere le più... -
Page 67: Caratteristiche Generali
ITALIANO 2 Caratteristiche Generali ATA ENERGY STORAGE SYSTEM presenta tutte le moderne caratteristiche che garantiscono massima affidabilità e sicurezza: Inverter OFF-GRID con sistema di accumulo Uscita sinusoidale pura Sistema MPPT Integrato per la ricerca del miglior punto di lavoro Diverse modalità di funzionamento selezionabili Corrente di ricarica selezionabile Priorità... -
Page 68: Ricevimento E Collocazione
ATTENZIONE: porre attenzione nell’utilizzare un sistema di fissaggio adeguato alla superficie di installazione e al peso dell’ATA. In caso contrario TECNOWARE declina ogni sua responsabilità. L'ATA è progettato per operare in ambienti chiusi. Si consiglia perciò d’installarlo in un luogo privo di umidità, polvere e fumo eccessivi. -
Page 69: Funzionamento
ITALIANO Fissare l’ATA sulla superficie scelta, tramite l’utilizzo di tasselli e viti. Fare riferimento alla figura sottostante per i punti di fissaggio predisposti a bordo dell’ATA. Non ostruire le fessure o i fori di ventilazione. Non inserire oggetti o versare liquidi nei fori di ventilazione. Non appoggiare alcun oggetto sopra l’ATA. -
Page 70: Modalità Sbu: Funzionamento Con Pannelli Non Attivi
ITALIANO Modalità SBU: funzionamento con Pannelli non Attivi Le apparecchiature vengono alimentate dal sistema ATA utilizzando l’energia accumulata nelle batterie fino a quando i pannelli fotovoltaici si attivano nuovamente. L’energia stoccata può essere utilizzata fino ad una soglia minima del 30/40% (valore impostabile tramite settaggi). Solo nel caso in cui questa energia non sia sufficiente, le apparecchiature vengono alimentate automaticamente dalla rete elettrica. -
Page 71: Altri Modi Di Funzionamento
ITALIANO 5 Altri Modi di Funzionamento 5.1 Modalità Only Solar: solo con Pannelli Fotovoltaici ATA utilizza l’energia dei pannelli fotovoltaici per alimentare le apparecchiature e contemporaneamente carica le batterie. Nel caso in cui l’energia dei pannelli fotovoltaici sia insufficiente ATA utilizza l’energia delle batterie. -
Page 72: Descrizione Esterna
ITALIANO 6 Descrizione Esterna Pannello Frontale Il pannello frontale informa l’utente sullo stato di funzionamento, sulle condizioni di allarme e sulle misure. Inoltre consente di controllare e configurare i parametri di funzionamento. Il pannello frontale, mostrato nella figura 1, è costituito da 2 parti: Un pannello LCD grafico che fornisce le informazioni complete sullo stato di funzionamento per i vari modi di funzionamento, sugli allarmi esistenti, sul carico in Uscita, sulle batterie, e sulle misure delle grandezze elettriche della linea d’Ingresso, d’Uscita e delle batterie. - Page 73 ITALIANO Pannello LCD Grafico Funzione Ingresso Indica la rete d’ingresso. Indica l’alimentazione da pannelli fotovoltaici. Indica tensione d’ingresso, frequenza d’ingresso, tensione pannelli PV, tensione batterie e corrente di ricarica. Settaggi ed errori/allarmi Indica il numero del settaggio. Indica il codice di allarme e di errore. Allarme: lampeggia il numero del codice di allarme.
-
Page 74: Led E Pulsanti
ITALIANO 6.1.2 Led e Pulsanti Le funzioni dei led e dei pulsanti presenti sul pannello frontale sono riportate sotto: Messaggio Fisso L’uscita è alimentata dalla rete elettrica. Verde L’uscita è alimentata dai pannelli fotovoltaici o dalle Lampeggiante batterie. Fisso Batterie completamente cariche. Verde Lampeggiante Batterie in carica. -
Page 75: Pannello Posteriore
ITALIANO Pannello Posteriore Figura 3 – Pannello Posteriore Interruttore On/Off: per accendere e spengere ATA. Morsettiera d’ingresso con terra: per connettere ATA alla rete elettrica. Ingresso pannelli PV: per connettere ATA ai pannelli fotovoltaici. Ingresso batterie: per connettere ATA alle batterie. Interruttore termico d’ingresso rete: l’interruttore scatta in caso di sovraccarico o cortocircuito;... -
Page 76: Installazione Elettrica
Per i collegamenti d’Ingresso/Uscita utilizzare esclusivamente cavi con caratteristiche conformi a quelle riportate nella tabella sottostante. In caso contrario TECNOWARE declina ogni sua responsabilità. I modelli ATA ENERGY STORAGE SYSTEM sono costituiti da un’unità che contiene l’elettronica. Le batterie sono installate esternamente. - Page 77 I cavi di ATA 4.0 MM devono essere dimensionati per sopportare correnti fino a 29A in ingresso rete, 60A in ingresso pannelli fotovoltaici, 75A dalle batterie e 18A in uscita. Per sicurezza e affidabilità occorre utilizzare cavi con sezione non inferiore a quelli indicati nella tabella sopra riportata.
-
Page 78: Installazione
ITALIANO 7.1 Installazione PANNELLI QUADRO DI CAMPO FOTOVOLTAICI CARICO INTERRUTTORE INTERRUTTORE MAGNETOTERMICO CONTATORE (GIA’ MAGNETOTERMICO DIFFERENZIALE ESISTENTE) DIFFERENZIALE 30mA (GIA' 300mA (NUOVO) ESISTENTE) ATA ENERGY STORAGE SYSTEM RETE D’ALIMENTAZIONE ELETTRICA BOX BATTERIE ATA CONNESSIONI SU ATA ENERGY STORAGE SYSTEM INGRESSO RETE ATA INGRESSO PANNELLI FOTOVOLTAICI PV+ PV- + BATTERIE... - Page 79 30mA tra la linea d’uscita dell’ATA e i dispositivi da alimentare (vedi figura 4). Connessione Box Batterie esterno: Si consiglia di utilizzare ESCLUSIVAMENTE i Box Batterie forniti da TECNOWARE. In caso contrario TECNOWARE declina ogni sua responsabilità.
-
Page 80: Prima Accensione
L’ATA non ha parti interne soggette a manutenzione da parte dell’utente. Interventi tecnici di qualsiasi tipo devono essere compiuti solo da personale tecnico specializzato ed autorizzato da TECNOWARE. In caso contrario TECNOWARE declina ogni sua responsabilità. Non rispettare queste precauzioni espone l'operatore al pericolo di shock elettrico. -
Page 81: Funzionamento
ITALIANO 9 Funzionamento Accensione e Spegnimento Per accendere l’ATA occorre: Portare su ON l’interruttore del pacco batterie. Portare su ON l’interruttore dei pannelli fotovoltaici. Portare su ON l’interruttore della linea elettrica d’Ingresso all’ATA. Portare su ON l’interruttore d’accensione dell’ATA. ... -
Page 82: Controllo Del Carico
ITALIANO Controllo del Carico L’ATA indica il livello del carico in Uscita per mezzo del display grafico, visualizzandolo, come descritto nel capitolo 5. Quando il carico in Uscita supera il valore nominale l’ATA segnala la condizione di Overload (Sovraccarico) per mezzo del display grafico e dell’allarme acustico, come descritto nella “Tabella Allarmi”... -
Page 83: Segnalazioni Di Guasto
ITALIANO Segnalazioni di Guasto Se durante il funzionamento si verifica un Guasto (Fault), allora l’ATA segnala la condizione critica con l’emissione dell’allarme acustico continuo. Inoltre sul display grafico è visualizzato il codice di Fault. Per maggiori dettagli consultare il capitolo “Anomalie ed Interventi”. In caso di Fault, prego controllare i carichi alimentati, i collegamenti, la ventilazione, i pannelli PV, la linea elettrica d’Ingresso, le batterie. -
Page 84: Interfacce Di Comunicazione
I segnali delle Interfacce RJ45/RS232 e USB sono tutti isolati tramite foto-accoppiatori dalle tensioni pericolose presenti all’interno dell’ATA. Collegandosi al sito internet www.tecnoware.com, è possibile scaricare gratuitamente la versione aggiornata del software di gestione dell’ATA, WatchPower, compatibile con i più diffusi Sistemi Operativi. - Page 85 ITALIANO 10.1.2 Impostazione parametri di funzionamento dell’ATA Cliccando sull’icona “Parameters Setting” (impostazione parametri), è possibile selezionare le stesse impostazioni selezionabili direttamente a bordo macchina tramite il pannello frontale. Queste impostazioni determinano il funzionamento dell’intero sistema. E’ possibile attivare o disattivare allarmi e funzioni (allarme acustico, allarme in mancanza della rete di alimentazione elettrica, modalità...
-
Page 86: Interfaccia Rs485
ITALIANO 10.1.3 Registrazione e rappresentazione grafica dei valori di funzionamento del sistema ATA dispone di un sistema di memorizzazione dello storico dei valori di funzionamento. E’ possibile visualizzare questi valori graficamente o estrapolarli su foglio excel. Si accede allo storico cliccando sul pulsante “Data”. -
Page 87: Modalità Connessione Parallelo
ITALIANO 11 Modalità Connessione Parallelo 11.1 Introduzione E’ possibile porre in parallelo fino a 4 unità e la massima potenza supportabile è di 20KVA/16KW (per ATA 5.0 MM). 11.2 Contenuto Confezione del Kit Parallelo Sotto riportato il contenuto della confezione: Scheda Cavo comunicazione Cavo corrente di sharing... - Page 88 ITALIANO 3. Rimuovere le viti come riportato nell’immagine sottostante e in seguito rimuovere il flat a 2 e 14 pin e la scheda posta sotto quella comunicazione. 4. Rimuovere il coperchio metallico come riportato nella figura sottostante. 5. Installare la scheda parallelo. Manuale utente ATA Energy Storage System MM...
- Page 89 ITALIANO 6. Riconnettere i flat a 2 e 14 pin sulla scheda parallelo e comunicazioni. Vedi immagini sottostanti. Scheda Parallelo Scheda Comunicazioni 7. Installare nuovamente la scheda comunicazioni dove era stata rimossa in precedenza. 8. Rimontare il coperchio metallico rimosso al punto 1. ATA Energy Storage System MM Manuale utente...
-
Page 90: Installazione Unità
ITALIANO 11.4 Installazione Unità Riferirsi all’immagine sottostante quando si installano più unità. NOTA: Per favorire l’areazione per diminuire la dissipazione di calore prodotta dalle unità ATA, è opportuno installare quest’ultime lasciando 20 cm di spazio fra le unità e 50 cm di spazio al di sopra e al di sotto di ciascuna unità. - Page 91 ITALIANO Il sistema di batterie può essere realizzato anche con dei paralleli di batterie. ATTENZIONE! Il pacco batterie deve essere comune a tutti gli inverter posti in parallelo Terminale: Per il dimensionamento dei cablaggi, fare riferimento alla tabelle sottostante. Dimensionamento cablaggi e terminali batterie: TERMINALE AD ANELLO MODELLO AMPERAGGIO...
-
Page 92: Connessione Alimentazione D'ingresso
ITALIANO 11.6 Connessione Alimentazione d’Ingresso Connettere la rete elettrica d’alimentazione alle barre di alimentazione delle unità ATA, suddividendo i collegamenti di fase, neutro e terra. E’ opportuno installare dei sistemi di protezione sulla linea di fase di ogni unità ATA e sulla linea di neutro del sistema. Fare riferimento al diagramma sottostante. ATTENZIONE: Solo le linee di fase di ogni ATA sono da porre sotto un sistema di protezione. -
Page 93: Connessione Circuito D'uscita E Carico
ITALIANO 11.7 Connessione Circuito d’Uscita e Carico Connettere la linea di fase, neutro e di terra dell’uscita di ogni unità ATA alle rispettive barre di collegamento. E’ opportuno installare dei sistemi di protezione sulle linee d’uscita di ogni unità ATA. Fare riferimento al diagramma sottostante. -
Page 94: Connessione Cavi Del Kit
ITALIANO 11.9 Connessione Cavi del Kit Fare riferimento all’immagine sottostante per la connessione dei cavi compresi nel kit parallelo. 2 unità ATA in parallelo: 3 unità ATA in parallelo: 4 unità ATA in parallelo: Manuale utente ATA Energy Storage System MM... -
Page 95: Impostazione Parametro
ITALIANO 11.10 Impostazione Parametro Questo parametro è impostabile solo con ATA in modalità stand-by. SETTAGGIO DESCRIZIONE OPZIONI SELEZIONABILI Singolo: Parallelo: Quando si utilizza ATA in un sistema parallelo, è necessario impostare su “PAL” Modalità Uscita: questo settaggio. Fase L1: ATA può operare in Con questo parametro, la priorità... - Page 96 ITALIANO Quando selezionata la voce “ALL”, solo quando tutti gli inverter sono connessi ai pannelli PV e la tensione dei pannelli PV è accettabile, Il sistema parallelo o parallelo trifase continua a lavorare secondo il principio di funzionamento dell’impostazione “solar first”. Per esempio, due inverter sono collegati in Tutti gli Inverter: parallelo ed è...
-
Page 97: Messa In Servizio
ITALIANO 11.11 Messa in Servizio 1. Controllare di aver rispettato le seguenti specifiche prima della messa in servizio del sistema: Controllare le connessioni all’interno del sistema parallelo Assicurarsi che i sistemi di protezione sulle linee di fase siano aperti e che le linee di neutro siano collegate in comune. -
Page 98: Anomalie Ed Allarmi Del Sistema
ITALIANO ATTENZIONE: per evitare che si verifichi una condizione di sovraccarico, è opportuno avere il sistema in funzione prima di attivare i dispositivi da alimentare a valle. ATTENZIONE: in questo tipo di operazione ci sono dei tempi di intervento, quindi potrebbero verificarsi delle interruzioni di funzionamento a quei dispositivi che non sono in grado di sopportare la presenza di un tempo di intervento. -
Page 99: Modalità Connessione Trifase
ITALIANO 12 Modalità Connessione Trifase 12.1 Introduzione E’ necessario porre in parallelo 3 unità, installando un ATA per ogni fase. La massima potenza supportabile è di 15KVA/12KW (per ATA 5.0 MM). 12.2 Contenuto Confezione Kit Parallelo Sotto riportato il contenuto della confezione: Scheda Cavo comunicazione Cavo corrente di sharing... - Page 100 ITALIANO 3. Rimuovere le viti come riportato nell’immagine sottostante e in seguito rimuovere il flat a 2 e 14 pin e la scheda posta sotto quella comunicazione. 4. Rimuovere il coperchio metallico come riportato nella figura sottostante. 5. Installare la scheda parallelo. Manuale utente ATA Energy Storage System MM...
- Page 101 ITALIANO 6. Riconnettere i flat a 2 e 14 pin sulla scheda parallelo e comunicazioni. Vedi immagini sottostanti. Scheda Parallelo Scheda Comunicazioni 7. Installare nuovamente la scheda comunicazioni dove era stata rimossa in precedenza. 8. Rimontare il coperchio metallico rimosso al punto 1. ATA Energy Storage System MM Manuale utente...
-
Page 102: Installazione Unità
ITALIANO 12.4 Installazione Unità Riferirsi all’immagine sottostante quando si installano più unità. NOTA: Per favorire l’aerazione per diminuire la dissipazione di calore prodotta dalle unità ATA, è opportuno installare quest’ultime lasciando 20 cm di spazio fra le unità e 50 cm di spazio al di sopra e al di sotto di ciascuna unità. - Page 103 ITALIANO Il sistema di batterie può essere realizzato anche con dei paralleli di batterie. ATTENZIONE! Il pacco batterie deve essere comune a tutti gli inverter posti in parallelo Terminale: Per il dimensionamento dei cablaggi, fare riferimento alla tabelle sottostante. Dimensionamento cablaggi e terminali batterie: TERMINALE AD ANELLO MODELLO AMPERAGGIO...
-
Page 104: Connessione Alimentazione D'ingresso
ITALIANO 12.6 Connessione Alimentazione d’Ingresso Connettere la fase di ogni unità ATA alla rispettiva fase di alimentazione (un ATA per la fase L1, uno per la fase L2 e uno per la fase L3). La linea di neutro è in comune tra le unità così come il contatto di terra. E’ opportuno porre dei sistemi di protezione sulle linee di fase di ogni ATA e sulla linea di neutro dell’alimentazione di rete. -
Page 105: Connessione Circuito D'uscita E Carico
ITALIANO 12.7 Connessione Circuito d’Uscita e Carico Connettere la linea di fase d’uscita di ogni unità ATA alla rispettiva fase di uscita dell’impianto a valle. Connettere la linea di neutro di ogni unità ATA in comune alla barra di collegamento di neutro. E’ opportuno installare dei sistemi di protezione sulla linea di fase di ogni unità... -
Page 106: Connessione Pannelli Fotovoltaici
ITALIANO 12.8 Connessione Pannelli Fotovoltaici Fare riferimento al capitolo “Installazione” per la connessione del sistema di pannelli fotovoltaici. ATTENZIONE: Ogni unità ATA deve essere collegata al proprio Sistema di pannelli fotovoltaici. Non è possibile utilizzare un sistema di pannelli fotovoltaici in comune per tutte le unità ATA. 12.9 Connessione Cavi del Kit Fare riferimento all’immagine sottostante per la connessione dei cavi compresi nel kit parallelo. -
Page 107: Impostazione Parametro
ITALIANO 12.10 Impostazione Parametro Questo parametro è impostabile solo con ATA in modalità stand-by. SETTAGGIO DESCRIZIONE OPZIONI SELEZIONABILI Singolo: Per utilizzare ATA in modalità trifase è necessario avere un sistema con 3 unità Parallelo: ATA installate. Ad ogni unità viene associata la rispettiva fase di lavoro (su sistema trifase), impostando su ogni unità... -
Page 108: Messa In Servizio
ITALIANO Quando selezionata la voce “ALL”, solo quando tutti gli inverter sono connessi ai pannelli PV e la tensione dei pannelli PV è accettabile, Il sistema parallelo o parallelo trifase continua a lavorare secondo il principio di funzionamento dell’impostazione “solar first”. Per esempio, due inverter sono collegati in Tutti gli Inverter: parallelo ed è... -
Page 109: Anomalie Ed Allarmi Del Sistema
ITALIANO Display LCD unità su fase 1 Display LCD unità su fase 2 Display LCD unità su fase 3 6. Se non vengono visualizzati altri errori, l’installazione del sistema trifase è completata. 7. Infine portare su ON gli interruttori dei dispositivi da alimentare. Il sistema provvederà ad alimentare questi dispositivi. -
Page 110: Caratteristiche Tecniche
ITALIANO 13 Caratteristiche Tecniche Modello ATA Energy Storage System Potenza 4000 VA 5000 VA Potenza Attiva Nominale 3200 W 4000 W Dimensioni (L x H x P) 29,5 x 54 x 14 cm Raffreddamento Forzato tramite ventola Rumorosità < 40 dBA a 1 m Peso Netto 12,5 kg 13,5 kg... - Page 111 ITALIANO INTERFACCIAMENTO Interfaccia Computer USB/RJ45 (RS232) WatchPower (compatibile con WINDOWS, MAC OS X fino alla versione 10.8, Software UNIX, LINUX, ecc.) Interfaccia esterna RS485 Si (opzionale) CONFIGURAZIONE PARALLELO Interfaccia parallelo Si (opzionale) Unità parallelabili Fino a 4 unità CONDIZIONI AMBIENTALI OPERATIVE Temperatura di stoccaggio Da -15 a 60 °C Temperatura di lavoro...
-
Page 112: Settaggi
ITALIANO 14 Settaggi Per accedere ai settaggi è necessario premere e tenere premuto per 3 secondi il tasto “ENTER”. Premere “UP” o “DOWN” per visualizzare il settaggio desiderato. Premere il tasto “ENTER” per accedere al settaggio o “ESC” per uscirne. SETTAGGIO DESCRIZIONE OPZIONI SELEZIONABILI... - Page 113 ITALIANO Corrente massima di ricarica: per impostare la massima 60A (default) corrente di ricarica da pannelli solari (se il parametro 16 è impostato su “SNU” la massima corrente di ricarica = corrente di ricarica rete elettrica + corrente di ricarica da pannelli solari) 100A 110A 120A...
- Page 114 ITALIANO Disattiva Attiva (default) Riaccensione automatica in caso di sovraccarico Disattiva Attiva (default) Riaccensione automatica in caso di sovratemperatura 60Hz 50Hz (default) Frequenza d’uscita 30A (default) Massima corrente di ricarica da rete elettrica Valore minimo tensione 46V (default) batterie per il quale il carico viene alimentato dalla rete elettrica e viene sganciata l’alimentazione da batterie.
- Page 115 ITALIANO 50V (default) Valore minimo tensione batterie per il quale il carico torna ad essere alimentato dal sistema PV/Batterie e viene sganciata l’alimentazione da rete elettrica. Questo settaggio è impostabile quando è selezionata la modalità “Priorità da pannelli solari” o “priorità...
- Page 116 ITALIANO Allarmi on (default) Allarmi off Allarme acustico Ritorno automatico Se selezionato, il display torna alla schermata principale schermata principale dopo un minuto (default) che l’utilizzatore ha concluso qualunque tipo di operazione di Ritorno automatico alla controllo tramite i pulsanti. schermata principale (visualizzazione stato Resta all’ultima...
- Page 117 ITALIANO Questo valore può essere impostato se nel settaggio 5 è selezionata la voce “altro tipo”. E’ possibile impostare un valore da 40.0V a 48.0V ad incrementi di 0.1V. Indipendentemente dal Spegnimento sistema per carico alimentato, raggiunto tale valore il sistema si arresta. bassa tensione batterie Quando la tensione batterie è...
-
Page 118: Manutenzione
ITALIANO 15 Manutenzione 15.1 Pulizia dell’ATA Prima di avviare la procedura, accertarsi che: 1. La linea elettrica d’Ingresso all’ATA sia scollegata. 2. Le batterie siano scollegate. 3. I pannelli fotovoltaici siano scollegati. 4. L’ATA sia completamente spento. Pulire le superfici esterne usando un panno leggermente inumidito solo con acqua. Se l’ATA opera in un ambiente insolitamente polveroso o sporco, rimuovere la polvere dalle feritoie. -
Page 119: Anomalie Ed Interventi
L’ATA non ha parti interne soggette a manutenzione da parte dell’utente. Interventi tecnici di qualsiasi tipo devono essere compiuti solo da personale tecnico specializzato ed autorizzato da TECNOWARE. In caso contrario TECNOWARE declina ogni sua responsabilità. SINTOMI LCD/LED/BUZZER POSSIBILE CAUSA... - Page 120 Codice errore 56 correttamente o fusibile contattare il Servizio interrotto. Assistenza. Se le anomalie descritte permanessero nonostante gli interventi consigliati, o si manifestassero problemi di altra natura, contattare: TECNOWARE SERVICE www.tecnoware.com Manuale utente ATA Energy Storage System MM...
-
Page 121: Conformità Alle Direttive Europee
ITALIANO Conformità alle Direttive Europee TECNOWARE S.r.l. dichiara che i prodotti ATA ENERGY STORAGE SYSTEM sono conformi ai requisiti stabiliti nella Direttiva Bassa Tensione (Sicurezza) 2014/35/UE e successive modifiche, e nella Direttiva EMC (Compatibilità Elettromagnetica) 2014/30/UE e successive modifiche. Smaltimento del Prodotto Il prodotto ATA ENERGY STORAGE SYSTEM non può... - Page 122 All trademarks are property of their respective owners. TECNOWARE s.r.l. Via Montetrini, 2E – Loc. Molino del Piano – 50065 - Pontassieve (FI) – Italy www.tecnoware.com This manual has been printed and edited by TECNOWARE s.r.l. March 2016 edition – version 1.2...
- Page 124 TECNOWARE s.r.l. www.tecnoware.com...
Need help?
Do you have a question about the ATA 4.0 MM and is the answer not in the manual?
Questions and answers