Table of Contents
Advertisement
Quick Links
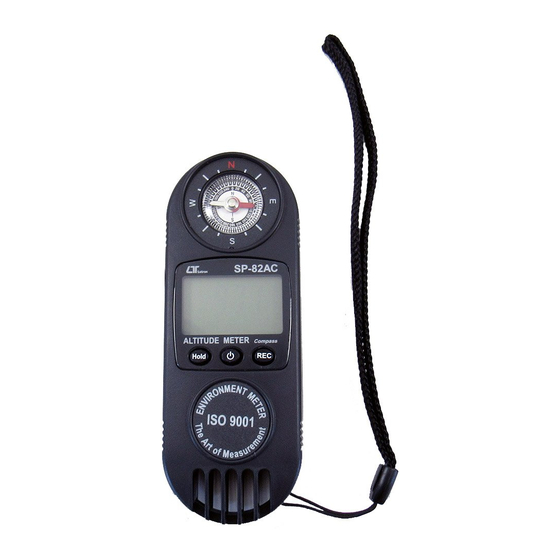
ALTITUDE METER
Model : SP-82AC
OPERATION MANUAL
Your purchase of this
A L T I T U D E
marks a step forward for
you into the field of
precision measurement.
Although this METER is
a complex and delicate
instrument, its durable
structure
will
many years of use if
p r o p e r
o p e r a t i n g
t e c h n i q u e s
developed. Please read
t h e
f o l l o w i n g
instructions
and always keep this
manual
within
reach.
M E T E R
allow
a r e
carefully
easy
Advertisement
Table of Contents

Subscribe to Our Youtube Channel
Related Manuals for Lutron Electronics SP-82AC


Summary of Contents for Lutron Electronics SP-82AC
- Page 1 ALTITUDE METER Model : SP-82AC Your purchase of this A L T I T U D E M E T E R marks a step forward for you into the field of precision measurement. Although this METER is a complex and delicate...
-
Page 2: Table Of Contents
TABLE OF CONTENTS 1. FEATURES..............1 2. SPECIFICATIONS............1 2-1 General Specifications ...........1 2-2 Electrical Specification..........2 3. FRONT PANEL DESCRIPTION........3 3-1 Hold button............3 button ( Power button )........3 3-3 REC button............3 3-4 LCD display............3 3-5 Wristlet..............3 3-6 Compass............. 3 3-7 Barometer sensor..........3 3-8 Battery Compartment / Cover....... -
Page 3: Features
1. FEATURES * 3 in 1 , Precision Altitude meter + Barometer and Compas. * Build in precision baro sensor for the atomsphere value and altitude measurement. * Build in the compass. * Tiny bone shape with lightweight and small size case design are suitable for handling with one hand. -
Page 4: Electrical Specification
Power Supply CR 2032 DC 3V battery Power Approx. DC 5 mA Consumption Weight 160g (battery included) Dimension HWD 120 x 45 x 20 mm (4.7 x 1.8 x 1.2 inch). Standard Instruction Manual Accessory 2-2 Electrical Specification ( 23 ± 5 ℃... -
Page 5: Front Panel Description
3. FRONT PANEL DESCRIPTION Fig. 1 3-1 Hold button Button ( Power button ) 3-3 REC nutton 3-4 LCD display 3-5 Wristlet 3-6 Compass 3-7 Barometer sensor 3-8 Battery Compartment / Cover 3-9 Button operation label... -
Page 6: Measuring Procedures
4. MEASURING PROCEDURE 4-1 Power on/off Button = Power Button Power on : Press " Power Button " once. Power off : During power on, press " Power Button " > 3 seconds. will power off. 4-2 LCD backlight on/off During power on, press "... -
Page 7: Unit Selection
Until the Display show the desired function, just release the " Hold button " , the meter will execute this function with default. Remark : When power off and on again, the meter will default to " Altitude " function automatically. 4-4 Unit selection During power on, press the "... - Page 8 Remark : Actual air pressure in the measurement location changes in response with two things : changes in altitude and changes in atmosphere. 2)Sea level barometric pressure value measurement Not move the location, if intend to see the sea level barometric pressure value, the procedures are : Press the "...
-
Page 9: Altitude Measurement
4-6 Altitude measurement Altitude measurement principal : The higher altitude location will get less barometric pressure value that compare with the sea level. If intend to measure your altitude value precisely, a. Method 1 : It should set the altitude value of your start location is known at the first. -
Page 10: Hold Function
2)Method 2 To reset the current sea level barometric pressure value is known at the first. a. Power on the meter and under the altitude function, press the " Hold button " once, the Display will show the indicator " HOLD " then press the " REC button "... -
Page 11: Rec ( Record ) Function
4-8 REC ( Record ) function 1)The REC ( Record ) function can record and display the maximum and minimum reading values. Start the Record function by pressing the " REC Button " once. There will be a " REC " symbol on the display. 2)With the REC symbol on the display : (a) Press the "... -
Page 12: Battery Replacement
5. BATTERY REPLACEMENT 1)When the LCD display shows " " symbol, it is necessary to replace the battery. However measurement may still be made for several hours after the low battery indicator appears. 2)Open the " Battery Compartment / Cover " ( 3-8, Fig. 1 ) and remove the battery.
Need help?
Do you have a question about the SP-82AC and is the answer not in the manual?
Questions and answers