HandHeld ALGIZ 10X Manual
Rugged tablet pc
Hide thumbs
Also See for ALGIZ 10X:
- User manual (83 pages) ,
- Manual (37 pages) ,
- Quick start manual (5 pages)
Table of Contents
Advertisement
Quick Links
Advertisement
Table of Contents

Related Manuals for HandHeld ALGIZ 10X


Summary of Contents for HandHeld ALGIZ 10X
- Page 1 ALGIZ 10X...
-
Page 2: Table Of Contents
Insertion of the Battery Pack ..................... 13 Removal of the Battery Pack ..................... 13 Charging the Battery ......................14 Power Supply ........................14 Starting ALGIZ 10X ......................15 Installing SIM Card, SD Card ..................... 15 SOFTWARE ........................16 Hot-Tab ..........................17 Adjusting the LCD Brightness ................... - Page 3 External WWAN Antenna ....................27 System Information ......................28 REGULATORY INFORMATION ..................29 FCC Compliance Statement....................30 FCC Warning ........................30 FCC RF Radiation Exposure ....................30 Copyright Notice ........................ 31 Trademark Acknowledgement ................... 31 Disclaimer ........................... 31 Customer Service ....................... 31...
- Page 4 Item Description One 2 Cell Li-Ion Battery Pack 19V Adapter w/ standard power cord. Standard type, 1.8M Handstrap ALGIZ 10X Quick start guide...
-
Page 5: Identifying Algiz 10X
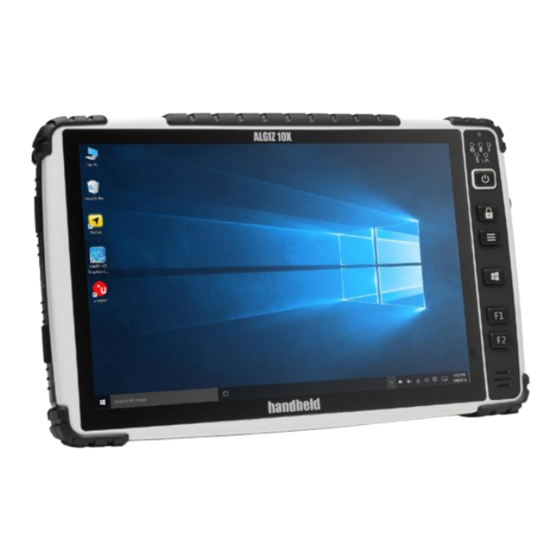
IDENTIFYING ALGIZ 10X Specification ALGIZ 10X is a rugged tablet PC designed for use in various challenging environments, e.g. field work, outdoor activities and construction sites. With its rugged design, ALGIZ 10X is able to withstand shocks, vibrations, high humidity as well as high/ low temperatures. -
Page 6: Com Port Assignment
Factory Reset The ALGIZ 10X has a built- factory state. Press F1 during booting when the Handheld logo screen appears. Follow the instructions on the screen to continue with the factory reset. CAUTION: This procedure will erase all data on your disk. -
Page 7: Front Side
Front Side Ref. Item Description Receives sound to make voice recordings. Front Microphone Senses the ambient light for automatic adjustment Light Sensor of the display backlight. The features can be enabled through the OSD Control Keypad. The Keypad provides hotkeys with all functions Keypad including Power On/Off, Menu, programmable hotkeys and a... -
Page 8: Left And Right Side
Left and Right Side Ref. Item Description DC Power Jack DC plug for supplying power to the device For connection to external display devices such as monitors and projectors USB 2.0 Port Can be connected to USB-interface peripherals RS232 Accepts external connections using the interface of RS232 (D-sub 9 pins) Ethernet(RJ45) Port For connection to an Ethernet 10/100/1000-based network... -
Page 9: Rear Side
Rear Side Item Description Stylus Pen Service Window User-accessible compartment. 1AL Ver 3.1... -
Page 10: Function Keys
Function Keys Components Description Hold down for 4 seconds to Power Button* turn the computer on. Touch mode/lock Touch mode selection. Lock screen. Controls brightness, volume, Menu battery, power to modules and system information. Windows key Open start menu Function keys Two programmable buttons. -
Page 11: Using Algiz 10X
PART 2: USING ALGIZ 10X 1AL Ver 3.1... -
Page 12: Ac Power
The ALGIZ 10X power supply is comprised of two parts, the power adapter and the battery. The power adapter converts AC power from a wall outlet to the DC power required by the ALGIZ 10X. Your ALGIZ 10X comes with a universal AC-DC adapter. That means that you may connect the power cord to any 100V-120V as well as 220V-240V outlets without using power converters. -
Page 13: Insertion Of The Battery Pack
Insertion of the Battery Pack Removal of the Battery Pack 1AL Ver 3.1... -
Page 14: Charging The Battery
Power it on and leave it be for at least 2 hours to fully charge the hotswap battery. Power Supply The power for the Handheld rugged tablet PC is supplied by the power adapter and battery pack, the power rating and manufacturer information are listed as below. For safety reasons, the adapter must be connected to ground (earth). -
Page 15: Starting Algiz 10X
Starting ALGIZ 10X Press the power button for 4 seconds to power on the ALGIZ 10X. Follow the Microsoft Windows on-screen instructions to get started with Windows. Installing SIM Card, SD Card Remove the SIM/SD card cover on the right side. This cover is secured with two screws. Insert the SIM card according to the picture. -
Page 16: Software
PART 3: SOFTWARE 1AL Ver 3.1... -
Page 17: Hot-Tab
Hot-Tab ALGIZ 10X has a pre-installed control application, Hot-Tab. The control application is used to monitor and control features such as brightness, volume, battery status, power to modules and system information. The control application is accessed by pressing menu on the ALGIZ 10X. -
Page 18: Adjusting The Speaker Volume
Battery Status The Battery status is accessed by pressing menu -> Setting. The ALGIZ 10X has a replaceable Main battery as well as a second built-in hot-swap battery. The hot-swap battery will activate once the main battery is empty or unplugged. -
Page 19: Wlan (1)
WLAN (1) ALGIZ 10X can connect to IEEE 802.11 ac a/b/g/n networks operating on dual band 2.4/5GHz. The Function Control is accessed by pressing menu -> Device. Check Wi-Fi to turn the Wi-Fi radio on. Uncheck Wi-Fi to turn it off. -
Page 20: Wwan (Lte) - Optional
The ALGIZ 10X is prepared for WWAN (LTE) connectivity. If you have a WWAN modem installed, then navigate to the WWAN by pressing menu -> Device. Check WWAN 3G/4G to turn the WWAN on/off. Note: You must install a SIM card in order for the ALGIZ 10X to access a WWAN network. 1AL Ver 3.1... -
Page 21: Gps
ALGIZ 10X is equipped with a dedicated GPS receiver for optimum performance. The Function Control is accessed by pressing menu -> Device. Check GPS to turn the GPS receiver on. Uncheck GPS to turn it off. The GPS evaluation software, U-Center, is accessed by double-clicking the U-Center icon available on the desktop. - Page 22 Set Baud rate to 9600 GPS will now start looking for satellites to calculate its position. This procedure may take from a few seconds to a few minutes depending on satellite positions, interference, environmental factors and radio noise. Tip: See the U-Center manual for more information about this GPS evaluation software. 1AL Ver 3.1...
-
Page 23: Camera
Camera The ALGIZ 10X has a built-in 5-megapixel camera. The Function Control is accessed by pressing menu -> Device. Check Camera to turn the Camera on. Uncheck Camera to turn it off. Or press menu and click the Camera icon to start the Camera. - Page 24 In the settings you can control the destination folder for saved pictures or videos, previews, as well as image resolution. In the settings you can control the flash light mode to on/off/auto. 1AL Ver 3.1...
- Page 25 In the settings you can control the image resolution. In the settings you can switch to photograph or video mode. 1AL Ver 3.1...
-
Page 26: External Gps Antenna
In the settings you can take a picture. External GPS Antenna The Function Control is accessed by pressing menu -> Device. Check External Antenna (auto) to activate an external antenna installed on the vehicle dock Alg10X-05A/05B. When this item is checked, Alg10X will automatically switch to the external antenna when the unit is docked. -
Page 27: External Wwan Antenna
External WWAN Antenna The Function Control is accessed by pressing menu -> Device. Check External WWAN (auto) to activate an external antenna installed on the vehicle dock Alg10X-05A/05B. When this item is checked, Alg10X will automatically switch to the external antenna when the unit is docked. Do not check this item unless you have an external antenna installed on your Alg10X vehicle dock. -
Page 28: System Information
System Information Press menu -> Setting to view system information. Please have this information ready if you are contacting Handheld support. 1AL Ver 3.1... -
Page 29: Regulatory Information
PART 4: REGULATORY INFORMATION 1AL Ver 3.1... -
Page 30: Fcc Compliance Statement
FCC Compliance Statement This device complies with Part 15 of the FCC Rules. Operation is subject to the following two conditions: 1. This device must not cause harmful interference, and 2. This device must be able to withstand any interference received, including interference that may cause undesired operation. -
Page 31: Copyright Notice
Handheld Group AB assumes no responsibility or liability for the use of the described product(s), conveys no license or title under any patent, copyright, or mask works rights to these products and makes no representations or warranties that these products are free from patent, copyright, or mask works rights infringement, unless otherwise specified.
Need help?
Do you have a question about the ALGIZ 10X and is the answer not in the manual?
Questions and answers