Table of Contents
Advertisement
Installation & Owner's Guide
32L Electronic
Internal / External Model
KM3211WH
KM3211WHQ
To be installed and serviced only
by an authorised person
This appliance is not suitable for
use as a pool heater
The "authorised installing person" is
responsible for:
1. Correct commissioning of this
appliance.
2. Ensure unit performs to the
specifications stated on the
rating label.
3. Demonstrate operation of unit to
customer before leaving.
4.
Hand
these
instructions
customer
.
Service Department: 1300 30 70 37
www.bosch.com.au
SAR8191
3
Rev. 10/11
to
This appliance must be installed in accordance with the manufacturer's
installation instructions, AS 5601 (AS5601), NZ 5261, AS3500.4.2 and all
Local Water, Building and Gas fitting regulations.
Failure to install this appliance in accordance with these installation
instructions may void warranty
In the interest of continued product improvement, Bosch reserves the
right to alter these specifications without notice.
*SAR8191 T*
Advertisement
Table of Contents

Related Manuals for Bosch KM3211WH


Summary of Contents for Bosch KM3211WH
- Page 1 Local Water, Building and Gas fitting regulations. Failure to install this appliance in accordance with these installation instructions may void warranty Service Department: 1300 30 70 37 In the interest of continued product improvement, Bosch reserves the www.bosch.com.au right to alter these specifications without notice. SAR8191 Rev.
-
Page 2: Table Of Contents
Contents Contents ......................2 Owner's Guide Important Safety Information ............... 3 General Parts Main Unit ....................6 Names and Functions of Each Parts ............7 Initial Operation .................... 9 How to Use When using RCM3211 Clock Adjustment ..................10 Running Hot Water .................. 11 Setting Hot Water Temperature .............. -
Page 3: Important Safety Information
Potential dangers from accidents during installation and use are divided into the following three categories. Closely observe these warnings; they are critical to your safety. Installation Guide Robert Bosch (Australia) Pty. Ltd. GAS WATER HEATER KM3211WH (Indoor or Outdoor Installation) - Page 4 1. Turn off the hot water supply 2. Turn off the power to the water heater 3. Turn off gas and water at the main 4. Consult the nearest Bosch Agent This will prevent fire, electric shocks or For Natural Gas damage to the unit. BOSCH...
- Page 5 Warning [When installing indoors] Do not place combustibles such as Where Applicable: laundry, newspapers, oils etc. near Check the air supply the heater or the exhaust vent vent for dust or terminal. obstructions. Exhaust vent terminal (indoor installation) Leave the proper clearance between the water heater and nearby objects (trees, timber, boxes with flammable materials etc.).
-
Page 6: General Parts
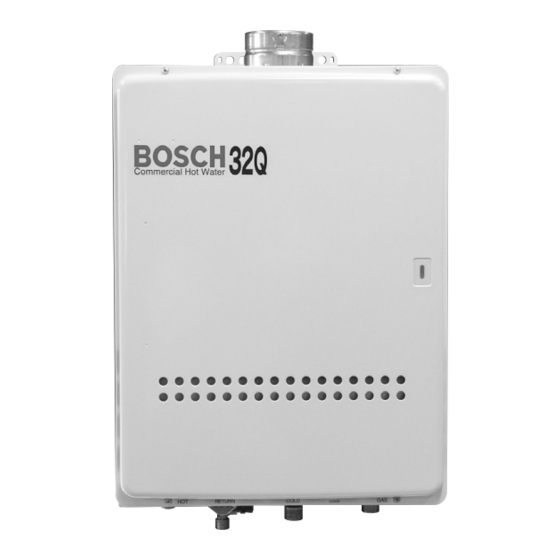
General Parts Main Unit Indoor or Outdoor Wall Mounted, Power Vented Model KM3211WH, KM3211WHQ * KM3211WH shown, pipe arrangement differs slightly on the KM3211WHQ model. Flue Collar Front Cover Burner On Indicator Lit during combustion. Blinks to indicate a problem. (... -
Page 7: Names And Functions Of Each Parts
Names and Functions of Each Parts-1 Main Remote Controller (RCM3211) <Included/Optional> * This remote controller is basically used with KM3211WHQ. Power On/Off Button For turning the heater on and off. Display Selection This page) Button • Used to adjust the Set Button temperature. - Page 8 Names and Functions of Each Parts-2 Waterproof Sub Remote Controller (RCS3211) <Optional> Power On/Off Button Priority For turning the heater on Burner on and off. Temperature setting Button Display • Used to adjust the This page) temperature. ( P24) Display The illustration below shows the remote controller display.
-
Page 9: Initial Operation
Follow steps Open the water supply valve. OPEN CLOSED Open a hot water fixture to confirm that water is available, and then close the fixture again. Hot water fixture Open the gas supply valve. Turn on the power. (Eg.: KM3211WH) -
Page 10: When Using Rcm3211
When using RCM3211 Clock Adjustment On this Display Operation Description * The is lit. ON/OFF Press the * When Circulation is on, the symbol blinks and circulation mode ON/OFF starts automatically. ( P15) button to turn it < Display detail > “On”. -
Page 11: Running Hot Water
When using RCM3211 Running Hot Water On this Display Operation Description * The is lit. ON/OFF Press the * When Circulation is on, the symbol blinks and circulation mode ON/OFF starts automatically. ( P15) button to turn it < Display detail > “On”. -
Page 12: Setting Hot Water Temperature
When using RCM3211 Setting Hot Water Temperature On this Display Operation Description * The is lit. ON/OFF Press the * When Circulation is on, the symbol blinks and circulation ON/OFF mode starts automatically. button to turn it P15) “On”. Use the Here buttons to adjust (Eg.: 40°C) - Page 13 Approximate hot water conditions 37 38 39 40 41 42 43 44 45 46 47 48 50 55 60 65 70 75 80 Set the maximum temperature to suit your own preference. ( P20 and 21) Washing Shower, hot water supply, etc. Hot water supply, etc.
-
Page 14: Filling Up The Bath
When using RCM3211 Filling Up the Bath On this Display Operation Description Preparation 1. Insert the bathplug into the plughole. * The is lit. ON/OFF Press the * When Circulation is on, the button ON/OFF symbol blinks and circulation mode starts automatically. -
Page 15: Circulation Operation
When using RCM3211 Display of on the remote controller Circulation Operation * Instant hot water operation means that water within the hot water supply line is to be heated, and enables hot water to be supplied instantly. * If is not displayed on the remote controller, circulation is not available. -
Page 16: Suspension Of Circulation
When using RCM3211 Display of on the remote controller Suspension of Circulation When the hot water tank circulation system is used, do not stop the circulation mode. If you are unsure how to use such a system, please contact the retailer. On this Display Operation Description... -
Page 17: Timer Setting Period For Circulation
When using RCM3211 Display of on the remote controller Timer Setting Period for Circulation-1 When a timer period is set, circulation mode will automatically turn on during that time. Until the timer operation is canceled ( P19), circulation operates during the same period every day. When using a hot water storage tank circulation system, do not set the timer for instant hot water operation. - Page 18 When using RCM3211 Display of on the remote controller Timer Setting Period for Circulation-2 (Continued) On this Display Operation Description * Circulation operates during the Press the button period set by the several times, until the is set to “PM 8 - 9”. * When the button is pressed, or the console is left untouched for...
- Page 19 On this Display Operation Description Modification of the timer setting Cancel the settings as per the following “Cancellation of timer operation” procedure, and then re-set in accordance with the procedure detailed on Pages 17 - 18. Confirmation of timer setting Follow procedures 1 - 2 of “Cancellation of * Pressing the button, or leaving...
-
Page 20: Other Setting Options
When using RCM3211 Other Setting Options Switching Scroll display ( P7) can be switched scroll display on = “yes” or off = “no” . This is set to drain the unit. Draining the unit On this Display [Maximum tempera- [Draining the unit] [Scroll display] ture setting] P29) - Page 21 Modification of the The maximum temperature setting can be maximum temperature modified. setting Operation On this Display q Press the ON/OFF button to “OFF”. w Press the button to show the settings screen. * This may not be displayed depending on the Press the button installation conditions.
-
Page 22: Confirmation Beeper On/Off
When using RCM3211 Confirmation Beeper On/Off The remote controller will emit a sound when any button is pushed. This sound can be muted if it is desired. * Initial factory setting is with sound. Operation Description * Setting is possible regardless Press the button for about five ON/OFF... -
Page 23: When Using Rcs3211
When using RCS3211 Running Hot Water Priority Burner on On this Display Operation Description * Hot water supply temperature is displayed. Priority Press the Burner on button to turn it “On”. * This is lit during combustion. Check Turn on hot water. Priority <... -
Page 24: Setting Hot Water Temperature
When using RCS3211 Setting Hot Water Temperture Priority Burner on On this Display Operation Description * Hot water supply temperature is displayed. Press the Priority Burner on button to turn it “On”. Priority Use the Burner on buttons to adjust the (Eg.: 40°C) temperature. - Page 25 Approximate hot water conditions 37 38 39 40 41 42 43 44 45 46 47 48 50 55 60 65 70 75 80 Upper limit (maximum temperature) for temperature adjustment can be set using the remote controller RCM3211. P20 and 21 Washing Shower, hot water supply, etc.
-
Page 26: Confirmation Beeper On/Off
When using RCS3211 Confirmation Beeper On/Off The remote controller will emit a sound when any button is pushed. This sound can be muted if it is desired. * Initial factory setting is with sound. Priority Burner on Operation Description * Setting is possible regardless of whether the power switch is Press the button for about five seconds. -
Page 27: No Remote Controller Case
No remote controller case Running Hot Water The water temperature will be set at 60°C (fixed). Please mix in some cold water through the water mixing valves. Whenever using hot water, such as when using the WARNING shower, first test the hot water temperature by hand. To prevent scalding. -
Page 28: Preventing Damage From Freezing
Protect this plumbing with insulation. If you are still worried that your heater will freeze, contact the nearest Bosch Service Dealer. outside temperature including wind chill For severely cold temperatures of less than -10°C Run water to prevent freezing. -
Page 29: When Unused For An Extended Period
When Unused for an Extended Period-1 If the water heater will not be used for a long period of time, drain the water. Whenever the unit is checked, maintained, or drained, the power CAUTION switch must be turned “Off”, and it must be allowed to cool down first. To prevent scalding. - Page 30 When Unused for an Extended Period-2 If the water heater will not be used for a long period of time, drain the water. Position of the cleanout plugs KM3211WH KM3211WHQ 4 positions 3 positions * The shapes of the cleanout plugs are as pictured on the right.
-
Page 31: Regular Maintenance
For water leaks from the Check equipment and piping. (Eg.: KM3211WH) Maintenance (Once a month) Equipment Wipe the outside surface with a wet cloth, then dry the surface. Use a neutral detergent to clean any stains. - Page 32 (Take care not to lose the packing.) 7. Close all hot water fixtures. Water Supply 8. Open the water supply valve and check that Valve water does not leak from the drain plugs or water drain valve (with water filter). (Eg.: KM3211WH)
-
Page 33: Troubleshooting
Troubleshooting-1 Temperature • Are the gas and water supply valves fully open? Hot water is not available when • Is the water supply cut off? the hot water fixture is opened. • Is the hot water fixture sufficiently open? • Is the heater frozen? •... -
Page 34: Remote Controller
Troubleshooting-2 Amount of hot water • When hot water is demanded at other fixtures, the The pressure at a certain fixture is not constant. amount available may be reduced. • Pressure fluctuations and other plumbing conditions can cause the temperature and pressure at a fixture to be unstable, but it should stabilize after a short time. - Page 35 • These plugs are pressure relief valves. If water is leaking out of them, excessive pressure is being supplied to the unit: Have the water pressure checked by your installer or Bosch Service Dealer.
- Page 36 Unlit longer lit. Contact a Bosch service dealer if: • Any other error code appears. • An error code is indicated again after the above actions were followed. • There are any other questions.
-
Page 37: Follow-Up Service
See Warranty Document on page 78. Minimum period of time for stocking repair parts Bosch will stock repair parts for this unit for a minimum of ten years after production has ceased. These are the parts necessary to repair or maintain this unit. -
Page 38: Specifications
• Specifications may be changed without prior notice. Specifications • The capacity may differ slightly, depending on the water pressure, water supply, piping conditions, and water temperature. Specifications Specification Item Model Name KM3211WH KM3211WHQ Type Installation Indoor or Outdoor, Wall Hanging Air Supply/Exhaust Power Vented Ignition... -
Page 39: External Outfitting
External outfitting External outfitting External outfitting KM3211WH KM3211WH KM3211WH KM3211WH. . . . . KM3211WHQ KM3211WHQ KM3211WHQ External outfitting External outfitting KM3211WH KM3211WHQ KM3211WHQ KM3211WH KM3211WHQ... - Page 40 External outfitting External outfitting External outfitting KM3211WH KM3211WH KM3211WH KM3211WH. . . . . KM3211WHQ KM3211WHQ KM3211WHQ External outfitting External outfitting KM3211WH KM3211WHQ KM3211WHQ Part Names Note Part Nos. Order Nos. Q'ty/unit KM3211WH BOS Front set-AS...
-
Page 41: Combustion Unit And Gas Route
Combution unit and gas route Combution unit and gas route Combution unit and gas route KM3211WH KM3211WH KM3211WH KM3211WH. . . . . KM3211WHQ KM3211WHQ KM3211WHQ Combution unit and gas route Combution unit and gas route... - Page 42 Combution unit and gas route Combution unit and gas route Combution unit and gas route KM3211WH KM3211WH KM3211WH KM3211WH. . . . . KM3211WHQ KM3211WHQ KM3211WHQ Combution unit and gas route Combution unit and gas route...
-
Page 43: Hot-Water Feed Route
Hot-water feed route1 Hot-water feed route1 Hot-water feed route1 KM3211WH KM3211WH KM3211WH Hot-water feed route1 Hot-water feed route1 KM3211WH KM3211WH... - Page 44 Hot-water feed route2 Hot-water feed route2 Hot-water feed route2 KM3211WHQ KM3211WHQ KM3211WHQ Hot-water feed route2 Hot-water feed route2 KM3211WHQ KM3211WHQ...
- Page 45 Hot-water feed route3 Hot-water feed route3 Hot-water feed route3 KM3211WH KM3211WH KM3211WH. . . . . KM3211WHQ KM3211WH KM3211WHQ KM3211WHQ Hot-water feed route3 Hot-water feed route3 KM3211WH KM3211WHQ KM3211WHQ (Thermal fuse rounding procedure) (Left side view)
- Page 46 Hot-water feed route Hot-water feed route Hot-water feed route KM3211WH KM3211WH KM3211WH KM3211WH. . . . . KM3211WHQ KM3211WHQ KM3211WHQ Hot-water feed route Hot-water feed route KM3211WH KM3211WHQ KM3211WHQ Note Part Nos. Part Names Order Nos.
- Page 47 Hot-water feed route Hot-water feed route Hot-water feed route KM3211WH KM3211WH KM3211WH KM3211WH. . . . . KM3211WHQ KM3211WHQ KM3211WHQ Hot-water feed route Hot-water feed route KM3211WH KM3211WHQ KM3211WHQ Note Part Nos. Part Names Order Nos.
-
Page 48: Electronic Controller
Electric controller Electric controller Electric controller KM3211WH KM3211WH KM3211WH KM3211WH. . . . . KM3211WHQ KM3211WHQ KM3211WHQ Electric controller Electric controller KM3211WH KM3211WHQ KM3211WHQ KM3211WH KM3211WHQ KM3211WHQ KM3211WH... - Page 49 Electric controller Electric controller Electric controller KM3211WH KM3211WH KM3211WH KM3211WH. . . . . KM3211WHQ KM3211WHQ KM3211WHQ Electric controller Electric controller KM3211WH KM3211WHQ KM3211WHQ Note Part Nos. Part Names Order Nos. Q'ty/unit Relay case EJX SET-AS...
-
Page 50: Remote Controller And Attached Set
Remote controller and attached set Remote controller and attached set Remote controller and attached set KM3211WH KM3211WH KM3211WH KM3211WH. . . . . KM3211WHQ KM3211WHQ KM3211WHQ Remote controller and attached set Remote controller and attached set... - Page 51 Remote controller and attached set Remote controller and attached set Remote controller and attached set KM3211WH KM3211WH KM3211WH KM3211WH. . . . . KM3211WHQ KM3211WHQ KM3211WHQ Remote controller and attached set Remote controller and attached set...
-
Page 52: Installation Guide
Installation Guide Robert Bosch (Australia) Pty. Ltd. GAS WATER HEATER KM3211WH (Indoor or Outdoor Installation) KM3211WHQ (Indoor or Outdoor Installation / Internal pump unit) WARNING: If the information in this manual is not followed exactly, a fire or explosion may result causing property damage, personal injury or death. -
Page 53: Quick Connect Multi System Installation
Quick Connect Multi System Installation • The Quick Connect Multi System allows the installation of two units together utilizing only the Quick Connect Cord. The Quick Connect Cord is 2m. long. Install the two units 470mm - 950mm apart at the center to ensure the cord will be able to reach between the units. -
Page 54: Before Installation
Before Installation Caution Check the Gas • Check that the rating plate indicates the correct type of gas. Check that the gas supply line is sized BOSCH for 250 MJ/h for this unit. KM3211WHQ MODEL Check the Power GAS TYPE... - Page 55 • Install the exhaust vent so that there are no obstacles around the termination and so that exhaust can't accumulate. Do not enclose the termination with corrugated metal or other materials. • Do not install the water heater where the exhaust will blow on outer walls or material not resistant to heat.
-
Page 56: Installation Clearances
Installation Clearances Caution Before installing, check for the following: Install in accordance with relevant building and mechanical codes, as well as any local, state or national regulations. Item Check Illustration • Maintain the following clearances (unit: mm) from both combustible and non-combustible materials. -
Page 57: Installation
Installation Securing to the wall Installation must conform with all local Building, Water or Gas Regulations or using AS5601. A heavy load will be applied to the wall on which the water heater is mounted. If the strength of the wall is not sufficient, reinforcement will be necessary. -
Page 58: Vent Pipe Installation
Vent Pipe Installation (Indoor Installation Only) • Make sure vent pipe is gas tight and will not Vent Piping leak. Use silicon sealant wherever necessary. • Use only approved vent materials. • Do not place any dangerous objects at the end •... - Page 59 Vertical Vent Termination Rain • Terminate at least 1.8m from the combustion air intake of any appliance, and 1m from any Roof other building opening, gas Flashing utility meter, service regulator etc. • Enclose exterior vent systems below the roof line to limit condensation and protect Firestop/ against mechanical failure.
- Page 60 Observe the commercial gas equipment installation criteria and operation criteria. Air inlet • Size the air inlet according to the AS5601. • Be sure to provide adequate air inlet. 300mm • The air inlet needs to open to the outside air 500mm from the room in which the water heater is used.
-
Page 61: Gas Piping
Gas Piping Follow the instructions from the gas supplier. The appliance must be disconnected from the gas supply piping system during any pressure testing of that system at test pressures in excess of 3.5 kPa. The appliance and its gas connections must be leak tested before operation. The inlet gas pressure must be within the range specified. -
Page 62: Water Piping
Water Piping Ask a qualified plumber to perform the installation of the plumbing. Observe all applicable codes. This appliance is suitable for potable water applications. Do not use this appliance if any part has been underwater. Immediately call a qualified service technician to inspect the appliance and replace any part of the control system and gas control which has been under water. - Page 63 Instantaneous Hot Water Piping Works [For KM3211WHQ] These appliances cannot be linked. Precaution of piping works 1. Be sure to connect a return pipe to circulate the hot water. (A one-way pipe is not allowed.) 2. The circulation pipe shall not be longer than 60 m (back to base), with no more than 20 bends. (Contact the relevant waterworks department for direct connection to city water at a distance of over 30m.) 3.
- Page 64 6. Expanded water shall be handled in the following way. When the instant hot water function is used, the volume of the water within the pipe expands, so this must be followed. Method using the safety valve Method using the expansion tank In situations where the water cannot As expanded water is discharged through be discharged...
-
Page 65: Plumbing Applications
Plumbing Applications Appliance 1 System controller SC-201 System selection connector Connect to the "instant hot water circulation system" Kitchen remote controller RCM3211 Additional remote controller RCS3211 Electrical device to control the pump Two core 220 V / 1 A or less shall be used. -
Page 66: Electrical Wiring
Consult a qualified electrician Electrical Wiring for the electrical work. Do not connect electrical power to the unit until all electrical wiring has been completed. This appliance must be electrically grounded in accordance with Electrical Authority Regulations. Caution: Label all wires prior to disconnection when servicing controls. Wiring errors can cause improper and dangerous operation. - Page 67 Remote Controller • Applicable Model KM3211WHQ KM3211WH Main Remote controller RCM3211 (included) RCM3211 * Up to three remote controllers can be connected. Additional remote controllers cannot be con- nected by themselves. The remote controller must be installed in accordance with the installation manual enclosed in the •...
- Page 68 Connecting Remote Controller Cord to Unit • Keep the remote controller cord away from the freeze prevention heaters in the unit. • Tie the redundant cord outside the water heater. Do not put the extra length inside the equipment. • The remote controller cord can be extended up to 100m with Remote controller cord. •...
-
Page 69: Commissioning
The installer should test operate the unit, explain to Commissioning the customer how to use the unit, and give the owner this manual before leaving the installation • Preparation ... (1) Ensure all lines are purged / flushed of debris prior to connection to appliance. (2) Open the shut off valve on the water supply, check that water passes through the valve and close the valve. -
Page 70: Dimensions
Dimensions (unit: mm) KM3211WH (FROM TOP SIDE VIEW) GAS INLET R3/4 +25A0CONNECTION HEIGHT FROM THE BOTTOM OF CASE (mm) COLD WATER INLET HOT WATER OUTLET GAS INLET HOT WATER OUTLET R3/4 COLD WATER INLET R3/4 ELECTRIC WIRE INLET EXHAUST PIPE CONNECTION... - Page 71 KM3211WHQ (unit: mm) (FROM TOP SIDE VIEW) GAS INLET R3/4 +25A0CONNECTION HEIGHT FROM THE BOTTOM OF CASE (mm) COLD WATER INLET HOT WATER OUTLET HOT WATER RETURN GAS INLET HOT WATER OUTLET R3/4 HOT WATER RETURN R1/2 COLD WATER INLET R3/4 ELECTRIC WIRE INLET EXHAUST PIPE CONNECTION 11- 7.2...
- Page 72 For Quick Connect Multi System Installation Connecting Quick Connect Cord use a Quick Connect Cord (Sold Separately). Caution The wire coloring on the Quick Connect Cord will 1.Red 1.Red 1.White 1.Red 2.Black 2.Black 2.Green 2.Black 3.White 3.White 3.Red 3.White not be the same as the wire coloring from the 4.Green 4.Green 4.Black...
- Page 73 Remarks Do not drink water that has been inside the Do not disassemble the remote controller. unit for an extended period of time. Do not drink the first use of hot water from the Do not use petrol, oil or fat detergents to unit in the morning.
-
Page 74: Remote Controller Installation Guide
Remote Controller RCM3211 carefully before carrying out installation. Installation Guide Robert Bosch (Australia) Pty. Ltd. Note Do not connect power to the water heater before the remote controller has been properly installed. (1) Remove the decorative cover. (The decorative cover is attached very simply.) Connect the Y-shaped terminal to the terminal block at the back of the remote controller. - Page 75 Remote Controller RCS3211 carefully before carrying out installation. Installation Guide Robert Bosch (Australia) Pty. Ltd. Note Do not connect power to the water heater before the remote controller has been properly installed. 1. Put the remote controller cord through the wall 3.
- Page 76 BOSCH KM3211WHQ MODEL GAS TYPE GAS CONSUMPTION 250 MJ/hr HEAT OUTPUT 55.5 kW ELECTRICAL RATING AC240V 50Hz RATED POWER 150 W HOT WATER SUPPLY CAPACITY 32L/min RAISED 25 C 1.54 kPa GAS PRESSURE TEST POINT MAX:900kPa WATER PRESSURE SERIAL NUMBER XXXX.XX - XXXXXX...
-
Page 77: Water Quality
WATER QUALITY All Bosch water heating appliances are constructed from high quality materials and components and all are certified for compliance with relevant parts of Australian and New Zealand gas, electrical and water standards. Whilst Bosch water heaters are warranted against defects, the warranty is conditional upon correct installation and use, in accordance with detailed instructions provided with the heater. - Page 78 NOTE: Any service call costs incurred by the owner or user of the hot water unit for any matter not covered by the terms of this warranty will not be reimbursed by Bosch, even if those costs are incurred during the warranty period. If the hot water unit is located outside the usual operating area of a Bosch service agent, the agent’s travel, freight or similar costs are not covered by this...
- Page 79 Warranty claims must be made before the end of the warranty period. (b) All warranty service calls must conducted by an authorised Bosch service agent. (c) Invoices for attendance and repair of a hot water unit by third parties not authorised by Bosch will not be accepted for payment by Bosch.
Need help?
Do you have a question about the KM3211WH and is the answer not in the manual?
Questions and answers