Table of Contents
Advertisement
UC BSD Light Microscopy Core Facility
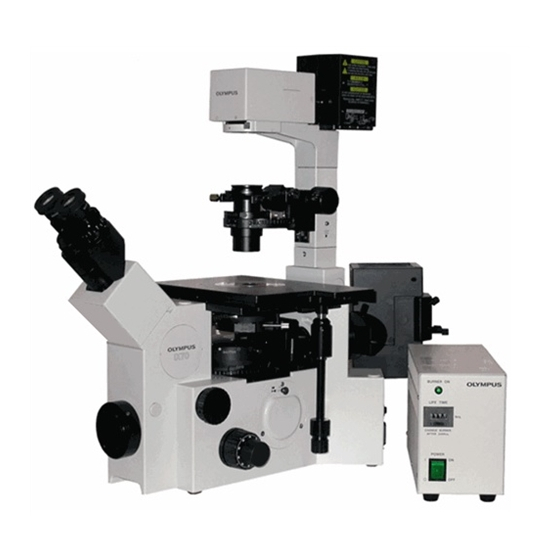
Olympus IX70 Multi-parameter Fluorescence Microscope
The IX70 microscope is a manual stand with the ability to collect multi-color fluorescence, differential
interference contrast (DIC) and total internal reflection fluorescence (TIRF), as well as provide optical
sectioning (z-axis stepping) and time lapse imaging. It is equipped with a high sensitivity, high resolution
chilled CCD camera, a green/red or blue/red emission beam splitter for simultaneous two color capture
and MetaMorph + MetaFluor software to control the system.
Examples of types of images that can be captured range from simple image capture (bright field or
Fluorescence), sequential capture of up to 4 fluorescent probes, time lapse imaging, (relatively) high speed
imaging, CFP-YFP FRET studies, ratiometric indicator dyes such the calcium probe Fura-2, etc.
Software provides a wide range of image capture and image processing capabilities. MetaFluor is
optimized for real-time (ratio) image capture with real time region of interest (ROI) intensity/
ratio/calibrated data display. MetaMorph is a more general image capture, processing, morphometry
package. Both packages allow images to be automatically collected and annotated.
PDF Created with deskPDF PDF Writer - Trial :: http://www.docudesk.com
Operations Manual (version 1.0 February '09)
Vytas Bindokas, Director
Advertisement
Table of Contents

Related Manuals for Olympus IX70


Summary of Contents for Olympus IX70
- Page 1 Olympus IX70 Multi-parameter Fluorescence Microscope Operations Manual (version 1.0 February ‘09) The IX70 microscope is a manual stand with the ability to collect multi-color fluorescence, differential interference contrast (DIC) and total internal reflection fluorescence (TIRF), as well as provide optical sectioning (z-axis stepping) and time lapse imaging.
-
Page 2: Shutting Down The System
Turning on the System 1) fire the arc lamp under the microscope table (make sure nothing else is on) always! 2) turn on the brightfield bulb power switch on the microscope base (#2) 3) turn on the filter changer box (#3) #5 for TIRF 4) power up the computer (#4) ONLY... - Page 3 System Anatomy The IX70 microscope is a manually operated microscope with automated digital image capture. The objectives, emission filter cubes, DIC prisms, and focus are all controlled manually. Image capture and excitation filters are controlled through the software. Objective turret...
- Page 4 produce illumination over the entire field of view. Be careful when trying to focus this lens on materials high above the stage—you may cause the high power objectives to push up on the stage plate/specimen and risk damage to optics. Ask for advice on how to use this lens. Available 4x/0.16 dry.
- Page 5 decoded by the sheet taped to the side of the scope. If you need filters not currently installed, please ask for assistance in swapping out the cubes (we have more choices than available turret positions). A manual shutter slide is also located on the side (Fig. 2 “manual shutter”). Push toward the wall to block fluorescence (but be aware this will prevent you from snapping a picture too!).
- Page 6 can also be layered on top of the media to prevent evaporation without image distortion. DO NOT USE SILICON OIL WITH THE WARNER DISHES! It will ruin the rubber gaskets and cause leaks. We have added a transmitted light shutter to gain better control of DIC capture and fluorescence sequences.
- Page 7 Importantly, there are two filter sliders to attenuate light (ND = neutral density filters) one on the filter changer just in front of the arc lamp housing, and one in front of the filter changer (Fig. 4). The filter changer (back) slider imposes an ND2 (100x less light, or 1% illumination), and the scope (front) slider produces 25% illumination.
- Page 8 fluorophores, you can make the task easier by using the Acquire Multiple Wavelengths menu. This automates collection of up to 6 “channels” of data, each stored with a fixed/different exposure (or autoexposure). To use the Acquire multiple wavelengths menu, pick the number of probes to collect and assign the identity and order in the lower section.
-
Page 9: Troubleshooting Guide
Troubleshooting Guide: • No Image by eye, no illumination of slide. If there is no illumination when using the software to open a filter setting (verify by looking at slide), check to see that you have turned on the mercury arc power (be sure to power down all electronics before firing it, if this is the case!);... - Page 10 and also allows you to directly enter the same display ranges for images meant to be shown identically. There is a taskbar menu item (top Right-side Column) that forces displays to full range (“scale12bits”). The “autoscale” taskbar button reverts/sets autoscaling. 3) Did you use the taskbar “Show Live”...
- Page 11 will allow even red probes to be used provided they can be excited at 488nm (perhaps fura-red or RFP). You can narrow the emission by using the 535 barrier filter in the camera filter changer (FITC (535BP) TIRF filter definition in taskbar menu). Be aware that CFP will not be excited very well at 488nm (in fact, it’s peak emission is near this wavelength).
- Page 12 useful here; the Full Chip buttons reverts to keeping the entire image. Do all of this setup in live mode. Still too slow? 1) Shorten the exposure time; you can’t run faster than the exposure. 2) Change the binning to 2x2 or higher. This decreases the amount of data to pass (by reading 4 pixels vs one {for 2x2}) and also increases the sensitivity by a factor of 4 {for 2x2 case}.
- Page 13 MetaMorph Screens Fluorescence shutter state/toggle on/off Save image Close all Main (left) screen The MM window spans across both monitors, only the left window content is shown here. Please note that you should NOT maximize the MM window since a program limitation will make it fill only one monitor.
- Page 14 The Z display reports the current position of the objective and the arrows allow you to move the focus up down remotely (however, it’s easier to focus the scope directly). This readout will tell you if you are focusing up or down. MetaMorph TaskBar Switch light path Turn fluor on/off...
- Page 15 MetaMorph Main Menus File Operations New creates a blank canvas (not especially useful) Open (cntl O shortcut) opens image data (single images or multipage files in tiffs or stk format, as well as Zeiss confocal files, etc) The BuildStack submenu allows you import many single files into a single memory stack The Browse function is not installed since the SQL engine posed a security risk...
- Page 16 Regions submenus -> shows ROI toolbar -> load/save ROI for later use -> use to copy exact ROI+locations to other images -> allows to manually move ROI to follow moving/drifting objects -> converts ROI from overlay to part of image (obvious) ->...
- Page 17 Acquire submenus You should open the Acquire/Acquire menu each session to access camera controls You can use the AcquireZseries menu to execute Z stack collection. You will need to set limits using the Devices/Focus menu first. This menu closes after you use it. AcquireMultipleWavelengths permits automated collection of up to 6 data channels.
- Page 18 Process submenus Tools to analyze and massage data. The top section lists common image filters. Many operations use “kernels” that pass over data and do operations. You can create/use custom filters (Kernel tools). FFT performs operations in frequency space such as periodic noise/line removal (very math intensive).
- Page 19 Measure submenu ->Assign XY calibrations (images collected here are generally pre-calibrated) -> for OpticalDensity work Thresholds define signal vs non-signal for counts/measurements; auto method good starting point Cut/join allows manual splitting/joining of objects for counts/etc Object standard used to define average object (to calc objects that are touching w/o split) IMA sophisticated measure/count tool (more later) Use to define objects in objects...
- Page 20 Applications submenu (why? These are extra-cost items) MDA collects multi-wavelength/time/z data Review- opens analysis portion (see below) Colocalization tool reports % overlaps Track objects automatically tracks/measures objects (speed/angles/location/etc) Graph intensities klutzy tool to plot 1+ ROI in stacks or live images (obvious) Window submenus All open windows are listed in LEFT Column (can...
- Page 21 Multi Dimensional Acquisition MDA setup Timelapse MDA main (can enter “0” for number of timepoints to run Be sure to select YOUR directory and a name; images indefinitely==until stopped manually) automatically save there! Pick dimensions to run (other tabs don’t appear unless you check those functions here) * Camera parameters (gain and offset, yes;...
- Page 22 Review MDA data: Do SelectBaseFile, SelectDirectory, check one or more to view(at once), then VIEW Select channels to view Play selected data as movie (T or Z) Check for color overlay (or else you Only combines as will get separate RGB (choose stacks) what goes where)
- Page 23 Hit LoadImage(s) to extract data into regular image stacks (for analysis, etc). You can make Z projections and rotations with appropriate data input. PDF Created with deskPDF PDF Writer - Trial :: http://www.docudesk.com...
- Page 24 MetaFluor This is the ratio imaging optimized sister program to MetaMorph. It allows you gather high-speed images used to calculate real-time ratio plots used to convert dye form (bound/unbound) and/or convert the ratio information to calibrated concentrations. Real-time plots or either/both output are available per region of interest (== “ROI”).
- Page 25 Screen after hitting “NEW” Shortcuts to common tasks are located in the default menu bar on the Left side. Main menus are in the top toolbar (all options vs common options). If you are making a new protocol, you need to define what to collect by using the menu Configure\ConfigureAcquisition...
- Page 26 Refer to the MM section on filter definitions currently used. Create a new name, select correct filter cube position from list. This example is not correct since the Sutter Lambda wheel positions are not defined (and must be). Wheel B is the emission wheel, Wheel A is the excitation wheel.
- Page 27 NOTICE: MF can sometimes ‘forget’ the camera is 12-bit (senile code) and the images will come up as 8-bit (see scale on side of image or histogram); it’s a bug. This happens if you don’t load a protocol before hitting NEW, or actually create a new protocol. To correct it, you need to close the experiment, use the File/select video channel/camera and re-select Retiga monochrome-12 bit (even though it looks selected).
- Page 28 Open the event mark menu by pressing the Events sidemenu button. You can enter any text you want associated with an event in the entry box, then either log it immediately or store it to the reuse list with buttons at the bottom. Hit the F5 button to speed mark an event (vs futzing with the mouse);...
- Page 29 Use the Acquire Standards Dialog to create or load calibrations into the system. Place the standard on Current the scope, enter acquired the value on a image or line (note double reloaded data >> indicating ACTIVE ENTRY LINE, change by clicking on line to .
- Page 30 If cells move during your experiment, you can drag one ROI on-the-fly to rack data while collecting images. You can adjust all ROI at once (if you bump the dish slightly adding a drug) using the RunExperiment Menu MOVE REGIONS. This jogs all ROI 1 or 10 pixel increments up to the point where one of them hits the edge of the image.
- Page 31 APPENDIX Filter cube specs: exciter dichroic emission DAPI (quad) Quad 450/65 DAPI (oly MNU2) 360-370 420LP 436/20 480/40 FITC (wide) 480/40HQ 510LP FITC(narrow) 480/40HQ quad 535/30HQ 500/20 535/30HQ Reds (quad) 530-550 Quad 630/60 Reds (oly MNG2) 530-550 590LP Cy5 (quad narrow) 640/20HQ Quad 682/22/75HQ...
Need help?
Do you have a question about the IX70 and is the answer not in the manual?
Questions and answers