Advertisement
Quick Links
2022/01/10 05:45
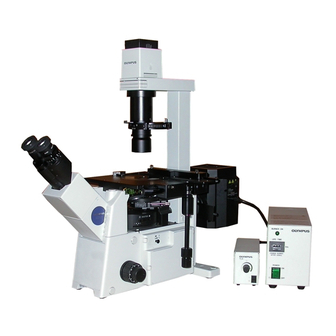
Olympus IX71 Microscope Z-Axis Motor Drive
Installation
This procedure steps you through the installation and alignment of the ASI's IX71 Z-axis motor drive
onto the Olympus IX71 microscope.
Typical diameter of threaded end of Olympus 4 mm fine focus shaft
ASI offers Z-Drives with drive shafts for both 3 mm and 4 mm versions
Applied Scientific Instrumentation - https://asiimaging.com/docs/
1/11
NOTE: On January 2007 Olympus changed the size of the
threaded end of their fine focus shaft from 3 mm to 4 mm.
Microscopes with serial numbers '7Axxxxxx' and newer, and
all 8-digit versions, identify the 4 mm version. The threaded
shaft diameter can also be directly measured after the left-
hand fine-focus knob has been removed. This installation
manual applies to both versions.
Olympus IX71 Microscope Z-Axis Motor Drive Installation
Advertisement

Related Manuals for Olympus IX71


Summary of Contents for Olympus IX71
- Page 1 Olympus IX71 Microscope Z-Axis Motor Drive Installation Olympus IX71 Microscope Z-Axis Motor Drive Installation This procedure steps you through the installation and alignment of the ASI’s IX71 Z-axis motor drive onto the Olympus IX71 microscope. NOTE: On January 2007 Olympus changed the size of the threaded end of their fine focus shaft from 3 mm to 4 mm.
- Page 2 Last update: 2021/09/23 17:15 olympus_ix71_zdrive_install https://asiimaging.com/docs/olympus_ix71_zdrive_install Threaded diameter of ASI’s 3 mm drive shaft Threaded diameter of ASI’s 4 mm drive shaft The following tools are required for this procedure: 1/16” Allen wrench (provided) 5/64” Allen wrench (provided) 3/32” Allen wrench (provided) 7/64”...
- Page 3 2022/01/10 05:45 3/11 Olympus IX71 Microscope Z-Axis Motor Drive Installation Part 1: Removing the Left Fine Focus Knob Remove rubber boot, if present. Remove the screw that secures the outer knob to the inner left fine focus knob with Allen wrench. Loosen set screw in knob if present.
- Page 4 Last update: 2021/09/23 17:15 olympus_ix71_zdrive_install https://asiimaging.com/docs/olympus_ix71_zdrive_install unscrewed, note if there is a small silver wave spring washer adhered to it; if so, remove the washer from the focus knob and place it on to the brass assembly located within the coarse focus knob.
- Page 5 2022/01/10 05:45 5/11 Olympus IX71 Microscope Z-Axis Motor Drive Installation Remove motor drive assembly from base plate (if attached) by using the 7/64 inch Allen wrench to remove the horizontal adjustment screw. Use the 7/64 inch Allen wrench to loosen the two vertical adjustment screws.
- Page 6 Last update: 2021/09/23 17:15 olympus_ix71_zdrive_install https://asiimaging.com/docs/olympus_ix71_zdrive_install Slide base plate under microscope and center beneath focus assembly. Leave base plate clamp loose at this time. Leave base plate clamp slightly loose for later adjustment. Slide the drive shaft of the motor drive assembly into the flexible coupler. https://asiimaging.com/docs/ Printed on 2022/01/10 05:45...
- Page 7 2022/01/10 05:45 7/11 Olympus IX71 Microscope Z-Axis Motor Drive Installation Slide the drive shaft into the flexible coupler. Coupler accepts about 4 mm of the drive shaft. Reinstall the horizontal adjustment screw and tighten loosely for later adjustment. Rotate the adjustment bar so that the lip on the bottom of the adjustment bar mates with the groove in the baseplate.
- Page 8 Last update: 2021/09/23 17:15 olympus_ix71_zdrive_install https://asiimaging.com/docs/olympus_ix71_zdrive_install Tighten the baseplate clamp snugly. Tighten the flexible coupler’s clamp onto the drive shaft. Tighten the clamp of the flexible coupler onto the drive shaft of the Z-drive unit using the 5/64 inch Allen wrench. Note: The flexible coupler clamp must be securely tightened or the drive may slip.
- Page 9 2022/01/10 05:45 9/11 Olympus IX71 Microscope Z-Axis Motor Drive Installation Tighten the horizontal adjustment screws after alignment. Note: there should be no point throughout the 360º rotation of the fine focus knob where an increase in drag is felt. If drag is felt, repeat the above steps.
- Page 10 Reinstall the large outer knob that was removed in Part One. Replace the rubber boot, if present. After screwing on small knob, attach the large knob. Drive and cover installed on the Olympus IX71. This completes the procedure for installing the ASI Z-axis motor drive onto the Olympus IX71. zdrive, olympus, ix71 From: https://asiimaging.com/docs/...
- Page 11 2022/01/10 05:45 11/11 Olympus IX71 Microscope Z-Axis Motor Drive Installation Applied Scientific Instrumentation - https://asiimaging.com/docs/...
Need help?
Do you have a question about the IX71 and is the answer not in the manual?
Questions and answers