Advertisement
Quick Links
®
Play Action
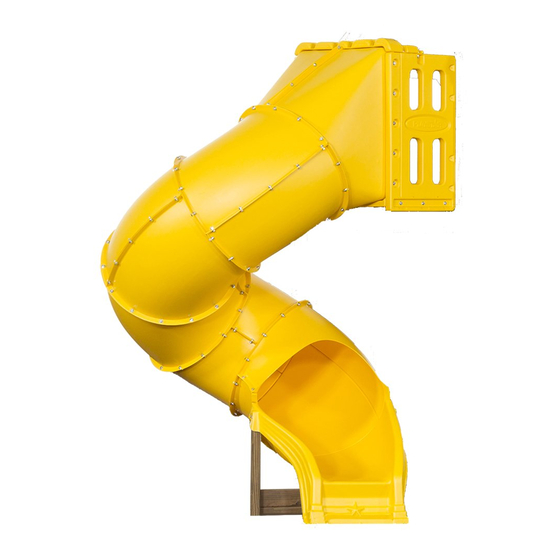
Spiral Tube Slide
Assembly Instructions
Important!
Intended for residential use by children ages 2 to 10, only on properly installed PlayStar playsets.
Before use refer to complete safety guidelines in your original playset, at www.playstarinc.com, or at 1-888-752-9782.
We're Here To Help!
1-888-752-9782
Call Toll Free
PS 8821
Customer Service: Monday - Friday, 8:00
to 5:00
C.S.T.
A.M.
P . M.
Advertisement

Related Manuals for PLAYSTAR PS 8821


Summary of Contents for PLAYSTAR PS 8821
- Page 1 Spiral Tube Slide Assembly Instructions Important! Intended for residential use by children ages 2 to 10, only on properly installed PlayStar playsets. Before use refer to complete safety guidelines in your original playset, at www.playstarinc.com, or at 1-888-752-9782. We’re Here To Help!
-
Page 2: Table Of Contents
CONTENTS Spiral Tube Slide Contents and Component Identification: (9) 60º Halves Floor Exit Top Top Bar (2) Side Walls Support Bracket (2) Anchors Left Right Entrance Entrance Exit Section Section TOOLS REQUIRED Socket Wrench Tape Measure ¹⁄₈", ¹⁄₄", ³⁄₈" Drill Bits Pencil ¹⁄₂"... - Page 3 SPIRAL TUBE SLIDE ASSEMBLY Before starting to assemble your Spiral Tube Slide, familiarize yourself with the contents. Identify each component and hardware listed on Page 2. Hardware is shown actual size. STEP 1: Items for Compression Crow’s Nest Assembly Fig. 1 Flanges (2) Side Walls (1) Floor...
- Page 4 Position Crow’s Nest Assembly into the playset " " opening. (Refer to your original PlayStar Safety Guidelines and Building Instructions for complete playset construction details.) Make sure the Crow’s Nest Assembly is fully inserted, and all three flanges are firmly resting against the lumber.
- Page 5 STEP 4: Items for Entrance Assembly (1) Left Entrance Section (1) Right Entrance Section (6) ⁵ ₁₆" x ³ ₄" hex bolts (12) ⁵ ₁₆" washers (6) ⁵ ₁₆" lock nuts Attach the two entrance sections using ⁵ ₁₆" x ³ ₄" hex bolts, ⁵ ₁₆" washers and ⁵...
- Page 6 STEP 6: Items for 60º Exit Assembly (1) 60° half (1) Exit Top (7) ⁵ ₁₆" x ³ ₄" hex bolts (14) ⁵ ₁₆" washers (7) ⁵ ₁₆" lock nuts Attach 60° half to the exit top using ⁵ ₁₆" x ³ ₄" hex bolts, ⁵ ₁₆" washers and ⁵...
- Page 7 STEP 8: Items for Attach 60º Tunnel Assembly using ⁵ ₁₆" x ³ ₄" hex bolts, ⁵ ₁₆" washers and ⁵ ₁₆" lock nuts as shown. Finger tighten only at this time. (3) 60º Tunnel Assemblies (42) ⁵ ₁₆" x ³ ₄" hex bolts Note: The long flange on the 60º...
- Page 8 STEP 10: Items for (1) Exit (8) ⁵ ₁₆" x ³ ₄" hex bolts (16) ⁵ ₁₆" washers (8) ⁵ ₁₆" lock nuts Attach the Exit using ⁵ ₁₆" x ³ ₄" hex bolts, ⁵ ₁₆" washers and ⁵ ₁₆" lock nuts as shown. Finger tighten only at this time.
- Page 9 STEP 11: The Spiral Tube Slide is designed to have the exit buried 1¹⁄₂” into the ground. Using the 2” x 4” to the right of the crow’s nest as a reference, mark a 23” x 17¹⁄₂” rectangle on the ground as shown. Remove 1¹⁄₂” of soil at the marked location.
- Page 10 STEP 12: Items for (8) ⁵ ₁₆" x ³ ₄" stove bolts (8) ⁵ ₁₆" washers (8) ⁵ ₁₆" lock nuts Lift the assembly to the upright position and insert the entrance end into the This requires two adults. Crow’s Nest Assembly. Attach at top and bottom using ⁵...
- Page 11 STEP 13: Items for (10) ⁵ ₁₆" x ³ ₄" hex bolts (20) ⁵ ₁₆" washers (10) ⁵ ₁₆" lock nuts Attach the sides using ⁵ ₁₆" x ³ ₄" hex bolts, ⁵ ₁₆" washers and ⁵ ₁₆" lock nuts as shown.
- Page 12 STEP 15: Items for (1) Step 14 Assembly (2) 2" x 4" x 19⁵ ₈" boards (8) #8 x 2¹ ₂" deck screws Lay the Step 14 Assembly on the ground under the slide exit as shown. Insert one 2" x 4" x 19⁵⁄₈" into each of the exit pockets as shown.
- Page 13 STEP 16: Items for (4) #14 x 1¹ ₄" pan head screws Make sure the 2" x 4" x 19⁵ ₈" boards are vertical and the exit pockets are firmly resting on top of them. Using the exit pocket holes as pattern, drill ¹...
- Page 14 STEP 17: Items for (2) Anchors (2) ³ ₈" x 2" lag screws (2) ³ ₈" washers Make sure the exit is level and making firm contact with the ground. Note: If the exit is not making contact with the ground, it will be necessary to remove earth under the lumber support until exit firmly contacts the ground.
-
Page 15: ³ ₈" X 2" Hex Bolt
Ready To Assemble Follow this section if your playset is a STOP Build it Yourself If your playset is , proceed to page 17. STEP 18-RTA: Items for (1) Support Bracket (1) 2" x 4" x 9¹ ₂" board (4) #8 x 1¹ ₄" deck screws Align the top edge and the second slot of the support bracket with the top and end of the 2"... -
Page 16: ³ ₈" X 2" Lag Screw
STEP 21-RTA: Items for (1) ³⁄₈" x 3¹ ₂" hex bolt (2) ³⁄₈" washers (1) ³⁄₈" lock nut (4) #8 x 2¹ ₂" deck screws Attach Support Bracket Assembly to the 2" x 4" x 88" board keeping it level as shown. Make sure the Support Bracket Assembly does not torque or twist the tube slide when in contact with... - Page 17 STEP 18-BIY: Items for (1) Support Bracket (1) 2" x 4" x 9¹ ₂" board (4) #8 x 1¹ ₄" deck screws Align the top edge and the first slot of the support bracket with the top and end of the 2" x 4" x 9¹ ₂" board as shown.
- Page 18 STEP 21-BIY: Items for (1) ³⁄₈" x 3¹ ₂" hex bolt (2) ³⁄₈" washers (1) ³⁄₈" lock nut (4) #8 x 2¹ ₂" deck screws Attach Support Bracket Assembly to the 2" x 4" x 112" board keeping it level as shown. Make sure the Support Bracket Assembly does not torque or twist the tube slide when in contact with...
- Page 19 Expand your Playset with the Water Slide Kit (PS 8840) Add the Water Slide Kit to extend sliding surface. May be used wet or dry. Kit includes: Water Slide, Water Cannon and Water Slide Stakes Water Cannon ® Water Slide (7 foot extension) Water Slide Stakes...
-
Page 20: ³ ₈" Washer
PlayStar, Incorporated, Janesville, WI 53547 © 2014 PlayStar, Inc. Reproduction of this document in part or whole is prohibited without the permission of PlayStar, Inc. Protected by one or more of the following United States or Foreign Patents: US D573,222; US D580,507 CA D119,674 LT 6411 R1 Printed in U.S.A.
Need help?
Do you have a question about the PS 8821 and is the answer not in the manual?
Questions and answers