Table of Contents
Advertisement
Quick Links
Advertisement
Table of Contents

Related Manuals for Rion NL-62


Summary of Contents for Rion NL-62
-
Page 1: Sound Level Meter
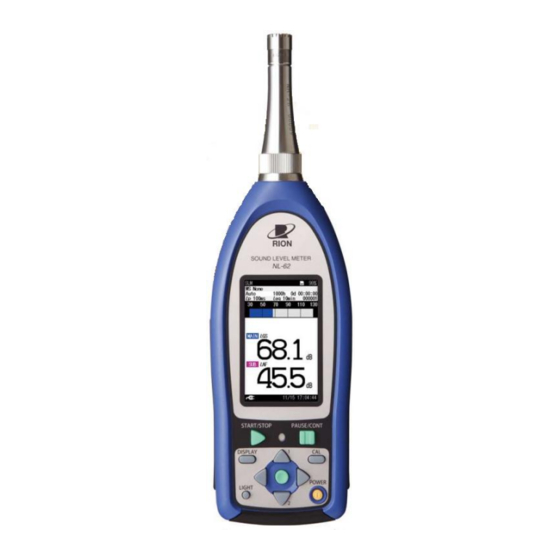
Sound Level Meter NL-62 Quick Instruction Manual (Ver.1.0) Sound Level Meter (With low-frequency sound measurement function) Class 1 NL-62 RION CO., LTD. Technical Support Division, Sound and Vibration Measuring Instruments Business Department November 9 , 2012 HU0-01... -
Page 2: Table Of Contents
Contents 1 Controls and Functions ............................3 1-1. Front panel, Operation key panel ......................3 1-2. Input/Output Connectors ........................... 4 1-3. Measurement screen display ........................4 2. Preparations ..............................5 2-1. Power on/off .............................. 5 2-2. Menu list screen ............................5 2-3. - Page 3 9-4. Key lock ..............................40 9-5. Eco setting (Power-saving mode) ......................40 10. Menu list ............................... 41 10-1. Menu list items of NL-62 ........................41 10-2. Menu list items of NX-42WR ....................... 41...
-
Page 4: Controls And Functions
1.Controls and Functions 1-1.Front panel, Operation key panel This sound level meter has the following display and key panel. Several settings such as frequency weighting, time weighting and other parameters for measurement are set from the menu list. The display supports various languages, and enables user-friendly, intuitive operation designed to be used comfortably, also by persons who are inexperienced in measurements. -
Page 5: Input/Output Connectors
1-2.Input/Output Connectors A variety of I/O connections 1-3.Measurement screen display The illustration below shows all elements of the display for explanation purposes. In actual operation, such a screen will not be shown. -
Page 6: Preparations
2.Preparations 2-1.Power on/off Power on : Hold down the POWER key until the power-on screen appears (at least 1 second). Power off : Hold down the POWER key until the unit is turned off (several seconds). 2-2.Menu list screen ① When the measurement screen is displayed, pressing the MENU/ENTER key brings up the menu list screen as shown to the right. - Page 7 Especially when the unit is connected to a Level Recorder, Data Recorder or Frequency Analyzer, it is necessary to consider the Dynamic Range. For example, when the unit is connected to a Level Recorder, whose dynamic range is maximum 50 dB, if the full scale output of the unit is set to 130 dB, the Level Recorder would record the data in the range from 80 dB to 130 dB.
-
Page 8: Internal Calibration
The procedure for acoustic calibration is described below. If the output level range should be changed, refer to “2-5. Output level range”. ① Turn off the Sound Calibrator NC-74 and NL-62. ② Insert the microphone very carefully and slowly all the way into the coupler. - Page 9 Calibration” is shown in the upper part of the screen, press the DISPLAY key. The calibration mode will change to “Acoustic Calibration”. Use the △/▽ keys to adjust the reading of the NL-62 to the value shown in the table below. These values were derived taking into consideration the relationship between the sound pressure level at the microphone in the coupler (specified sound pressure level) and the influence of case reflections and the microphone refraction effect when placed in a sound field.
-
Page 10: Setting Of The Frequency Weighting And The Time Weighting
2-8.Setting of the frequency weighting and the time weighting Frequency weighting Time weighting ① Press the MENU/ENTER key to bring up the menu list screen. ② On the touch screen, select the frequency weighting characteristic for the main channel. Each press on the “Freq”... -
Page 11: Measurement
3.Measurement 3-1.Sound level measurement ① Press the MENU/ENTER key and select the frequency weighting characteristic on the touch screen. ② Set the frequency weighting as described below. ・A-weighted sound pressure level: “A” setting. ・C-weighted sound pressure level: “C” setting. ・Z-weighted sound pressure level: “Z” setting. ・G-weighted sound pressure level:... -
Page 12: Store Operation
3-2.Store operation (1) Manual mode store operation All processed data except sound level are considered as a single data set, and the operator stores the data sets one-by-one manually. When the operator performs the store operation after a measurement, each processed value and measurement condition will be stored with the time value. - Page 13 ③ Bring up the menu list screen and select [Store]. Manual mode setting is as follows. The store name only appears when a SD memory card is inserted. Setting item Setting Store mode Manual Store name Number of four digits Measurement time 10 s / 1 min / 5 min / 10 min / 15 min / 30 min / 1 h / 8 h / 24 h / Manual arbitrary measurement time (maximum 24 hours)
- Page 14 ④ Back to the measurement screen, the Use the △/▽ keys to currently selected address is shown on set store address the screen. The △/▽ keys can be used to specify the address in the range from 0001 to 1000. (If the address is shown in red, it already contains data.
-
Page 15: Auto Mode Operation
(2) Auto mode operation An SD memory card should be inserted in the card slot. The data will automatically be stored on the card. With the Auto mode, L store and L store are executed simultaneously (Separate operation is also possible). ・... - Page 16 ● The procedure for Auto store operation is as follows: ① Measurement settings as described in chapter “3-1 Sound level measurement” must be completed beforehand. ② To select the measurement values L (N = 05, 10, 50, 90, and L 95)you want to display, set the desired items to ON in the [Display] screen from the menu list screen.(Refer to the figure on the right.)...
- Page 17 ④ Press the START/STOP key to start the measurement. While the measurement is in progress, the symbol flashes and the elapsed time is displayed. In addition, the indicator LED flashes red. While the measurement is in progress, the symbol flashes Press the START/STOP key to and the elapsed time is displayed.
-
Page 18: Timer Auto Mode Operation
(3) Timer Auto mode operation ● About Timer Auto mode operation An SD memory card should be inserted. Auto store is executed using a set start time, stop time and, if set, a Timer Auto interval. Refer to the figure below. With the Timer Auto mode, L store and L store are executed simultaneously (but separate operation... - Page 19 ③ Bring up the menu list screen and select [Store]. Make the settings as follows: Setting item setting Store mode Timer Auto Store name Number of four digits store interval Can be selected from OFF / 100ms / 200ms / 1s / L ,1s.
- Page 20 While the measurement is in progress, the symbol flashes and the elapsed time is displayed. In addition, the indicator LED flashes red. While the measurement is in progress, the symbol flashes Press the START/STOP key to and the elapsed time is displayed. start the measurement In addition, the indicator LED flashes...
-
Page 21: Data Recall
4.Data recall 4-1.Recalling stored data on the screen of the sound level meter ● About data recall This is the function to read out the stored data from the internal memory or SD memory card. ● The procedure is as follows: ①... - Page 22 ・ Recall screen of L ) store data in Auto mode.(SD Auto L (a) Numeric screen of L store data Use the △/▽ keys to select the address of which you want to display the L store data. File name store data (b) Time-Level screen of L store data...
-
Page 23: Recalling Stored Data On A Computer
Therefore these files can be opened directly in spreadsheet software, for example Microsoft Excel. The procedure is described below. For Auto store data or Timer Auto store data, we recommend using RION Data Management Software for Environmental Measurement AS-60. Various files and subdirectories created on the card are described below. - Page 24 ● The procedure to open data in spreadsheet software is as follows: ① Start spreadsheet software (for example Excel) and click “File Open”. ② Select the folder containing the data file, make sure to select “All files” at file type. Select “All files”...
- Page 25 ⑥ The selected data file will be opened. 《Manual store data, opened in Excel》 《Auto store L store data, opened in Excel》 《Auto store L store data, opened in Excel》...
-
Page 26: Delay Time, Pause, Back Erase
5.Delay time, Pause, Back erase 5-1.Delay time ● Outline A delay in starting a measurement from the point of pressing the START/STOP key can be set. This function is useful for excluding the operating sound made when pushing the start key or the sound of the operator's footsteps. -
Page 27: Pause, Back Erase
5-2.Pause, Back erase ● Outline Note: Only when the store mode is Manual, the Pause and Back erase functions are available. When the store mode is Auto or Timer auto, these functions are not available. ・ Pause During a measurement, the PAUSE/CONT key can be used to exclude unwanted events from processing. - Page 28 ● The procedure for setting the Back erase time is as follows ① Select [Store] from the menu list and select [Store Mode]. Select the Manual mode. (When the store mode is Auto or Timer Auto, the Pause and Back erase functions are not available.) ②...
-
Page 29: Marker
6.Marker ● Outline When the store mode is set to Auto or Timer Auto, and the L store interval is specified, a marker can be added to the data. Pressing △ key or ▽ key will add the corresponding marker to the data. If the marker is added to a target event, the marker helps to distinguish between the target sound and background noise. -
Page 30: Sub Channel Settings, Additional Processing Settings
7. Sub channel and additional processing value measurement ● Outline When the sub channel is set to ON, the sub channel L value can be displayed with the main channel L value on the measurement screen. When the sub channel is set to ON, one of the following additional processed quantities is available in addition to L , and L :... - Page 31 ① ON ② Frequency Weighting and Time Weighting ③ Set the additional processing function ※ Caution ・ When data store is executed with the sub channel set to ON and the additional processing function set to ON, the main processing values and the additional processing values are saved as Manual stored data or Auto stored L data.
-
Page 32: Waveform Recording
8. Waveform Recording function ● Outline When the Waveform Recording program NX-42WR is installed, this function enables users to record a sound pressure waveform on SD card as a WAVE file of PCM form, together with the stored numerical data. The recorded WAVE files can be played on computer and can be used for frequency analysis. ●... - Page 33 ・Playback of recorded files Recorded files can be played with WAVE file playback software (on public sale) or with the Waveform analysis software DA-20PA1, DA-40Viewer or AS-60 from RION. Playback on the NL-62 is not possible. ・Analysis of recorded files Analysis (playback is also possible) of recorded files can be done with the Waveform Analysis software CAT-WAVE from RION.
- Page 34 ● Store format of waveform recording data ■ Store destination folder Files are saved in the sub folder SOUND which is created in the store folder specified by the store name. Example: Manual_0123/SOUND (with Manual store) Auto_0123/SOUND (with Auto store) ■...
-
Page 35: Manual Recording
8-1. Manual recording ● Outline Manual recording allows recording of the sound pressure waveform for any duration during Auto store operation. This type of recording is suitable when the operator is able to control the recording function manually as necessary. ●... -
Page 36: Level Recording
8-2. Level recording ● Outline When Level recording is set to “ON”, recording executes while the level exceeds the trigger level. It is used in order to record only high sound levels. ● Operation procedure ① Set [Store Mode] in the Store menu list screen to “Auto” or “Timer Auto”, and make the required setup. - Page 37 ※Note ・ When the maximum recording time is set to “OFF”, files are divided at 1 hour. ・ When the maximum recording time is set to 10 minutes, recording will stop after 10 minutes, also when sound still continues to exceed the trigger level for a longer time (such as the sound of an idling car).
-
Page 38: Interval Recording
8-3. Interval recording ● Outline When Interval recording is set to “ON”, recording starts at preset intervals. The interval is can be selected as 10 or and 1 hour. The recording time can be selected as 15 seconds or 1 minute. This function can be used to record environmental sound on certain fixed periods. -
Page 39: Total Recording
8-4. Total recording ● Outline of Total waveform recording In Auto store mode, the sound waveform will be recorded continuously during measurement. In Manual store mode, the sound waveform is recorded during the entire measurement and stored after finishing the measurement. ●... -
Page 40: Other Operations
・ In case of Auto store or Timer Auto store When you press the START/STOP key to start Auto store, waveform recording also starts simultaneously. Files are created and saved for each recording period. To stop recording, press the START/STOP key. During Auto store, the PAUSE/CONT key (Pause function) cannot be used. 9. -
Page 41: Key Lock
9-4. Key lock Pressing the keys together activates the key lock. A lock symbol appears in the bottom left corner of the display, and the operation keys except for the LIGHT key are disabled. If a key other than the LIGHT key is pressed, a key lock indication appears. Pressing the keys together once more cancels the key lock. - Page 42 10. Menu lists 10-1. NL-62 menu list items 10-2. NX-42WR menu list items...
Need help?
Do you have a question about the NL-62 and is the answer not in the manual?
Questions and answers