Table of Contents
Advertisement
Quick Links
Advertisement
Table of Contents

Subscribe to Our Youtube Channel
Related Manuals for Rion NX-43WR


Summary of Contents for Rion NX-43WR
- Page 1 Waveform Recording Program NX-43WR Instruction Manual...
- Page 3 This section explains the functions of the NX-43WR. • Preparation Before Use This section explains how to install the NX-43WR and the settings before using it. • Reading the Display This section provides a basic explanation about the text displayed on the measurement screen when recording.
- Page 4 Rion also does not assume liability for any damage caused to you by such an alteration or modification. 5. Liability of Rion for any damages will not exceed the actual price that was paid for the license to use the Software.
- Page 5 2. If the software does not operate according to specifications, and the cause is the responsibility of Rion, and if this is detected and Rion is informed of this fact within 90 days from the purchase date of the Software, Rion will undertake to remedy the problem free of charge.
-
Page 6: Table Of Contents
Contents Overview of This Product Preparation Before Use Installing ………………………………………………………………………………………………… 9 Uninstalling ……………………………………………………………………………………………… 12 If you cannot install ……………………………………………………………………………………… 14 SD card …………………………………………………………………………………………………… 15 Reading the Display Waveform Recording Settings Menu Display method…………………………………………………………………………………………… 18 Wave Rec. Mode ………………………………………………………………………………………… 20 Sampling Frequency …………………………………………………………………………………… 20 Bit Length …………………………………………………………………………………………………... - Page 7 5.2.2 Level recording …………………………………………………………………………………… 38 5.2.3 Interval recording ………………………………………………………………………………… 45 5.2.4 Priority order of recording modes ……………………………………………………………… 47 Store data format and file structure …………………………………………………………………… 48 Playing/analyzing recorded files ……………………………………………………………………… 49 Communication Commands Specifications...
-
Page 8: Overview Of This Product
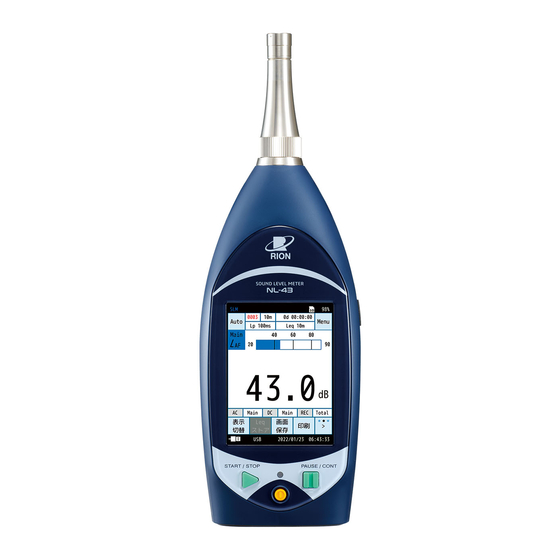
Overview of This Product This program is a program card to add a sound pressure waveform recording function to the Class 2 Sound Level Meter NL-43, Class 1 Sound Level Meter NL-53, or Class 1 Sound Level Meter (with low-frequency sound measurement function) NL-63. -
Page 9: Preparation Before Use
Support Room on the RION website (https://www.rion.co.jp/english/). Note • Before installing NX-43WR for NL-43/53, you must fi rst install the function extension program NX-43EX. • NX-43EX does not need to be installed for NL-63. - Page 10 Preparation Before Use Touch [Menu] on the measurement screen. The [Menu] screen appears. Touch [Option] on the [Menu] screen. The [Option] screen appears. Touch [Install Optional Program] on the [Option] screen.
- Page 11 Preparation Before Use Touch [Install]. The waveform recording program will now be installed. • You can check the installed programs from [Menu] - [System] - [System Information] - [Program Information].
-
Page 12: Uninstalling
Preparation Before Use Uninstalling Important • Check that the power supply of the sound level meter is turned off before installing the program card. • To uninstall, ensure that either the battery is fully charged, or is charging via the USB cable or AC adapter. •... - Page 13 Preparation Before Use Touch [Install Optional Program] on the [Option] screen. Touch [Uninstall]. The program will now be uninstalled.
-
Page 14: If You Cannot Install
NX-43WR. Touch [Back] or press the START/STOP key to return to the measurement screen. Note • NX-43EX does not need to be installed for NL-63. • If NX-43WR is already installed, it cannot be installed again. -
Page 15: Sd Card
10 MB of space, you will not be able to start measuring. Temporarily transfer the data or format the SD card for storing data with this device (refer to the Operation Guide). • Use SD cards provided by Rion. The performance of other cards is not guaranteed. SD card capacity and recording time Saving to the SD card is done in the “recorded data (WAVE file) + store data”... -
Page 16: Reading The Display
Reading the Display The measurement screen when recording is as shown in the fi gure below. Note • The screens shown in this instruction manual are only examples. They may differ from the actual screens. Each time you touch this, the Menu ring displayed menu switches. - Page 17 Reading the Display Name Description Each time you touch the [info]* on the menu ring, the displayed information will switch. * [info] is displayed by touching [>] on the far right of the menu ring. This displays the recording mode of waveform recording and the number of files recorded in each mode.
-
Page 18: Waveform Recording Settings Menu
Waveform Recording Settings Menu Display method From the measurement screen, touch [Menu] - [WR]. The waveform recording screen appears. Touch [Wave Rec. Mode], and then select [Total] or [Event]. The appearance of the waveform recording screen differs according to the [Wave Rec. Mode] settings. - Page 19 Waveform Recording Settings Menu When [Total] is selected for [Wave Rec. Mode] When [Event] is selected for [Wave Rec. Mode] Name Description Wave Rec. Mode Sets the waveform recording function (Page 20). Sampling Frequency Sets the sampling frequency to be recorded (Page 20). Bit Length Sets the bit length of the data to be recorded (Page 21).
-
Page 20: Wave Rec. Mode
Waveform Recording Settings Menu Wave Rec. Mode Sets the waveform recording function. Item Description Waveform recording will not be performed. Records waveforms for the whole time from the start to the Total end of measuring. You can perform Manual recording, Level recording, or Event Interval recording. -
Page 21: Bit Length
Waveform Recording Settings Menu Bit Length Sets the bit length of the data to be recorded. The higher the setting value, the more accurate the analysis and the higher the play quality will be. Note • For high-precision analysis, set the bit length to [24bit]. However, as this increases the amount of data, the recording time will become shorter. -
Page 22: Frequency Weighting
Waveform Recording Settings Menu Frequency Weighting Sets the frequency weighting for the waveform to be recorded. Item Description Sets A-weighting. Sets C-weighting. Sets Z-weighting. Sets G-weighting. Z (HPF) Sets Z-weighting and high-pass filter. Z (LPF,100Hz) Sets Z-weighting and low-pass filter (cutoff frequency 100 Hz). Z (LPF,500Hz) Sets Z-weighting and low-pass filter (cutoff frequency 500 Hz). -
Page 23: Manual Rec. (Event Recording)
Waveform Recording Settings Menu Manual Rec. (Event Recording) Used to configure the manual recording settings (Page 34). Item Description Rec. Turns on/off manual recording. You can configure this setting so that the data just before the recording start operation is also recorded (the selected Pre-time time will be recorded retroactively). -
Page 24: Level Rec. (Event Recording)
Waveform Recording Settings Menu Level Rec. (Event Recording) Used to configure the level recording settings (Page 38). Item Description Rec. Turns on/off Level recording. Channel Sets the channel to be subject to the Level Rec. judgment. Trigger Level Sets the trigger level for waveform recording. You can configure this setting so that the data just before Pre-time the recording start operation is also recorded (the selected... -
Page 25: Trigger Level
Waveform Recording Settings Menu 4.9.2 Trigger Level Sets the trigger level for waveform recording. The value that can be set is 30 dB to 130 dB in 1 dB increments. This can be set when all [Threshold Per Time Zone] items are set to [Off]. 4.9.3 Pre-time You can configure this setting so that the data just before the recording start operation is also recorded (the selected time will be recorded retroactively). -
Page 26: Threshold Per Time Zone
Waveform Recording Settings Menu 4.9.5 Threshold Per Time Zone You can set a measurement time zone. You can set different waveform recording trigger levels for up to 4 categories from [Time1] to [Time4]. Item Description Time Zone Turns on/off the selected time zone settings. Sets the measurement start time. -
Page 27: Interval Rec. (Event Recording)
Waveform Recording Settings Menu 4.10 Interval Rec. (Event Recording) Used to configure the interval recording settings (Page 45). Item Description Rec. Turns on/off interval recording. Rec. Interval You can set the interval for starting recording. Rec. Time You can set the recording time for each set recording interval. 4.10.1 Rec. -
Page 28: Recording Modes
Recording Modes The NX-43WR program has two recording modes: Total recording and Event recording (Manual recording, Level recording, and Interval recording). Store mode Recording mode Manual Auto Timer Auto ✓ ✓ ✓ Total recording × ✓ ✓ Event recording Note •... -
Page 29: Total Recording
Recording Modes Total recording In Auto mode or Timer Auto mode, all sound pressure waveforms during storing are recorded. By performing a store operation after measuring, the Manual mode records the sound pressure waveforms for all time while measuring. Total recording concept diagram •... - Page 30 Recording Modes • In Timer Auto mode Auto store/recording starts at the set start time. The data is automatically saved each time the set L store interval and L eq calculation interval elapse. To finish Auto store/recording, press the START/STOP key. Auto store/recording stops automatically when the specified stop time has elapsed.
-
Page 31: Recording Function Settings
Recording Modes 5.1.1 Recording function settings From the measurement screen, touch [Menu] - [WR]. Select [Total], and then touch [Apply]. - Page 32 Recording Modes Set [Sampling Frequency]. 1. Touch [Sampling Frequency] on the [WR] screen. The [Sampling Frequency] screen appears. 2. Select the sampling frequency to be recorded, and then touch [Apply]. Note • [240Hz] and [1.2kHz] are features available only with the NL-63. Set [Bit Length].
- Page 33 Recording Modes Set [Frequency Weighting]. 1. Touch [Frequency Weighting] on the [WR] screen. The [Frequency Weighting] screen appears. 2. Select a frequency weighting, and then touch [Apply]. Note • G, Z (HPF), Z (LPF,100Hz), and Z (LPF,500Hz) weighting are features of the NL-63 only.
-
Page 34: Event Recording
Recording Modes Event recording Sound pressure waveforms can be recorded only in Auto mode or Timer Auto mode. Event mode has three methods: Manual recording, Level recording, and Interval recording. Note • It is not possible to play and re-analyze on the sound level meter itself. 5.2.1 Manual recording Records the sound pressure waveforms for a chosen time during Auto store. - Page 35 Recording Modes Select [Event], and then touch [Apply]. Set [Sampling Frequency]. 1. Touch [Sampling Frequency] on the [WR] screen. The [Sampling Frequency] screen appears. Note • [240Hz] and [1.2kHz] are features available only with the NL-63. 2. Select the sampling frequency to be recorded, and then touch [Apply].
- Page 36 Recording Modes Set [Bit Length]. 1. Touch [Bit Length] on the [WR] screen. The [Bit Length] screen appears. 2. Select the bit length of the data to be recorded, and then touch [Apply]. Set [Manual Rec.] to [On]. On the [WR] screen, touch [Manual Rec] - [Rec.] to set it to [On]. Set [Pre-time].
- Page 37 Recording Modes Touch [Back] or press the START/STOP key to return to the measurement screen. START / STOP PAUSE / CONT Press the START/STOP key to start Auto store. Pressing the PAUSE/CONT key starts recording retroactively for the amount of time set in [Pre-time].
-
Page 38: Level Recording
Recording Modes 5.2.2 Level recording Automatically records the sound pressure waveforms while the sound pressure exceeds the set level. Level is used to record the sounds of a large level. Note • If events occur at the same time, priority is given in the following order: Manual > Level > Interval (Page 47). Level recording concept diagram Recording time Post-recording... - Page 39 Recording Modes • The example below explains the operation when recording time is OFF and the maximum recording time is set to 10 min When the maximum recording time is set to OFF: Recording First recording = Pre-time + 1 h Second recording onwards = 1 h 10 min Post-recording...
- Page 40 Recording Modes Perform of “5.2.1 Manual Rec.” (Page 34). Set [Level Rec.] to [On]. On the [WR] screen, touch [Level Rec.] - [Rec.] to set it to [On]. Set [Channel]. 1. Touch [Channel] on the [Level Rec.] screen. The [Channel] screen appears. 2.
- Page 41 Recording Modes Set [Trigger Level]. 1. Touch [Trigger Level] on the [Level Rec.] screen. The [Trigger Level] screen appears. 2. Enter the trigger level for waveform recording, and then touch [Apply]. Set [Pre-time]. 1. Touch [Pre-time] on the [Level Rec.] screen. The [Pre-time] screen appears.
- Page 42 Recording Modes Set [Threshold Per Time Zone]. Note • When [Threshold Per Time Zone] is set to [On], will not be displayed. 1. Touch [Threshold Per Time Zone] on the [Level Rec.] screen. 2. Touch the threshold per time zone to be used from [Time1] to [Time4].
- Page 43 Recording Modes 3. Touch [Time Zone] to set it to [On]. 4. Touch [Time], set a measurement start time, and then touch [Apply]. 5. Touch [Trigger Level], set the measurement trigger level, and then touch [Apply].
- Page 44 Recording Modes 6. Touch [Back]. 7. To use other [Threshold Per Time Zone], set by following the same procedure. Touch [Back] or press the START/STOP key to return to the measurement screen. START / STOP PAUSE / CONT Press the START/STOP key to start Auto store. If a signal exceeding the set trigger level is received, the pre-time setting time will be recorded retroactively.
-
Page 45: Interval Recording
Recording Modes 5.2.3 Interval recording This records sound pressure waveforms for 15 seconds, 1 minute, or 2 minutes for a set fi xed interval (10 minutes, 1 hour). Interval is used to grasp the environmental noise of each predetermined time. Note •... - Page 46 Recording Modes Perform of “5.2.1 Manual Rec.” (Page 34). Set [Interval Rec.] to [On]. On the [WR] screen, touch [Interval Rec.] - [Rec.] to set it to [On]. Set [Rec. Interval]. 1. Touch [Rec. Interval] on the [Interval Rec.] screen. The [Rec.
-
Page 47: Priority Order Of Recording Modes
Recording Modes Touch [Back] or press the START/STOP key to return to the measurement screen. Press the START/STOP key to start Auto store. If you start Auto store, recording will start after each specifi ed recording START / STOP PAUSE / CONT interval for the specifi ed time. -
Page 48: Store Data Format And File Structure
Recording Modes Store data format and fi le structure Folder and fi le names to be saved differ depending on the selected store mode. File organization NL-43 Manual_0000 NL_0001_SLM_MAN_0000_0000.rnd Sound (Recording type)_(Recording folder number) ST_01 NL_0001_20220912_141900_100dB_0909_0000_SM0001.wav Sound_0000.rwh Auto_0000 Leq store data le Auto_Leq NL_0001_SLM_Leq_0000_0001.rnd Auto_Lp_01... -
Page 49: Playing/Analyzing Recorded Files
Recording Modes File name of recorded data Recorded files are named as shown below. NL_0255_20230304_155430_130dB_0518_0999_ST0001.wav Recording start date and time Address Recording type (model)_(index number)_(recording start date and time)_(waveform full scale range)_(store name)_(address)_(recording type)(recording file number).wav • Recording start date and time yyyyMMdd_hhmmss •... -
Page 50: Communication Commands
Communication Commands For a list of additional commands, refer to the respective Communication Guide for the following meters: • Class 2 Sound Level Meter NL-43 • Class 1 Sound Level Meter NL-53 • Class 1 Sound Level Meter (with low-frequency sound measurement function) NL-63... -
Page 51: Specifications
Specifications Class 2 Sound Level Meter NL-43 Corresponding Class 1 Sound Level Meter NL-53 models Class 1 Sound Level Meter (with low-frequency sound measurement function) NL-63 Media SD card: 2 GB Sampling NL-43/NL-53 48 kHz, 24 kHz, 12 kHz frequency NL-63 48 kHz, 24 kHz, 12 kHz, 1.2 kHz, 240 Hz Bit length... - Page 52 • QR code is a registered trademark of DENSO WAVE Incorporated. • All company names and product names mentioned in this manual are trademarks or registered trademarks of their respective owners. https://www.rion.co.jp/english/ 3-20-41 Higashimotomachi, Kokubunji, Tokyo 185-8533, Japan No. 66251 23-05...
Need help?
Do you have a question about the NX-43WR and is the answer not in the manual?
Questions and answers