Table of Contents
Advertisement
Quick Links
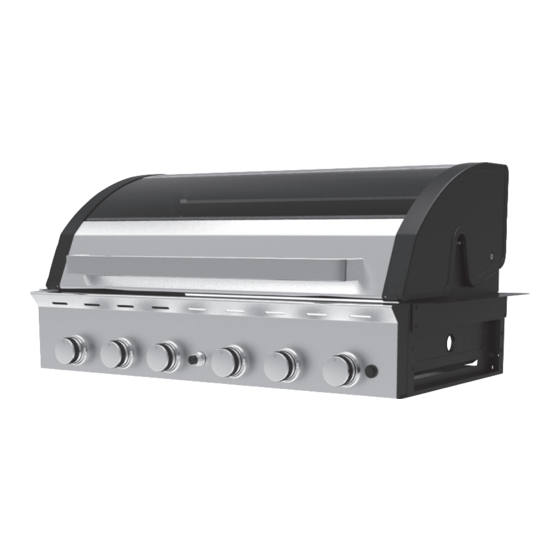
Specialist Deluxe Series II
Built-In 4 & 6 Burner BBQ
FEATURES
• Deluxe BBQ featuring vitreous
enamel body and #304 stainless
steel fascia
• #304 Stainless steel hood includes
glass window and temperature gauge
• L.E.D. Control knobs
• Electronic ignition
• Cast iron rail burners
Gasmate
®
is a registered trademark of: Sitro Group Australia Pty Ltd www.gasmate.com.au
Important: Retain these instructions for future use.
03192 08/14
BQ8342B & BQ8362B
Aber – Hamilton, N.Z.
• Satin enamel cast iron grill and
reversible hotplate
• Cast iron flame tamer with
ceramic briquettes
• Operates on Universal L.P.G.
• Certified for conversion to Natural Gas
• IAPMO Oceana certified
www.gasmate.co.nz
Advertisement
Table of Contents

Related Manuals for Gasmate BQ8342B


Summary of Contents for Gasmate BQ8342B
- Page 1 • Certified for conversion to Natural Gas • Electronic ignition • IAPMO Oceana certified • Cast iron rail burners Gasmate ® is a registered trademark of: Sitro Group Australia Pty Ltd www.gasmate.com.au Aber – Hamilton, N.Z. www.gasmate.co.nz Important: Retain these instructions for future use. 03192 08/14...
-
Page 2: General Information
GEnERAl InFoRmATIon Hose & Regulator Safety The regulator and hose assembly supplied with the ImPoRTAnT barbecue are suitable for Propane Gas or Universal L.P.G. only. Read these instruction carefully prior to use. A gas regulator adjusted to have an outlet Familiarise yourself with the appliance before pressure of 2.75kPa is supplied for connection to connecting it to it’s gas container. -
Page 3: For Your Safety
IF THERE IS A lEAK FoR YoUR SAFETY • Turn the cylinder off. • Ventilate the area to disperse gas. • Failure to comply with these instructions • Check all connections. could result in a fire or explosion which could cause serious bodily injury, death or •... -
Page 4: Protect Children
GEnERAl InFoRmATIon location of your Barbecue FoR YoUR SAFETY DO NOT use your barbecue in garages, porches, sheds, breezeways, or other enclosed areas. Your barbecue is to be used OUTDOORS. The barbecue • Do not store or use petrol or other is not intended to be installed in or on recreational flammable liquids in the vicinity of this or vehicles and/or boats and should not be placed... -
Page 5: Care And Maintenance
CARE & mAInTEnAnCE Care of Cooking Surface As with all appliances, proper care and maintenance will keep them in top operating Use and care of the cooking surface is important. condition and prolong their life. Your new gas Do not use pans on the cooking surface. Do not barbecue is no exception. - Page 6 BQ8342B - EXPloDED DIAGRAm...
- Page 7 BQ8342B - PARTS lIST 1. Hood & Body Assembly 2. Grease Tray Left Bracket 3. Grease Tray Right Bracket 4. Mounting Bracket 2pcs 5. Grease Tray 6. Flame Tamer 7. Ceramic Stone 8. Grill Plate 25pcs 2pcs 9. Hot Plate 10.
- Page 8 BQ8362B - EXPloDED DIAGRAm...
- Page 9 BQ8362B - PARTS lIST 1. Hood & Body Assembly 2. Grease Tray Left Bracket 3. Grease Tray Right Bracket 4. Mounting Bracket 2pcs 5. Grease Tray 6. Flame Tamer 7. Ceramic Stone 8. Grill Plate 2pcs 36pcs 2pcs 9. Hot Plate 10.
-
Page 10: Assembly Instructions
ASSEmBlY InSTRUCTIonS Remove any transit protection material. Tools Required: Phillips Head Screwdriver & Adjustable Spanner. STEP 1 Attach the grease tray left and right brackets (2,3) beneath the body left and right side panels by using 4pcs M6*12 screws (11), M6 nuts (13) and washer (12) as shown. STEP 2 Attach the mounting brackets (4) as shown, onto the barbecue body (1) using 8pcs M6*12 bolts (14). - Page 11 STEP 3 Slide the grease tray (5) into the grease tray bracket (2,3), then insert the grease cup (15) as shown.
- Page 12 STEP 4 Place the Flame Tamers (6) on the top of left side 4 burners and place 36pcs Ceramic Stone (7) into the concave shape of flame tamer, place 2pcs Grill Plate (8), Hot Plate (9) and Warming Rack (10) into the body assembly as shown in the picture.
- Page 13 BUIlT-In GAS BBQ ClEARAnCES Built-In Barbecue Dimensions (4 Burner illustrated) II.) SIDE VIEW OF BARBECUE WITH MOUNTING BRACKETS FITTED III.) Iv.) 1050mm MINIMUM (6 BURNER) 850mm MINIMUM (4 BURNER) Small Hose Assembly Natural Gas Stop Valve Australian Standard (not supplied) certified regulator Long Hose Assembly (not supplied)
-
Page 14: Natural Gas Conversion
nATURAl GAS ConvERSIon Installation, operation & maintenance SERvICInG InSTRUCTIonS Instructions Appliances should be serviced at least annually and servicing must only be carried out by a To BE InSTAllED onlY on oR In A Licensed Plumber or Authorised Person. non-ComBUSTIBlE EnCloSURE Clean the Burner Ports and top with a Soft Brush. -
Page 15: Safe Appliance Locations
SAFE APPlIAnCE loCATIonS Within a partial enclosure that includes an overhead cover and more than two walls, the This appliance shall only be used in an above following will apply: ground open-air situation with natural ventilation, at least 25% of the total wall area is completely without stagnant areas, where gas leakage and open, and at least 30% of the remaining wall area products of combustion are rapidly dispersed by... -
Page 16: Bbq Specifications
BBQ SPECIFICATIonS overall Barbecue Dimensions Barbecue Hood Model Length Width Height Length Width Height 4 Burner 830mm 590mm 200mm 830mm 575mm 300mm 6 Burner 1000mm 590mm 200mm 1000mm 575mm 300mm nominal Hourly Gas Consumption Number of BBQ Injector Size BBQ Total Gas Gas Type Burners...
Need help?
Do you have a question about the BQ8342B and is the answer not in the manual?
Questions and answers