Advertisement
Quick Links
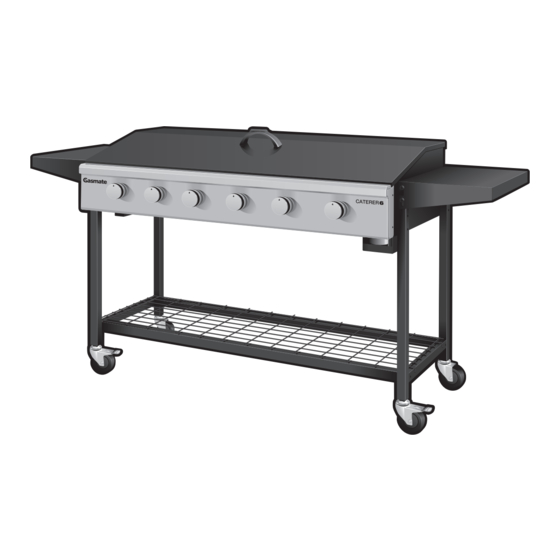
CATERER 6 BURNER BBQ
•
Ideal heavy duty BBQ for sporting and social clubs
or anywhere large groups are entertained
•
Solid 5mm thick steel hotplate
•
Castors for easy moving
•
Stainless steel burners
This LCC27 Regulator can only be used with the new safer industry standard LCC27 Gas Cylinder Connection.
Improper installation, adjustment, alteration, service or maintenance can cause injury or property damage.
Read the instructions thoroughly before installing or servicing this equipment.
LCC27 REGULATOR SUPPLIED
OUTDOOR USE ONLY
Important: Retain these instructions for future use.
Gasmate® is a registered trademark of
Sitro Group Australia Pty Ltd www.gasmate.com.au
Aber, N.Z. www.gasmate.co.nz
Model No. BQ3461
•
Removable lid that doubles as a windshield
•
Foldable side shelves
•
Propane Gas
•
Gas Certified to Australian and New Zealand
Standards
WARNING:
04619 06/23
Advertisement

Related Manuals for Gasmate CATERER 6


Summary of Contents for Gasmate CATERER 6
- Page 1 Improper installation, adjustment, alteration, service or maintenance can cause injury or property damage. Read the instructions thoroughly before installing or servicing this equipment. Important: Retain these instructions for future use. 04619 06/23 Gasmate® is a registered trademark of Sitro Group Australia Pty Ltd www.gasmate.com.au Aber, N.Z. www.gasmate.co.nz...
- Page 2 CONTENTS GENERAL INFORMATION Gas Cylinder Use & Safety FOR YOUR SAFETY This is a low pressure barbecue and must only be used Gas Installation Codes Section Page with the hose and regulator supplied. Your barbecue • Barbecues must be used in accordance with the is designed for use with 4.5Kg or 9Kg gas cylinders •...
- Page 3 COMPONENTS - 6 BURNER WARNINGS • Do not store a spare gas cylinder under or near this barbecue. Never fill the cylinder beyond 80% full. This barbecue is only to be used and stored • Failure to comply with these instructions could result outdoors.
- Page 4 STEP 2 HARDWARE Attach the handles to the top of the legs using 8 x M5x12mm long screws, then attach the cylinder hanging hook, heat shiled and fat cup holder as shown using 4 x M6x12mm long screws. M6x40mm (x12) M6x12mm (x6) M5x12mm (x8) M6 Shoulder Screws (x8)
- Page 5 STEP 3 STEP 4 Attach the folding side shelves as shown using 8 x M6 shoulder screws. Attach the handle to the lid ensuring the lid hook is oriented as shown on the underside using 2 x M6x12mm screws. The lower wire rack and warming rack can be installed as required. M6x12mm (x2) M6 Shoulder Screws (x8)
- Page 6 CARE & MAINTENANCE GENERAL ASSEMBLY STEP 5 The completed assembly. Care & Maintenance Connecting & Disconnecting Note: Before use always leak test the connection to the gas cylinder and appliance using a soapy water solution. If to Gas Source As with all appliances, proper care and maintenance bubbles are present, tighten and then re-test the connection.
- Page 7 LIGHTING PROCEDURE BURNER OPERATION & IGNITION SYSTEM CHECK WARNINGS Burner Operation & Ignition System Check Problem Possible Reason Solution • Before connecting and disconnecting barbecue to 1. With cylinder valve in ‘OFF’ position push and turn Valve on gas bottle closed Open valve on gas bottle gas source, make sure burner controls are in ‘OFF’...
- Page 8 OPERATING PROCEDURE SAFE APPLIANCE LOCATIONS DIAGRAMMATIC REPRESENTATIONS OF OUTDOOR AREAS This appliance shall only be used in an above ground The following figures are diagrammatic representations of outdoor areas. Rectangular areas have been used in these Preheating open-air situation with natural ventilation, without figures –...
- Page 9 For any queries or assistance call Customer Service (Australia Only) 1300 174 876 Hours of operation: Monday to Friday 8am - 5pm EST Do not return to place of purchase. Keep your purchase receipt, this will be required to make any claims under the 1 year warranty.
Need help?
Do you have a question about the CATERER 6 and is the answer not in the manual?
Questions and answers