Sign In
Upload
Download
Table of Contents
Contents
Add to my manuals
Delete from my manuals
Share
URL of this page:
HTML Link:
Bookmark this page
Add
Manual will be automatically added to "My Manuals"
Print this page
×
Bookmark added
×
Added to my manuals
Manuals
Brands
JUMO Manuals
Controller
Quantrol LC200
Operating manual
JUMO Quantrol LC200 Operating Manual
Universal pid controller series
Hide thumbs
1
2
Table Of Contents
3
4
5
6
7
8
9
10
11
12
13
14
15
16
17
18
19
20
21
22
23
24
25
26
27
28
29
30
31
32
33
34
35
36
37
38
39
40
page
of
40
Go
/
40
Contents
Table of Contents
Bookmarks
Table of Contents
Table of Contents
1 Introduction
Device Documentation
Safety Information
Scope of Delivery
2 Installation - Electrical Connection
Identifying the Device Version
Excerpt from the Technical Data
Installation
Installation Notes
Electrical Isolation
Connection Diagram
3 Operation - Configuration - Parameterization
Operation
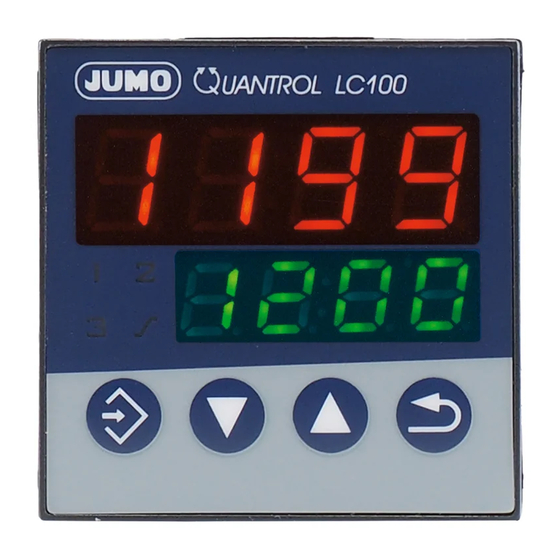
Display and Operating Elements
Self-Optimization, Setpoint and Manual Mode
Ramp Function/Firing Curve
Level Concept
Operator Level (Opr)
Configuration (Conf)
Analog Input (Inp)
Controller (Cntr)
Ramp Function/Firing Curve (Rafc)
Limit Value Monitoring (Li1, Li2)
Timer (Tfct)
Outputs (Outl, Outa)
Binary Functions (Binf)
Display and Operation (Disp)
Interface (Intf)
Parameterization (Para)
4 Supplement
Additional Information about Installation
Device Representation Including Dimensions
Cleaning the Device Front
Additional Information about the Device Functions
Entries and Operator Prompting
Analog Input
Analog Output
Ramp Function and Firing Curve
Timers
Limit Value Monitoring
Error Messages
Technical Data
Advertisement
Quick Links
1
Device Documentation
2
Installation
3
Operation
4
Operation - Configuration - Parameterization
5
Self-Optimization, Setpoint and Manual Mode
6
Display and Operating Elements
7
Configuration (Conf)
Download this manual
JUMO Quantrol LC100/LC200/LC300
Universal PID Controller Series
B 702030.0
Operating Manual
2013-06-24/00600571
Table of
Contents
Previous
Page
Next
Page
1
2
3
4
5
Advertisement
Table of Contents
Need help?
Do you have a question about the Quantrol LC200 and is the answer not in the manual?
Ask a question
Questions and answers
Related Manuals for JUMO Quantrol LC200
Controller JUMO Quantrol LC100 Operating Manual
Universal pid controller series (40 pages)
Controller JUMO Quantrol LC300 Operating Manual
Universal pid controller series (40 pages)
Controller JUMO DICON 401 Operating Manual
Universal profile controller, universal profile generator (100 pages)
Controller JUMO AQUIS 500 pH Operating Instructions Manual
Transmitter/controller for ph, orp and nh3- (ammonia) concentration (104 pages)
Controller JUMO AQUIS 500 AS Operating Manual
Indicator/controller for standard signals, type 202568 (136 pages)
Controller JUMO IMAGO 500 Operating Manual
Multi-channel process and program controller (92 pages)
Controller JUMO AQUIS 500 RS Operating Manual
Display unit/controller for digital sensors with modbus protocol (102 pages)
Controller JUMO eTron M 100 Operating Instructions Manual
Electronic refrigeration controller (48 pages)
Controller JUMO DICON touch Datasheet
Two-channel process and program controller with paperless recorder and touchscreen (24 pages)
Controller JUMO IMAGO F3000 Operating Instructions Manual
Process controller for the meat processing industry (92 pages)
Controller JUMO dTRON 304 Operating Manual
Compact controller with program function (78 pages)
Controller JUMO diraTRON 104 Operating Manual
Compact controller (104 pages)
Controller JUMO dTRON 16.1 B 70.3011 Operating Manual
Compact microprocessor controller (56 pages)
Controller JUMO diraTRON Series Interface Description
Compact controller/digital indicator (40 pages)
Controller JUMO dTRON 304 Operating Instructions Manual
Compact controller with program function (24 pages)
Controller JUMO iTRON04 Manual
Pc-interface (16 pages)
This manual is also suitable for:
Quantrol lc100
Quantrol lc300
Table of Contents
Print
Rename the bookmark
Delete bookmark?
Delete from my manuals?
Login
Sign In
OR
Sign in with Facebook
Sign in with Google
Upload manual
Upload from disk
Upload from URL


Need help?
Do you have a question about the Quantrol LC200 and is the answer not in the manual?
Questions and answers