Table of Contents
Advertisement
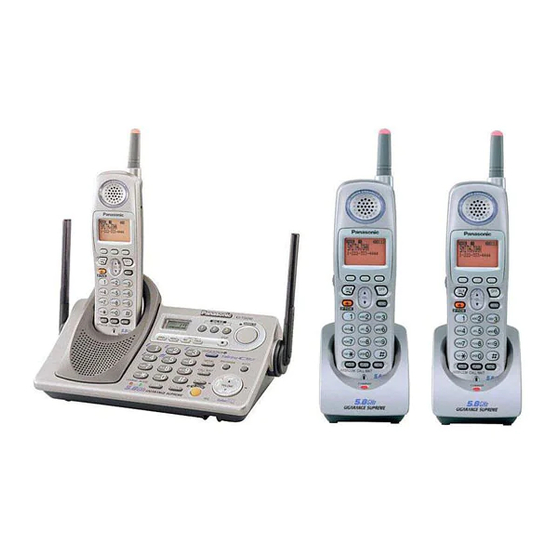
5.8GHz Expandable Cordless Phone System
PLEASE READ BEFORE USE AND SAVE.
Charge the battery for about 6 hours before initial use.
Panasonic World Wide Web address: http://www.panasonic.com
for customers in the USA or Puerto Rico
Operating Instructions
KX-TG5240M
Model No.
Pulse-or-tone dialing capability
Caller ID Compatible
Advertisement
Table of Contents

Related Manuals for Panasonic KX-TG5240M


Summary of Contents for Panasonic KX-TG5240M
- Page 1 Operating Instructions KX-TG5240M Model No. Pulse-or-tone dialing capability Caller ID Compatible PLEASE READ BEFORE USE AND SAVE. Charge the battery for about 6 hours before initial use. Panasonic World Wide Web address: http://www.panasonic.com for customers in the USA or Puerto Rico...
- Page 2 Thank you for purchasing your new Panasonic cordless telephone. Please read the IMPORTANT SAFETY INSTRUCTIONS on page 95 before use. Read and understand all instructions. Caller ID and Call Waiting Service, where available, are telephone company services. After subscribing to Caller ID, this phone will display a caller’s name and phone number, then announce the displayed caller’s name.
-
Page 3: Expanding Your Phone
Expanding Your Phone KX-TG5240 includes one handset and one base unit. You can expand the system by adding up to 3 accessory handsets, sold separately. A maximum of 4 handsets can be registered to the base unit. The model numbers of the accessory handsets are KX-TGA520M and KX-TGA523S. -
Page 4: Table Of Contents
Contents Using the Caller List..34 Preparation Viewing the Caller List..35 Calling Back from the For Best Performance ..6 Caller List . - Page 5 Contents Temporary Tone Dialing (For Direct Remote Operation ..74 Rotary or Pulse Service Users). . 56 Useful Information For Call Waiting Service Users ....56 Belt Clip .
-
Page 6: For Best Performance
For Best Performance Battery charge The handset is powered by a rechargeable Nickel- Metal Hydride (Ni-MH) battery. Charge the battery for about 6 hours before initial use (p. 13). Base unit location/Noise Calls are transmitted between the base unit and the handset using wireless radio waves. -
Page 7: Location Of Controls
Location of Controls Base unit Display (p. 11) MAILBOX Buttons (p. 66) [ANSWER ON] Button and Indicator (p. 65) [ERASE] Button [STOP] Button (p. 68) (p. 24, 69) [MEMO] Button (p. 70) [GREETING CHECK] Button (p. 24) [GREETING REC] Button (p. 23) Charge Contacts (p. - Page 8 Location of Controls Handset Back side Ringer Indicator (p. 26, 31) Antenna Speaker Receiver Display (p. 10) Soft Keys (p. 9) Navigator Key Headset Jack (p. 75) ([d], [B]) (p. 9) ] (TALK) Button (p. 27) [OFF] Button (p. 15, 27) ] (Speakerphone) [MENU] Button (p.
-
Page 9: Lighted Handset Keypad
Location of Controls How to use the soft keys/navigator keys Handset soft keys Three soft keys are used to select functions SPIPRIVACY1 IN USE displayed directly above each key. Functions displayed above each key will change depending on the state of use. On this sample display, “... -
Page 10: Displays
Displays Handset 1 23 4 56 SPIPRIVACY1 IN USE Received calls C I D P LAY “ ” functions as follows. IN USE Off (invisible) The line is free. The line is being used. A call is on hold within this system (handset or base unit) Flashing or the Answering System is answering a call (p. - Page 11 Displays Base unit 1 2 3 RINGER “ ” indicates the base unit ringer is off (p. 21). “ ” flashes when no new messages can be FULL FULL recorded. Erase unnecessary messages (p. 69). R R INGER “ ” flashes when you have not set the clock yet or a power failure may have occurred.
-
Page 12: Installation
Power Outlet (AC 120 V, 60 Hz) AC Adaptor • USE ONLY WITH Panasonic AC ADAPTOR PQLV1 (Order No. PQLV1Z). • The AC adaptor must remain connected at all times. (It is normal for the adaptor to feel warm during use.) •... -
Page 13: Installing The Battery In The Handset
Installation Installing the Battery in the Handset Insert the battery (1), and press it down until it snaps into the compartment (2). Close the cover. To replace the battery: Press the notch on the cover firmly and slide it as indicated by the arrow. -
Page 14: Battery Information
Clean the charge contacts. If the battery still does not hold its charge, the battery needs to be replaced. Please order a new Panasonic HHR-P104 battery at the telephone number shown on page 2. To replace the battery, see page 13. -
Page 15: Programmable Settings
Programmable Settings Programming Guidelines Handset The unit has several programmable functions which can be selected from the function menu on the display (p. 16). The soft key works as BACK BACK SAVE SAVE SAVE SELECT SAVE key. The soft key works [OFF] exits BACK as the... -
Page 16: Function Menu Table
Programmable Settings Function Menu Table You can use the following functions to customize your unit. See the corresponding pages for function details. • After pressing [MENU], you can also program menu items directly by pressing ([0] to [9], [*] and [#]) instead of using the soft keys (p. 79–80). Sub-menu Sub-menu Main menu... -
Page 17: Date And Time
Programmable Settings Date and Time Handset Press [MENU]. Scroll to “Date and time” by pressing [d] or [B], then press the soft key ( SELECT Date and time BACK P LAY SELECT (1) Enter 2 digits each for month, day and Date:| 1 2.31.2004 year. -
Page 18: Display Language
Programmable Settings Display Language Handset You can select either “English” or “Spanish” as the display language. The factory preset is “English”. Press [MENU]. Scroll to “Initial setting” by pressing Initial setting [d] or [B], then press the soft key ( SELECT Scroll to “Change language”... -
Page 19: Line Mode
Programmable Settings Line Mode Handset The line mode is preset to “B” and generally should not be adjusted. If a Panasonic customer call center representative or service person recommends changing the line mode, change it to “A”. Press [MENU]. Scroll to “Initial setting” by pressing... -
Page 20: Ringer Volume
Programmable Settings Ringer Volume You can set the handset and base unit ringer volumes to HIGH, MEDIUM, LOW or OFF. The factory preset is HIGH. If set to OFF, the handset and base unit will not ring for outside calls and a caller’s name will not be announced even if the Talking Caller ID feature is ON (p. -
Page 21: Ringer Tone
Programmable Settings Base unit ringer volume Base Unit Make sure the base unit is not being used. To select HIGH (preset), MEDIUM or LOW, press [d] or [B]. • To increase volume, press [B]. To decrease volume, press [d]. To turn the ringer OFF, press and hold [d] until 2 beeps sound. RINGER •... -
Page 22: Lcd Contrast
Programmable Settings Base unit ringer tone (use either the handset or the base unit) Base Unit Make sure the base unit is not being used. Press [H] or [G]. • The base unit will ring at the current ringer tone. Within 30 seconds, select the desired ringer by pressing [H] or tone... -
Page 23: System
Preparing the Answering System Greeting Message Base Unit You can record a personal greeting message of up to 2 minutes. If you do not record your own message, one of two pre-recorded greetings will be played for callers (p. 24). The total recording time of all messages (greeting, incoming and voice memo) is about 16 minutes. -
Page 24: Caller's Recording Time
Preparing the Answering System To adjust the speaker volume, press [d] or [B] during playback. • 9 levels (0–8) are available while using the Answering System. To play the greeting Press [GREETING CHECK]. To erase the greeting Press [GREETING CHECK], then press [ERASE] while the recorded message is being played. -
Page 25: Number Of Rings
Preparing the Answering System Scroll to “Recording time” by pressing Recording time [d] or [B], then press the soft key ( SELECT Select the recording time by pressing [d] or Recording time [B]. :3min • You can also select the recording time by pressing [1], [2], [3], or [0] (Greeting only). -
Page 26: Recording Mode
Preparing the Answering System Recording Mode Handset Two recording modes are available. The factory preset is “Standard recording (16 min.)”, which provides more recording time (16 min.) and standard sound quality. “Enhanced recording (8 min.)” provides less recording time (8 min.) but clearer sound quality. -
Page 27: Making Calls
Making Calls Using the Handset Handset Press [C]. • “Talk” is displayed. Dial a phone number. • The dialed number is displayed. • After a few seconds, the display will show the length of the call. To hang up, press [OFF] or place the handset on the base unit. - Page 28 Making Calls To dial after confirming the To redial using the redial entered number list (Memory Redial) 1. Dial a phone number. The last 5 phone numbers dialed with the handset are stored in the redial list. 3334444| 1. Press [REDIAL]. •...
-
Page 29: Voice Enhancer Technology
Making Calls Voice Enhancer Technology Panasonic’s Voice Enhancer technology clarifies the voice of the person you are talking to, reproducing a more natural-sounding voice that is easier to hear and understand. Voice Enhancer Technology can be switched on or off. The factory preset is off. -
Page 30: Using The Base Unit
Making Calls Using the Base Unit Base Unit Press [SP-PHONE]. [REDIAL/PAUSE] [STOP] • The SP-PHONE indicator lights. [ ], [ ] Dial a phone number. • If you misdial, press [SP-PHONE] and start again from step 1. When the other party answers, talk into the MIC (microphone). -
Page 31: Answering Calls
Answering Calls To put a call on hold Press [HOLD] during a conversation. • The SP-PHONE indicator flashes. To return to the call, press [SP-PHONE]. • Handset users can take the call by pressing [C] or [s]. • If another phone is connected on the same line (p. 12), you can also take the call by lifting its handset. -
Page 32: Caller Id Service
Caller ID Service This unit is compatible with Caller ID services offered by your telephone company. If you subscribe to Caller ID, caller names and phone numbers will be displayed and recorded in the Caller List. How Caller ID information is displayed and announced When a call comes in, the unit will ring and Caller ID Example information will be received. -
Page 33: Talking Caller Id
Caller ID Service Talking Caller ID Handset Base Unit To use this feature, you need to subscribe to Caller ID. For further information, please contact your telephone company. • If a caller dialed from an area which does not provide a name display service, the unit will announce “Call from out of area”, “Call from private caller”, “Call from long distance”... -
Page 34: Using The Caller List
Using the Caller List Handset Base unit Talking Caller ID feature This feature must be turned on or off for the base unit by using the handset. Press [MENU]. Scroll to “Initial setting” by pressing Initial setting [d] or [B], then press the soft key ( SELECT Scroll to “Set base unit”... -
Page 35: Viewing The Caller List
Using the Caller List Viewing the Caller List Handset Press the soft key ( ), [d], or [B] to C I D Ex. 10 calls missed enter the Caller List. Caller list 10 missed calls dB=Scroll list To search from the most recent call, press [d]. Example To search from the oldest call, press [B]. -
Page 36: Editing The Caller's Phone Number
Using the Caller List Editing the Caller’s Phone Number Handset You can edit a phone number in the Caller List by removing its area code and/or the long distance code “1”. Numbers can be edited automatically by the Auto Edit feature (p. -
Page 37: Caller Id Number Auto Edit
Using the Caller List Caller ID Number Auto Edit Handset This unit can automatically edit incoming phone numbers. For example, it can ignore the area code of calls originating from your area code, so that you can call these numbers from the Caller List without dialing the area code. To activate this feature, you must edit a caller’s phone number in the Caller List (p. -
Page 38: Storing Caller Information In The Phone Book
Using the Caller List Storing Caller Information in the Phone Book Handset Caller names and phone numbers that are in the Caller List can be stored in the phone book. Press the soft key ( ), [d], or [B] to enter the Caller List. C I D Scroll to the desired caller by pressing [d] or [B]. -
Page 39: Phone Book
Phone Book The handset can store up to 50 names and phone numbers in its phone book. You can make a call by selecting a name or number from the phone book, and copy phone book items from one handset to another (p. 44, 45). Storing Names and Numbers Handset Press the soft key (C). -
Page 40: Selecting Characters To Enter Names
Phone Book Selecting characters to enter names Enter names using the dialing buttons. Press each button until the desired character is displayed. • Pressing each button selects a character in the order shown below. Keys Characters Keys Characters # & ’ ( ) ; , – . / 1 m n o M N O 6 a b c A B C 2 p q r s P Q R S 7... -
Page 41: Dialing From The Phone Book
Phone Book Dialing from the Phone Book Handset Press the soft key (C). Phone book 10 items • The display shows the number of stored items. 0-9=Name search • You can press the soft key ( ) to view the SEARCH dB=Scroll list first item. -
Page 42: Chain Dialing
Phone Book Chain Dialing Handset Chain dialing allows you to dial numbers stored in the phone book while you are on a call. This feature can be used, for example, to dial a calling card access number that you have stored in the phone book, without having to dial manually. While you are on a call;... -
Page 43: Editing An Item In The Phone Book
Phone Book Editing an Item in the Phone Book Handset Press the soft key (C), then scroll to the Jane desired item by pressing [d] or [B]. 456-7890 • To search for the item by initial, see page 41. Press the soft key ( EDIT Enter name J ane... -
Page 44: Copying Items In The Phone Book
Phone Book Copying Items in the Phone Book Handset (When the System Has Two or More Handsets) You can copy one or all phone book items between two handsets. The destination handset will save the items in its phone book. •... -
Page 45: Copy All Items
Phone Book To copy all of the items in your phone book to another handset Make sure the destination unit is not in use. Press [MENU]. Scroll to “Copy phone book” by pressing Copy phone book [d] or [B], then press the soft key ( SELECT Scroll to “Copy all items”... -
Page 46: Speed Dialer
Speed Dialer Storing Phone Numbers Base Unit You can store up to 10 phone numbers in the base unit. The dialing buttons ([0] to [9]) function as memory stations. Make sure the base unit is not being used. Press [PROGRAM]. [REDIAL/PAUSE] Memory •... -
Page 47: Intercom
Intercom A 2-way intercom can be set up between a handset and the base unit, and between two handsets (when the system has two or more handsets, p. 3). You can page all handsets at once from the base unit, and announce the page to all handsets (Voice Paging, p. -
Page 48: Answering A Page
Intercom During an intercom call: • If you have difficulty hearing, decrease the speaker volume by pressing [d]. • If an incoming call is being received, you will hear two tones (incoming call tone, p. 61) and the IN USE indicator on the base unit will flash rapidly. To answer the call;... -
Page 49: Voice Paging
Intercom Voice Paging Base Unit The base unit user can make a voice announcement that is heard through the speakers of all handsets. Press [LOCATOR/INTERCOM/TRANSFER]. • The LOCATOR/INTERCOM/TRANSFER and SP-PHONE indicators light. To make a voice announcement to all handsets, press [5]. •... - Page 50 Transferring a Call From the Base Unit to the Handset Base unit: (1) During a call, press [LOCATOR/INTERCOM/TRANSFER]. • The call is put on hold. (2) To page a specified handset, press its extension number ([1] to [4]). To page all handsets, press [0]. To make a voice announcement to all handsets, press [5], then speak into the MIC after the ringback tones stop.
- Page 51 Transferring a Call Quick call transfer You can hang up a call before the paged party answers your page. Handset During a call, press [HOLD/INTERCOM], press the extension number ([0] for the base unit, [1] to [4] for the handset), and press [OFF] to hang up. Base Unit 1.
-
Page 52: Conference Calls
Conference Calls While you are talking with an outside caller, the base unit user or a handset user can join the conversation and establish a conference call. Handset Base Unit During a call, press [HOLD/ During a call, press INTERCOM]. [LOCATOR/INTERCOM/ TRANSFER]. -
Page 53: Room Monitor
Room Monitor This feature allows you to monitor a room by using the intercom feature. For example, you can monitor a baby from different areas of the house. You can call the destination unit to monitor the room. The called unit will not ring. When the system has two or more handsets (p. - Page 54 Room Monitor To monitor with Handset The destination unit must not be in use and the destination handset must be off the base unit. Press [HOLD/INTERCOM], then press the soft key ( MONITOR To call the base unit, press [0]. Press extension# To call another handset, press its extension to room monitor...
-
Page 55: Special Features
Special Features Muting Your Conversation During a call, you can mute your phone so the other party cannot listen to you. When muting your conversation, you can hear the other party. Handset Press the soft key ( MUTE • “Mute” will be displayed for a few seconds and “ ”... -
Page 56: Temporary Tone Dialing (For Rotary Or Pulse Service Users)
Special Features Temporary Tone Dialing (For Rotary or Pulse Service Users) Handset Base Unit Press [*] (TONE) before entering access numbers which require tone dialing. • The dialing mode changes to tone. You can enter numbers to access an answering service, electronic banking service, etc. When you hang up, the dialing mode will return to pulse. -
Page 57: Call Waiting Deluxe Service
Special Features Call Waiting Deluxe Service Handset This unit is compatible with the Call Waiting Deluxe Service offered by your telephone company. After subscribing, Call Waiting Deluxe not only allows your handset to display a second caller’s information, but also offers you a variety of ways to deal with the second call (p. - Page 58 Special Features To use Call Waiting Deluxe Service You can choose from the options on the display as shown below. Display Signification Answers the second call, while keeping the first call on Ans (Answer) hold. The second call is put on hold. The caller will hear the pre- Hold recorded hold message played by the telephone company.
- Page 59 Special Features After selecting “Ans” (Answer) or “Hold”: You can choose one of the following options: “Return”—to return to the waiting call. “Drop”—to hang up the current call and answer the waiting call. “Conference”—to make a conference call. 1. Press [FLASH/CALL WAIT] to display the option 1=Return menu.
-
Page 60: Flash Button
Special Features FLASH Button Handset Base Unit Pressing [FLASH/CALL WAIT] allows you to use special features of your host PBX such as transferring an extension call, or accessing optional telephone services such as call waiting. • Pressing [FLASH/CALL WAIT] cancels the Temporary Tone Dialing mode or the mute (p. -
Page 61: Incoming Call Tone
Special Features Incoming Call Tone Handset Base Unit During an intercom call, or while using the Room Monitor feature, you can be informed by two tones if a call arrives. If you set incoming call tone to ON, this tone will be heard for as long as the line rings. -
Page 62: Key Tone
Special Features Key Tone Handset You can select whether or not the handset keys will sound tones (key tone, confirmation tone, error tone). The factory preset is ON. Press [MENU]. Scroll to “Initial setting” by pressing Initial setting [d] or [B], then press the soft key ( SELECT Scroll to “Key tone”... -
Page 63: Mailbox Features
Mailbox Features The Answering System provides three voice mailboxes. You can share these mailboxes with other members of your family or office as you wish. Callers from touch tone phones can a specify mailbox in which to leave a message. If callers do not specify a mailbox or call from rotary telephones, messages will be recorded into Mailbox 1. -
Page 64: Setting The Mailbox Password (For Mailbox 2 And 3)
Mailbox Features Setting the Mailbox Password (for Mailbox 2 and 3) Handset You can use Mailbox 2 or 3 as personal mailboxes. To prevent unauthorized people from accessing your mailbox and listening to your messages, assign a 2-digit password (00–99) to Mailbox 2 or 3. Each password and the remote code (p. -
Page 65: Automatic Answering Operation
Automatic Answering Operation The Answering System allows the unit to answer calls with a greeting message. Callers can then leave a message in a mailbox (p. 63). Setting the Unit to Answer Calls Base Unit Press to turn on the Answering [ANSWER ON] [ANSWER ON] System. -
Page 66: Listening To Messages
Listening to Messages You can see the total number of recorded Ex. Mailbox 1 has new messages; Mailbox 2 has old messages; messages on the base unit display. If the Mailbox 3 has no messages. ANSWER ON indicator flashes, new messages have been recorded. -
Page 67: Using The Handset (Remote Operation)
Listening to Messages Using the Handset (Remote Operation) Handset If “ ” flashes, there are new messages. If there are only old messages PLAY “ ” is displayed but will not flash. PLAY To play back messages Press the soft key ( PLAY Ex. - Page 68 Listening to Messages Voice menu If you do not press any buttons at the end of the last message, the unit will announce “End of final message” and the voice menu will begin. The unit announces, “Press 4 to play back new messages. Press 5 to play back all messages.”...
-
Page 69: Erasing Messages
Erasing Messages The unit will announce the remaining recording time after playback if it is less than 3 minutes. New messages cannot be recorded when: — “Memory full” is heard. — “ ” is displayed on the base unit. FULL —... -
Page 70: Message
Recording a Memo Message Base Unit You can record a voice memo message of up to 3 minutes in the desired mailbox for other users or yourself. Press [MEMO]. • “Please select Mailbox” is heard. Within 10 seconds, press a MAILBOX button ([MAILBOX 1], [MAILBOX 2] or [MAILBOX 3]). -
Page 71: Remote Operation From A Touch Tone Phone
Transferring a Call to a Mailbox Interrupting remote operation If another user is calling from a remote location to check mailboxes and you answer the call, repeat steps 1 and 2 of “Transferring a Call to a Mailbox” on page 70. •... -
Page 72: Remote Code
Remote Operation from a Touch Tone Phone Remote Code Handset The remote code prevents unauthorized people from accessing your unit and listening to your messages. Choose any 2-digit number (00–99) for your remote code. The factory preset remote code is “11”. If you do not program your own remote code, you can use “11”. -
Page 73: Voice Menu
Remote Operation from a Touch Tone Phone Voice Menu The shaded parts are voice prompts. Press [1]. All Message Playback. Press 1 to play back all messages. All recorded messages in the Press 2 for other functions. mailbox are played back. At the Press [2]. -
Page 74: Direct Remote Operation
Remote Operation from a Touch Tone Phone Direct Remote Operation Once you have accessed one of the mailboxes (p. 71), you can also control your unit by direct commands instead of using the voice menu. To end the remote operation, hang up at anytime. Direct commands [4]: Plays back new messages. -
Page 75: Belt Clip
Optional Headset Handset Connecting an optional headset to the handset allows hands-free phone conversation. Please use only a Panasonic KX-TCA60, KX-TCA86, KX-TCA88, KX-TCA91, KX-TCA92, or KX-TCA98 headset. To order, call the accessories telephone number on page 2. Connecting an optional headset Open the headset jack cover, and insert the headset plug into the headset jack as shown below. -
Page 76: Wall Mounting
Wall Mounting This unit can be mounted on a wall phone plate. Connect the AC adaptor. To Power Outlet Tuck the telephone line cord inside the wall mounting adaptor (A). Connect the telephone line cord (B). Insert the hooks on the wall mounting adaptor into the holes ( ) and ) on the base unit. - Page 77 Wall Mounting Adjust the adaptor to hold the base unit, then push it in the direction of the arrow until it clicks into place. Connect the telephone line cord. Mount the unit, then slide it down. • Raise the antennas. To charge the handset battery: Place the handset on the base unit.
- Page 78 Wall Mounting To remove the wall mounting adaptor While pushing down the RELEASE LEVERS (A), remove the adaptor (B). RELEASE LEVERS...
-
Page 79: Direct Commands
Direct Commands Handset After pressing [MENU], you can also program menu items directly by pressing ([0] to [9], [*] and [#]) instead of using the soft keys. Menu item Command Selection items Page Ringer volume [1] [1] [0] : Off [1] : Low [2] : Medium p. - Page 80 Direct Commands Menu item Command Selection items Page Call Waiting Options [0] [5] [4] [1] : On [2] : Off p. 57 Number of rings [0] [6] [1] [2]–[7] : 2–7 rings p. 25 [0] : Toll saver Recording time [0] [6] [2] [1] : 1 minute [2] : 2 minutes p.
-
Page 81: Canceling Registration/Re-Registration
Canceling Registration/Re-registration Canceling the Handset Registration Handset If you no longer need to use the handset or if you want to use the handset with a different base unit of the same model, it is necessary to cancel the handset’s registration from the current base unit. -
Page 82: Re-Registering The Handset
Canceling Registration/Re-registration Re-registering the Handset Handset & Base Unit If you want to re-register the handset to the base unit or a different base unit of the same model, you need to register it to that base unit. The handset will be given a new extension number of that base unit. -
Page 83: If The Following Appear On Your Display
If the Following Appear on Your Display... If the unit detects a problem, one of the following messages will be displayed on the handset. Error beeps or a busy tone will sound. Display message Cause & Remedy • The battery needs to be charged. Recharge the Recharge battery battery (p. - Page 84 If the Following Appear on Your Display... Display message Cause & Remedy • If more than one unit is in use, such as conducting System is busy. Please try again outside/intercom calls or listening to messages, you later. may not be able to use another unit. Try again later. •...
- Page 85 If the Following Appear on Your Display... Display message Cause & Remedy • 4 handsets have already been registered to the base Error!! 4 handsets have unit. To cancel a handset’s registration, see page 81. already been • You may have registered one of your handsets to registered.
-
Page 86: Troubleshooting
Troubleshooting If the handset display shows error messages, see “If the Following Appear on Your Display...” (p. 83–85) for the Cause & Remedy. Telephone System Problem Cause & Remedy Static, sound cuts in/out, • Move the handset and the base unit away fades. - Page 87 Troubleshooting Problem Cause & Remedy The handset does not display • You need to subscribe to Caller ID. the caller’s name and/or • Other telephone equipment may be phone number. interfering with your phone. Disconnect it and try again. • Other electrical appliances connected to the same outlet may be interfering with Caller ID.
- Page 88 Troubleshooting Answering System Problem Cause & Remedy The Answering System is on, • The recording time is set to “Greeting only”. but incoming messages are Select “1 minute”, “2 minutes” or “3 minutes” not recorded. (p. 24). • Memory is full. Erase unnecessary messages (p.
- Page 89 Troubleshooting General Problem Cause & Remedy The unit does not work. • Check the settings (p. 12–14). • Check whether the dialing mode setting is correct (p. 18). • Fully charge the battery(p. 13). • Clean the charge contacts and charge again (p.
- Page 90 If you cannot solve your • Call our customer call center at problem 1-800-211-PANA(7262). • Panasonic’s e-mail address for customer inquiries: consumerproducts@panasonic.com for customers in the USA or Puerto Rico ONLY When you try to download the •...
-
Page 91: Openlcr Service For Caller Iq
• If you have any questions regarding the openLCR service, call openLCR’s customer service department at 1-866-openLCR (1-866-673-6527). • NEITHER PANASONIC COMMUNICATIONS CO., LTD. (PCC) NOR MATSUSHITA ELECTRIC CORPORATION OF AMERICA (MECA) IS IN ANY WAY AFFILIATED WITH, OR RESPONSIBLE FOR THE ACTS OR OMISSIONS OF, OPENLCR.COM, INC. -
Page 92: Downloading Data
openLCR Service for Caller IQ Downloading Data You can download the following data to your unit from the openLCR web site. • Phone book data • Ringer melodies • Function setup for your unit • Information such as weather forecasts, stock quotes, lottery results, sports scores and horoscopes Accessing the openLCR web site can be done from any computer with Internet access. -
Page 93: Get New Info
openLCR Service for Caller IQ To download data from openLCR Handset Each time you download data (p. 92) from openLCR, the information stored in your unit will be updated. To view up-to-date information, you will need to download it to your unit. - Page 94 openLCR Service for Caller IQ • If the handset beeps 3 times and “Download incomplete. Phone book full.” is displayed, some items could not be stored in the phone book. Store items by following the steps below. 1. Erase items which do not exist on the web from the phone book of the unit (p. 43). 2.
-
Page 95: Important Safety Instructions
Important Safety Instructions When using this unit, basic safety precautions should always be followed to reduce the risk of fire, electric shock, or personal injury. 1. Read and understand all instructions. 2. Follow all warnings and instructions marked on this unit. 3. -
Page 96: Fcc And Other Information
Important Safety Instructions CAUTION: To reduce the risk of fire or injury to persons, read and follow these instructions. 1. Use only the battery(ies) specified. 2. Do not dispose of the battery(ies) in a fire. They may explode. Check with local waste management codes for special disposal instructions. - Page 97 FCC and Other Information The telephone company may make changes in its facilities, equipment, operations or procedures that could affect the operation of the equipment. If this happens the telephone company will provide advance notice in order for you to make necessary modifications to maintain uninterrupted service.
- Page 98 • If there is any trouble — disconnect the unit from the telephone line and connect a known working phone. If the known working phone operates properly, have your unit repaired by one of the authorized Panasonic Factory Service Centers. If the known working phone does not operate properly, consult your telephone...
-
Page 99: Index
Index Error messages ....83 Accessories ....2 Extension number. - Page 100 Index Monitoring incoming calls ..65 Specifications....103 MUTE ..... . . 55 SP-Phone, base unit .
-
Page 101: Warranty
Panasonic Services Company Customer Servicenter Suite B 4900 George McVay Drive McAllen, TX 78503 For assistance in Puerto Rico call Panasonic Sales Company (787)-750-4300 or fax (787)-768-2910. For Limited Warranty service for headsets if a headset is included with this product please call Panasonic Call Center at 1-800-211-PANA (7262). -
Page 102: Customer Services Directory
(We Accept Visa, MasterCard, Discover Card, American Express, and Personal Checks) For hearing or speech impaired TTY users, TTY : 1-866-605-1277 Service in Puerto RICO Matsushita Electric of Puerto Rico, Inc. Panasonic Sales Company Factory Servicenter: Ave. 65 de Infantería, Km. 9.5, San Gabriel Industrial Park,... -
Page 103: Specifications
Specifications Handset Power Supply: Ni-MH battery (3.6 V, 830 mAh) Frequency: 5.76 GHz – 5.84 GHz Dimensions (H x W x D): Approx. 220 mm x 53 mm x 40 mm " x 2 " x 1 ") Mass (Weight): Approx. - Page 104 Symptom • Send the unit to an authorized servicenter, prepaid and adequately insured. • Do not send your unit to the Panasonic Consumer Electronics Company listed below or to executive or regional sales offices. These locations do not repair consumer products.
Need help?
Do you have a question about the KX-TG5240M and is the answer not in the manual?
Questions and answers