Table of Contents
Advertisement
Quick Links
Advertisement
Table of Contents
Troubleshooting

Subscribe to Our Youtube Channel
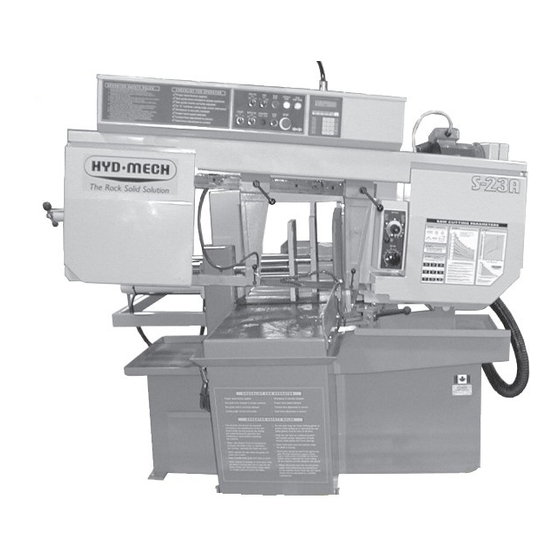
Related Manuals for Hyd-Mech S-23A


Summary of Contents for Hyd-Mech S-23A
- Page 1 OPERATIONS & MAINTENANCE M A N U A L B A N D S A W T E C H N O L O G Y...
- Page 2 S-23A S-23A S-23A S-23A S-23A 2001, rev c, 393365 THANK YOU, On behalf of everyone at HYD . MECH, I would like to thank and congratulate you on your decision to purchase a HYD . MECH band saw. Your new machine is now ready to play a key role in increasing the efficiency of your operation, helping you to reduce cutting costs while boosting quality and productivity.
- Page 3 THIS PAGE INTENTIONALLY LEFT BLANK...
-
Page 4: Table Of Contents
SPEED ADJUSTOR INSTALLATION ........................4 HYDRAULIC OIL and TANK ............................4 POWER WIRING CONNECTIONS ........................... 5 POWER WIRING CONNECTIONS (for S-23A with the PLC option) ................6 SECTION 2, OPERATING INSTRUCTIONS BLADE BASICS ..............................7 VARIABLE SPEED CONTROL ..........................7 OPERATOR CONTROL CONSOLE .......................... - Page 5 SECTION 3, MAINTENANCE and TROUBLESHOOTING BLADE CHANGING PROCEDURE ........................31 BLADE TRACKING ADJUSTMENT ........................32 IDLER WHEEL ADJUSTMENT ......................... 32 DRIVE WHEEL ADJUSTMENT ......................... 32 BLADE BRUSH ADJUSTMENT ..........................33 ANGLE BRAKE ADJUSTMENT and PROCEDURE ....................33 DRIVE BELT REPLACEMENT ..........................33 BLADE GUIDE ADJUSTMENT ..........................
- Page 6 HYDRAULIC TANK ASSEMBLY (Less hoses) ......................80 HYDRAULIC PUMP ASSEMBLY (Less hoses) ...................... 81 PIVOT LINK ASSEMBLY ............................82 FRONT VISE ASSEMBLY ............................. 84 SHUTTLE VISE ASSEMBLY ..........................85 INFEED CONEYOR ASSEMBLY ........................... 86 COOLANT GROUP ............................... 86 LENGTH CONTROL ASSEMBLY ........................... 88 DOORS and COVERS ............................
- Page 7 THIS PAGE INTENTIONALLY LEFT BLANK...
- Page 8 SECTION 1 INSTALLATION...
-
Page 10: Section 1, Installation
SAFETY PRECAUTIONS The S-23A has been designed to give years of reliable service. It is essential that operators be alerted to the safe operation of this saw, and the practices to avoid that could lead to injury. The following safety rules are at the minimum necessary for the safe installation, operation, and maintenance of the saw. -
Page 11: Operator Safety - Visual Inspection
OPERATOR SAFETY - VISUAL INSPECTION The operator should always make a visual inspection of the saw before operating. The following areas should be checked. 5 (BEHIND HEAD) Safety Inspection Points for Operators BLADE KEEP AWAY FROM MOVING BLADE! VISE NEVER LOAD STOCK WITH BLADE MOVING! HEAD WATCH FOR HEAD DESCENDING TO TABLE! PIVOT... -
Page 12: Lifting The S-23A
LIFTING THE S-23A The S-23A is shipped with a shipping pallet attached to the saw. When lifting the pallet with a forklift truck make sure that the load is firmly balanced. The following photo shows a lift truck lifting the saw and pallet from the correct side. -
Page 13: Levelling The Saw
CUTTING FLUID The S-23A uses a pump and reservoir to circulate the necessary cutting fluid to the blade for maximum blade life. Your saw blade supplier will be able to provide information to the cutting fluid products that are available for your needs. -
Page 14: Power Wiring Connections
- SHUT THE HYDRAULICS OFF - and change the phase order. As supplied your new S-23A is set to run on three phase voltage. The supply voltage of the machine is shown on the serial plate attached to the front of the machine. Connection from the Main supply is made to L1, L2, L3, and ground terminals in the electrical control box as shown below. -
Page 15: Power Wiring Connections (For S-23A With The Plc Option)
POWER WIRING CONNECTIONS (for S-23A with the PLC option) After the machine is levelled and anchored the necessary power hook-up needs to be performed. In order to provide a safe operation as well as to prevent potential damage to the machine, only qualified personnel should be allowed to do the work. - Page 16 SECTION 2 OPERATING INSTRUCTIONS...
-
Page 18: Section 2, Operating Instructions
SECTION 2, OPERATING INSTRUCTIONS This section has been prepared to give the operator the ability to set up the saw for most cutting situations. Before cutting any material, the operator should be familiar with all operations and controls as well as the basic cutting theory described below. -
Page 19: Operator Control Console
Sequencer controller, and the Head Up Limit setting knob. The hydraulic functions of the S-20A Series II / S-23A are controlled from the Hydraulic Feed Control unit. This unit is covered in detail later in this section, see “Hydraulic Feed Control” on page 25. -
Page 20: Manual Controls
Manual Controls TOP ROW PLC SWITCH The PLC On/Off switch controls the power supply to the Sequencer controller. When the switch is ON, the controller is active for display in Manual Mode, and to set the saw operation cycles in Automatic Mode. FIXED VISE SWITCH This switch has three positions, OPEN, HOLD, and CLOSE. - Page 21 BOTTOM ROW CONTROL FUSE HOLDER The Control fuse is located in the fuse holder and is accessible by depressing the holder in and turning. The control fuse is used for protection of the control circuitry which operates at 120 volts. The fuse is rated for 5 Amps maximum at 250 volts.
-
Page 22: Sequencer Operation Guide
The Sequencer interface. The Hyd . Mech Sequencer controller provides automatic operation of the S-20A Series II or S-23A. The operator needs only to set the required length measurement using the adjusting block and scale. For longer lengths than 29", the SEQUENCER can provide multi-indexes of the shuttle by setting the single digit #INDEX function. -
Page 23: Blade Speed Indicator
If the length required is greater than 29", then the # INDEX function can be used to advance the required length of stock before the cut. For example if a 75" piece length is required then, as 75" is not divisible by 29" without a remainder, select a divisor which can provide a repeat length less than 29". -
Page 24: Parameter Options
With option 2 the Blade wheel circumference measured in feet, times a factor of ten (Examples S-20A, 4.2 feet x 10 = 42, S-23A, 5.0 feet x 10 = 50), is entered into the program. This value is used to calculate and display the blade speed. -
Page 25: Optional Plc 100 Operation Guide
OPTIONAL PLC 100 OPERATION GUIDE The PLC controller provides the operator with the ability to operate the saw in automatic mode. Starting on page 16, this controller is described in detail. Topics covered include Operation, Parameter Setup, and examples. Manual Control Switches for PLC 100 E200 PLC Interface. - Page 26 CYCLE START BUTTON The Cycle Start button is a white illuminated push button which will begin a cut cycle in the PLC Auto or Manual operations. COOLANT This switch has three positions WASH, OFF, and ON. BOTTOM ROW WASH: Coolant flows any time the machine is under power, permitting wash down with spray nozzle without running machine.
-
Page 27: Plc 100 Control System
PLC 100 CONTROL SYSTEM NOTE: This instruction manual is applicable to the S-20A, S-23A, and H-10 equipped with a MITSUBISHI PLC manufactured after and including the following serial numbers: Machine Model Serial # S-20A 80801168 (excluding 80901180) S-23A XA0801180 E200 operator interface. -
Page 28: Activating The Plc
ACTIVATING THE PLC Position the head, fixed vise, and shuttle vise switches to the NEUTRAL (center) positions. If any of these switches are not in the NEUTRAL position, the hydraulics will not start. The PLC control will become active when the HYDRAULIC START button is depressed and "held in" momentarily. First, the HMI and PLC's current revision number, 2100 1.0, will be shown on the display window and finally the MANUAL MODE display window will appear as shown below. -
Page 29: Function Key Descriptions
FUNCTION KEY DESCRIPTIONS If a red indicator light above a function button is illuminated, it means that the function printed in red at the top of the button is enabled. No light indicates the function printed in black at the bottom of the function button is enabled. The following are the function keys for AUTO and MAN modes: AUTO / MAN MODE - This key will toggle between MAN and AUTO modes. -
Page 30: Single Part Cycle Operation
SINGLE PART CYCLE OPERATION In MAN mode, the PLC allows the operator to initiate a "Single Part Cycle " to cut one piece at a desired length. To accomplish this, follow the procedure below. 1) A trim cut should be made before initiating the "Single Part Cycle " operation. 2) Make sure the front vise switch is in the closed position and set the head up limit switch. -
Page 31: Automatic Operation
NOTE: Whenever a new job or new material is being loaded for production, the head up limit switch should be properly set (ref pg. 23) to clear the material, material positioned for a trim cut and the front vise closed (in "MANUAL MODE"). -
Page 32: Working With A Queue
NOTE: Before entering "AUTO MODE" and working with a "QUEUE", follow the same procedures outlined on the previous page for "AUTOMATIC OPERATION" with regards to setting up for an initial trim cut. WORKING WITH A QUEUE The purpose of a QUEUE is to allow the operator to run several jobs (max of 5) in series if they are of the same material and shape. -
Page 33: Kerf Correction For Angle Cutting
KERF CORRECTION for ANGLE CUTTING When making mitered cuts, the part length must be set longer than the desired length by an amount called the "KERF CORRECTION" or the kerf value must be adjusted. This is due to the fact that the PLC will not account for a difference in the kerf value at various angles. -
Page 34: Head Up Limit Setting
MECHANICAL CONTROLS HEAD SWING and BRAKE An integral function of the S-23A is the ability to make mitred cuts at angles between 90 and 45 . The Head swing of the S-23A is easily changed to set a different cutting angle by first releasing the Angle Brake lever, and then manually moving the Head to the cutting angle desired. -
Page 35: Guide Arm Positioning
GUIDE ARM POSITIONING The S-23A guide arms are adjustable to accommodate varying material widths. The guide Guide Arm arms should be adjusted as close to the material Locking Handles width as possible while still allowing the material to pass between them. This process of matching the guide arm width to the material size is important to optimize blade life. -
Page 36: Hydraulic Feed Control
HYDRAULIC FEED CONTROL The Hydraulic Feed Control is located adjacent to the drive wheel box. These controls allow independent control of Feed Force and Feed Rate. Feed Force Knob Used to set Feed Force Limit (counter clockwise rotation to increase and clockwise rotation to decrease). Fast Approach Lever Depress for fast head descent. -
Page 37: Chart Example #1
CHART EXAMPLE #1 We will use the parameters chart to set up the saw for cutting 8" (200mm) Diameter #1045 Carbon Steel. STEP 1, DETERMINE EFFECTIVE MATERIAL WIDTH - W ( inches ) or (mm) Effective material width, W (in.) for most common shapes of materials, is the widest solid part of the material to be in contact with blade during cutting. -
Page 38: Step 3, Determine Optimum Blade Pitch
STEP 3, DETERMINE OPTIMUM BLADE PITCH - TEETH PER INCH (T.P.I.) Selecting a blade with proper tooth pitch is important in order to achieve optimal cutting rates and good blade life. For cutting narrow or thin wall structural materials a fine blade with many teeth per inch (T.P.I.) is recommended. -
Page 39: Step 5, Determine Feed Rate Setting
The following table gives examples of the optimum blade speeds for different materials. MATERIALS OPTIMUM BLADE SPEED ft./min. m/min 5" (125mm) Dia Solid Carbon Steel 12" (300mm) I-Beam 4" x 4" (100 x 100mm) Rec Tube, 1/4" (6mm) Wall 4"(100) 400 Stainless Steel 2"... -
Page 40: Additional Cutting Setup Examples
Feed Rate, continued If the saw is fitted with a blade coarser than optimum (e.g.. 1.4/2.5 TPI) we can still use the graph, but we go to the 1.4/2.5 curve. As a result we find that the FEED RATE is decreased to 1.3 in/min (133mm/min) for this blade. If however, the machine is fitted with a finer than optimum blade (e.g. - Page 41 THIS PAGE INTENTIONALLY LEFT BLANK...
- Page 42 SECTION 3 MAINTENANCE AND TROUBLE SHOOTING...
-
Page 44: Section 3, Maintenance And Troubleshooting
SECTION 3, MAINTENANCE and TROUBLESHOOTING BLADE CHANGING PROCEDURE NOTE: Wear gloves for protection from the sharp blade. Open the Idler Wheel and Drive Wheel doors and swing the head to as this will make it easier to grip the blade closer to both wheels. Loosen the Blade Tensioner by turning counter clockwise. -
Page 45: Blade Tracking Adjustment
BLADE CHANGING PROCEDURE, CONTINUED 9A. As the blade tracking will stay fairly constant, it should be checked occasionally as shown on the drive wheel tracking photo below. The blade teeth should protrude from .195" to .210" (5mm to 5.3mm) from the face of the blade wheels. -
Page 46: Blade Brush Adjustment
DRIVE BELT REPLACEMENT The drive belt on the S-23A is a long life grooved belt. It should last for many hours of operation and should rarely require replacement. See the BLADE DRIVE ASSEMBLY on Pg 6.2. Pg 33... -
Page 47: Head Down Limit Switch
Head horizontal pivot fitting. Swivel Pivot pin fitting under dome cap. The S-23A rear view shows lubrication points that should Guide Arm Rail. be attended to on a monthly basis. Lubrication should be a general purpose grease. Blade tension... -
Page 48: Hydraulic Maintenance
HYDRAULIC MAINTENANCE There are only FOUR items of routine maintenance associated with the hydraulic system. OIL FILTER - Ten micron filtration of the hydraulic oil is provided by a spin on type filter mounted on the tank return line . The element should be changed after the first 50 Hours of operation and then every 500 working hours. -
Page 49: Trouble Shooting Guide
Most problems which may occur have relatively simple solutions which appear in this section. If the solution is not found here, contact the Hyd-Mech Distributor from whom you purchased your bandsaw. They have trained field service personnel who will be able to rectify the problem. - Page 50 PROBLEM PROBABLE CAUSE SOLUTION Saw will not start. Motor overload has tripped. Depress each of the overload buttons located in the electrical box. Depressing one button at a time and trying to start the saw will indicate which motor was overloaded. Control circuit fuse has blown.
-
Page 51: Troubleshooting The Sequencer
TROUBLESHOOTING THE SEQUENCER Removing the electrical control box cover exposes the electrical wiring of the S-23A. The Sequencer Control Board as viewed from the rear is shown. The INPUT LED's light when the 1 2 3 condition is met. - Page 52 In manual mode, with front vise switch in 'CLOSE' position press FWD and REV keys simultaneously (not more than 0.5 sec. apart). The PLC will prompt for a password which is obtainable from Hyd-Mech Saws. If the password is correct a screen of parameters will appear. The display will show two lines of parameters at a time. The first display is for the machine's self calibration of it's length control.
-
Page 53: Plc 100E Parameters
PLC 100 PARAMETERS Parameter DEFINITION SPEED CONST Blade speed adjustment number. If Actual Blade speed is different than displayed Blade Speed a new speed factor will need to be calculated. (Providing wheel Trgs is set correctly): Actual speed / Display = Adjustment factor X Existing speed factor = New speed factor. -
Page 54: Plc 100 Troubleshooting
COOLANT When “BLD” selected, coolant flows when the blade is running. When “BLD+ DWN” selected, coolant flows when the blade is running and head is moving down. QUEUE The QUEUE allows the operator to run several jobs (max 5) in series. If “REPEAT” is selected the above series will be executed the selected number of times. -
Page 55: Inaccurate Lengths In Auto Mode
PROBLEM # 2, for automatic models with a shuttle. Inaccurate lengths in AUTO mode. POSSIBLE CAUSES; i) Encoder - pinion not engaging rack all the way from front to back; mechanical interference, pinion loose on encoder shaft. ii) Encoder Cable - bad connection at encoder or at PLC - intermittent open in one or more signal wires iii) Improper programmed information... -
Page 56: Consistent Inaccuracy
CONSISTENT INACCURACY (make sure blade kerf value is correct) - change "Actual Pos." parameter to 1. This will make the PLC show actual shuttle travel in AUTO With no material in the machine: - program JOB 1 for 2 pieces of 5" length, JOB 2 for 2 pieces of 10" length, and JOB 3 for 2 pieces of a length as one shuttle will allow. -
Page 57: Auto Cycle Not Being Completed
If the fuse is good and no output voltage condition still exists, with the output light on, then the relay is defective. If this is the case the PLC will have to be returned to the manufacturer for repair. (Contact HYD-MECH SERVICE). -
Page 58: No Display
FUSES The PLC has five glass fuses in line with it. Fuse '4FU' is a 2 amp instant blow fuse which feeds power to the input side of the PLC through input terminal 'L'. Fuses '5FU1' to '5FU4' are 3 amp time delay fuses which each supply power to a specific bank of output relays through that bank of relay's 'COM' terminal: 5FU1 is wired to terminal 'COM 1' supplying Outputs - Y0, Y1, Y2, Y3... -
Page 59: Mitsubishi 100 Inputs & Outputs
MITSUBISHI 100 INPUTS & OUTPUTS MITSUBISHI 0 1 2 3 Power 10 11 12 13 14 15 16 17 Batt V Prog E FX2N-32MR 0 1 2 3 10 11 12 13 14 15 16 17 Y13 COM4 COM3 COM2 COM1 A - input terminals E - output indicating LED 's... -
Page 60: Input / Output Terminal Information
Input / Output Terminal Information Inputs - X0 - Shuttle Encoder, Channel A X10 - Shuttle Vise Close Switch X1 - Shuttle Encoder, Channel B X11 - Shuttle Vise Open Switch X2 - Blade Speed X12 - Front Vise Close Switch X3 - Blade Stop X13 - Front Vise Open Switch X4 - Head Raise L/S... - Page 61 CALIBRATION PROCEDURE FOR MITSUBISHI PLC with 2100 series software Length calibration may be achived in two ways: by inputting “ACTUAL LTH” (actual length) or “LTH CONST” (length constant) parameter. A) To determine “Actual LTH” value, the “LTH CLB” (length calibration) procedure must be executed. In manual mode position a piece of material which is longer than the shuttle full stroke length (i.e.S20A=29.00") and close the front VISE.
- Page 62 To adjust “”LTH CONST”, follow this procedure; Cut length I Programmed length X Existing “LTH CONST” = New “LTH CONST” Example; Cut length of 11.998”, Programmed length of 12”, Existing “LTH CONST” parameter of 0.001256. 11.988 I 12.000 X 0.001256 = 0.001255 The new “LTH CONST”...
-
Page 63: Service Record & Notes
SERVICE RECORD & NOTES DATE SERVICED BY COMMENTS Pg 50 S22A / S23A mits 2001... -
Page 64: Section 4, Electrical System
SECTION 4 ELECTRICAL SYSTEM... -
Page 66: Initial Start-Up
This machine has been built to the customers requirements, however, if any voltage changes are required, refer to the information on the following pages and then consult Hyd-Mech service department before implement- ing any changes. The control panel layout is shown on the next page. -
Page 67: Sequencer Control Box Layout
SEQUENCER CONTROL BOX LAYOUT. NOTE; 1LS may be located at horizontal pivot shaft. Shuttle length control box. (Found on the side of the shuttle) Pg 52 S23A 2001a... - Page 68 On machines beginning with serial #'s 80400870, for S20A or XA0400113 for S23A, four rubber bumpers ENCODER (pn B-1333) were installed at the top of the PLC control box (not sequencer machines). These bumpers will maintain a spacing between the lid and the top of the Length Control Box operator interface.
-
Page 69: Sequencer Electrical Parts Lists
SEQUENCER ELECTRICAL PARTS LISTS " ! " # $ ! #! ! " # $ # &$ # $ 4.. " ! # $ 4&5 .&/ 0 12 3 ! &6 2$ $ " 2$ $ " " . # $ ;. "... - Page 70 " ! " # $ ! #! ! 1$ ; $$*5 1A'- 1$ ; $$*5 & 1 B ! ,1 ; %& 1$ ; %&*5 *$ $ $ 7 &9 / !: ) 2$>9 C)' $5 61 ' 8 C , 6)>...
- Page 71 ! " " & #! ! & &6 +. , ! - .0) 1 ./22 3 3 3 - '1 '- 0 ; $ & ; $ & ; $ & ; $ & ; $ & ; $ & ,-1;...
-
Page 72: Optional Plc Electrical Parts Lists
OPTIONAL PLC ELECTRICAL PARTS LISTS " ! " # $ ! #! ! # $ '% " # $ # &$ # $ 4.. " ! # $ 4&5 .&/ 0 12 3 ! &6 # $ 4. " < # $ 4&5 .&/ 0 12 3 ! &6... - Page 73 " ! " # $ ! #! ! 78$ .$ 78$ .$ $&& $&& 78$ .$ &&2 %%% 5%26 *$ $ $ 7 &9 " *$ $ $ 7 &9 / !: ) 2$>9 61 ' 1'; 6 4C & $1 D 1* $ 4C &...
- Page 74 & ! " " #! ! & &6 +. , ! - .0) 1 ./22 3 3 3 " - '1 '- 0 && && && && && && - '1 ' ,- C " 0 - ,30 - < 1 A1, "...
-
Page 75: Sequencer Electrical Schematic &Wiring Drawings
SEQUENCER ELECTRICAL SCHEMATIC &WIRING DRAWINGS... -
Page 79: Optional Plc Electrical Schematic &Wiring Drawings
OPTIONAL PLC ELECTRICAL SCHEMATIC &WIRING DRAWINGS... - Page 87 THIS PAGE INTENTIONALLY LEFT BLANK...
-
Page 88: Section 5, Hydraulic System
SECTION 5 HYDRAULIC SYSTEM... -
Page 90: Hydraulic Components List And Locations
SECTION 5, HYDRAULIC SYSTEM The S-23A hydraulic system does not require any special work on a new machine before its start-up. The hydraulic tank is filled with Texaco Rando HD46 hydraulic oil and all machine functions have been tested at the factory to ensure proper operation upon initial start-up. -
Page 91: Cylinder Assemblies
CYLINDER ASSEMBLIES Gland assemblies Piston assemblies Pg 68 S23A 2001... -
Page 92: Hydraulic Schematic & Plumbing Drawings
HYDRAULIC SCHEMATIC & PLUMBING DRAWINGS Pg 69 S23A 2001... - Page 93 Pg 70 S23A 2001...
- Page 94 Pg 71 S23A 2001...
- Page 95 THIS PAGE INTENTIONALLY LEFT BLANK...
-
Page 96: Section 6, Mechanical Assemblies
SECTION 6 MECHANICAL ASSEMBLIES... -
Page 98: Guide Arm & Carbide Assemblies
SECTION 6, MECHANICAL ASSEMBLIES GUIDE ARM & CARBIDE ASSEMBLIES " " %" & & Pg 73 S23A 2001a... -
Page 99: Blade Drive Assembly
BLADE DRIVE ASSEMBLY Pg 74 S23A 2001a... - Page 100 5 HORSE POWER DRIVE SPEED ADJUSTOR INSTALLATION IN " $ " '( ! STRUCTIONS AND PARTS LIST. The speed adjustor is packaged seperately for shipping purposes. Installation of the speed adjustor must be completed prior to connecting the power supply. Remove the assembly from the coolant reservoir "...
-
Page 101: Hm4A Gear Box Assembly
HM4A GEAR BOX ASSEMBLY Pg 76 S23A 2001a... -
Page 102: Idler Wheel Assembly
IDLER WHEEL ASSEMBLY " " %" $ % +, ! " " ! " " -./01 2345+1 345+1 6 7809$ :849 ,59 ;+ 9.3/01 /+1< %" Pg 77 S23A 2001a... -
Page 103: Blade Brush Assembly
BLADE BRUSH ASSEMBLY !" !" !" Pg 78 S23A 2001a... -
Page 104: Counter Balance Spring Assembly
COUNTER BALANCE SPRING ASSEMBLY " " Pg 79 S23A 2001a... -
Page 105: Hydraulic Tank Assembly (Less Hoses)
HYDRAULIC TANK ASSEMBLY (Less hoses) " =;,34+ ' " >:; "" < # 1/2 < # 1/2 ' < " " < =;,34+ Pg 80 S23A 2001a... -
Page 106: Hydraulic Pump Assembly (Less Hoses)
HYDRAULIC PUMP ASSEMBLY (Less hoses) $ " '( ! " %" ! & ( ! & ( %" ! & ( " " %"? ' % ' % ?* % ? # "" " & " " Pg 81 S23A 2001a... -
Page 107: Pivot Link Assembly
PIVOT LINK ASSEMBLY Pg 82 S23A 2001a... - Page 108 " " " " % ? ;1 %"? $ % ? " Pg 83 S23A 2001a...
-
Page 109: Front Vise Assembly
FRONT VISE ASSEMBLY & %"? " & Pg 84 S23A 2001a... -
Page 110: Shuttle Vise Assembly
SHUTTLE VISE ASSEMBLY %" & < " %"? & Pg 85 S23A 2001a... -
Page 111: Infeed Coneyor Assembly
INFEED CONEYOR ASSEMBLY " " " " " %"? Pg 86 S23A 2001a... -
Page 112: Coolant Group
COOLANT GROUP ○ ○ ○ ○ ○ ○ ○ ○ ○ ○ ○ ○ ○ ○ ○ ○ ○ ○ ○ ○ ○ ○ ○ ○ ○ ○ ○ ○ ○ ○ TO OUTFEED FENCE 494 ASSY SNAPLOC HOSE ASSEMBLY 101-B 1/4"... -
Page 113: Length Control Assembly
LENGTH CONTROL ASSEMBLY " * %" " & " Pg 88 S23A 2001a... -
Page 114: Doors And Covers
DOORS and COVERS Control box lid. Drive belt cover. S22-71-02 S22-41-02 Blade tension handle. S22-42-00 Lower blade gaurd. Drive wheel door. Idler wheel door. S22-41-01D with S23-33A-00 S23-32A-00 1/4-20 x 3/4 thumb screw & hex nut. NOTE: When ordering doors or covers, specify label language. Shuttle gaurd S22A-91-00 and two 3/8"... - Page 115 THIS PAGE INTENTIONALLY LEFT BLANK...
- Page 116 SECTION 7 OPTIONAL ASSEMBLIES...
-
Page 118: Section 7, Options
SECTION 7, OPTIONS WORK STOP " Pg 91 S22A/S23A... -
Page 119: Over Head Bundling
OVER HEAD BUNDLING NOTES: 1) The relative speed of the bundling jaws and vise jaws can be adjusted with the needle valves at each cylinder. 2) The following steps will ensure the effiecient operation of the Overhead Bundling. a) The material should be loaded into the machines vises and advanced to a position where a trim cut can be performed. -
Page 120: Mitsubishi Plc 100
MITSUBISHI PLC 100 (SEE SECTION 2A FOR DETAILS) Mitsubishi PLC 100 Control Panel Pg 93 S22A/S23A... -
Page 121: Plc Length Encoder Assembly
PLC LENGTH ENCODER ASSEMBLY (Required with the PLC option.) "" " #$% &'( &#)'% " #$% -./. -01'- " Pg 94 S22A/S23A... -
Page 122: Blade Breakage
BLADE BREAKAGE (Standard on CE machines) XCKL 115H7 LIMIT SWITCH BLADE TENSIONER ASSEMBLY WORK LAMP ASSEMBLY #MS3 WORK LAMP MOUNTING STUD 0618-3-AS WITH HEX NUT & TOOTH WASHER Pg 95 S22A/S23A... -
Page 123: Out Of Stock Switch
OUT OF STOCK SWITCH (Standard on CE machines) Limit switch & trip. VARIABLE VISE PRESSURE VVP control VVP valve assembly Pg 96 S22A/S23A... -
Page 124: Section 8, Specifications
SECTION 8 SPECIFICATIONS... -
Page 126: Specification List
SECTION 8, SPECIFICATIONS SPECIFICATION LIST Cutting Capacity rectangular 16" High x 18" Wide round 16" diameter 13" diameter @ 45 Degrees Blade length 15' 6" width 1 1/4" (Actual measurment 1.350" including teeth.) thickness .042" Blade speed 75 to 400 Surface Feet/Minute - Variable Blade guides Carbide Blade wheel diameter... -
Page 127: Layout Drawings
LAYOUT DRAWINGS Pg 98 S23A 2001... - Page 128 SEQUENCER ELECTRICAL SUPPLY LOCATION ELECTRICAL SUPPLY LOCATION...
- Page 129 THIS PAGE INTENTIONALLY LEFT BLANK...
-
Page 130: Warranty
SECTION 9 WARRANTY... - Page 132 MOTOR, GEARBOX, PUMP, ELECTRIC COMPONENTS, VALVES, HOSES, FITTINGS, and any other items used in the manufacture of the S-23A, but not originally manufactured by Hyd-Mech are subject to the original manufacturer's warranty. Hyd-Mech will provide such assistance and information as is necessary and available to facilitate the user's claim to such other manufacturer.
-
Page 133: Mitsubishi Plc Parameters
SEQUENCER PARAMETERS NOTE: With the V.V.P., option parameter #1 is increased to allow vises to close. MITSUBISHI PLC PARAMETERS Interface, E200 2100 software, Version ___________ DATE:___/____/____ SER#______________ VOLTAGE:_______ Pg 102 S23A 2001... - Page 134 OPERATIONS & MAINTENANCE MANUAL OPERATIONS & MAINTENANCE MANUAL OPERATIONS & MAINTENANCE MANUAL OPERATIONS & MAINTENANCE MANUAL OPERATIONS & MAINTENANCE MANUAL OPERATIONS & MAINTENANCE MANUAL OPERATIONS & MAINTENANCE MANUAL OPERATIONS & MAINTENANCE MANUAL OPERATIONS & MAINTENANCE MANUAL OPERATIONS & MAINTENANCE MANUAL OPERATIONS &...
Need help?
Do you have a question about the S-23A and is the answer not in the manual?
Questions and answers