DX Engineering DXE-MBVE-5A Instructions Manual
Dxe-mbve-5a series multi-band vertical antenna 160 through 10 meters with the patented saf-t-tilt base
Hide thumbs
Also See for DXE-MBVE-5A:
- Instruction manual (8 pages) ,
- Manual (40 pages) ,
- Quick start manual (9 pages)
Table of Contents
Advertisement
Multi-Band
Vertical Antenna
160 through 10 Meters
with the patented
™
SAF-T-TILT
Base
DXE-MBVE-5A Series
US Patent Nos. 654,064 and 8,686,919
DXE-MBVE-5A-Series - INS-Revision 1b
© DX Engineering 2017
1200 Southeast Ave. - Tallmadge, OH 44278 USA
MBVE-5 Shown with optional UNUN
Phone: (800) 777-0703 ∙ Tech Support and International: (330) 572-3200
Fax: (330) 572-3279 ∙ E-mail:
DXEngineering@DXEngineering.com
Advertisement
Table of Contents

Related Manuals for DX Engineering DXE-MBVE-5A


Summary of Contents for DX Engineering DXE-MBVE-5A
- Page 1 SAF-T-TILT Base DXE-MBVE-5A Series US Patent Nos. 654,064 and 8,686,919 DXE-MBVE-5A-Series - INS-Revision 1b © DX Engineering 2017 1200 Southeast Ave. - Tallmadge, OH 44278 USA MBVE-5 Shown with optional UNUN Phone: (800) 777-0703 ∙ Tech Support and International: (330) 572-3200 Fax: (330) 572-3279 ∙...
-
Page 2: Table Of Contents
Table of Contents Introduction Manual Updates DXE-MBVE-5A Models Available DXE-MBVE-5A Remote Tuner Upgrades Available Tools Required Warning Suggested Parts Additional Material Needed, Not Supplied Basics for All New Installations Site Selection Radial System Mounting Pipe Assembly Radial Plate to Mounting Pipe... -
Page 3: Introduction
Every effort is made to supply the latest manual revision with each product. Occasionally a manual will be updated between the time your DX Engineering product is shipped and when you receive it. Please check the DX Engineering web site (www.dxengineering.com) for the latest revision manual. -
Page 4: Dxe-Mbve-5A Models Available
DXE-MBVE-5A Models Available DX Engineering MBVE-5A Model Numbers DXE-MBVE-5A Req’d DXE-MBVE-5A-4P Req’d DXE-MBVE-5A-4UP DXE-MBVE-5A-4UPR DXE-MBVE-5A-3ATP optional not applicable DXE-MBVE-5AE-BRT optional not applicable DXE-MBVE-5AEBRT3 not applicable DXE-MBVE-5AEBRT4 not applicable DXE-MBVE-5AE-RT optional not applicable DXE-MBVE-5AERT8 not applicable X = Included Reqd = Required (see text) -
Page 5: Tools Required
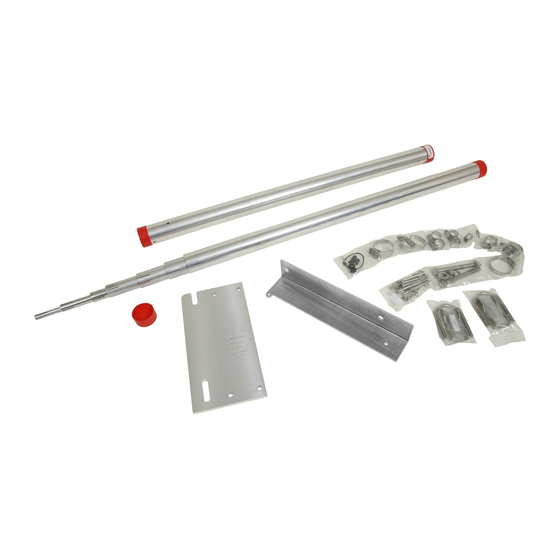
The SAF-T-TILT™ Base is the same for all models with one exception. The thick wall base tube is longer for the tube mounted remote tuner options. This manual describes in detail the DXE-MBVE-5A-4UPR antenna package which includes the basic antenna with the DXE-RADP-3 Radial Plate, DXE-43 UNUN and DXE-UN-BRKT. -
Page 6: Warning
DXE-RADP-3 - Radial Plate, Stainless Steel with 20 Sets of SS Radial Attachment Hardware The patented DX Engineering Radial Plate is meant for those of you that have or are building a quarter wave vertical antenna and who want an easy, neat and effective way to connect those essential radial wires and the coax to your vertical antenna for the lowest takeoff angle and strongest signals. -
Page 7: Additional Material Needed, Not Supplied
For details on guying this antenna, refer to the Guying a Vertical Antenna System page. See these and other options available from DX Engineering for this antenna system in this manual refer to the Optional Accessory Items page. -
Page 8: Basics For All New Installations
Grass will quickly overgrow the radials and it will be virtually impossible to see them. An article describing this process is available on the DX Engineering website. Radials can also be buried just under the surface by using a power edger to make a slit in the soil. -
Page 9: Mounting Pipe
Mounting Pipe Use a customer supplied thick-walled galvanized steel mounting pipe at least 4 feet long. This will allow approximately 2 feet or more to be below ground and 20 inches above ground. A thick-walled steel pipe 1-3/4" OD to 2" OD maximum is recommended with a minimum thickness of 1/8"... -
Page 10: Radial Plate To Mounting Pipe
Note: The following assembly instructions are based on the MBVE-5A-4UPR which includes the DXE-RADP-3 Radial Plate and the DXE-UN-43 UNUN, DXE-UN-BRKT Bracket with hardware using a customer supplied 2" OD Mounting Pipe. Note: For reference purposes, an exploded drawing of the completed SAF-T-TILT™ base is show in Figure 21. -
Page 11: Attaching Ground Radial Wires To The Radial Plate
Using the 20 sets of supplied 1/4" stainless steel hardware (Bolt, Star Washer, Flat Washer, Split Washer, Nut) connect the optional ground radial wires to the DXE-RADP-3 Radial Plate as shown in Figure 2. Additional hardware kits are available from DX Engineering: DXE-RADP-1HWK contains 20 sets of Radial Plate Hardware. - Page 12 Make sure the Tilt Base and DXE-RADP-3 Radial Plate are oriented correctly for the direction you wish to tilt the antenna. See Figure 11 which shows the tilt action. Tighten the V-clamps evenly so the length of the exposed threads is approximately equal. Any clamp should be tightened evenly from side-to-side with an equal amount of thread above each nut.
-
Page 13: Saf-T-Tilt™ Antenna Base Section Assembly
DXE-MBVE-5A SAF-T-TILT™ Antenna Base Section Assembly Attach the 7” ground wire with ring terminals to the tilt base angle plate using the hardware as shown in Figure 4. Refer to pages 26 & 27 for description of numbered parts. Figure 4 Attach the tilt base tube to the tilt base angle using the hardware as shown in Figure 5. - Page 14 Attach the completed assembly to the tilt plate using the hardware as shown in Figure 6. Figure 6 Figure 7 is shows all of the parts for reference purposes. Pictures are shown in Figure 19 and Appendix 1 has a full description of numbered parts. Figure 7 - 11 - - 13 -...
-
Page 15: Aluminum Tubing Information
Deburring is a finishing method used in manufacturing. DX Engineering aluminum tubing is machine cut on both ends and machine slit on one end and you should further assure that there are no ragged edges or protrusions. -
Page 16: Assembling The Vertical Sections
Assembling the Vertical Sections ™ Note: JTL-12555 Jet-Lube SS-30 Anti-Oxidant should be used between all antenna ™ element sections. Jet-Lube SS-30 is an electrical joint compound to affect a substantial electrical connection between metal parts such as aluminum tubing or other antenna pieces. - Page 17 Vertical Antenna Elements 2.125" (2-1/8”) x 0.058" x 36" Tube (Slit one end, drilled) 2.000" (2”) x 0.058" x 36" Tube (Slit one end) 1.875" (1-7/8”) x 0.058" x 36" Tube (Slit one end) 1.750" (1-3/4”) x 0.058" x 36" Tube (Slit one end) 1.625"...
- Page 18 Figure 10 Element Assembly (Drawing not scale) - 17 -...
-
Page 19: Mating The Vertical Sections To The Tilt Base
Mating the Vertical Sections to the SAF-T-TILT™ Base Note: Sawhorses or ladders should be used to support the vertical sections during assembly with the SAF-T-TILT™ Base and whenever the vertical is tilted down. As shown in Figure 12. When the upper element sections are assembled together install the black vinyl cap in place at the top of the smallest element section. - Page 20 While holding the base at approximately a 90 degree angle, slide the bottom 2-1/8” OD element section onto the black insulator, aligning up the two holes in the 2” OD aluminum tube with the two holes in the black insulator as shown in Figure 13. Figure 13 - Mating the vertical antenna to the SAF-T-TILT™...
-
Page 21: Raising The Vertical
Raising the Vertical DANGER : Make sure you have not inadvertently located the antenna underneath power lines. Residential power lines are often less than 40' high. Contact With Any Power or Utility Lines Can Be Lethal ! The tilt-base certainly makes it easier however, this antenna can be challenging to put up the first time or with gusty winds. -
Page 22: Assembling The Optional Unun Mounting Bracket
Assembling the DXE-UN-BRKT UNUN Mounting Bracket & UNUN (US Patent No. D597,086) Using the #6 hex head bolts, #6 flat washers, and #6 Nyloc nuts, attach the DXE-UN-43 UNUN to the patented DXE-UN-BRKT UNUN Bracket with the SO-239 connector facing as shown below. Tighten the Nyloc Nuts so they are snug. -
Page 23: Installation Of Optional Unun Assembly
Installation of UNUN Assembly to Antenna Lower Section The completed UNUN and UNUN Mounting Bracket assembly are mounted to the antenna lower section. To allow easy installation of the UNUN Bracket to the lower base section, open the upper and lower custom studded element clamps as shown in Figure 16. Figure 16 Position the UNUN and mounting bracket so the bottom element clamp is located between the feedpoint hardware and the black insulator shown in Figure 17. -
Page 24: Feedline Connections
Feedline Connections The DXE-UN-43 UNUN is attached to the feedline antenna connection using one 6” wire with ring terminals and one 7” wire with ring terminals. Connect the 6” wire with terminals from the antenna feedpoint located on the antenna element to the terminal on the DXE-UN-43 UNUN closest to the Red "+"... -
Page 25: Coaxial Cable And 160 Meter Notes
A 43 foot vertical antenna is a short antenna for 160, but it will get you on the air. In this instance, coaxial cable type is a very important item to consider. DX Engineering recommends a length of 150 feet of DXE-213U an RG-213/U to give most tuners the ability to match the antenna on the lower frequency bands where most tuning problems are encountered. -
Page 26: Guying A Vertical Antenna System
Guying a Vertical Antenna System Guying of vertical antennas is always recommended for stability. However, if your area encounters severe wind velocities or icing conditions, simple guying will reduce the possibility of failure. Using the DXE-GUY kits, you can install one, two or three level guy ropes. Figure 20 shows a two level guying system. -
Page 27: Dxe-Mbve-5A Parts List
DXE-MBVE-5A Antenna Parts List SAF-T-Tilt™ Base Assembly Drawing Ref. (US Patent Nos. 654,064 AND 8,686,919) Number Tilt Base Plate - 12” x 6” x 3/8” thick Tilt Plate Tube - 2.5” OD x 14” x 1/4” thick, drilled Tilt Base Insulator - 2” OD x 10”, drilled Tilt Base Angle Bracket - laser cut and drilled Stainless Steel Saddle for 3/8”... -
Page 28: Exploded View Of The Dxe-Mbve-5A
DXE-MBVE-5A SAF-T-TILT™ Base Section For reference purposes Figure 21 shows an exploded view of the DXE-MBVE-5A Base Section (US Patent Nos. 654,064 AND 8,686,919) Figure 21 Item Description Item Description Tilt Base Plate - 12” x 6” x 3/8” thick 1/2”... -
Page 29: Appendix A - Mfj-927 Optional Remote Tuner
Appendix A - DXE-MBVE-5A-3ATP - Antenna Package with the MFJ-927 Remote Automatic Tuner Note: The DXE-MBV-ATU-1 Remote Automatic Antenna Tuner - MFJ-927- is limited to 200 Watts maximum power. Refer to the DXE-MBV-ATU-1 manual for details on assembly. The only changes when using the... - Page 30 Positioning of the remote tuner shelf in relation to the MBVE-5A and the DXE-RADP-3 Radial Plate. Pictures shown below show how this is accomplished. Note the Tilt Base is mounted 6-1/2” above the Radial Plate to allow the extra room needed for this remote tuner package. Please refer to the DXE-MBV-ATU-1 manual for additional details.
-
Page 31: Appendix B - Extended Base Remote Tuner Options
DXE-MBVE-5A which is described in detail earlier in this manual. The SAF-T-TILT™ base and the aluminum vertical elements are all the same for all of the DXE-MBVE-5A models. The only difference is the base tube length (Short Base tube is 14”, Long Base Tube is 36”) and associated hardware. -
Page 32: Extended Base Tube Exploded View Drawing
Figure B-1 - Extended Base Tube Drawing Figure B-1 This drawing shows the DXE-MBVE-5AE that uses the extended base tube (Item 2) and a new drilled insulator (Item 3) with the associated hardware. Required for using the MFJ-993BRT, MFJ-994BRT or MFJ-998RT remote tuners. -
Page 33: Upgrade Hardware Exploded View Drawing
Drawing SAF-T-Tilt™ Base Assembly Upgrade Hardware Kit Ref. DXE-MBVE-5A-UGHW for the extended base tube option Number 1/4”-20 x 3/4” long Hex Head Bolt, Stainless Steel 1/4”-20 x 2-3/4” long Hex Head Cap Screw, Stainless Steel 1/4”-20 x 3-1/4” long Hex Head Cap Screw, Stainless Steel 1/4”... - Page 34 Appendix C - MFJ-993BRT or MFJ-994BRT Remote Tuner Install There are 3 complete DXE-MBVE-5A antenna systems for use with either the MFJ-993BRT or MFJ-994BRT Remote Tuner. MFJ-993BRT - MFJ-994BRT - DX Engineering MFJ-993/4BRT - Tuner Tuner Antenna Model Brackets 300 Watt...
-
Page 35: Appendix C - Mfj-993/994Brt Remote Tuner Option
Installing the MFJ-993BRT or MFJ-994BRT option 1. Install the short ground wire in the corner hole on the tuner mounting flange using the 5/16”-18 Hex Nut, 5/16”-18 x 5/8” long Hex Head Cap Bolt, 5/16” Flat Washer, 5/16” External Tooth Washer, 5/16”... - Page 36 4. Place on 5/16” External Tooth Washer on each leg of the upper saddle clamp U-bolt and then position the MFJ-993BRT or MFJ-994BRT tuner in place on the upper U-bolt that protrudes from the saddle clamp. Once in place, loosely install the two 5/16” Flat Washers, two 5/16” Split Lock Washers and two 5/16”-18 Hex Nuts to hold the tuner in place on the upper clamp as shown.
- Page 37 Bias-T in the radio room connects to the other side of the connector on the Radial Plate. See the Bias Tee Information - Appendix E and Appendix F- Coaxial Cable Connection to the optional DXE-RADP-3 Radial Plate. Two views showing the MFJ-993BRT or MFJ-994BRT installed on the DXE-MBVE-5A antenna - 36 -...
-
Page 38: Appendix D - Mfj-998Rt Remote Tuner Option
Appendix D - MFJ-998RT Remote Tuner Installation There are two complete DXE-MBVE-5A systems for use with the MFJ-998RT Remote Tuner DX Engineering MFJ-998RT MFJ-998RT MBVE-5A Tuner Brackets Model Numbers 1500 Watt DXE-MBVE-5AE-RT DXE-MBVE-5AERT8 There are two upgrade retrofit kits for existing DXE-MBVE-5/5A systems for use with the MFJ- 998RT remote tuner. - Page 39 Installing the MFJ-998RT option The MFJ-998RT Tuner is mounted on a custom made stainless steel shelf that is attached to the DXE-MBVE-5A antenna. 1. Install the four 1/4”-20 x 3/4” long Hex Head Cap Bolts, four 1/4” External Tooth Washers and four 1/4”-20 Hex Nuts on the tuner shelf bracket as shown.
- Page 40 4. Place one 5/16” External Star Washer on each of the four bolts that are installed in the tuner shelf bracket and then place the MFJ-998RT Tuner on the bolts as shown. Position the tuner so it is straight and the large hole on the tuner metal bracket is close to the antenna (this is where the feedline wire will pass through).
- Page 41 Bias-T in the radio room connects to the other side of the connector on the Radial Plate. See the Bias Tee Information - Appendix E and Appendix F- Coaxial Cable Connection to the optional DXE-RADP-3 Radial Plate. Two views showing the MFJ-998RT installed on the DXE-MBVE-5A antenna - 40 -...
-
Page 42: Appendix E - Bias Tee Information
Appendix E - Bias Tee Information The MFJ-4117 Bias Tee is included with the MFJ Remote Tuner. Since the coaxial cable is supplying the DC voltage to the remote tuner (injected in the coaxial cable by the Bias Tee), the coaxial cable used must have a good DC path. -
Page 43: Parts Listings For Dxe-Mbve-Thw And Tbhw
Parts Listings DXE-MBVE-THW DXE-MBVE-THW Mounting Hardware Kit For the MFJ-993BRT/MFJ-994BRT Tuner mounting option U-Bolt, Stainless Steel, 2.5”, 4” long, 5/16”-18 threads Aluminum Saddle, V-Block 5/16”-18 Hex Nut, Stainless Steel 5/16”-18 x 5/8” long, Hex Head Cap Bolt, Stainless Steel 5/16” Washer, Flat, Stainless Steel 5/16”... -
Page 44: Parts Listings For Dxe-Mbve-5A-Ughw
DXE-RADP-3 - Radial Plate, Stainless Steel with 20 Sets of SS Radial Attachment Hardware The patented DX Engineering Radial Plate is meant for those of you that have or are building a quarter wave vertical antenna and who want an easy, neat and effective way to connect those essential radial wires and the coax to your vertical antenna for the lowest takeoff angle and strongest signals. - Page 45 DXE-UN-43 - UNUN - 4:1, High Power, for use with Non-Resonant Verticals ® DX Engineering high power transmission line transformers with Maxi-Core Technology allow your antenna to perform to its full potential and reduces the stresses on your equipment more efficiently than similar competitive products.
- Page 46 A no compromise system! A Bias Tee is included with this special package for supplying the 12 Vdc power through the coaxial cable from your radio shack to the remote tuner. Works on all DX Engineering, Zero-Five, MFJ and Hy-Gain 43 foot vertical multi-band antennas.
- Page 47 DXE-STPL - Radial Wire Anchor Pins, 100/pack - No need to bury your radials! DX Engineering Radial Wire Anchor Pins are perfect for fastening radials below the grass line to eliminate the risk of damaging your radials during lawn maintenance.
-
Page 48: Technical Support And Warranty
Warranty All products manufactured by DX Engineering are warranted to be free from defects in material and workmanship for a period of one (1) year from date of shipment. DX Engineering’s sole obligation under these warranties shall be to issue credit, repair or replace any item or part thereof which is proved to be other than as warranted;...
Need help?
Do you have a question about the DXE-MBVE-5A and is the answer not in the manual?
Questions and answers