Table of Contents
Advertisement
Quick Links
60 Meter Mono-Band
Conversion Kit for the
DXE-MBVE-5A Multi-Band
Vertical Antenna
DXE-MBVE-5A60MCK
DXE-MBVE-5A60MCK-INS Revision 0
© DX Engineering 2017
1200 Southeast Ave. - Tallmadge, OH 44278 USA
Phone: (800) 777-0703 ∙ Tech Support and International: (330) 572-3200
Fax: (330) 572-3279 ∙ E-mail:
DXEngineering@DXEngineering.com
Advertisement
Table of Contents

Related Manuals for DX Engineering DXE-MBVE-5A60MCK


Summary of Contents for DX Engineering DXE-MBVE-5A60MCK
- Page 1 60 Meter Mono-Band Conversion Kit for the DXE-MBVE-5A Multi-Band Vertical Antenna DXE-MBVE-5A60MCK DXE-MBVE-5A60MCK-INS Revision 0 © DX Engineering 2017 1200 Southeast Ave. - Tallmadge, OH 44278 USA Phone: (800) 777-0703 ∙ Tech Support and International: (330) 572-3200 Fax: (330) 572-3279 ∙ E-mail:...
- Page 2 The DXE-VE-60-2P-RAD package includes the DXE-MBVE-5A Vertical Antenna, 60 Meter Conversion Kit, COMTEK 1:1 Balun, Balun Mounting Kit and hardware. Also included in this kit is the DX Engineering Radial Plate, Stainless Steel V-Clamp for the Radial Plate, Radial Wire, Lawn Staples and 20 Ring Terminals for the Radials.
- Page 3 Tools Required Medium size flat blade screwdriver or 5/16” nut driver for the element clamps Medium size flat blade screwdriver or 1/4” nut driver for the smaller element clamps Tape measure Black Felt-tip marker or pencil Installation The following instructions are based on an existing DXE-MBVE-5A antenna system. 1.
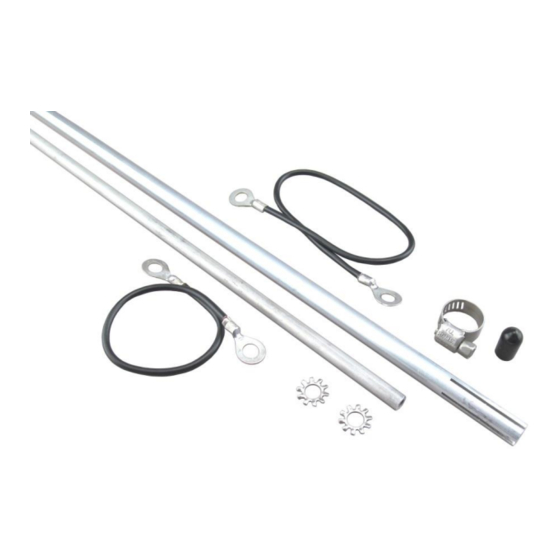
- Page 4 3B. Install the new 1/4” OD into the new 3/8” OD element with a 2 inch overlap. Using the new 0.50” element clamp, tighten the element in place as shown. Install the new 1/4” black vinyl cap on the top of the 1/4”...
- Page 5 Installation of Balun Assembly to Antenna Lower Section The completed balun with balun mounting bracket assembly ise mounted to the antenna lower section. To allow easy installation of the UNUN Bracket to the lower base section, open the upper and lower custom studded element clamps as shown.
- Page 6 7” wire connected from Balun “+” to the bolt just above where the mounting clamp is located. 10.5” wire with terminals connected from the balun “-“ to the bolt holding the angle plate in place. Move the external tooth washer previously installed on the antenna (Item 21) to the position as shown. - 5 -...
- Page 7 Your coaxial cable from the radio connects directly to the SO-239 connector on the bottom of the balun. Weatherproof this coaxial connection using TES-06132 - Scotch® Super 33+ and TES-2155 - 3M Temflex™ 2155 Rubber Splicing Tape. Tuning the 60 Meter Vertical Antenna System After the installation of the conversion is complete and antenna is in the up position, use an antenna analyzer...
- Page 8 All products manufactured by DX Engineering are warranted to be free from defects in material and workmanship for a period of one (1) year from date of shipment. DX Engineering’s sole obligation under these warranties shall be to issue credit, repair or replace any item or part thereof which is proved to be other than as warranted; no allowance shall be made for any labor charges of Buyer for replacement of parts, adjustment or repairs, or any other work, unless such charges are authorized in advance by DX Engineering.
Need help?
Do you have a question about the DXE-MBVE-5A60MCK and is the answer not in the manual?
Questions and answers