
Related Manuals for DX Engineering Hummelmasten Mini XL


Summary of Contents for DX Engineering Hummelmasten Mini XL
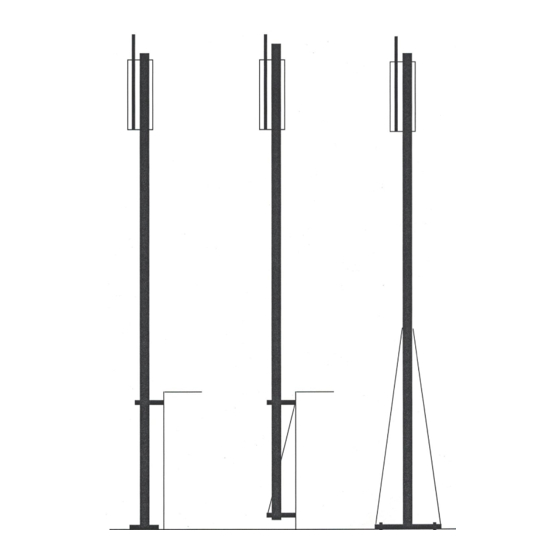
- Page 1 Hummelmasten, 75417 Mühlacker, Industriestr. 14/1 Tel. +49-7041-45 2 44, Fax -86 43 08 Seite Easy Step by Step Manual Teletower Mini XL Wall-Floor installation e-mail: info@hummelmasten.de www.hummelmasten.de...
- Page 2 Hummelmasten, 75417 Mühlacker, Industriestr. 14/1 Tel. +49-7041-45 2 44, Fax -86 43 08 Seite The tower packages #1-#2-#3 e-mail: info@hummelmasten.de www.hummelmasten.de...
- Page 3 Hummelmasten, 75417 Mühlacker, Industriestr. 14/1 Tel. +49-7041-45 2 44, Fax -86 43 08 Seite Open Base Package #1 for the main tower parts. Here you see the three tower tubes (H-Head, M-Middle, F-Feed) and the side steam of the carriage (No.34 on them) e-mail: info@hummelmasten.de www.hummelmasten.de...
- Page 4 Hummelmasten, 75417 Mühlacker, Industriestr. 14/1 Tel. +49-7041-45 2 44, Fax -86 43 08 Seite Next Step: Open Base Package #2 There are this parts inside e-mail: info@hummelmasten.de www.hummelmasten.de...
- Page 5 Hummelmasten, 75417 Mühlacker, Industriestr. 14/1 Tel. +49-7041-45 2 44, Fax -86 43 08 Seite Base Package #3 got the wall bracket and the feedflange of the tower. All screws an nuts to build them are inside. e-mail: info@hummelmasten.de www.hummelmasten.de...
- Page 6 Hummelmasten, 75417 Mühlacker, Industriestr. 14/1 Tel. +49-7041-45 2 44, Fax -86 43 08 Seite Take one screw with one washer on it. Stuck it into No.5 the other in No.3 and make one more washer on it. Screw them together No 5 to No 6 No 3 to No 4, one more washer and the stop nut.
- Page 7 Hummelmasten, 75417 Mühlacker, Industriestr. 14/1 Tel. +49-7041-45 2 44, Fax -86 43 08 Seite 99 in- when your ready with the feedflange you have to sign the 99 inch or 2.5 meter from feedflange to wall brac- ket. You can go higher if you want but Now make the wallbrak- ket ready Only the back...
- Page 8 Hummelmasten, 75417 Mühlacker, Industriestr. 14/1 Tel. +49-7041-45 2 44, Fax -86 43 08 Seite Go to the position of the tower, errect it ( only feed part with installed flange and braccet) when it is in the water you sign the holes feedflange and wall braccet. Drill the feedflange position, also the wallbraccet e-mail: info@hummelmasten.de www.hummelmasten.de...
- Page 9 Hummelmasten, 75417 Mühlacker, Industriestr. 14/1 Tel. +49-7041-45 2 44, Fax -86 43 08 Seite You take now the coupling parts and screw them loosen into the F and M tubes. e-mail: info@hummelmasten.de www.hummelmasten.de...
- Page 10 Hummelmasten, 75417 Mühlacker, Industriestr. 14/1 Tel. +49-7041-45 2 44, Fax -86 43 08 Seite Fix the wall bracket, take only the back 2 screws into it. When tower is erected you fix the both infront. e-mail: info@hummelmasten.de www.hummelmasten.de...
- Page 11 Hummelmasten, 75417 Mühlacker, Industriestr. 14/1 Tel. +49-7041-45 2 44, Fax -86 43 08 Seite Segments: The nuts in the foot segment Loosely screw in. The next segment Push it loose, loosely here as well They can be aligned. Compensate transitions! Only then are the screws tightened with tor- que.
- Page 12 Hummelmasten, 75417 Mühlacker, Industriestr. 14/1 Tel. +49-7041-45 2 44, Fax -86 43 08 Seite Manual of winch Fixed winch on the tower take the wire between tower and carriage to the head plate, from there to the right. Very Important!!!!! Make this at both carriage parts.
- Page 13 Hummelmasten, 75417 Mühlacker, Industriestr. 14/1 Tel. +49-7041-45 2 44, Fax -86 43 08 Seite Here at the lower carriage part. The wire is going to the winch and has to be fixed there lice you see in Now you can crank it so the wire is strange to the carriage. This is the moment when you can fix the feedflanch No3 and 5.
- Page 14 Hummelmasten, 75417 Mühlacker, Industriestr. 14/1 Tel. +49-7041-45 2 44, Fax -86 43 08 Seite MOUNTING: Basics: All screws are tightened with standard torque! M8 25 Newton / meter, M12 86 Newton / meter Headplate NR.42 Handwinch Head Segments: Coupling in section The nuts in the foot segment Loosely screw in.
- Page 15 Hummelmasten, 75417 Mühlacker, Industriestr. 14/1 Tel. +49-7041-45 2 44, Fax -86 43 08 Seite Slide the carriage level rotator and bearing together and place them on the mast: The slide levels are pushed from the head to the mast. There are inlets which facilitate the sliding on. The mast part is simply pushed horizontally against a wall in order to have a fixed installation.
- Page 16 Hummelmasten, 75417 Mühlacker, Industriestr. 14/1 Tel. +49-7041-45 2 44, Fax -86 43 08 Seite Installation of the mast: CAUTION: First, lock the carriage in the uppermost position on the horizontal slide block. The rear tensioning screws are inserted into the upper wall bracket. So we have a stop after set- ting up.
Need help?
Do you have a question about the Hummelmasten Mini XL and is the answer not in the manual?
Questions and answers